

如何使用Arduino的TFTLCD
电子说
描述
在显示器上呈现想法
在电子项目中,在用户和系统之间创建接口非常重要。可以通过显示有用的数据,菜单和易于访问来创建该界面。漂亮的设计也很重要。
有几个组件可以实现这一点。 LED,7段,字符和图形显示,以及全彩TFT LCD。项目的正确组件取决于要显示的数据量,用户交互类型和处理器容量。
TFT LCD是液晶显示器(LCD)的一种变体,它使用薄膜晶体管(TFT)技术来改善图像质量,例如可寻址性和对比度。 TFT LCD是有源矩阵LCD,与无源矩阵LCD或具有少量段的简单直接驱动LCD相比。
在基于Arduino的项目中,处理器频率很低。因此无法显示复杂的高清图像和高速运动。因此,全彩色TFT LCD只能用于显示简单的数据和命令。
在本文中,我们使用图书馆和先进的技术,以专业的设计显示数据,图表,菜单等。这可以将您的项目演示文稿移动到更高的级别。
哪个尺寸?哪个控制器?
显示大小会影响项目参数。更大的显示并不总是更好。如果要显示高分辨率图像和标志,则应选择分辨率更高的大尺寸显示器。但它会降低处理速度,需要更多空间,还需要更多电流才能运行。
所以,首先,您应该检查分辨率,运动速度,项目图像,文本和数字的颜色和大小细节。
我们建议流行尺寸的Arduino显示屏,如3.5英寸480×320,2.8英寸400×240,2.4英寸320×240和1.8英寸220×176。
选择正确的显示器后,是时候选择合适的控制器了。如果您想显示字符,测试,数字和静态图像以及显示速度并不重要,Atmega328 Arduino板(如Arduino UNO)是一个合适的选择。如果代码的大小很大,UNO板可能还不够。您可以使用Arduino Mega2560代替。如果你想高速显示高分辨率图像和动作,你应该使用ARM核心Arduino板,如Arduino DUE。
司机&库
在电子/计算机硬件中,显示驱动器通常是半导体集成电路(但也可以包括状态)由分立逻辑和其他组件组成的机器,其在微处理器,微控制器,ASIC或通用外围接口和特定类型的显示设备之间提供接口功能,例如LCD,LED,OLED,ePaper,CRT,真空荧光灯或Nixie。
显示驱动程序通常会接受命令和数据使用行业标准的通用串行或并行接口,如TTL,CMOS,RS232,SPI,I2C等,并生成具有适当电压,电流,定时和多路分解的信号,以使显示器显示所需的文本或图像。
LCD制造商在其产品中使用不同的驱动程序。其中一些更受欢迎,其中一些是非常未知的。要轻松运行显示器,您应该使用Arduino LCD库并将其添加到您的代码中。否则运行显示器可能非常困难。您可以在互联网上找到许多免费库,但关于库的重点是它们与LCD驱动程序的兼容性。您的液晶显示器的驱动程序必须为您的图书馆所知。在本文中,我们使用Adafruit GFX库和MCUFRIEND KBV库和示例代码。您可以从以下链接下载它们。
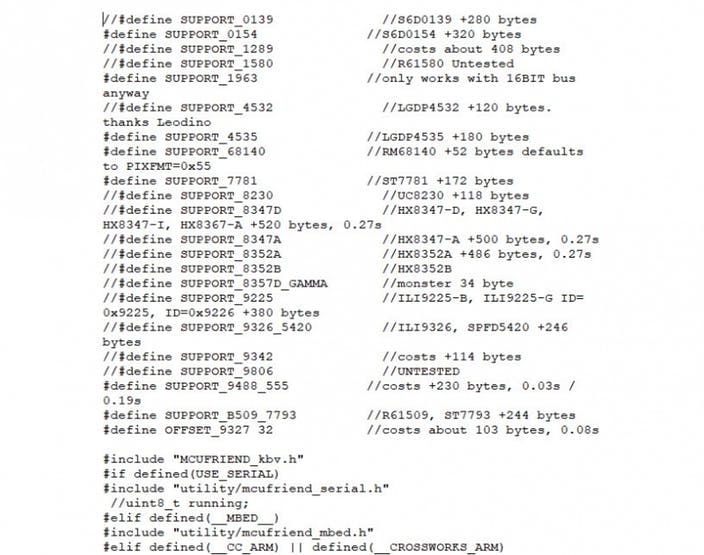
解压缩MCUFRIEND KBV并打开MCUFRIEND_kbv.CPP。您可以看到MCUFRIEND库支持的驱动程序列表。
打开示例文件夹。 Arduino可以运行几个示例代码。连接LCD并测试一些例子。
代码
您必须添加库然后上传代码。如果这是您第一次运行Arduino板,请不要担心。只需按照以下步骤操作:
访问www.arduino.cc/en/Main/Software下载您的操作系统软件。按照说明安装IDE软件。
运行Arduino IDE并清除文本编辑器并在文本编辑器中复制以下代码。
导航到草图并包含库。现在单击添加ZIP库并添加库
选择工具和板中的板,选择您的Arduino板。
将Arduino连接到PC并在工具中设置COM端口
按上传(箭头标志)按钮。
你已经完成了设置!
上传示例代码后,就可以了解如何在液晶显示屏上创建图像。
打开一个新的草图,以及必要的代码,如以下部分所述。
图书馆
#include “Adafruit_GFX.h”
#include “MCUFRIEND_kbv.h”
第一行为显示添加核心图形库(由Adafruit编写)。
第二个添加了一个支持MCUFRIEND Arduino显示屏蔽驱动程序的库。
#include “TouchScreen.h” // only when you want to use touch screen
#include “bitmap_mono.h” // when you want to display a bitmap image from library
#include “bitmap_RGB.h” // when you want to display a bitmap image from library
#include “Fonts/FreeSans9pt7b.h” // when you want other fonts
#include “Fonts/FreeSans12pt7b.h” // when you want other fonts
#include “Fonts/FreeSerif12pt7b.h” // when you want other fonts
#include “FreeDefaultFonts.h” // when you want other fonts
#include “SPI.h” // using sdcard for display bitmap image
#include “SD.h”
这些库不是必需的现在,但你可以添加它们。
基本命令
Class&对象
//(int CS=A3, int RS=A2, int WR=A1, int RD=A0, int RST=A4)
MCUFRIEND_kbv tft(A3, A2, A1, A0, A4);
该行从MCUFRIEND_kbv类创建一个名为TFT的对象,并在LCD和Arduino之间提供SPI通信。
运行LCD
uint16_t ID = tft.readID();
tft.begin(ID);
tft.readID函数从显示中读取ID并将其放入ID变量中。然后tft.begin函数获取ID并且LCD准备工作。
显示器的分辨率
tft.width(); //int16_t width(void);
tft.height(); //int16_t height(void);
通过这两个函数,您可以找到显示器的分辨率。只需将它们添加到代码中,并将输出放在uint16_t变量中。然后通过Serial.println();从串口读取它。首先添加Serial.begin(9600);在setup()。
屏幕颜色
tft.fillScreen(t); //fillScreen(uint16_t t);
fillScreen功能将屏幕颜色更改为t颜色。 t应该是一个包含UTFT颜色代码的16位变量。
#define BLACK 0x0000
#define NAVY 0x000F
#define DARKGREEN 0x03E0
#define DARKCYAN 0x03EF
#define MAROON 0x7800
#define PURPLE 0x780F
#define OLIVE 0x7BE0
#define LIGHTGREY 0xC618
#define DARKGREY 0x7BEF
#define BLUE 0x001F
#define GREEN 0x07E0
#define CYAN 0x07FF
#define RED 0xF800
#define MAGENTA 0xF81F
#define YELLOW 0xFFE0
#define WHITE 0xFFFF
#define ORANGE 0xFD20
#define GREENYELLOW 0xAFE5
#define PINK 0xF81F
您可以将这些行添加到代码的顶部,只需使用函数中的颜色名称。
填充像素
tft.drawPixel(x,y,t); //drawPixel(int16_t x, int16_t y, uint16_t t)
tft.readPixel(x,y); //uint16_t readPixel(int16_t x, int16_t y)
drawPixel 功能用t颜色填充x和y位置的像素。
readPixel 函数读取x和y位置中像素的颜色。
绘制线
tft.drawFastVLine(x,y,h,t);
//drawFastVLine(int16_t x, int16_t y, int16_t h, uint16_t t)
tft.drawFastHLine(x,y,w,t);
//drawFastHLine(int16_t x, int16_t y, int16_t w, uint16_t t)
tft.drawLine(xi,yi,xj,yj,t);
//drawLine(int16_t x0, int16_t y0, int16_t x1, int16_t y1, uint16_t t)
drawFastVLine 函数绘制一条从x,y位置开始的垂直线,其长度为h像素,颜色为t。
drawFastHLine 函数绘制一条从x和y位置开始的水平线和len gth是w像素,颜色是t。
drawLine 函数绘制一条线从xi和yi位置开始的是xj和yj,颜色是t。
for (uint16_t a=0; a《5; a++)
{ tft.drawFastVLine(x+a, y, h, t);}
for (uint16_t a=0; a《5; a++)
{ tft.drawFastHLine(x, y+a, w, t);}
for (uint16_t a=0; a《5; a++)
{ tft.drawLine(xi+a, yi, xj+a, yj, t);}
for (uint16_t a=0; a《5; a++)
{ tft.drawLine(xi, yi+a, xj, yj+a, t);}
这三个代码块像前面的代码一样绘制线条,厚度为5像素。
tft.fillRect(x,y,w,h,t);
//fillRect(int16_t x, int16_t y, int16_t w, int16_t h, uint16_t t)
tft.drawRect(x,y,w,h,t);
//drawRect(int16_t x, int16_t y, int16_t w, int16_t h, uint16_t t)
tft.fillRoundRect(x,y,w,h,r,t);
//fillRoundRect (int16_t x, int16_t y, int16_t w, int16_t h, uint8_t R , uint16_t t)
tft.drawRoundRect(x,y,w,h,r,t);
//drawRoundRect(int16_t x, int16_t y, int16_t w, int16_t h, uint8_t R , uint16_t t)
fillRect 函数在x和y位置绘制一个填充的矩形。 w是宽度,h是高度,t是rextangle的颜色
drawRect 函数在x和y位置绘制一个矩形,宽度为w,高度为h,颜色为t。
fillRoundRect 函数绘制一个填充的矩形,其中x和y位置具有r半径圆角,w宽度和h高度和t颜色。
drawRoundRect 函数绘制一个矩形,在x和y位置具有r半径圆角,w宽度和h高度和t颜色。
绘制圆圈
tft.drawCircle(x,y,r,t); //drawCircle(int16_t x, int16_t y, int16_t r, uint16_t t)
tft.fillCircle(x,y,r,t); //fillCircle(int16_t x, int16_t y, int16_t r, uint16_t t)
drawCircle 函数在x和y位置以及r radius和t color中绘制一个圆。
fillCircle 函数在x和y位置以及r radius和t color中绘制一个实心圆。
for (int p = 0; p 《 4000; p++)
{ j = 120 * (sin(PI * p / 2000));
i = 120 * (cos(PI * p / 2000));
j2 = 60 * (sin(PI * p / 2000));
i2 = 60 * (cos(PI * p / 2000));
tft.drawLine(i2 + 160, j2 + 160, i + 160, j + 160, col[n]);
}
通过此代码,你可以绘制弧形。更改0到4000之间的“for”。
绘制三角形
tft.drawTriangle(x1,y1,x2,y2,x3,y3,t);
//drawTriangle(int16_t x1, int16_t y1, int16_t x2, int16_t y2, int16_t x3, int16_t y3,// uint16_t t)
tft.fillTriangle(x1,y1,x2,y2,x3,y3,t);
//fillTriangle(int16_t x1, int16_t y1, int16_t x2, int16_t y2, int16_t x3, int16_t y3,// uint16_t t)
drawTriangle 函数绘制一个三角形的三角形位置x,y和z,以及t颜色。
fillTriangle 函数绘制一个三角形位置x,y和z以及t颜色的实心三角形。
显示文本
tft.setCursor(x,y); //setCursor(int16_t x, int16_t y)
此代码将光标位置设置为x和y
tft.setTextColor(t); //setTextColor(uint16_t t)
tft.setTextColor(t,b); //setTextColor(uint16_t t, uint16_t b)
第一行设置文字的颜色。下一行设置文本的颜色及其背景。
tft.setTextSize(s); //setTextSize(uint8_t s)
此代码用s设置文本的大小。 s是介于1和5之间的数字。
tft.write(c); //write(uint8_t c)
此代码显示一个字符。
tft.println(“www.Electropeak.com”);
tft.print(“www.Electropeak.com”);
第一个函数显示一个字符串并将光标移动到下一个第一行显示字符串。
showmsgXY(x,y,sz,&FreeSans9pt7b,“www.Electropeak.com”);
//void showmsgXY(int x, int y, int sz, const GFXfont *f, const char *msg)
void showmsgXY(int x, int y, int sz, const GFXfont *f, const char *msg)
{ uint16_t x1, y1;
uint16_t wid, ht;
tft.setFont(f);
tft.setCursor(x, y);
tft.setTextColor(0x0000);
tft.setTextSize(sz);
tft.print(msg);
}
这函数更改文本的字体。您应该添加此功能和字体库。
for (int j = 0; j 《 20; j++) {
tft.setCursor(145, 290);
int color = tft.color565(r -= 12, g -= 12, b -= 12);
tft.setTextColor(color);
tft.print(“www.Electropeak.com”);
delay(30);
}
此功能可淡化文字。你应该把它添加到你的代码中。
旋转屏幕
tft.setRotation(r); //setRotation(uint8_t r)
此代码旋转屏幕。 0 = 0,1 = 90,2 = 180,3 = 270。
反转屏幕颜色
tft.invertDisplay(i); //invertDisplay(boolean i)
此代码反转屏幕的颜色。
tft.color565(r,g,b); //uint16_t color565(uint8_t r, uint8_t g, uint8_t b)
此代码提供RGB代码并获取UTFT颜色代码。
滚动屏幕
for (uint16_t i = 0; i 《 maxscroll; i++) {
tft.vertScroll(0, maxscroll, i);
delay(10);}
此代码滚动屏幕。 Maxroll是滚动的最大高度。
重置
tft.reset();
此代码重置屏幕。
显示单色图像
static const uint8_t name[] PROGMEM =
{ //Add image code here.
}
tft.drawBitmap(x, y, name, sx, sy, 0x0000);
首先你应将您的图像转换为十六进制代码。从以下链接下载该软件。如果您不想更改软件的设置,则必须反转图像的颜色并使图像水平镜像并逆时针旋转90度。现在将其添加到软件并进行转换。打开导出的文件并将十六进制代码复制到Arduino IDE。 x和y是图像的位置。 sx和sy是图像的大小。您可以在最后一个输入中更改图像的颜色。
RGB彩色图像显示
const uint16_t name[] PROGMEM = {
//Add image code here.
}
tft.drawRGBBitmap(x, y, name, sx, sy);
首先,您应该将图像转换为代码。使用此链接转换图像:
http://www.rinkydinkelectronics.com/t_imageconverter565.php
上传图像并下载UTFT库可以处理的转换文件。现在将十六进制代码复制到Arduino IDE。 x和y是图像的位置。 sx和sy是图像的大小。
预先设计的模板
载入
在这个模板中,我们只使用了一个字符串和8个实心圆圈按顺序改变颜色。要在静态点周围绘制圆圈,可以使用sin();和cos();功能。您应该定义PI编号。要更改颜色,可以使用color565();功能并替换您的RGB代码。
#include “Adafruit_GFX.h”
#include “MCUFRIEND_kbv.h”
MCUFRIEND_kbv tft;
#include “Fonts/FreeSans9pt7b.h”
#include “Fonts/FreeSans12pt7b.h”
#include “Fonts/FreeSerif12pt7b.h”
#include “FreeDefaultFonts.h”
#define PI 3.1415926535897932384626433832795
int col[8];
void showmsgXY(int x, int y, int sz, const GFXfont *f, const char *msg)
{
int16_t x1, y1;
uint16_t wid, ht;
tft.setFont(f);
tft.setCursor(x, y);
tft.setTextColor(0x0000);
tft.setTextSize(sz);
tft.print(msg);
}
void setup() {
tft.reset();
Serial.begin(9600);
uint16_t ID = tft.readID();
tft.begin(ID);
tft.setRotation(1);
tft.invertDisplay(true);
tft.fillScreen(0xffff);
showmsgXY(170, 250, 2, &FreeSans9pt7b, “Loading.。.”);
col[0] = tft.color565(155, 0, 50);
col[1] = tft.color565(170, 30, 80);
col[2] = tft.color565(195, 60, 110);
col[3] = tft.color565(215, 90, 140);
col[4] = tft.color565(230, 120, 170);
col[5] = tft.color565(250, 150, 200);
col[6] = tft.color565(255, 180, 220);
col[7] = tft.color565(255, 210, 240);
}
void loop() {
for (int i = 8; i 》 0; i--) {
tft.fillCircle(240 + 40 * (cos(-i * PI / 4)), 120 + 40 * (sin(-i * PI / 4)), 10, col[0]); delay(15);
tft.fillCircle(240 + 40 * (cos(-(i + 1)*PI / 4)), 120 + 40 * (sin(-(i + 1)*PI / 4)), 10, col[1]); delay(15);
tft.fillCircle(240 + 40 * (cos(-(i + 2)*PI / 4)), 120 + 40 * (sin(-(i + 2)*PI / 4)), 10, col[2]); delay(15);
tft.fillCircle(240 + 40 * (cos(-(i + 3)*PI / 4)), 120 + 40 * (sin(-(i + 3)*PI / 4)), 10, col[3]); delay(15);
tft.fillCircle(240 + 40 * (cos(-(i + 4)*PI / 4)), 120 + 40 * (sin(-(i + 4)*PI / 4)), 10, col[4]); delay(15);
tft.fillCircle(240 + 40 * (cos(-(i + 5)*PI / 4)), 120 + 40 * (sin(-(i + 5)*PI / 4)), 10, col[5]); delay(15);
tft.fillCircle(240 + 40 * (cos(-(i + 6)*PI / 4)), 120 + 40 * (sin(-(i + 6)*PI / 4)), 10, col[6]); delay(15);
tft.fillCircle(240 + 40 * (cos(-(i + 7)*PI / 4)), 120 + 40 * (sin(-(i + 7)*PI / 4)), 10, col[7]); delay(15);
}
}
徽标演示
在此模板中,我们将a.jpg图像转换为.c文件并添加到代码中,写了一个字符串并使用淡入淡出代码进行显示。然后我们使用滚动代码向左移动屏幕。下载.h文件并将其添加到Arduino sketch的文件夹中。
#include “Adafruit_GFX.h” // Core graphics library
#include “MCUFRIEND_kbv.h” // Hardware-specific library
MCUFRIEND_kbv tft;
#include “Ard_Logo.h”
#define BLACK 0x0000
#define RED 0xF800
#define GREEN 0x07E0
#define WHITE 0xFFFF
#define GREY 0x8410
#include “Fonts/FreeSans9pt7b.h”
#include “Fonts/FreeSans12pt7b.h”
#include “Fonts/FreeSerif12pt7b.h”
#include “FreeDefaultFonts.h”
void showmsgXY(int x, int y, int sz, const GFXfont *f, const char *msg)
{
int16_t x1, y1;
uint16_t wid, ht;
tft.setFont(f);
tft.setCursor(x, y);
tft.setTextSize(sz);
tft.println(msg);
}
uint8_t r = 255, g = 255, b = 255;
uint16_t color;
void setup()
{
Serial.begin(9600);
uint16_t ID = tft.readID();
tft.begin(ID);
tft.invertDisplay(true);
tft.setRotation(1);
}
void loop(void)
{
tft.invertDisplay(true);
tft.fillScreen(WHITE);
tft.drawRGBBitmap(100, 50, Logo, 350, 200);
delay(1000);
tft.setTextSize(2);
for (int j = 0; j 《 20; j++) {
color = tft.color565(r -= 12, g -= 12, b -= 12);
tft.setTextColor(color);
showmsgXY(95, 280, 1, &FreeSans12pt7b, “ELECTROPEAK PRESENTS”);
delay(20);
}
delay(1000);
for (int i = 0; i 《 480; i++) {
tft.vertScroll(0, 480, i);
tft.drawFastVLine(i, 0, 320, 0xffff); // vertical line
delay(5);}
while (1);
}
圆点图
在这个模板中,我们使用了绘制线,实心圆和字符串显示功能。
#include “Adafruit_GFX.h”
#include “MCUFRIEND_kbv.h”
MCUFRIEND_kbv tft;
uint16_t ox=0,oy=0;
int ave=0, avec=0, avet=0;
////////////////////////////////////////////////////////////////
void aveg(void)
{int z=0;
Serial.println(ave);
Serial.println(avec);
avet=ave/avec;
Serial.println(avet);
avet=avet*32;
for (int i=0; i《24; i++){
for (uint16_t a=0; a《3; a++){
tft.drawLine(avet+a, z, avet+a, z+10, 0xFB21);} // thick
for (uint16_t a=0; a《2; a++){ tft.drawLine(avet-a, z, avet-a, z+10, 0xFB21);} delay(100); z=z+20; } } ////////////////////////////////////////////////////////////////// void dchart_10x10(uint16_t nx,uint16_t ny) { ave+=nx; avec++; nx=nx*32; ny=ny*48; tft.drawCircle(nx, ny, 10, 0x0517); tft.drawCircle(nx, ny, 9, 0x0517); tft.fillCircle(nx, ny, 7, 0x0517); delay (100); ox=nx; oy=ny; } /////////////////////////////////////////////////////////////////////// void dotchart_10x10(uint16_t nx,uint16_t ny) { ave+=nx; avec++; nx=nx*32; ny=ny*48; int plus=0; float fplus=0; int sign=0; int y=0,x=0; y=oy; x=ox; float xmines, ymines; xmines=nx-ox; ymines=ny-oy; if (ox》nx)
{xmines=ox-nx;
sign=1;}
else
sign=0;
for (int a=0; a《(ny-oy); a++)
{
fplus+=xmines/ymines;
plus=fplus;
if (sign==1)
tft.drawFastHLine(0, y, x-plus, 0xBFDF);
else
tft.drawFastHLine(0, y, x+plus, 0xBFDF);
y++;
delay(5);}
for (uint16_t a=0; a《2; a++){
tft.drawLine(ox+a, oy, nx+a, ny, 0x01E8);} // thick
for (uint16_t a=0; a《2; a++){
tft.drawLine(ox, oy+a, nx, ny+a, 0x01E8);}
ox=nx;
oy=ny;
}
////////////////////////////////////////////////////////////////////
void setup() {
tft.reset();
Serial.begin(9600);
uint16_t ID = tft.readID();
tft.begin(ID);
}
void loop() {
tft.invertDisplay(true);
tft.fillScreen(0xffff);
dotchart_10x10(3, 0);
dotchart_10x10(2, 1);
dotchart_10x10(4, 2);
dotchart_10x10(4, 3);
dotchart_10x10(5, 4);
dotchart_10x10(3, 5);
dotchart_10x10(6, 6);
dotchart_10x10(7, 7);
dotchart_10x10(9, 8);
dotchart_10x10(8, 9);
dotchart_10x10(10, 10);
dchart_10x10(3, 0);
dchart_10x10(2, 1);
dchart_10x10(4, 2);
dchart_10x10(4, 3);
dchart_10x10(5, 4);
dchart_10x10(3, 5);
dchart_10x10(6, 6);
dchart_10x10(7, 7);
dchart_10x10(9, 8);
dchart_10x10(8, 9);
dchart_10x10(10, 10);
tft.setRotation(1);
tft.setTextSize(2);
tft.setTextColor(0x01E8);
tft.setCursor(20, 20);
tft.print(“Average”);
int dl=20;
for (int i=0;i《6;i++){
for (uint16_t a=0; a《3; a++){
tft.drawLine(dl, 40+a, dl+10, 40+a, 0xFB21);}
dl+=16;}
tft.setRotation(0);
aveg();
while(1);
}
您可以在此处找到更多图表模板。
音乐
在这个模板中,我们添加了将转换后的图像转换为代码,然后使用两个黑色和白色弧来创建卷的指针。下载.h文件并将其添加到Arduino草图的文件夹中。
#include “Adafruit_GFX.h”
#include “MCUFRIEND_kbv.h”
MCUFRIEND_kbv tft;
#include “Volume.h”
#define BLACK 0x0000
int a = 0,b = 4000,c = 1000,d = 3000;
int s=2000;
int j, j2;
int i, i2;
int White;
void setup()
{
Serial.begin(9600);
uint16_t ID = tft.readID();
tft.begin(ID);
tft.invertDisplay(true);
tft.setRotation(1);
}
void loop(void)
{
tft.invertDisplay(true);
tft.fillScreen(BLACK);
tft.drawRGBBitmap(0, 0, test, 480, 320);
White = tft.color565(255, 255, 255);
while(1){
if (a 《 s) {
j = 14 * (sin(PI * a / 2000));
i = 14 * (cos(PI * a / 2000));
j2 = 1 * (sin(PI * a / 2000));
i2 = 1 * (cos(PI * a / 2000));
tft.drawLine(i2 + 62, j2 + 240, i + 62, j + 240, White);
j = 14 * (sin(PI * (a-300) / 2000));
i = 14 * (cos(PI * (a-300) / 2000));
j2 = 1 * (sin(PI * (a-300) / 2000));
i2 = 1 * (cos(PI * (a-300) / 2000));
tft.drawLine(i2 + 62, j2 + 240, i + 62, j + 240, 0x0000);
tft.fillRect(50, 285, 30, 30, 0x0000);
tft.setTextSize(2);
tft.setTextColor(0xffff);
tft.setCursor(50, 285);
tft.print(a / 40); tft.print(“%”);
a++;
}
if (b 《 s) {
j = 14 * (sin(PI * b / 2000));
i = 14 * (cos(PI * b / 2000));
j2 = 1 * (sin(PI * b / 2000));
i2 = 1 * (cos(PI * b / 2000));
tft.drawLine(i2 + 180, j2 + 240, i + 180, j + 240, White);
j = 14 * (sin(PI * (b-300) / 2000));
i = 14 * (cos(PI * (b-300) / 2000));
j2 = 1 * (sin(PI * (b-300) / 2000));
i2 = 1 * (cos(PI * (b-300) / 2000));
tft.drawLine(i2 + 180, j2 + 240, i + 180, j + 240, 0x0000);
tft.fillRect(168, 285, 30, 30, 0x0000);
tft.setTextSize(2);
tft.setTextColor(0xffff);
tft.setCursor(168, 285);
tft.print(b / 40); tft.print(“%”);
b++;}
if (c 《 s) {
j = 14 * (sin(PI * c / 2000));
i = 14 * (cos(PI * c / 2000));
j2 = 1 * (sin(PI * c / 2000));
i2 = 1 * (cos(PI * c / 2000));
tft.drawLine(i2 + 297, j2 + 240, i + 297, j + 240, White);
j = 14 * (sin(PI * (c-300) / 2000));
i = 14 * (cos(PI * (c-300) / 2000));
j2 = 1 * (sin(PI * (c-300) / 2000));
i2 = 1 * (cos(PI * (c-300) / 2000));
tft.drawLine(i2 + 297, j2 + 240, i + 297, j + 240, 0x0000);
tft.fillRect(286, 285, 30, 30, 0x0000);
tft.setTextSize(2);
tft.setTextColor(0xffff);
tft.setCursor(286, 285);
tft.print(c / 40); tft.print(“%”);
c++;}
if (d 《 s) { j = 14 * (sin(PI * d / 2000)); i = 14 * (cos(PI * d / 2000)); j2 = 1 * (sin(PI * d / 2000)); i2 = 1 * (cos(PI * d / 2000)); tft.drawLine(i2 + 414, j2 + 240, i + 414, j + 240, White); j = 14 * (sin(PI * (d-300) / 2000)); i = 14 * (cos(PI * (d-300) / 2000)); j2 = 1 * (sin(PI * (d-300) / 2000)); i2 = 1 * (cos(PI * (d-300) / 2000)); tft.drawLine(i2 + 414, j2 + 240, i + 414, j + 240, 0x0000); tft.fillRect(402, 285, 30, 30, 0x0000); tft.setTextSize(2); tft.setTextColor(0xffff); tft.setCursor(402, 285); tft.print(d / 40); tft.print(“%”); d++;} if (a 》 s) {
j = 14 * (sin(PI * a / 2000));
i = 14 * (cos(PI * a / 2000));
j2 = 1 * (sin(PI * a / 2000));
i2 = 1 * (cos(PI * a / 2000));
tft.drawLine(i2 + 62, j2 + 240, i + 62, j + 240, White);
j = 14 * (sin(PI * (a+300) / 2000));
i = 14 * (cos(PI * (a+300) / 2000));
j2 = 1 * (sin(PI * (a+300) / 2000));
i2 = 1 * (cos(PI * (a+300) / 2000));
tft.drawLine(i2 + 62, j2 + 240, i + 62, j + 240, 0x0000);
tft.fillRect(50, 285, 30, 30, 0x0000);
tft.setTextSize(2);
tft.setTextColor(0xffff);
tft.setCursor(50, 285);
tft.print(a / 40); tft.print(“%”);
a--;}
if (b 》 s) {
j = 14 * (sin(PI * b / 2000));
i = 14 * (cos(PI * b / 2000));
j2 = 1 * (sin(PI * b / 2000));
i2 = 1 * (cos(PI * b / 2000));
tft.drawLine(i2 + 180, j2 + 240, i + 180, j + 240, White);
j = 14 * (sin(PI * (b+300) / 2000));
i = 14 * (cos(PI * (b+300) / 2000));
j2 = 1 * (sin(PI * (b+300) / 2000));
i2 = 1 * (cos(PI * (b+300) / 2000));
tft.drawLine(i2 + 180, j2 + 240, i + 180, j + 240, 0x0000);
tft.fillRect(168, 285, 30, 30, 0x0000);
tft.setTextSize(2);
tft.setTextColor(0xffff);
tft.setCursor(168, 285);
tft.print(b / 40); tft.print(“%”);
b--;}
if (c 》 s) {
j = 14 * (sin(PI * c / 2000));
i = 14 * (cos(PI * c / 2000));
j2 = 1 * (sin(PI * c / 2000));
i2 = 1 * (cos(PI * c / 2000));
tft.drawLine(i2 + 297, j2 + 240, i + 297, j + 240, White);
j = 14 * (sin(PI * (c+300) / 2000));
i = 14 * (cos(PI * (c+300) / 2000));
j2 = 1 * (sin(PI * (c+300) / 2000));
i2 = 1 * (cos(PI * (c+300) / 2000));
tft.drawLine(i2 + 297, j2 + 240, i + 297, j + 240, 0x0000);
tft.fillRect(286, 285, 30, 30, 0x0000);
tft.setTextSize(2);
tft.setTextColor(0xffff);
tft.setCursor(286, 285);
tft.print(c / 40); tft.print(“%”);
c--;}
if (d 》 s) {
j = 14 * (sin(PI * d / 2000));
i = 14 * (cos(PI * d / 2000));
j2 = 1 * (sin(PI * d / 2000));
i2 = 1 * (cos(PI * d / 2000));
tft.drawLine(i2 + 414, j2 + 240, i + 414, j + 240, White);
j = 14 * (sin(PI * (d+300) / 2000));
i = 14 * (cos(PI * (d+300) / 2000));
j2 = 1 * (sin(PI * (d+300) / 2000));
i2 = 1 * (cos(PI * (d+300) / 2000));
tft.drawLine(i2 + 414, j2 + 240, i + 414, j + 240, 0x0000);
tft.fillRect(402, 285, 30, 30, 0x0000);
tft.setTextSize(2);
tft.setTextColor(0xffff);
tft.setCursor(402, 285);
tft.print(d / 40); tft.print(“%”);
d--;}
}
}
点击此链接可以找到更多动画模板(如下面的GIF)
屏幕保护程序
在这个模板中,我们只是通过RGBbitmap和位图功能显示一些图像。只需为触摸屏制作代码并使用此模板即可。下载.h文件并将其添加到Arduino草图的文件夹中。
#include “Adafruit_GFX.h” // Core graphics library
#include “MCUFRIEND_kbv.h” // Hardware-specific library
MCUFRIEND_kbv tft;
#define BLACK 0x0000
#define RED 0xF800
#define GREEN 0x07E0
#define WHITE 0xFFFF
#define GREY 0x8410
#include “images.h”
#include “Fonts/FreeSans9pt7b.h”
#include “Fonts/FreeSans12pt7b.h”
#include “Fonts/FreeSerif12pt7b.h”
#include “FreeDefaultFonts.h”
int a = 3000;
int b = 4000;
int j, j2;
int i, i2;
void showmsgXY(int x, int y, int sz, const GFXfont *f, const char *msg)
{
int16_t x1, y1;
uint16_t wid, ht;
// tft.drawFastHLine(0, y, tft.width(), 0xffff);
tft.setFont(f);
tft.setCursor(x, y);
tft.setTextColor(WHITE);
tft.setTextSize(sz);
tft.print(msg);
delay(1000);
}
void setup()
{
Serial.begin(9600);
uint16_t ID = tft.readID();
tft.begin(ID);
tft.invertDisplay(true);
tft.setRotation(1);
}
void loop(void)
{
tft.invertDisplay(true);
tft.fillScreen(BLACK);
tft.drawRGBBitmap(0, 0, test, 480, 320);
tft.drawBitmap(20, 20, Line1, 45, 45, 0xffff);//battery
tft.drawBitmap(65, 20, Line2, 45, 45, 0xffff);//wifi
tft.drawBitmap(125, 25, Line3, 45, 45, 0xffff);//mail
tft.drawBitmap(185, 25, Line4, 45, 45, 0xffff);//instagram
tft.drawBitmap(245, 25, Line6, 45, 45, 0xffff);//power
tft.drawBitmap(20, 260, Line5, 45, 45, 0xffff);//twitter
tft.drawBitmap(410, 140, Line7, 45, 45, 0xffff);//rain
tft.setTextSize(6);
tft.setTextColor(0xffff);
tft.setCursor(280, 210);
tft.print(“20:45”);
tft.setTextSize(2);
tft.setTextColor(0xffff);
showmsgXY(330, 280, 1, &FreeSans12pt7b, “Saturday”);
showmsgXY(300, 305, 1, &FreeSans12pt7b, “6 October 2018”);
while (1);
}
-
TFTLCD是什么?TFTLCD具有哪些优点2021-10-28 0
-
什么是TFTLCD?什么是FSMC2021-12-06 0
-
TFTLCD原理与配置的相关资料推荐2021-12-13 0
-
TFTLCD驱动原理是什么2022-02-09 0
-
TFTLCD代码2016-05-20 593
-
STM32单片机对TFTLCD的驱动设计2018-12-19 6599
-
【STM32】TFTLCD驱动原理2021-12-05 635
-
STM32学习——TFTLCD原理2021-12-05 459
-
对于驱动TFTLCD,读这篇文章就够了!2021-12-09 370
-
STM32CubeMX系列|TFTLCD显示2021-12-17 457
-
TFTLCD for STM32资料分享2022-09-13 215
-
ATK 4.3 TFTLCD V1.6模块2022-09-28 330
-
ATK 4.3 TFTLCD V1.6图2022-09-28 287
-
ATK 7 TFTLCD V2.3图2022-09-28 310
-
TFTLCD(MCU屏)实验2023-09-15 114
全部0条评论

快来发表一下你的评论吧 !
