

如何使用Arduino将Adafruit驻极体麦克风放大器连接到测量声级
电子说
描述
概述

本指南介绍了如何使用Arduino将Adafruit驻极体麦克风放大器连接到测量声级。
麦克风放大器将驻极体胶囊麦克风与aMAX4466运算放大器配对,该放大器经过优化,可用于麦克风前置放大器应用。灵活的电源电压和可调节的增益使该模块适用于各种音频应用。
规格:
电源电压:2.4v-5v
输出:轨到轨-最高5vp-p
频率响应:20Hz-20 KHz
可调增益25x-125x
可用范围:当然是Adafruit!
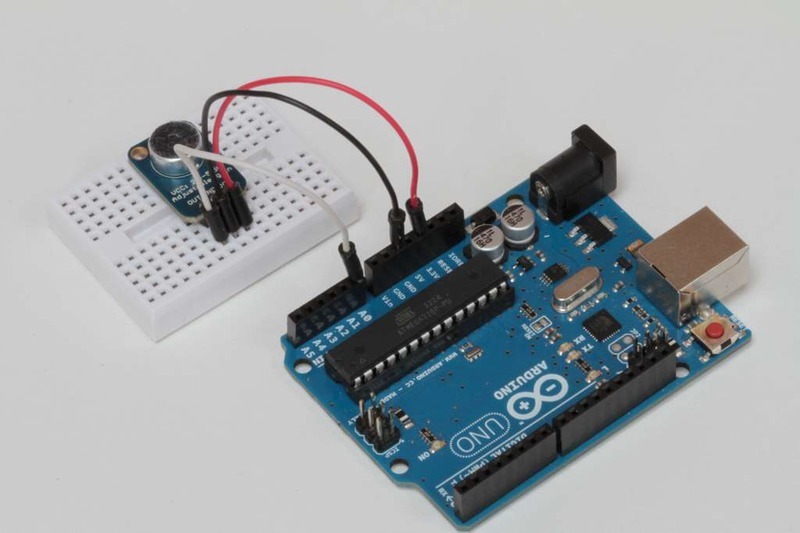
组装和接线
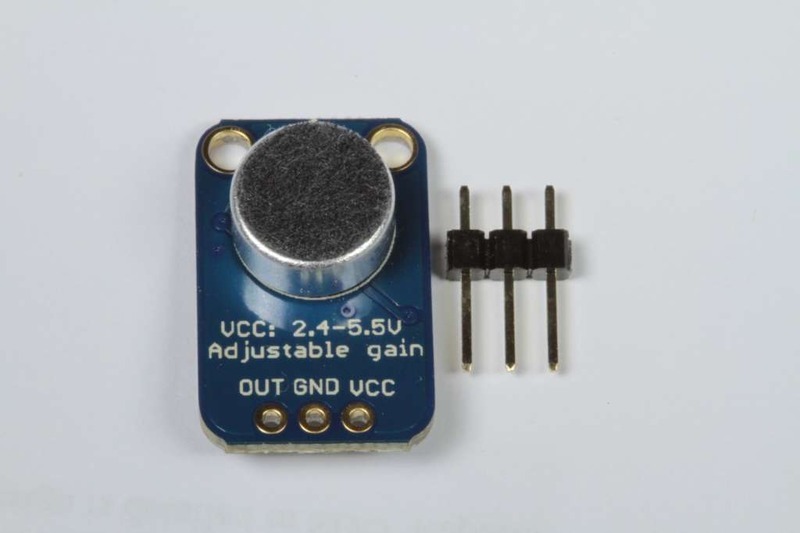
装配:该板附带所有表面贴装的组件-焊接。可以将附带的标题条焊接起来,以方便在带有0.1英寸连接器的面包板上使用。
准备标题条: 如有必要,将标题条切成一定长度。如果将其插入面包板,则焊接起来会更容易-长针向下。
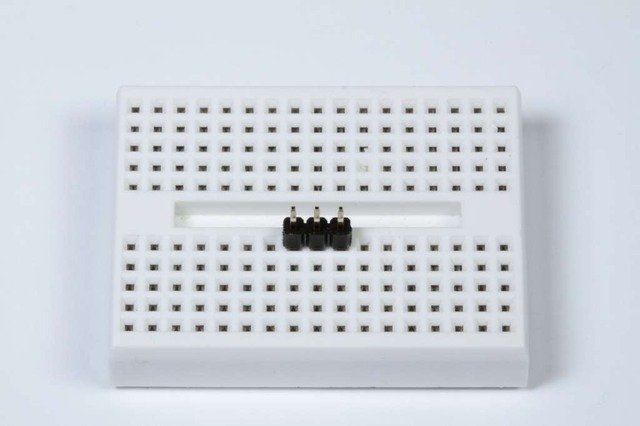
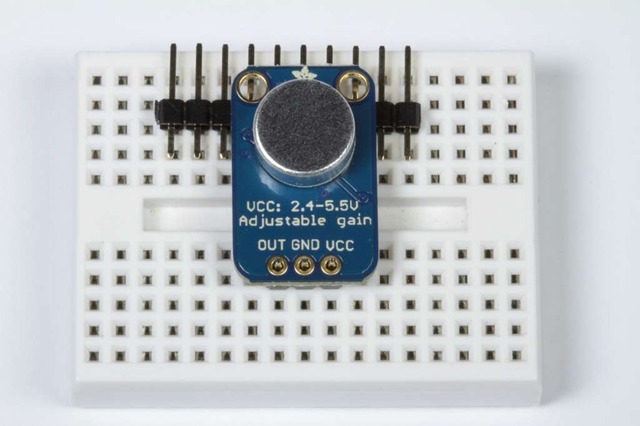
添加分支板: 将分支板放置在插针上。
(您可以用一些额外的插针支撑板的自由边缘,以便更好地对齐以进行焊接。)
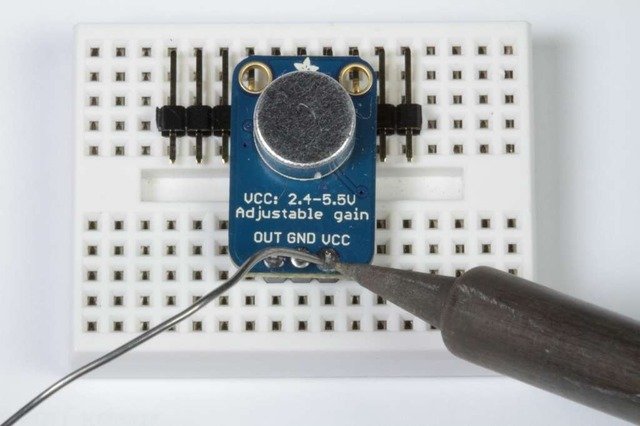
和焊接! 确保焊接所有引脚以确保可靠的电接触。
(有关焊接的技巧,请务必查看我们的 优良焊接指南 )。
接线:该放大器只有3个连接,因此接线很简单:
GND-》 GND
VCC-》 3.3V
OUT-》 AIN0
VCC的电压范围可以是2.4-5VDC。为了获得最佳性能,我们使用3.3v引脚,因为它是Arduino上的“最安静”电源。
输出将具有VCC/2的DC偏置,因此当其完全安静时,电压为稳定的VCC/2(1.65v)。
测量声音水平
来自放大器输出的音频信号是变化的电压。为了测量声级,我们需要进行多次测量以找到信号的最小和最大范围或“峰到峰幅度”。
在下面的示例中,我们选择50毫秒的示例窗口。这足以测量低至20 Hz(人类听觉的下限)频率的声音水平。
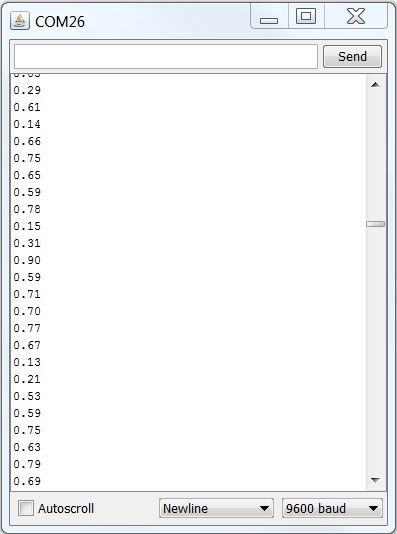
找到最小和最大样本后,我们计算差值并将其转换为伏特,然后将输出打印到串行监视器。
下载:文件
复制代码
/****************************************
Example Sound Level Sketch for the
Adafruit Microphone Amplifier
****************************************/
const int sampleWindow = 50; // Sample window width in mS (50 mS = 20Hz)
unsigned int sample;
void setup()
{
Serial.begin(9600);
}
void loop()
{
unsigned long startMillis= millis(); // Start of sample window
unsigned int peakToPeak = 0; // peak-to-peak level
unsigned int signalMax = 0;
unsigned int signalMin = 1024;
// collect data for 50 mS
while (millis() - startMillis 《 sampleWindow)
{
sample = analogRead(0);
if (sample 《 1024) // toss out spurious readings
{
if (sample 》 signalMax)
{
signalMax = sample; // save just the max levels
}
else if (sample 《 signalMin)
{
signalMin = sample; // save just the min levels
}
}
}
peakToPeak = signalMax - signalMin; // max - min = peak-peak amplitude
double volts = (peakToPeak * 5.0) / 1024; // convert to volts
Serial.println(volts);
} /****************************************
Example Sound Level Sketch for the
Adafruit Microphone Amplifier
****************************************/
const int sampleWindow = 50; // Sample window width in mS (50 mS = 20Hz)
unsigned int sample;
void setup()
{
Serial.begin(9600);
}
void loop()
{
unsigned long startMillis= millis(); // Start of sample window
unsigned int peakToPeak = 0; // peak-to-peak level
unsigned int signalMax = 0;
unsigned int signalMin = 1024;
// collect data for 50 mS
while (millis() - startMillis 《 sampleWindow)
{
sample = analogRead(0);
if (sample 《 1024) // toss out spurious readings
{
if (sample 》 signalMax)
{
signalMax = sample; // save just the max levels
}
else if (sample 《 signalMin)
{
signalMin = sample; // save just the min levels
}
}
}
peakToPeak = signalMax - signalMin; // max - min = peak-peak amplitude
double volts = (peakToPeak * 5.0) / 1024; // convert to volts
Serial.println(volts);
}
确定,所以这不是很令人兴奋。您还能做什么?
滚动声级计因此,现在我们将进行峰峰值测量,并使用它来驱动BicolorLED矩阵以显示声级。为了使它更有趣,我们将滚动显示屏幕,以便实时绘制最近的8个测量结果。
为此,您需要下载Adafruit GFX库和LED背包库。 Wire Library包含在Arduino IDE安装中。
组装矩阵,请按照以下教程进行操作:
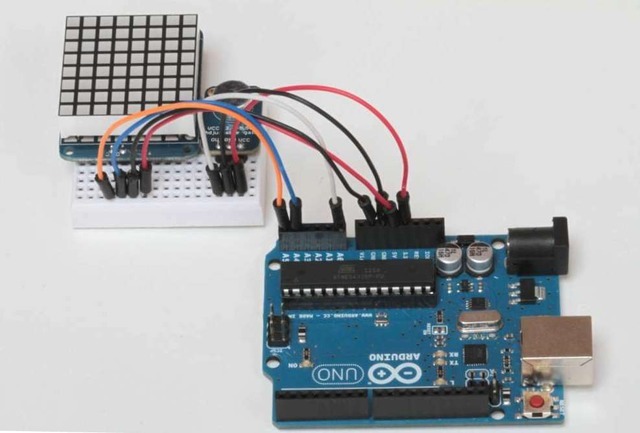
连接Matrix Matrix背包有4个插针,其连接方式如下:
‘+’-》 5v
‘-’-》 GND
D-》 SDA(模拟引脚4)
C-》 SCL(模拟引脚5)
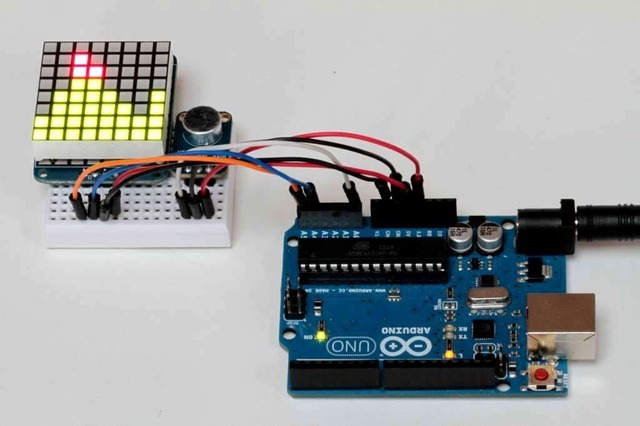
上传代码,将以下代码粘贴到Arduino IDE中并上传。以正常的声音说话,距离麦克风大约6-8英寸,并且声级计矩阵显示应该开始滚动。
调整增益尽管放大器能够产生轨到轨信号(在这种情况下为3.3v),但是代码映射了一个1v峰峰值信号可满幅显示。
这可以在代码中更改。或者,您可以使用小号直刃螺丝刀调节放大器的增益微调电位器。放大器增益可在25倍至125倍之间调节。
轻轻进行所有增益调整。如果您感到阻力,请停止。小巧的装饰锅很精致,很容易通过挡块损坏。
下载:文件
复制代码
/****************************************
Scrolling Sound Meter Sketch for the
Adafruit Microphone Amplifier
****************************************/
#include
#include “Adafruit_LEDBackpack.h”
#include “Adafruit_GFX.h”
// Include the Matrix code for display
Adafruit_BicolorMatrix matrix = Adafruit_BicolorMatrix();
const int maxScale = 8;
const int redZone = 5;
const int sampleWindow = 50; // Sample window width in mS (50 mS = 20Hz)
unsigned int sample;
void setup()
{
Serial.begin(9600);
matrix.begin(0x70); // pass in the address
}
void loop()
{
unsigned long startMillis= millis(); // Start of sample window
unsigned int peakToPeak = 0; // peak-to-peak level
unsigned int signalMax = 0;
unsigned int signalMin = 1024;
while (millis() - startMillis 《 sampleWindow)
{
sample = analogRead(0);
if (sample 《 1024) // toss out spurious readings
{
if (sample 》 signalMax)
{
signalMax = sample; // save just the max levels
}
else if (sample 《 signalMin)
{
signalMin = sample; // save just the min levels
}
}
}
peakToPeak = signalMax - signalMin;
// map 1v p-p level to the max scale of the display
int displayPeak = map(peakToPeak, 0, 1023, 0, maxScale);
// Update the display:
for (int i = 0; i 《 7; i++) // shift the display left
{
matrix.displaybuffer[i] = matrix.displaybuffer[i+1];
}
// draw the new sample
for (int i = 0; i 《= maxScale; i++)
{
if (i 》= displayPeak) // blank these pixels
{
matrix.drawPixel(i, 7, 0);
}
else if (i 《 redZone) // draw in green
{
matrix.drawPixel(i, 7, LED_GREEN);
}
else // Red Alert! Red Alert!
{
matrix.drawPixel(i, 7, LED_RED);
}
}
matrix.writeDisplay(); // write the changes we just made to the display
} /****************************************
Scrolling Sound Meter Sketch for the
Adafruit Microphone Amplifier
****************************************/
#include
#include “Adafruit_LEDBackpack.h”
#include “Adafruit_GFX.h”
// Include the Matrix code for display
Adafruit_BicolorMatrix matrix = Adafruit_BicolorMatrix();
const int maxScale = 8;
const int redZone = 5;
const int sampleWindow = 50; // Sample window width in mS (50 mS = 20Hz)
unsigned int sample;
void setup()
{
Serial.begin(9600);
matrix.begin(0x70); // pass in the address
}
void loop()
{
unsigned long startMillis= millis(); // Start of sample window
unsigned int peakToPeak = 0; // peak-to-peak level
unsigned int signalMax = 0;
unsigned int signalMin = 1024;
while (millis() - startMillis 《 sampleWindow)
{
sample = analogRead(0);
if (sample 《 1024) // toss out spurious readings
{
if (sample 》 signalMax)
{
signalMax = sample; // save just the max levels
}
else if (sample 《 signalMin)
{
signalMin = sample; // save just the min levels
}
}
}
peakToPeak = signalMax - signalMin;
// map 1v p-p level to the max scale of the display
int displayPeak = map(peakToPeak, 0, 1023, 0, maxScale);
// Update the display:
for (int i = 0; i 《 7; i++) // shift the display left
{
matrix.displaybuffer[i] = matrix.displaybuffer[i+1];
}
// draw the new sample
for (int i = 0; i 《= maxScale; i++)
{
if (i 》= displayPeak) // blank these pixels
{
matrix.drawPixel(i, 7, 0);
}
else if (i 《 redZone) // draw in green
{
matrix.drawPixel(i, 7, LED_GREEN);
}
else // Red Alert! Red Alert!
{
matrix.drawPixel(i, 7, LED_RED);
}
}
matrix.writeDisplay(); // write the changes we just made to the display
}
更多酷项目!
要使用Adafruit麦克风放大器获得更多乐趣,请查看出色的Wave ShieldVoice Changer项目:
Tiny Arduino Music Visualizer!
下载
数据表
链接到MAX4466数据表(主放大器芯片)
使用的驻极体麦克风
下载EAGLE文件
示意图:
单击以进行签名

责任编辑:wv
-
#硬声创作季 如何将麦克风连接到放大器Mr_haohao 2022-10-17
-
单节9V电池电源和驻极体麦克风前置放大器设计流程2018-11-27 0
-
MEMS与ECM:比较麦克风技术2019-02-23 0
-
请问连接麦克风到PSoC有可能使用嵌入式软件放大器吗?2019-10-18 0
-
模拟MEMS麦克风与前置放大器的连接能实现什么功能?2020-04-16 0
-
FAN3850A麦克风前置放大器的典型应用2020-06-18 0
-
用于FAN3850A麦克风前置放大器的典型应用立体声麦克风电路2020-06-19 0
-
如何采用业界最小的运算放大器设计麦克风电路?2021-05-31 0
-
驻极体麦克风电路2022-04-14 0
-
使用LM387制作的动圈麦克风前置放大器电路2023-08-31 0
-
使用晶体管的驻极体麦克风放大器电路2023-09-08 0
-
驻极体麦克风前置放大器2009-09-05 7490
-
基于放大器LM358和驻极体麦克风2023-06-20 369
-
驻极体麦克风放大电路图详解2023-07-25 3093
-
小型驻极体麦克风前置放大器电路图2023-09-05 1889
全部0条评论

快来发表一下你的评论吧 !
