

鸿蒙版微信聊天UI效果实现!
描述
最近开发中要做一个类似微信聊天的工单系统客服中心界面(安卓版)所以想着也模仿一个鸿蒙版(基于 Java UI 的,JS UI 版本的后期更新哈) 那么废话不多数说我们正式开始。
具体实现
mainabiilty 布局文件:
<DependentLayout
    xmlns:ohos="http://schemas.huawei.com/res/ohos"
    ohos:height="match_parent"
    ohos:width="match_parent"
    ohos:alignment="center"
    ohos:orientation="vertical">

    <DependentLayout
        ohos:id="$+id:company_page_dl"
        ohos:height="50vp"
        ohos:width="match_parent"
        ohos:orientation="horizontal"
        ohos:align_parent_bottom="true"
        >

        <Button
            ohos:id="$+id:main_my_btn"
            ohos:width="match_content"
            ohos:height="match_content"
            ohos:text="发送"
            ohos:text_size="35vp"
            ohos:align_parent_right="true"
            ohos:background_element="$graphic:background_btn"
            >
        Button>
     <TextField
         ohos:id="$+id:main_textfiled"
         ohos:width="match_parent"
         ohos:height="match_parent"
         ohos:hint="请输入你的消息"
         ohos:vertical_center="true"
         ohos:text_size="50"
         ohos:left_of="$id:main_my_btn"
         ohos:layout_alignment="left"
         >
     TextField>
    DependentLayout>

    <ListContainer
        ohos:above="$id:company_page_dl"
        ohos:id="$+id:main_list"
        ohos:height="match_parent"
        ohos:width="match_parent"
        >
    ListContainer>

DependentLayout>
观察布局文件,我们可以看到写了一个列表控件 ListContainer 来装载发送出去的消息和接收到的消息。然后底部写了一个 TextField 控件来处理用户的输入和一个 button 来触发发送的动作。
逻辑代码
我们初始化对应控件并且 listContainer 和适配器绑定到一起:
    private void initview() {
        listContainer= (ListContainer) findComponentById(ResourceTable.Id_main_list);
        textField= (TextField) findComponentById(ResourceTable.Id_main_textfiled);
        mainbtn= (Button) findComponentById(ResourceTable.Id_main_my_btn);
        mainbtn.setClickedListener(this);
        myProvider=new MyProvider(data,getAbility());
        listContainer.setItemProvider(myProvider);
        myProvider.notifyDataChanged();//有新消息时,刷新ListView中的显示
    }
①初始默认假数据
我们方便展示就写了 3 条假数据仅供展示:
     private void initMsg() {
        Msg msg1 = new Msg("你好",Msg.RECEIVED);
        data.add(msg1);
        Msg msg2 = new Msg("你好呀",Msg.SENT);
        data.add(msg2);
        Msg msg3 = new Msg("很高兴认识你",Msg.RECEIVED);
        data.add(msg3);
    }
②用户输入逻辑:
 @Override
    public void onClick(Component component) {
        content=textField.getText().toString();
        switch (component.getId()){
            case ResourceTable.Id_main_my_btn:
                if(!flag){
                    Msg msg = new Msg(content, Msg.SENT);
                    data.add(msg);
                    flag=true;
                }else {
                    Msg msg = new Msg(content, Msg.RECEIVED);
                    data.add(msg);
                    flag=false;
                }
                myProvider.notifyDataChanged();//有新消息时,刷新ListView中的显示
                textField.setText("");//清空输入框的内容
                break;

            default:
                break;

        }

    }
我们通过一个布尔值 flag 来做一个开关处理用户输入的,动作轮流来处理是接收到消息还是发送出消息。发送消息:
  Msg msg = new Msg(content, Msg.SENT);
                    data.add(msg);
接收消息:
 Msg msg = new Msg(content, Msg.RECEIVED);
                    data.add(msg);
bena 类
package com.example.imdemo.bean;

public class Msg{

   public static final int RECEIVED = 0;//收到一条消息

   public static final int SENT = 1;//发出一条消息

   private String  content;//消息的内容

   private int type;//消息的类型

   public  Msg(String content,int type){
       this.content = content;
       this.type = type;
   }

   public String getContent(){
       return content;
   }

   public int getType(){
       return type;
   }
}
我们分别定义了 2 个常量和 2 个变量来处理我们的消息逻辑。
适配器
适配器 item.xml 布局:
<DirectionalLayout
    xmlns:ohos="http://schemas.huawei.com/res/ohos"
    ohos:height="match_content"
    ohos:width="match_parent"
    ohos:orientation="vertical">
   <DirectionalLayout
       ohos:id="$+id:left_layout"
       ohos:height="match_content"
       ohos:width="match_content"
       ohos:layout_alignment="left"
        ohos:background_element="$graphic:background_blue"
       ohos:left_margin="5vp"
       ohos:visibility="visible"
       ohos:top_margin="10vp"
       >

   <Text
       ohos:id="$+id:left_msg"
       ohos:height="match_content"
       ohos:width="match_content"
       ohos:text="哈哈哈测试"
       ohos:text_color="#fff"
       ohos:text_size="20vp"
       ohos:margin="10vp"
       >
   Text>

   DirectionalLayout>


    <DirectionalLayout
        ohos:id="$+id:right_Layout"
        ohos:height="match_content"
        ohos:width="match_content"
        ohos:layout_alignment="right"
        ohos:background_element="$graphic:background_red"
        ohos:right_margin="5vp"
        ohos:visibility="visible"
        >
        <Text
            ohos:id="$+id:right_msg"
            ohos:height="match_content"
            ohos:width="match_content"
            ohos:text="哈哈哈测试"
            ohos:text_color="#fff"
            ohos:text_size="20vp"
            ohos:margin="10vp"
            >
        Text>
    DirectionalLayout>
DirectionalLayout>
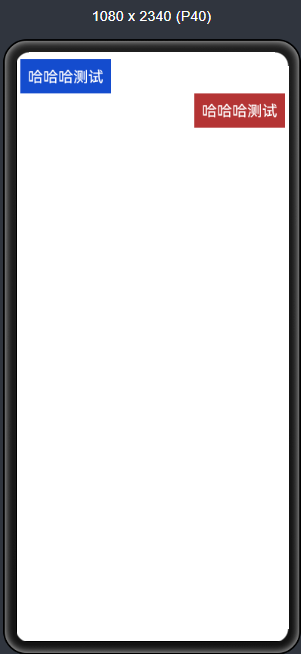
item 布局预览效果:
 适配器逻辑代码:
package com.example.imdemo.provider;
import com.example.imdemo.ResourceTable;
import com.example.imdemo.bean.Msg;
import ohos.aafwk.ability.Ability;
import ohos.agp.components.*;

import java.util.List;

public class MyProvider extends BaseItemProvider {

    private List list;
    private Ability  ability;


    public MyProvider(List list, Ability ability) {
        this.list = list;
        this.ability = ability;
    }

    @Override
    public int getCount() {
        return list.size();
    }

    @Override
    public Object getItem(int i) {
        return list.get(i);
    }

    @Override
    public long getItemId(int i) {
        return i;
    }

    @Override
    public Component getComponent(int i, Component component, ComponentContainer componentContainer) {

        ViewHodler hodler=null;
        Msg msg = list.get(i);
        if (component== null) {
            component = LayoutScatter.getInstance(ability).parse(ResourceTable.Layout_item,null,false);
            hodler=new ViewHodler();
            hodler.leftLayout = (DirectionalLayout) component.findComponentById(ResourceTable.Id_left_layout);
            hodler.rightLayout = (DirectionalLayout) component.findComponentById(ResourceTable.Id_right_Layout);
            hodler.leftMsg = (Text) component.findComponentById(ResourceTable.Id_left_msg);
            hodler.rightMsg = (Text) component.findComponentById(ResourceTable.Id_right_msg);
           component.setTag(hodler);
        } else {
           hodler= (ViewHodler) component.getTag();
        }
        System.out.println("type--- >  "+msg.getType());
        if(msg.getType()==Msg.RECEIVED){
            System.out.println("左边消息");
            //如果是收到的消息,则显示左边消息布局,将右边消息布局隐藏
            hodler.leftLayout.setVisibility(0);
            hodler.rightLayout.setVisibility(1);
            hodler.leftMsg.setText(msg.getContent());
        }else if(msg.getType()==Msg.SENT){
            System.out.println("右边消息");
            //如果是发出去的消息,显示右边布局的消息布局,将左边的消息布局隐藏
            hodler.rightLayout.setVisibility(0);
            hodler.leftLayout.setVisibility(1);
            hodler.rightMsg.setText(msg.getContent());
        }
        return  component;
    }

    class ViewHodler{
        DirectionalLayout leftLayout;
        DirectionalLayout rightLayout;
        Text leftMsg;
        Text rightMsg;

    }
}
我们通过在 getComponent 方法中通过小标 i 来遍历集合然后拿到里面每一个对应里面的 type 属性来判断是显示左边布局还是右边布局。
也就是对应的发送消息和接收消息的 UI,我们通过简单布局显示影藏来实现消息的左右两边显示效果,到此整个仿微信聊天的布局 UI 效果就讲完了 。
总结
鸿蒙的仿微信聊天 UI 效果实现起来相对比较简单,其实还有一种办法那就是 ListContainer 的多布局也是通过 bean 里面的标识来显示左右不同的布局实现聊天界面的效果。因为篇幅有限这里就不展开讲了有兴趣的同学可以私下研究。最后希望我的文章能帮助到各位解决问题,以后我还会贡献更多有用的代码分享给大家。
项目地址:
https://gitee.com/qiuyu123/hms_im_demo
编辑:jq
声明:本文内容及配图由入驻作者撰写或者入驻合作网站授权转载。文章观点仅代表作者本人,不代表电子发烧友网立场。文章及其配图仅供工程师学习之用,如有内容侵权或者其他违规问题,请联系本站处理。
举报投诉
-
腾讯突然宣布,微信鸿蒙版要来了!2024-04-30 0
-
实锤!腾讯终于拥抱鸿蒙生态,微信鸿蒙原生版本即将上线2024-04-30 0
-
最新开源代码证实!“鸿蒙原生版”微信正在积极开发中2024-05-08 0
-
效果实现2016-04-24 0
-
微信修改聊天记录图片数字软件2017-11-08 0
-
html5仿微信聊天开发|仿微信1v1聊天|仿微信表情2018-07-01 0
-
请问labview怎么实现聊天的气泡效果?2019-05-15 0
-
iOS如何抽奖轮盘效果实现思路2020-04-28 0
-
什么是Android - 微信聊天记录恢复 v5.0 解锁版?2021-06-29 0
-
求助:哪个网站点击进去能自动弹出微信视频邀请聊天的铃声?2021-09-07 0
-
鸿蒙应用开发的JS UI框架如何实现高德地图的访问?2022-04-28 0
-
如何实现HarmonyOS Java端的气泡聊天框?2022-06-13 0
-
鸿蒙应用ui布局2023-09-20 0
-
使用Arduino实现三彩渐变效果实验的资料合集免费下载2021-02-03 528
-
鸿蒙实战开发ArkTS运用:【ai聊天框】2024-03-08 299
全部0条评论

快来发表一下你的评论吧 !
