

如何使用Arduino Leonardo和MPU6050制作一个有线的手势控制器
描述
本文将向你展示如何使用Arduino Leonardo和MPU6050加速计/陀螺仪模块来制作一个类似于任天堂Wii控制器的手势控制装置。手势控制装置主要用于游戏、互动活动和一些基础娱乐。几年前,任天堂创造了一种全新的人机交互模式,手势控制,它允许用户在Wii控制器的帮助下,通过游戏手柄与游戏内容进行交互。Wii控制器使用一个加速度计来识别你当前的手势,然后将手势映射到游戏控制器上。下面,我们也将使用Arduino Leonardo和MPU6050模块来制作一个有线的手势控制器。
Arduino Leonardo
工作原理
该装置依赖于两个关键组件:MPU6050和Arduino Leonardo。MPU6050可以帮助我们收集控制装置沿x轴和y轴移动的三维姿态数据。然后,根据传感器的值,我们可以控制光标位置。要实现单击鼠标的效果,需要停止移动光标并将其锁定在一个点上两秒钟(或者将它设置成一个按钮)。
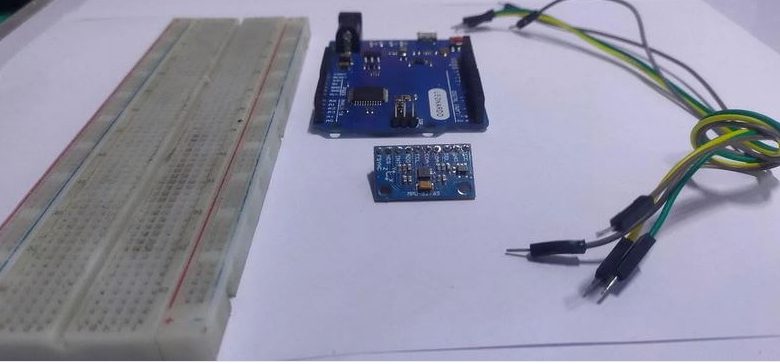
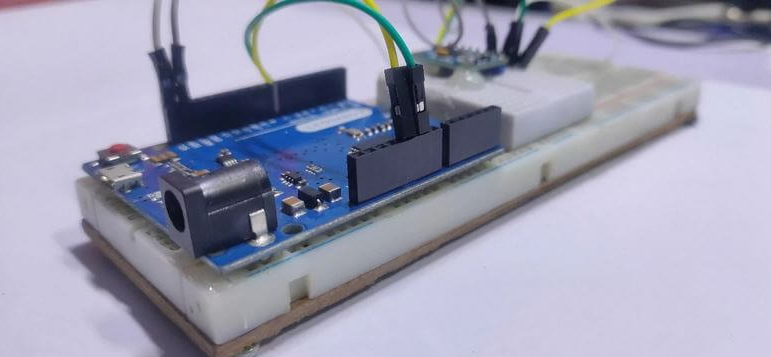
Arduino Leonardo 和 MPU6050
MPU6050是一个IMU传感器,它基于MEMS技术,包含有6个自由度,可以提供6个值作为输出。这六个值中,三个来自加速度计,其余三个来自陀螺仪。
Arduino Leonardo与Arduino Uno外形相同。Arduino Uno配备的是ATmega385芯片,而Leonardo配备了atmega32u4芯片。它有20个数字输入/输出引脚,20个引脚中,7个引脚可作为PWM输出,12个引脚可作为模拟输入,同时它板载了一个微型USB接口,一个电源插口,一个ICSP端口和一个复位按钮。详见
连接Arduino Leonardo和MPU6050
需要说明:因为该装置代码中需要引入mouse.h库文件,而该库文件只支持ATmega32U4芯片,所以只有在基于ATmega32U4芯片的Arduino开发板才能支持这个项目。因此,除了选择Arduino Leonardo外你还可以使用 Arduino Pro Mini开发板。
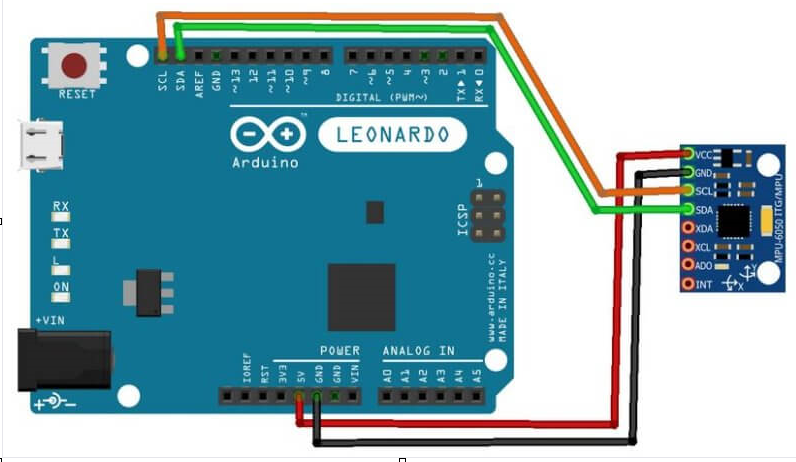
Arduino Leonardo和MPU605电路连接图
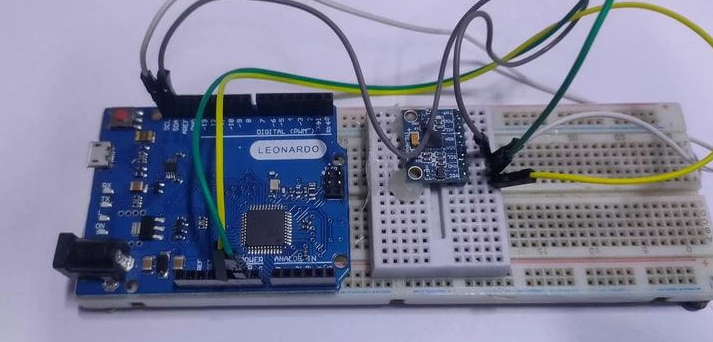
Arduino Leonardo和MPU605实物连接图
上传代码
根据上面的图连接好硬件后,就可以将你的Arduino Leonardo连接到电脑上,并将代码上传到你的Arduino上。代码分为两部分,第一部分是校准代码,第二部分是包点击功能的代码。首先上传校准代码:
//calibrate_air_mouse
//calibrate_air_mouse
#include
#include
#include
#include
MPU6050 mpu;
int16_t ax, ay, az, gx, gy, gz;
int vx, vy;
void setup() {
Serial.begin(9600);
Wire.begin();
mpu.initialize();
if (!mpu.testConnection()) { while (1); }
}
void loop() {
mpu.getMotion6(&ax, &ay, &az, &gx, &gy, &gz);
vx = (gx+300)/150; // change 300 from 0 to 355
vy = -(gz-100)/150; // same here about "-100" from -355 to 0
Serial.print("gx = ");
Serial.print(gx);
Serial.print(" | gz = ");
Serial.print(gz);
Serial.print(" | X = ");
Serial.print(vx);
Serial.print(" | Y = ");
Serial.println(vy);
Mouse.move(vx, vy);
delay(20);
}
上传代码后,鼠标指针就会映射到传感器上。尝试摇动MPU传感器模块。如果正常,请可以接着上传第二部分代码。如果光标不能与MPU6050的移动而移动,那么需要更改源代码中的一些值。可以打开串口监视器,确保可以x和y值可以归零,也就是静止状态。如果不能归零,请根据校准情况修改源代码中的 vx 或 vy 的值。位置如下:
vx = (gx+300)/150; // change 300 from 0 to 355
vy = -(gz-100)/150; // same here about "-100" from -355 to 0
校准完成后,就可以上传第二部分的代码,这段代码还添加了单击功能。单击时,是将光标停留在计算机屏幕上的某个点上约两秒钟。代码将检查光标是否在屏幕的10×10像素区域内停留了x秒的延迟,来执行点击效果的。
//air_mouse_with_click
#include
#include
#include
#include
MPU6050 mpu;
int16_t ax, ay, az, gx, gy, gz;
int vx, vy, vx_prec, vy_prec;
int count=0;
void setup() {
Serial.begin(9600);
Wire.begin();
mpu.initialize();
if (!mpu.testConnection()) {
while (1);
}
}
void loop() {
mpu.getMotion6(&ax, &ay, &az, &gx, &gy, &gz);
vx = (gx+300)/200;
vy = -(gz-100)/200;
Mouse.move(vx, vy);
if ( (vx_prec-5)<=vx && vx<=vx_prec+5 && (vy_prec-5)<=vy && vy<=vy_prec+5) { // for checking the cursor doesn't move too much from its actual position: (in this case a 10 pixel square)
count++;
if(count == 100){ // the click will happen after 2 seconds the pointer has stopped in the 10px square
if (!Mouse.isPressed(MOUSE_LEFT)) {
Mouse.press(MOUSE_LEFT);
count = 0;
}
}
else {
if (Mouse.isPressed(MOUSE_LEFT)) {
Mouse.release(MOUSE_LEFT);
}
}
}
else {
vx_prec = vx; // updating values to check the position of the pointer and allow the click
vy_prec = vy;
count = 0;
}
delay(20);
}
-
手势小车—如何用蓝牙将MPU6050的数据传送至89C51单片机2014-07-06 0
-
【转载】mpu6050的完全解读2021-01-28 0
-
怎样使用MPU6050陀螺仪自制Arduino数字量角器2021-06-28 0
-
IIC控制器和MPU6050的相关资料推荐2022-02-10 0
-
基于Arduino创建一个手势控制车2022-06-22 0
-
MPU6050(硬件IIC)2017-04-02 2641
-
Arduino与MPU6050的通信2017-11-07 7036
-
mpu6050姿态解算原理_mpu6050姿态解算程序2018-03-09 42165
-
MPU6050简介2021-12-06 1564
-
STM32-I2C总线通信与MPU60502021-12-06 713
-
23.IIC控制器和MPU60502021-12-06 461
-
使用Arduino Leonardo和红外传感器制作手势控制设备2022-10-26 317
-
带MPU6050的Arduino陀螺仪游戏2022-11-11 345
-
使用arduino、mpu6050和python控制游戏2022-12-13 498
-
用Arduino和MPU6050控制伺服电机2023-07-03 247
全部0条评论

快来发表一下你的评论吧 !
