

用基于gin框架的Go语言来实现手机号发送短信验证码登录
描述
现在大多数app或wap都实现了通过手机号获取验证码进行验证登录,下面来看下用go来实现手机号发送短信验证码登录的过程,基于的框架是gin 。
首先是短信服务商的申请,比如腾讯云、阿里云、网易易盾等,腾讯云自己申请个微信公众号就行,然后申请相关的短信签名、和短信模板,腾讯有100条试用喔。 具体的代码实现 配置腾讯云短信服务的发送短信相关配置,具体可以参考腾讯云短信服务的api 文档,进行配置
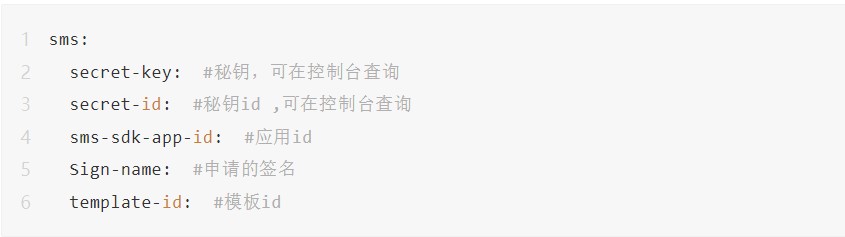
go 这里采用的是viper进行加载配置,相关的加载配置代码如下 定义相关的配置结构体,并加载到整个项目的总的options 配置结构体中
// sms 发送短信的配置options
type SmsOptions struct {
SecretKey string `json:"secret-key,omitempty" mapstructure:"secret-key"`
SecretId string `json:"secret-id,omitempty" mapstructure:"secret-id"`
SmsSdkAppId string `json:"sms-sdk-app-id,omitempty" mapstructure:"sms-sdk-app-id"`
SignName string `json:"sign-name,omitempty" mapstructure:"sign-name"`
TemplateId string `json:"template-id,omitempty" mapstructure:"template-id"`
}
func NewSmsOptions() *SmsOptions {
return &SmsOptions{
SecretKey: "",
SecretId: "",
SmsSdkAppId: "",
SignName: "",
TemplateId: "",
}
}
// 这为项目总的一个options配置,项目启动的时候会将yaml中的加载到option中
type Options struct {
GenericServerRunOptions *genericoptions.ServerRunOptions `json:"server" mapstructure:"server"`
MySQLOptions *genericoptions.MySQLOptions `json:"mysql" mapstructure:"mysql"`
InsecuresServing *genericoptions.InsecureServerOptions `json:"insecure" mapstructure:"insecure"`
Log *logger.Options `json:"log" mapstructure:"log"`
RedisOptions *genericoptions.RedisOptions `json:"redis" mapstructure:"redis"`
SmsOptions *genericoptions.SmsOptions `json:"sms" mapstructure:"sms"`
}
func NewOptions() *Options {
o:=Options{
GenericServerRunOptions: genericoptions.NewServerRunOptions(),
MySQLOptions: genericoptions.NewMySQLOptions(),
InsecuresServing: genericoptions.NewInsecureServerOptions(),
RedisOptions: genericoptions.NewRedisOptions(),
Log: logger.NewOptions(),
SmsOptions: genericoptions.NewSmsOptions(),
}
return &o
}
viper加载配置的代码如下
func AddConfigToOptions(options *options.Options) error {
viper.SetConfigName("config")
viper.AddConfigPath("config/")
viper.SetConfigType("yaml")
err := viper.ReadInConfig()
if err != nil {
return err
}
optDecode := viper.DecodeHook(mapstructure.ComposeDecodeHookFunc(mapstructure.StringToTimeDurationHookFunc(), StringToByteSizeHookFunc()))
err = viper.Unmarshal(options, optDecode)
fmt.Println(options)
if err != nil {
return err
}
return nil
}
func StringToByteSizeHookFunc() mapstructure.DecodeHookFunc {
return func(f reflect.Type,
t reflect.Type, data interface{}) (interface{}, error) {
if f.Kind() != reflect.String {
return data, nil
}
if t != reflect.TypeOf(datasize.ByteSize(5)) {
return data, nil
}
raw := data.(string)
result := new(datasize.ByteSize)
result.UnmarshalText([]byte(raw))
return result.Bytes(), nil
}
}
下面是发送验证码的实现
type SmsClient struct {
Credential *common.Credential
Region string
Cpf *profile.ClientProfile
Request SmsRequest
}
type Option func(*SmsClient)
func NewSmsClient(options ...func(client *SmsClient)) *SmsClient {
client := &SmsClient{
Region: "ap-guangzhou",
Cpf: profile.NewClientProfile(),
}
for _, option := range options {
option(client)
}
return client
}
func WithRequest(request SmsRequest) Option {
return func(smsClient *SmsClient) {
smsClient.Request = request
}
}
func WithCredential(options options.SmsOptions) Option {
return func(smsClient *SmsClient) {
smsClient.Credential = common.NewCredential(options.SecretId, options.SecretKey)
}
}
func WithCpfReqMethod(method string) Option {
return func(smsClient *SmsClient) {
smsClient.Cpf.HttpProfile.ReqMethod = method
}
}
func WithCpfReqTimeout(timeout int) Option {
return func(smsClient *SmsClient) {
smsClient.Cpf.HttpProfile.ReqTimeout = timeout
}
}
func WithCpfSignMethod(method string) Option {
return func(smsClient *SmsClient) {
smsClient.Cpf.SignMethod = method
}
}
func (s *SmsClient) Send() bool {
sendClient, _ := sms.NewClient(s.Credential, s.Region, s.Cpf)
_, err := sendClient.SendSms(s.Request.request)
if _, ok := err.(*errors.TencentCloudSDKError); ok {
logger.Warnf("An API error has returned: %s", err)
return false
}
if err != nil {
logger.Warnf("发送短信失败:%s,requestId:%s", err)
return false
}
logger.Info("发送短信验证码成功")
return true
}
定义发送的client,这里采用function option 的编程模式来初始化发送的client.和发送的request,request的代码如下
type SmsRequest struct {
request *sms.SendSmsRequest
}
func NewSmsRequest(options *options.SmsOptions, withOptions ...func(smsRequest *SmsRequest)) *SmsRequest {
request := sms.NewSendSmsRequest()
request.SmsSdkAppId = &options.SmsSdkAppId
request.SignName = &options.SignName
request.TemplateId = &options.TemplateId
smsRequest := &SmsRequest{request: request}
for _, option := range withOptions {
option(smsRequest)
}
return smsRequest
}
type RequestOption func(*SmsRequest)
func WithPhoneNumberSet(phoneSet []string) RequestOption {
return func(smsRequest *SmsRequest) {
smsRequest.request.PhoneNumberSet = common.StringPtrs(phoneSet)
}
}
func WithTemplateParamSet(templateSet []string) RequestOption {
return func(smsRequest *SmsRequest) {
smsRequest.request.TemplateParamSet = common.StringPtrs(templateSet)
}
}
创建发送验证码的控制层,发送成功,并将此处的电话号码和验证码保存到redis缓存中,用来登录时候的验证码有效性的校验
func (u *userService) SendPhoneCode(ctx context.Context, phone string) bool {
// 获取配置参数
smsSetting := global.TencenSmsSetting
phoneSet := []string{phone}
// 随机生成6位的验证码
var randCode string = fmt.Sprintf("%06v", rand.New(rand.NewSource(time.Now().UnixNano())).Int31n(1000000))
templateSet := []string{randCode, "60"}
smsRequest := tencenSms.NewSmsRequest(smsSetting, tencenSms.WithPhoneNumberSet(phoneSet), tencenSms.WithTemplateParamSet(templateSet))
smsClient := tencenSms.NewSmsClient(tencenSms.WithRequest(*smsRequest), tencenSms.WithCredential(*smsSetting))
go smsClient.Send()
// 将验证码和手机号保存到redis中
_ = u.cache.UserCaches().SetSendPhoneCodeCache(ctx, phone, randCode)
return true
}
后面是通过手机验证码进行登录的流程
func (u *userService) LoginByPhoneCode(ctx context.Context, phone string, phoneCode string) (*model.User,error) { // 从缓存中获取该手机号对应的验证码是否匹配 cacheCode, err :=u.cache.UserCaches().GetSendPhoneCodeFromCache(ctx,phone) if err != nil { return nil, errors.WithCode(code.ErrUserPhoneCodeExpire,err.Error()) } if cacheCode!=phoneCode { return nil,errors.WithCode(code.ErrUserPhoneCodeMiss,"") } return &model.User{ Nickname: "lala", }, nil
审核编辑:刘清
-
织梦dedecms登陆提示“验证码不正确”的完整解决方案2011-03-10 0
-
12306图片验证码难倒了谁?2015-12-08 0
-
论坛注册时不显示验证码啊2016-03-01 0
-
无法验证邮箱,总是提示验证码错误,验证码明明是正确的。2017-05-12 0
-
告别短信验证时代的先驱者2017-05-27 0
-
如何用阿里大于发送短信?2018-02-03 0
-
为什么短信验证码在我们生活中频频出现2018-04-16 0
-
如何在KEIL单片机编程环境下实现随机的6位数验证码?2019-10-22 0
-
打码平台是如何高效的破解市面上各家验证码平台的各种形式验证码的?2022-11-01 0
-
【国民技术N32项目移植】手机验证码项目移植4--手机验证码计算2023-02-24 0
-
OpenHarmony端云一体化应用开发快速入门练习(中)登录认证2023-06-20 0
-
基于加密短信验证码的移动安全支付解决方案2017-11-29 784
-
短信验证码漏洞风险多,安全系统待升级2018-08-18 1285
-
以一个真实网站的验证码为例,实现了基于一下KNN的验证码识别2018-12-24 7439
-
一个短信验证码爆破重置2022-09-07 4083
全部0条评论

快来发表一下你的评论吧 !
