

如何在SpringBoot项目中实现动态定时任务
电子说
描述
之前写过文章记录怎么在SpringBoot项目中简单使用定时任务,不过由于要借助cron表达式且都提前定义好放在配置文件里,不能在项目运行中动态修改任务执行时间,实在不太灵活。
经过网上搜索学习后,特此记录如何在SpringBoot项目中实现动态定时任务。
因为只是一个demo,所以只引入了需要的依赖:
        org.springframework.boot
        spring-boot-starter-web


        org.springframework.boot
        spring-boot-starter-log4j2
        true


        org.springframework.boot
        spring-boot-starter-validation


        org.projectlombok
        lombok
        true
启动类:
package com.wl.demo;

import org.springframework.boot.SpringApplication;
import org.springframework.boot.autoconfigure.SpringBootApplication;
import org.springframework.scheduling.annotation.EnableScheduling;

/**
 * @author wl
 */
@EnableScheduling
@SpringBootApplication
public class DemoApplication {

    public static void main(String[] args) {
        SpringApplication.run(DemoApplication.class, args);
        System.out.println("(*^▽^*)启动成功!!!(〃'▽'〃)");
    }
}
配置文件application.yml,只定义了服务端口:
server:
  port: 8089
定时任务执行时间配置文件:task-config.ini:
printTime.cron=0/10 * * * * ?
定时任务执行类:
package com.wl.demo.task;

import lombok.Data;
import lombok.extern.slf4j.Slf4j;
import org.springframework.beans.factory.annotation.Value;
import org.springframework.context.annotation.PropertySource;
import org.springframework.scheduling.Trigger;
import org.springframework.scheduling.TriggerContext;
import org.springframework.scheduling.annotation.SchedulingConfigurer;
import org.springframework.scheduling.config.ScheduledTaskRegistrar;
import org.springframework.scheduling.support.CronTrigger;
import org.springframework.stereotype.Component;

import java.time.LocalDateTime;
import java.util.Date;

/**
 * 定时任务
 * @author wl
 */
@Data
@Slf4j
@Component
@PropertySource("classpath:/task-config.ini")
public class ScheduleTask implements SchedulingConfigurer {

    @Value("${printTime.cron}")
    private String cron;

    @Override
    public void configureTasks(ScheduledTaskRegistrar taskRegistrar) {
        // 动态使用cron表达式设置循环间隔
        taskRegistrar.addTriggerTask(new Runnable() {
            @Override
            public void run() {
                log.info("Current time: {}", LocalDateTime.now());
            }
        }, new Trigger() {
            @Override
            public Date nextExecutionTime(TriggerContext triggerContext) {
                // 使用CronTrigger触发器,可动态修改cron表达式来操作循环规则
                CronTrigger cronTrigger = new CronTrigger(cron);
                Date nextExecutionTime = cronTrigger.nextExecutionTime(triggerContext);
                return nextExecutionTime;
            }
        });
    }
}
编写一个接口,使得可以通过调用接口动态修改该定时任务的执行时间:
package com.wl.demo.controller;

import com.wl.demo.task.ScheduleTask;
import lombok.extern.slf4j.Slf4j;
import org.springframework.beans.factory.annotation.Autowired;
import org.springframework.web.bind.annotation.GetMapping;
import org.springframework.web.bind.annotation.RequestMapping;
import org.springframework.web.bind.annotation.RestController;

/**
 * @author wl
 */
@Slf4j
@RestController
@RequestMapping("/test")
public class TestController {

    private final ScheduleTask scheduleTask;

    @Autowired
    public TestController(ScheduleTask scheduleTask) {
        this.scheduleTask = scheduleTask;
    }

    @GetMapping("/updateCron")
    public String updateCron(String cron) {
        log.info("new cron :{}", cron);
        scheduleTask.setCron(cron);
        return "ok";
    }
}
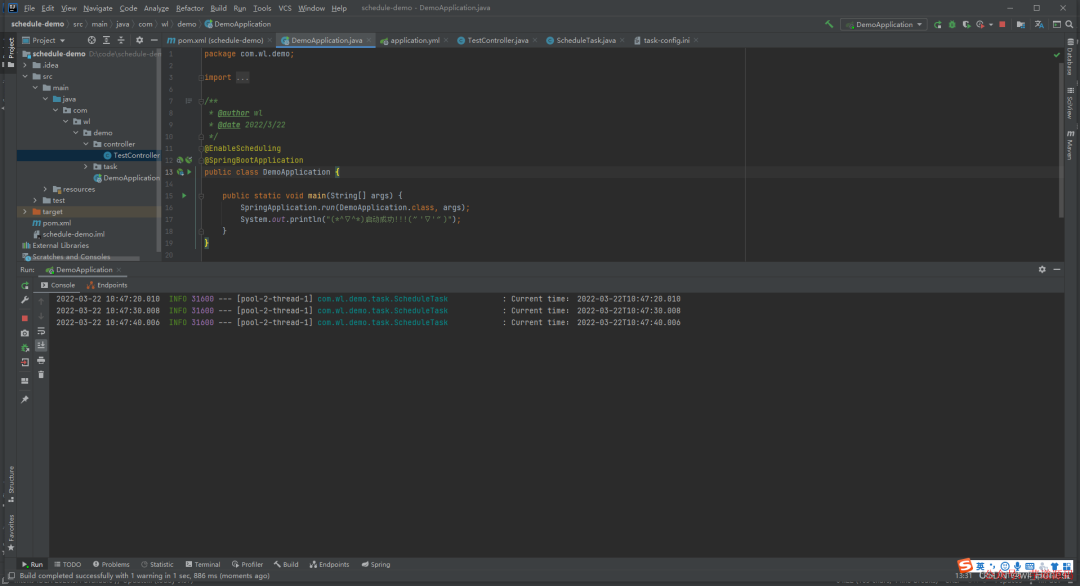
启动项目,可以看到任务每10秒执行一次:
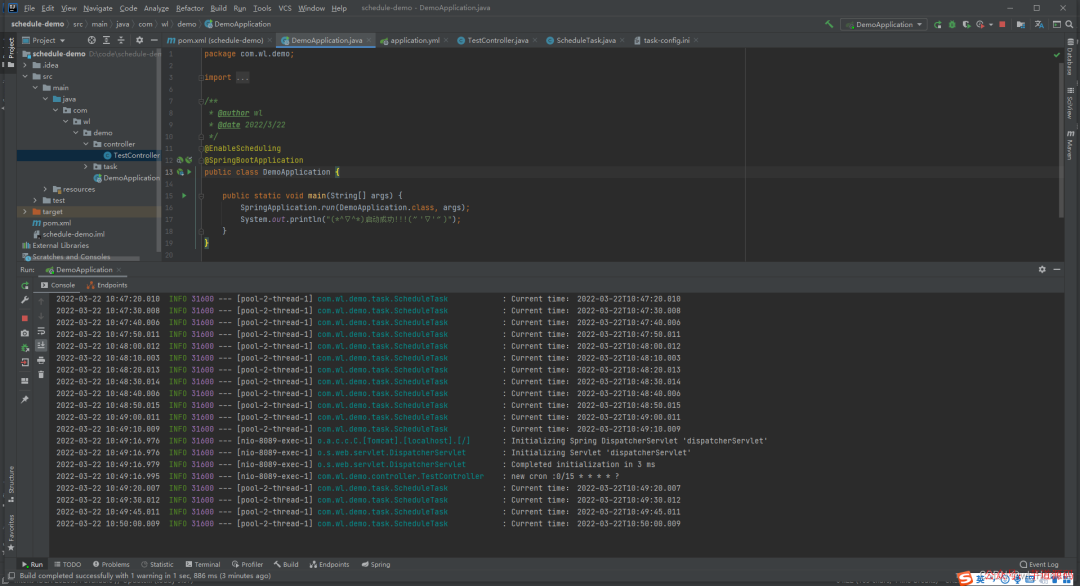
访问接口,传入请求参数cron表达式,将定时任务修改为15秒执行一次:
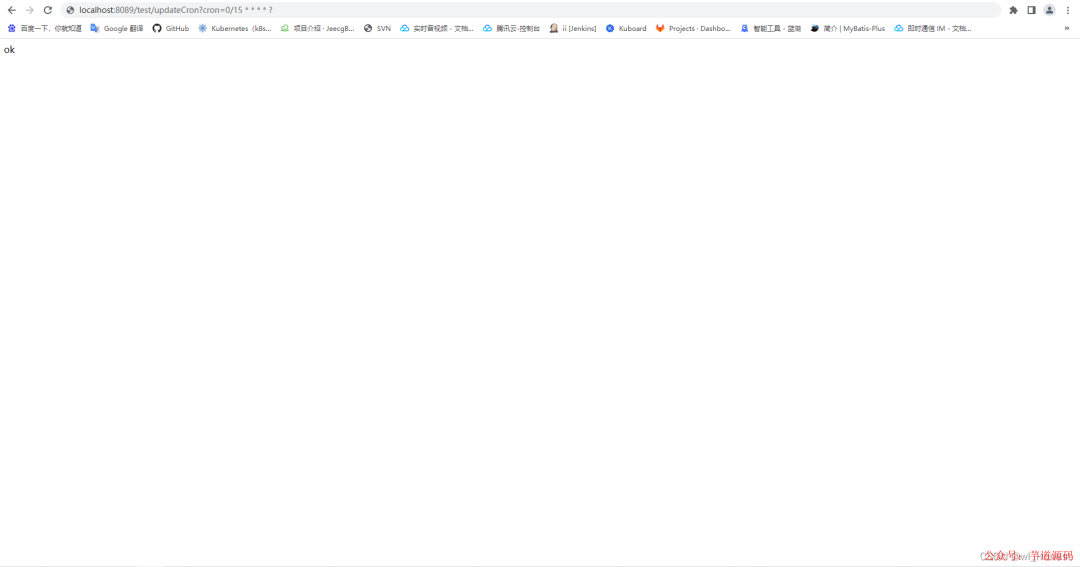
可以看到任务变成了15秒执行一次
除了上面的借助cron表达式的方法,还有另一种触发器,区别于CronTrigger触发器,该触发器可随意设置循环间隔时间,不像cron表达式只能定义小于等于间隔59秒。
package com.wl.demo.task;

import lombok.Data;
import lombok.extern.slf4j.Slf4j;
import org.springframework.beans.factory.annotation.Value;
import org.springframework.context.annotation.PropertySource;
import org.springframework.scheduling.Trigger;
import org.springframework.scheduling.TriggerContext;
import org.springframework.scheduling.annotation.SchedulingConfigurer;
import org.springframework.scheduling.config.ScheduledTaskRegistrar;
import org.springframework.scheduling.support.CronTrigger;
import org.springframework.scheduling.support.PeriodicTrigger;
import org.springframework.stereotype.Component;

import java.time.LocalDateTime;
import java.util.Date;

/**
 * 定时任务
 * @author wl
 */
@Data
@Slf4j
@Component
@PropertySource("classpath:/task-config.ini")
public class ScheduleTask implements SchedulingConfigurer {

    @Value("${printTime.cron}")
    private String cron;

    private Long timer = 10000L;

    @Override
    public void configureTasks(ScheduledTaskRegistrar taskRegistrar) {
        // 动态使用cron表达式设置循环间隔
        taskRegistrar.addTriggerTask(new Runnable() {
            @Override
            public void run() {
                log.info("Current time: {}", LocalDateTime.now());
            }
        }, new Trigger() {
            @Override
            public Date nextExecutionTime(TriggerContext triggerContext) {
                // 使用CronTrigger触发器,可动态修改cron表达式来操作循环规则
//                CronTrigger cronTrigger = new CronTrigger(cron);
//                Date nextExecutionTime = cronTrigger.nextExecutionTime(triggerContext);

                // 使用不同的触发器,为设置循环时间的关键,区别于CronTrigger触发器,该触发器可随意设置循环间隔时间,单位为毫秒
                PeriodicTrigger periodicTrigger = new PeriodicTrigger(timer);
                Date nextExecutionTime = periodicTrigger.nextExecutionTime(triggerContext);
                return nextExecutionTime;
            }
        });
    }
}
增加一个修改时间的接口:
package com.wl.demo.controller;

import com.wl.demo.task.ScheduleTask;
import lombok.extern.slf4j.Slf4j;
import org.springframework.beans.factory.annotation.Autowired;
import org.springframework.web.bind.annotation.GetMapping;
import org.springframework.web.bind.annotation.RequestMapping;
import org.springframework.web.bind.annotation.RestController;

/**
 * @author wl
 */
@Slf4j
@RestController
@RequestMapping("/test")
public class TestController {

    private final ScheduleTask scheduleTask;

    @Autowired
    public TestController(ScheduleTask scheduleTask) {
        this.scheduleTask = scheduleTask;
    }

    @GetMapping("/updateCron")
    public String updateCron(String cron) {
        log.info("new cron :{}", cron);
        scheduleTask.setCron(cron);
        return "ok";
    }

    @GetMapping("/updateTimer")
    public String updateTimer(Long timer) {
        log.info("new timer :{}", timer);
        scheduleTask.setTimer(timer);
        return "ok";
    }
}
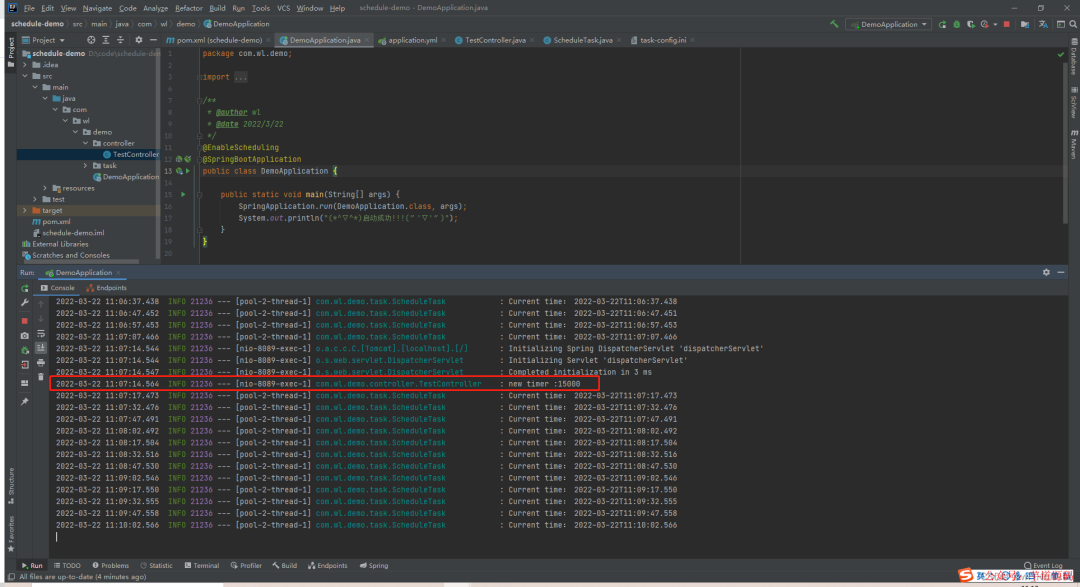
测试结果:
基于 Spring Boot + MyBatis Plus + Vue & Element 实现的后台管理系统 + 用户小程序,支持 RBAC 动态权限、多租户、数据权限、工作流、三方登录、支付、短信、商城等功能
项目地址:https://gitee.com/zhijiantianya/ruoyi-vue-pro
视频教程:https://doc.iocoder.cn/video/
基于 Spring Cloud Alibaba + Gateway + Nacos + RocketMQ + Vue & Element 实现的后台管理系统 + 用户小程序,支持 RBAC 动态权限、多租户、数据权限、工作流、三方登录、支付、短信、商城等功能
项目地址:https://gitee.com/zhijiantianya/yudao-cloud
视频教程:https://doc.iocoder.cn/video/
- 相关推荐
- 接口
- spring
- SpringBoot
-
Linux系统定时任务Crond2019-07-05 0
-
linux的循环定时任务2020-05-20 0
-
定时任务的发展史是怎么样的2019-07-18 569
-
SpringBoot如何实现动态增删启停定时任务2021-09-24 2628
-
Python定时任务的实现方式2021-10-08 3235
-
解析Golang定时任务库gron设计和原理2022-12-15 980
-
求一种SpringBoot定时任务动态管理通用解决方案2023-02-03 569
-
SpringBoot如何实现定时任务(下)2023-04-07 1049
-
SpringBoot如何实现定时任务(上)2023-04-07 1049
-
Spring Boot中整合两种定时任务的方法2023-04-07 1258
-
在Spring Boot中如何使用定时任务2023-04-12 789
-
如何动态添加修改删除定时任务?2023-04-12 883
-
Linux如何使用cron进行定时任务的操作2023-05-12 1821
-
python定时任务实践2023-05-20 793
-
定时器如何实现定时任务2023-11-09 396
全部0条评论

快来发表一下你的评论吧 !
