

使用LM35制作一个Web服务器
描述
在本教程中,我们将探索有关这个有趣的MCU的更多信息,并通过将NodeMCU与互联网连接来慢慢地潜入物联网世界。在这里,我们将使用此模块在Web浏览器上获取室温,即我们将制作一个Web服务器以LM35作为温度传感器显示温度。
所需组件:
节点单片机 - ESP12
LM35 温度传感器
面包板
公母连接器
LM35 温度传感器:
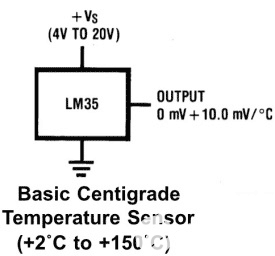
LM35是一款模拟线性温度传感器。其输出与温度成正比(以摄氏度为单位)。工作温度范围为 -55°C 至 150°C。 输出电压变化 10mV 以响应oC 温度升高或下降。它可以采用 5V 和 3.3 V 电源供电,待机电流小于 60uA。
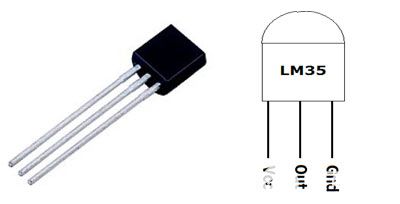
请注意,LM35 有 3 个系列变体,即 LM35A、LM35C 和 LM35D 系列。主要区别在于它们的温度测量范围。LM35D 系列设计用于测量 0 至 100 摄氏度,而 LM35A 系列设计用于测量 -55 至 155 摄氏度的更宽范围。LM35C 系列设计用于测量 -40 至 110 摄氏度。
将 LM35 与 NodeMCU 连接:
下面给出了将LM35与NodeMCU连接的电路图:
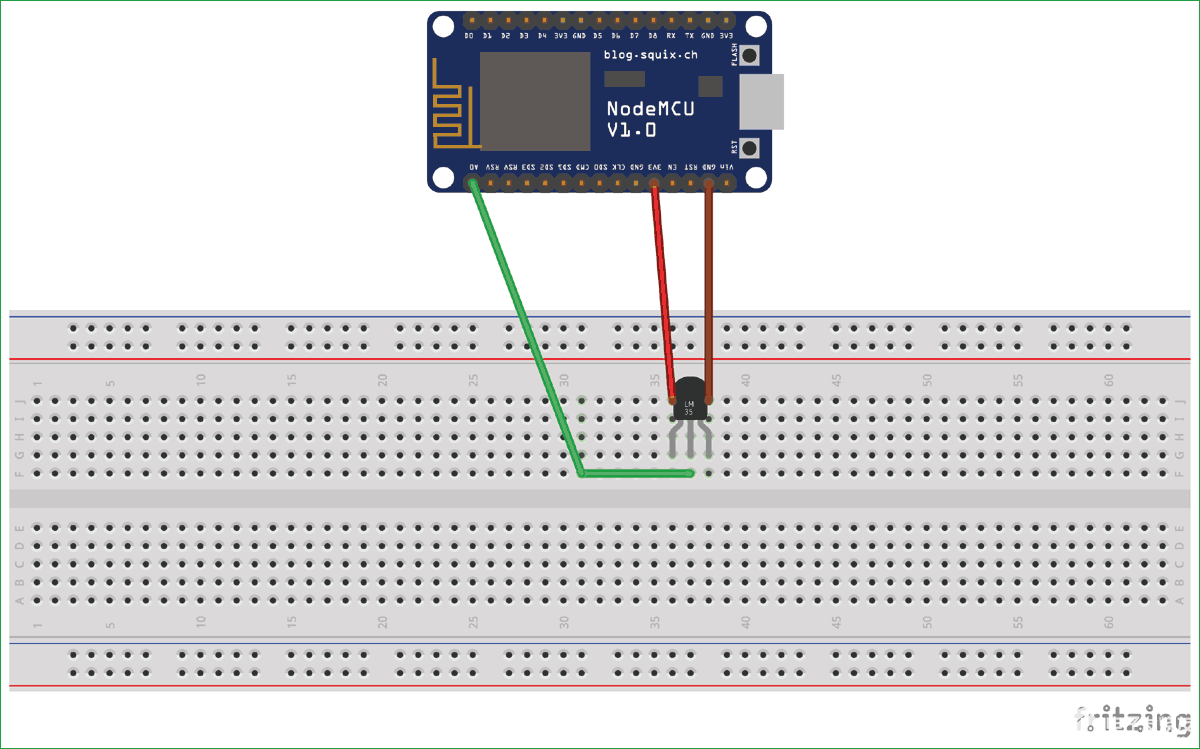
LM35 是一个模拟传感器,因此我们必须将此模拟输出转换为数字输出。为此,我们使用定义为A0的NodeMCU的ADC引脚。我们将 LM35 的输出连接到 A0。
我们在NodeMCU的引脚上有3.3 V作为输出电压。因此,我们将使用 3.3V 作为 LM35 的 Vcc。
代码说明:
本文末尾提供了带有演示视频的完整代码。在这里,我们将解释代码的几个部分。
首先,我们必须包含 ESP8266wifi 库才能访问 Wi-Fi 功能。
#include
然后在 ssid 和密码字段中输入您的 Wi-Fi 名称和密码。还初始化了变量并在波特率为 115200 的端口 80 上启动服务器。
const char* ssid = "*********"; // Your ssid
const char* password = "***********"; // Your Password
float temp_celsius = 0;
float temp_fahrenheit = 0;
WiFiServer server(80);
void setup() {
Serial.begin(115200);
通过调用这些函数建立 Wi-Fi 连接。
Serial.println();
Serial.println();
Serial.print("Connecting to ");
Serial.println(ssid);
WiFi.begin(ssid, password);
连接可能需要几秒钟才能建立,因此请继续显示“...”直到连接不会建立。然后系统将继续等待并检查客户端连接...
while (WiFi.status() != WL_CONNECTED) {
delay(500);
Serial.print(".");
}
Serial.println("");
Serial.println("WiFi is connected");
server.begin();
Serial.println("Server started");
Serial.println(WiFi.localIP());
}
在循环部分中,读取传感器值并将其转换为摄氏度和华氏度,并在串行监视器上显示这些值。
void loop() {
temp_celsius = (analogRead(A0) * 330.0) / 1023.0; // To convert analog values to Celsius We have 3.3 V on our board and we know that output voltage of LM35 varies by 10 mV to every degree Celsius rise/fall. So , (A0*3300/10)/1023 = celsius
temp_fahrenheit = celsius * 1.8 + 32.0;
Serial.print(" Temperature = ");
Serial.print(temp_celsius);
Serial.print(" Celsius, ");
在网页上显示温度的 HTML 代码:
我们在网页上显示温度,以便可以通过互联网从世界任何地方访问它。HTML代码非常简单;我们只需要使用 client.println 函数来回显 HTML 代码的每一行,以便浏览器可以执行它。
这部分显示用于创建显示温度值的网页的HTML代码。
WiFiClient client = server.available();
client.println("HTTP/1.1 200 OK");
client.println("Content-Type: text/html");
client.println("Connection: close"); // the connection will be closed after completion of the response
client.println("Refresh: 10"); // update the page after 10 sec
client.println();
client.println("");
client.println("
");
client.print("
Digital Thermometer
");
client.print("
Temperature (*C)= ");
client.println(temp_celsius);
client.print("
Temperature (F) = ");
client.println(temp_fahrenheit);
client.print("
");
client.println("");
delay(5000);
}
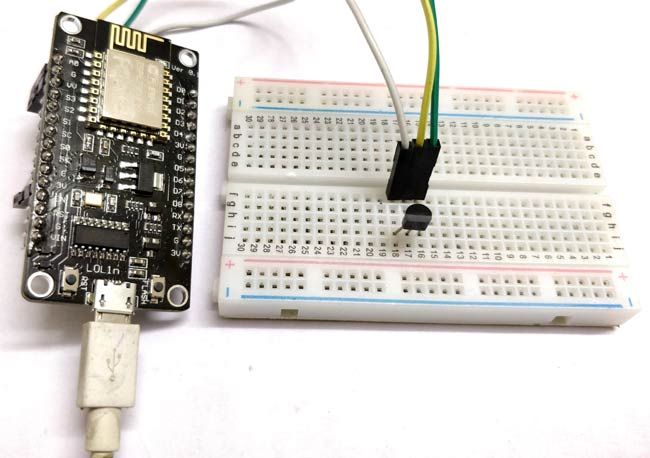
加工:
使用 Arduino IDE 上传代码后,打开串行监视器并按 NodeMCU 上的重置按钮。
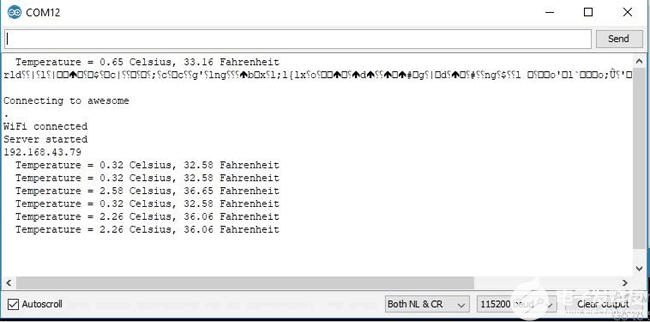
现在,您可以看到该板已连接到您在代码中定义的Wi-Fi网络,并且还获得了IP。复制此 IP 并将其粘贴到任何 Web 浏览器中。确保运行 Web 浏览器的系统应连接到同一网络。
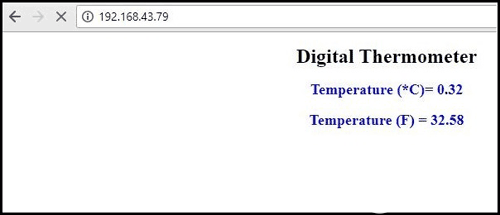
您的数字温度计已准备就绪,温度将在每 10 秒后在网络浏览器中自动刷新。
#include
const char* ssid = "*********"; // Your ssid
const char* password = "***********"; // Your Password
float temp_celsius = 0;
float temp_fahrenheit = 0;
WiFiServer server(80);
void setup() {
Serial.begin(115200);
pinMode(A0, INPUT);
Serial.println();
Serial.println();
Serial.print("Connecting to ");
Serial.println(ssid);
WiFi.begin(ssid, password);
while (WiFi.status() != WL_CONNECTED) {
delay(500);
Serial.print(".");
}
Serial.println("");
Serial.println("WiFi is connected");
server.begin();
Serial.println("Server started");
Serial.println(WiFi.localIP());
}
void loop() {
temp_celsius = (analogRead(A0) * 330.0) / 1023.0; // To convert analog values to Celsius We have 3.3 V on our board and we know that output voltage of LM35 varies by 10 mV to every degree Celsius rise/fall. So , (A0*3300/10)/1023 = celsius
temp_fahrenheit = celsius * 1.8 + 32.0;
Serial.print(" Temperature = ");
Serial.print(temp_celsius);
Serial.print(" Celsius, ");
Serial.print(temp_fahrenheit);
Serial.println(" Fahrenheit");
WiFiClient client = server.available();
client.println("HTTP/1.1 200 OK");
client.println("Content-Type: text/html");
client.println("Connection: close"); // the connection will be closed after completion of the response
client.println("Refresh: 10"); // update the page after 10 sec
client.println();
client.println("");
client.println("");
client.print("
Digital Thermometer
");
client.print("
Temperature (*C)= ");
client.println(temp_celsius);
client.print("
Temperature (F) = ");
client.println(temp_fahrenheit);
client.print("
");
client.println("");
delay(5000);
}
-
LM35温度传感芯片为什么无法正常工作2014-08-11 0
-
LM35与ICL7107构成的温度计,LM35 thermometer2018-09-20 1641
-
LM35温度传感器2012-08-14 0
-
LM35温度采集系统2013-12-21 0
-
基于LM35的电压式温度采集2018-06-28 0
-
请问温度传感器LM35可以输出到spartan3E板吗?2019-07-17 0
-
使用LM35的冷却风扇控制器2022-06-30 0
-
如何制作一个多端口Web服务器?2023-02-27 0
-
LM35,datasheet,pdf(Precision C2009-10-20 883
-
温度传感器 LM35介绍2009-12-02 28875
-
LM35温度传感器应用及特性2010-01-16 11665
-
lm35测温电路图大全(二款lm35测温电路设计)2018-01-31 22598
-
LM35温度测量电路,LM35 temperature measurement circuit2018-09-20 1618
-
如何使用PIC微控制器和LM35温度传感器制作数字温度计2022-11-16 3224
-
如何使用Arduino和LM35传感器制作温度计2022-11-24 684
全部0条评论

快来发表一下你的评论吧 !
