

OLED显示器如何与Raspberry Pi一起使用?
描述
我们大多数人都熟悉16×2点阵LCD显示器,在大多数项目中用于向用户显示一些信息。但是这些LCD显示器有很多局限性。在本教程中,我们将了解OLED显示器以及如何将它们与Raspberry Pi一起使用。市场上有很多类型的OLED显示器,有很多方法可以让它们工作。我们已经将 7 针 OLED 与 Arduino 一起使用。
所需硬件:
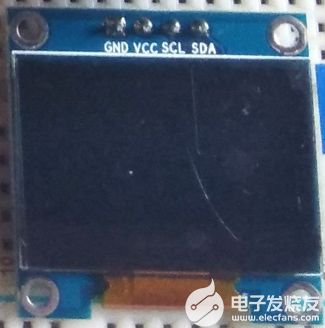
128×64 OLED 显示模组 (SSD1306)
树莓派
面包板
连接线
电源
了解OLED显示器:
术语OLED代表“有机发光二极管”,它使用与我们大多数电视中使用的相同技术,但与它们相比像素更少。将这些看起来很酷的显示模块与Raspberry Pi连接真的很有趣,因为它会让我们的项目看起来很酷。我们在这里介绍了有关OLED显示器及其类型的完整文章。在这里,我们使用单色 4 针 SSD1306 0.96 英寸 OLED 显示屏。此液晶屏只能与 I2C 模式配合使用。

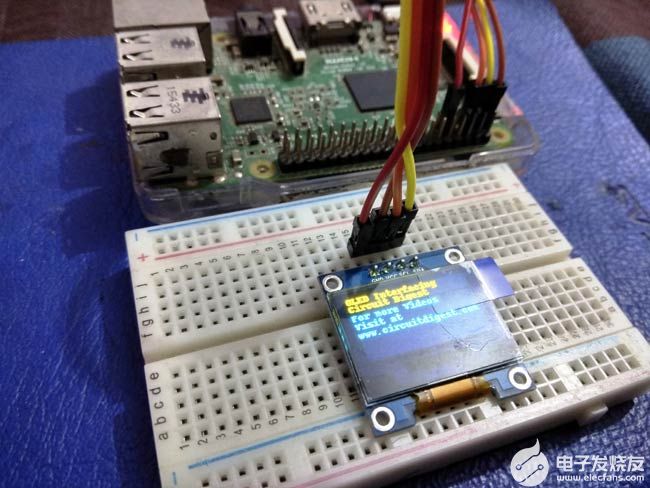
以下是OLED与树莓派的连接:
| 有机硅引脚 | RPI 引脚 |
| 可变资本公司 | 3.3V |
| 接地 | 接地 |
| 自主权评估 | SDA(物理引脚 3) |
| 标准及校正实验所 | SCL(物理引脚 5) |
电路图:
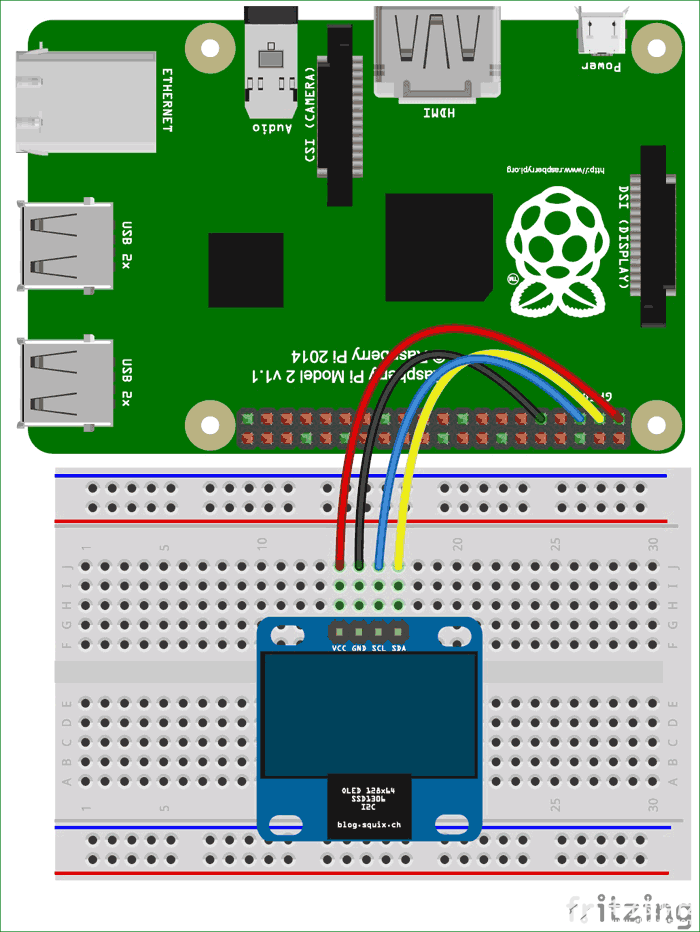
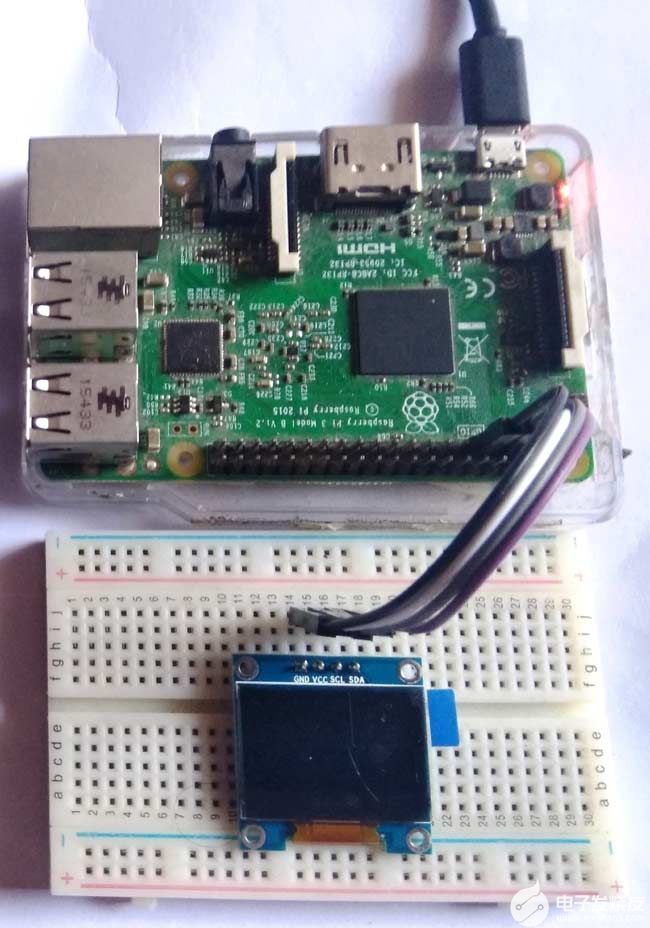
将OLED与树莓派连接:
RPI社区已经为我们提供了很多库,可以直接用于使这变得更加简单。我尝试了一些库,发现Adafruit_SSD1306 OLED库非常易于使用,并且有一些图形选项,因此我们将在本教程中使用相同的选项。
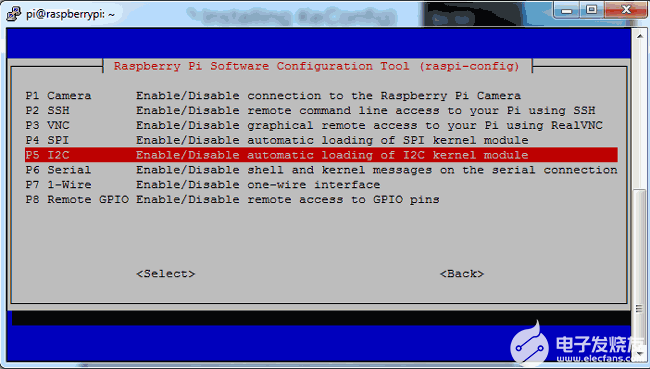
步骤 1:启用 I2C 通信
在安装 Adafruit SSD1306 库之前,我们需要在树莓派中启用 I2C 通信。
要在树莓派控制台中执行此操作:
sudo raspi-config
然后会出现蓝屏。现在选择接口选项
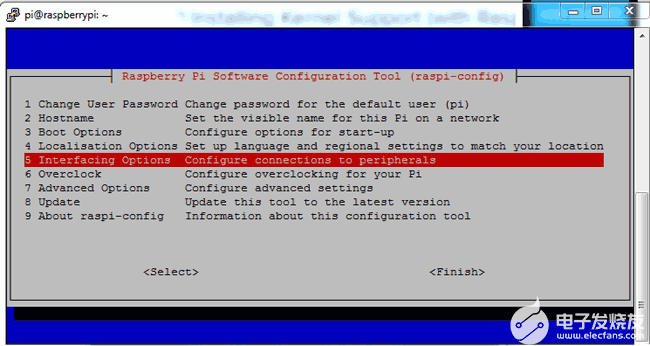
在此之后,我们需要选择I2C
在此之后,我们需要选择是并按回车键,然后确定
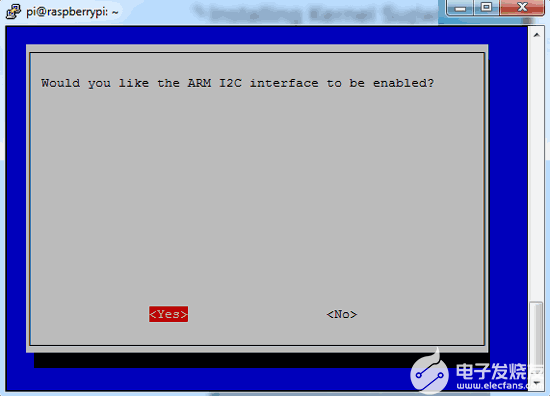
在此之后,我们需要通过发出以下命令重新启动树莓派:
sodo reboot
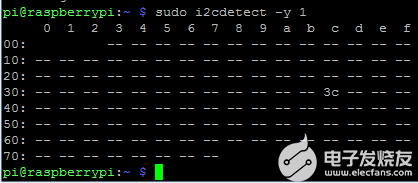
第 2 步:查找 OLED I2C 地址并更新它
然后我们需要使用给定的命令找到OLED I2C地址,您将看到一个十六进制地址。
sudo i2cdetect –y 1
然后使用给定的命令更新树莓派:
sudo apt-get update
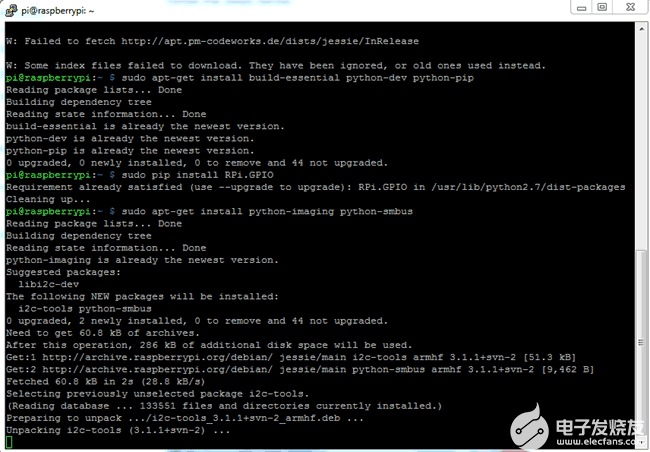
第 3 步:安装 python-pip 和 GPIO 库
在此之后,我们需要使用给定的命令安装pip:
sudo apt-get install build-essential python-dev python-pip
并安装树莓派 GPIO 库
sudo pip installs RPi.GPIO
步骤 4:安装Python 映像库和smbus库
最后,我们需要使用给定的命令在 Raspberry Pi 中安装 Python 映像库和 smbus 库:
sudo apt-get install python-imaging python-smbus
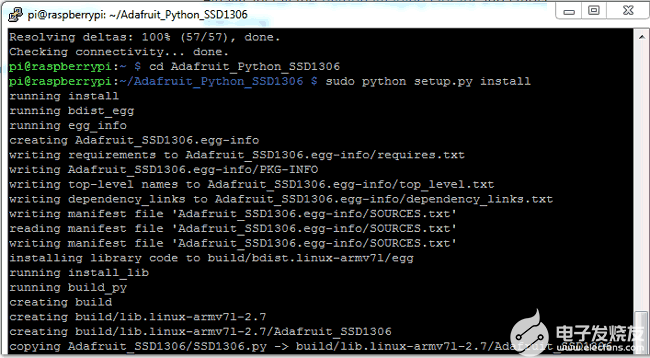
第 5 步:安装 Adafruit SSD1306 python 库
现在是时候使用给定的命令安装 Adafruit SSD1306 python 库代码和示例了:
sudo apt-get install git
git clone
https://github.com/adafruit/Adafruit_Python_SSD1306.git
cd Adafruit_Python_SSD1306 sudo python setup.py install
现在用户可以在树莓派中找到OLED接口的代码,您可以直接播放或自己自定义。在这里,我们自定义了一个示例代码进行演示。您可以在文章末尾找到完整的 Python 代码。
编程说明:
用于将OLED与RPi项目接口的编程部分很容易。首先,我们需要导入一些必要的库。
import time
import Adafruit_GPIO.SPI as SPI
import Adafruit_SSD1306
from PIL import Image
from PIL import ImageDraw
from PIL import ImageFont
import subprocess
在此初始化后初始化显示
RST = 0
disp = Adafruit_SSD1306.SSD1306_128_64(rst=RST)
disp.begin()
disp.clear()
disp.display()
width = disp.width
height = disp.height
image1 = Image.new('1', (width, height))
draw = ImageDraw.Draw(image1)
draw.rectangle((0,0,width,height), outline=0, fill=0)
padding = -2
top = padding
bottom = height-padding
x = 0
font = ImageFont.load_default()
在此之后,我们可以使用给定的代码将数据或图像发送到OLED
# Write two lines of text.
disp.clear()
disp.display()
draw.text((x, top), "OLED Interfacing " , font=font, fill=255)
draw.text((x, top+8), "Circuit Digest", font=font, fill=255)
draw.text((x, top+16), "For more Videos", font=font, fill=255)
draw.text((x, top+25), "Visit at", font=font, fill=255)
draw.text((x, top+34), "www.circuitdigest.com", font=font, fill=255)
# Display image.
disp.image(image1)
disp.display()
time.sleep(2)
if disp.height == 64:
image = Image.open('img1.png').convert('1')
else:
image = Image.open('img1.png').convert('1')
disp.image(image)
disp.display()
time.sleep(2)
if disp.height == 64:
image = Image.open('img3.jpg').convert('1')
else:
image = Image.open('img3.jpg').convert('1')
这款OLED有两种变体,一种是128 * 32,另一种是128 * 64,因此用户可以在初始化OLED时相应地选择任何人。在这里,我们为两者编写了此代码。用户只需要初始化128 * 64像素的OLED,例如:
disp = Adafruit_SSD1306.SSD1306_128_64(rst=RST)
所有代码和函数都易于理解,无需进一步解释。只需开始并尝试使用高度,宽度和图像,并尝试其他一些功能来创建一些更酷的几何图形。
import time
import Adafruit_GPIO.SPI as SPI
import Adafruit_SSD1306
from PIL import Image
from PIL import ImageDraw
from PIL import ImageFont
import subprocess
RST = 0
disp = Adafruit_SSD1306.SSD1306_128_64(rst=RST)
disp.begin()
disp.clear()
disp.display()
width = disp.width
height = disp.height
image1 = Image.new('1', (width, height))
draw = ImageDraw.Draw(image1)
draw.rectangle((0,0,width,height), outline=0, fill=0)
padding = -2
top = padding
bottom = height-padding
x = 0
font = ImageFont.load_default()
while True:
draw.rectangle((0,0,width,height), outline=0, fill=0)
# Write two lines of text.
disp.clear()
disp.display()
draw.text((x, top), "OLED Interfacing " , font=font, fill=255)
draw.text((x, top+8), "Circuit Digest", font=font, fill=255)
draw.text((x, top+16), "For more Videos", font=font, fill=255)
draw.text((x, top+25), "Visit at", font=font, fill=255)
draw.text((x, top+34), font=font, fill=255)
# Display image.
disp.image(image1)
disp.display()
time.sleep(2)
if disp.height == 64:
image = Image.open('img1.png').convert('1')
else:
image = Image.open('img1.png').convert('1')
disp.image(image)
disp.display()
time.sleep(2)
if disp.height == 64:
image = Image.open('img3.jpg').convert('1')
else:
image = Image.open('img3.jpg').convert('1')
disp.image(image)
disp.display()
time.sleep(2)
if disp.height == 64:
image = Image.open('img4.jpg').convert('1')
else:
image = Image.open('img4.jpg').convert('1')
disp.image(image)
disp.display()
time.sleep(2)
- 相关推荐
- OLED显示器
-
Raspberry Pi 3B机械开关和OLED屏幕护罩的资料分享2022-08-30 0
-
通过以太网线与VEE一起使用Raspberry Pi不起作用2018-10-10 0
-
使用八个微型OLED显示器构建一个滚动消息显示器2022-07-15 0
-
一个Raspberry Pi扩展板2022-07-29 0
-
用于Raspberry Pi的DIN导轨安装2022-08-26 0
-
Raspberry Pi 4机械开关和OLED屏幕护罩的资料分享2022-08-30 0
-
Raspberry Pi 3B+机械开关和OLED屏幕护罩的资料分享2022-08-30 0
-
Raspberry Pi 2机械开关和OLED屏幕护罩的资料分享2022-08-30 0
-
如何用传感器、显示器等装备ESP,并使用Arduino IDE或MicroPython对它们进行编程?2023-06-01 0
-
如何在Raspbian上设置没有显示器和键盘的Raspberry Pi2022-09-22 1100
-
如何在Raspberry Pi Pico中使用OLED显示器2022-10-18 1208
-
Raspberry Pi 2机械开关和OLED屏幕护罩2023-02-06 218
-
Raspberry Pi 4机械开关和OLED屏幕护罩2023-02-06 278
-
将Arduino库与Raspberry Pi Pico C/C++ SDK一起使用2023-06-15 552
-
为Raspberry Pi添加15美元的显示器2023-06-20 183
全部0条评论

快来发表一下你的评论吧 !
