
资料下载


使用Arduino实现低功耗蓝牙(BLE)加密狗通信的USB CDC主机
张昂笙
分享资料个
描述
#1。介绍
该项目是一个简单的示例,展示了一种将带有 USB Host Shield 的 Arduino 设置为能够与 BleuIO 加密狗通信的 USB CDC 主机的快速方法。
当 BleuIO Dongle 连接到 USB 端口时,BleuIO Dongle 将开始广播。然后它将充当终端,接受输入并将数据发送到 Arduino 虚拟 Com 端口。
在本示例中,我们使用了带有 SparkFun 的 USB Host Shield (DEV-09947) 的 Arduino Uno Rev. 3。
#2。你需要什么
- 固件版本为 2.1.0 或更高版本的BleuIO BLE USB 加密狗
- Arduino Uno Rev. 3 ( https://store.arduino.cc/products/arduino-uno-rev3)
- USB 主机屏蔽 ( https://www.sparkfun.com/products/9947)
- Arduino IDE(https://www.arduino.cc/en/software)
SparkFun 板的要求
- 使用 SparkFun 板,您似乎必须在 Vin 或筒式千斤顶上提供外部电源。来自 USB 电缆的 5V 不起作用。
- 您还必须从引脚 D7 到 RESET 使用跳线。
#3。关于守则
你可以在这里获得项目
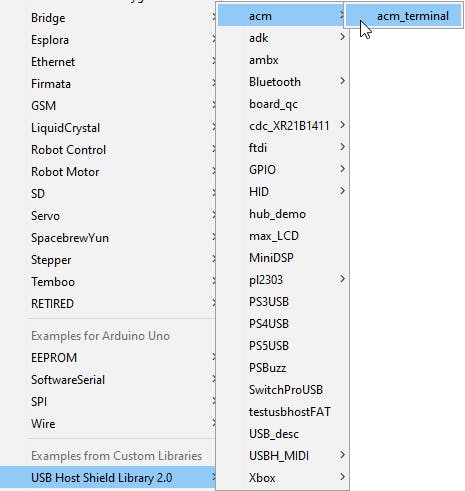
该项目基于Host USB Shield Library 2.0中的“acm_terminal”示例
函数 Acm.RcvData() 最大可能的最大数据包大小为 64 字节,因此为了容纳我们将接收的数据量,我们使用三个缓冲区来接收来自 BleuIO 加密狗的数据。
如果缓冲区接收到任何数据,我们将其打印到连接到虚拟 COM 端口的串行终端。
 void loop()
{
   Usb.Task();
   if( Acm.isReady()) {
      uint8_t rcode;
      uint8_t rcode2;
      uint8_t rcode3;
      /* reading the keyboard */
      if(Serial.available()) {
        uint8_t data= Serial.read();
        /* sending to the BleuIO Dongle */
        rcode = Acm.SndData(1, &data);
        if (rcode)
           ErrorMessage<uint8_t>(PSTR("SndData"), rcode);
      }//if(Serial.available()...
       if(start_flag == 0x00)
       {
           rcode = Acm.SndData(strlen((char *)START_CMDS), (uint8_t *)START_CMDS);
           if (rcode)
           {
               ErrorMessage<uint8_t>(PSTR("SndData"), rcode);
           }
         start_flag = 0x01;
       }
       /* reading the BleuIO Dongle */
       uint8_t  buf[64];
       uint16_t rcvd = 64;
       uint8_t  buf2[64];
       uint16_t rcvd2 = 64;
       uint8_t  buf3[64];
       uint16_t rcvd3 = 64;
       uint8_t  dongle_input[3*64];
       uint16_t input_indx = 0;
       memset(dongle_input, 0, sizeof(dongle_input));
       rcode = Acm.RcvData(&rcvd, buf);
       delay(1);
       rcode2 = Acm.RcvData(&rcvd2, buf2);
       delay(1);
       rcode3 = Acm.RcvData(&rcvd3, buf3);
        if (rcode && rcode != hrNAK)
        {
           ErrorMessage<uint8_t>(PSTR("Ret"), rcode);
        }
        if (rcode2 && rcode2 != hrNAK)
        {
            ErrorMessage<uint8_t>(PSTR("Ret"), rcode2);
        }
        if (rcode3 && rcode3 != hrNAK)
        {
            ErrorMessage<uint8_t>(PSTR("Ret"), rcode3);
        }
           if( rcvd ) { //more than zero bytes received
             for(uint16_t i=0; i < rcvd; i++ ) {
               Serial.print((char)buf[i]); //printing on the screen
               dongle_input[input_indx] = buf[i];
               input_indx++;
             }
           }
           if( rcvd2 ) { //more than zero bytes received
             for(uint16_t i=0; i < rcvd2; i++ ) {
               Serial.print((char)buf2[i]); //printing on the screen
               dongle_input[input_indx] = buf2[i];
               input_indx++;
             }
           }
           if( rcvd3 ) { //more than zero bytes received
             for(uint16_t i=0; i < rcvd3; i++ ) {
               Serial.print((char)buf3[i]); //printing on the screen
               dongle_input[input_indx] = buf3[i];
               input_indx++;
             }
           }
           dongle_input[input_indx] = 0x00;
           // Example on a way for the Arduino to react to BleuIO events
           if(strlen((char *)dongle_input) != 0)
           {
             if(strstr((char *)dongle_input, "handle_evt_gap_connected") != NULL)
             {
               Serial.print("<>");
             }
             else if(strstr((char *)dongle_input, "handle_evt_gap_disconnected") != NULL)
             {
               Serial.print("<>");
             }
           }
   }//if( Usb.getUsbTaskState() == USB_STATE_RUNNING..
}
我们还将来自加密狗的最新数据存储到 dongle_input 缓冲区中,并通过一个简单的“解析器”运行它,以展示如何对事件做出反应并让 Arduino 执行某些操作的简单方法。
在这个例子中,我们明确地寻找 BLE 连接或断开事件。找到后,我们只需将“<>”或“<>”打印到终端。
#4。如何设置项目
从 GitHub 下载项目
在这里获取项目
https://github.com/smart-sensor-devices-ab/arduino_bleuio_example
克隆项目,或者将其下载为 zip 文件并将其解压缩到您的 Arduino 文件夹中。
下载 USB Host Shield Library 2.0
从此处下载库 ( https://felis.github.io/USB_Host_Shield_2.0/)并将文件夹放入 Arduino 文件夹内的库文件夹中。
(有关安装库的信息,请参阅:http://www.arduino.cc/en/Guide/Libraries)
或者通过 Arduino IDE 下载:
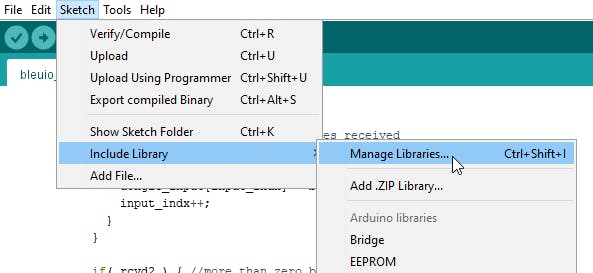
在 Arduino IDE 中选择 Sketch>Include Library>Manage Library
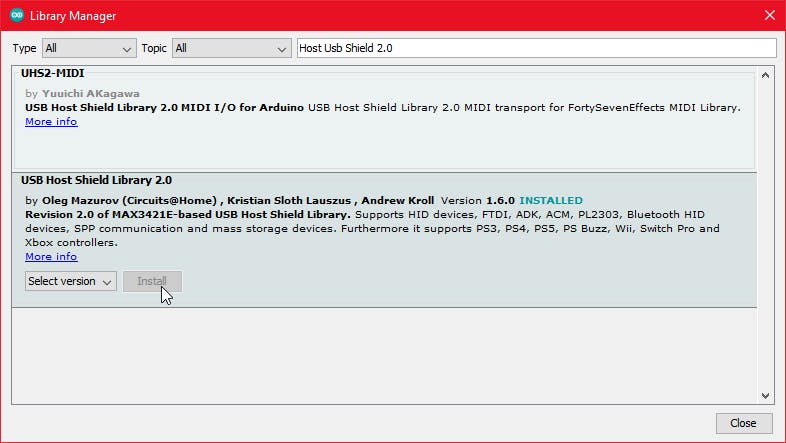
搜索 USB Host Shield Library 2.0 并单击“安装”
#5。运行示例
在 Arduino IDE 中单击上传按钮将项目上传到您的 Arduino。

使用 TeraTerm、Putty 或 CoolTerm 等串行终端仿真程序打开“Arduino Uno 虚拟 COM 端口”。
串口设置:波特率:115200 数据位:8 奇偶校验:无 停止位:1 流量控制:无
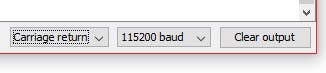
或者在 Arduino IDE 中打开 Arduino Monitor 并在右下角选择“回车”和“115200 波特”
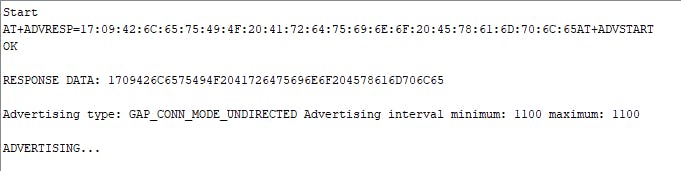
您应该看到“开始”一词,然后看到加密狗运行两个命令:设置响应数据和启动广告。您现在可以向加密狗键入命令。

声明:本文内容及配图由入驻作者撰写或者入驻合作网站授权转载。文章观点仅代表作者本人,不代表电子发烧友网立场。文章及其配图仅供工程师学习之用,如有内容侵权或者其他违规问题,请联系本站处理。 举报投诉
- 相关下载
- 相关文章


