

【英飞凌开发板模块评测任务大挑战】PWM外设使用
电子说
描述
2.PWM驱动
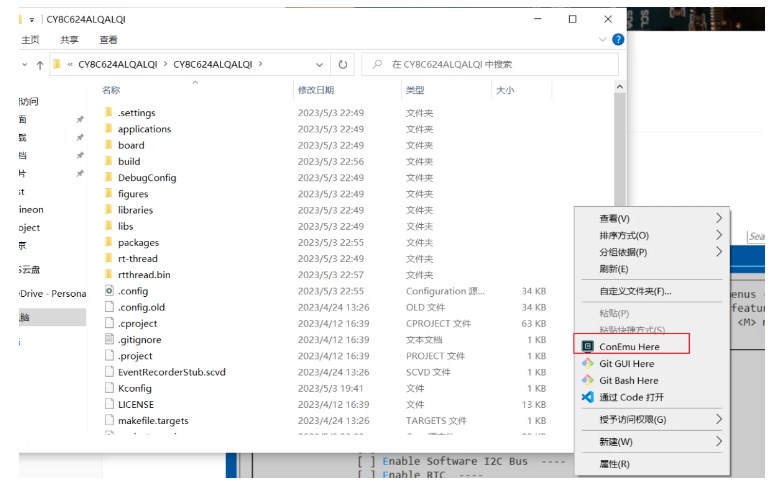
2.1进入工程目录,启动 Env 控制台
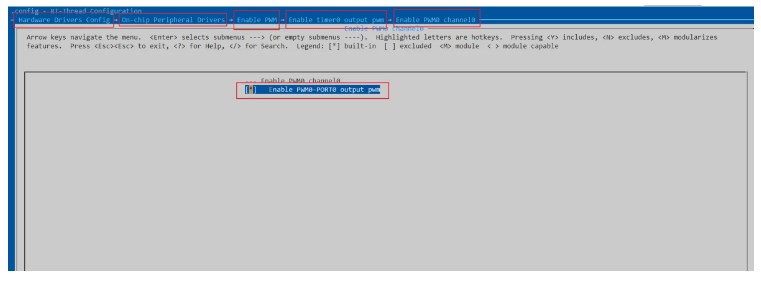
2.2pwm 驱动使能
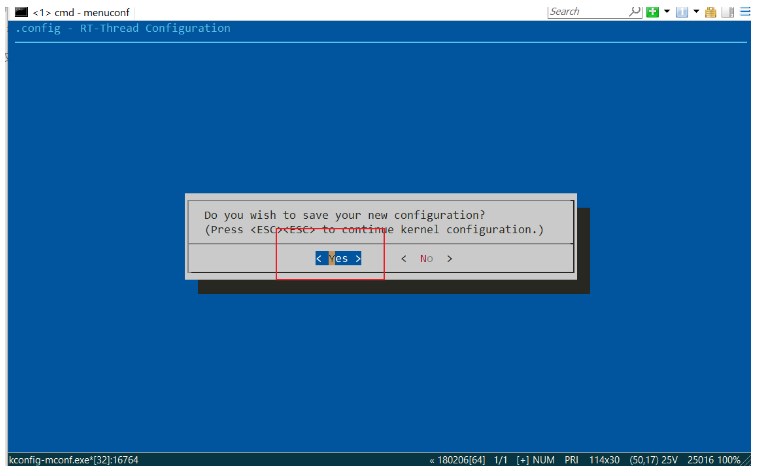
2.3保存配置,自动生成mdk5的工程
2.4测试驱动代码
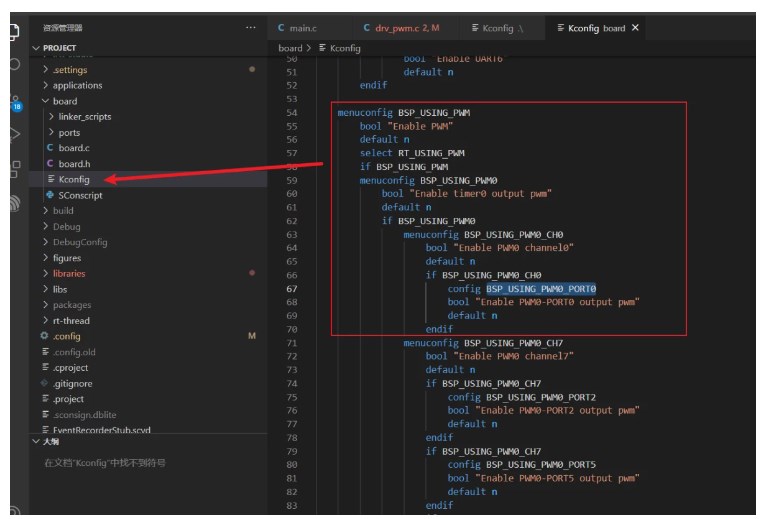
驱动涉及的io口
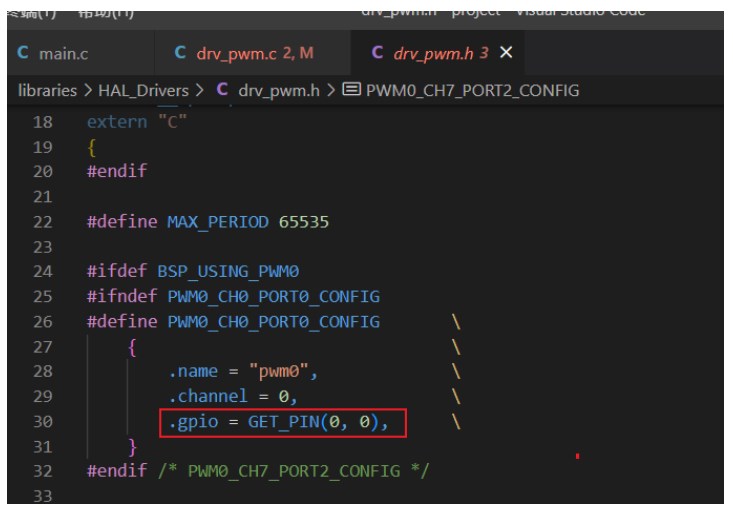
在menuconfig中配置生成的宏
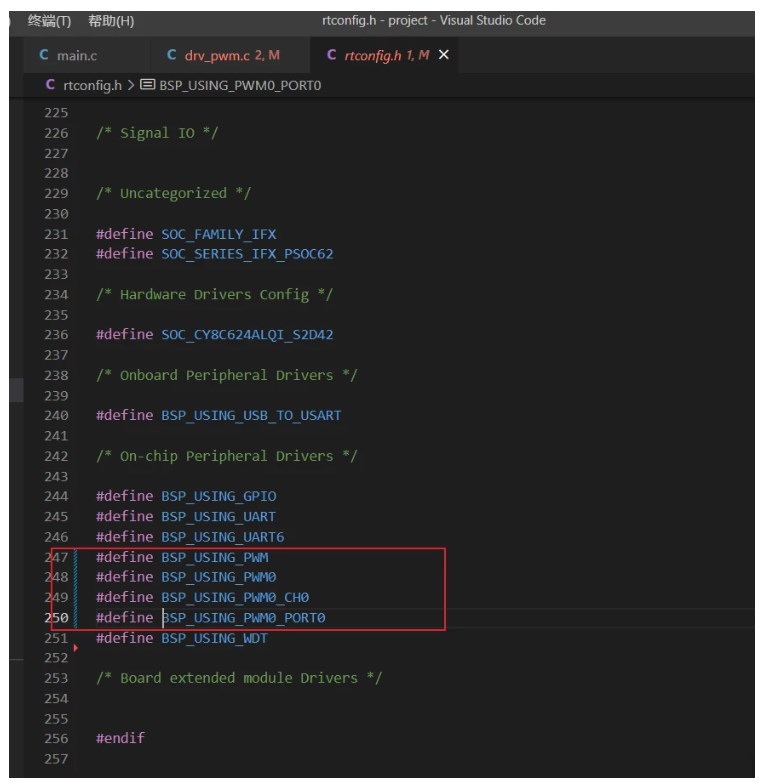
KConfig
2.5测试代码
//-----------------------------pwm测试代码 ---------------开始------------------
#define PWM_DEV_NAME "pwm0"
#define PWM_DEV_CHANNEL 0
struct rt_device_pwm *pwm_dev;
static int pwm_sample(int argc, char *argv[])
{
rt_uint32_t period, pulse, dir;
period = 1 * 1000 * 1000;
dir = 1;
pulse = 0;
pwm_dev = (struct rt_device_pwm *)rt_device_find(PWM_DEV_NAME);
if (pwm_dev == RT_NULL)
{
rt_kprintf("pwm sample run failed! can't find %s device!n", PWM_DEV_NAME);
return -RT_ERROR;
}
rt_pwm_set(pwm_dev, PWM_DEV_CHANNEL, period, pulse);
rt_pwm_enable(pwm_dev, PWM_DEV_CHANNEL);
rt_kprintf("Now PWM[%s] Channel[%d] Period[%d] Pulse[%d]n", PWM_DEV_NAME, PWM_DEV_CHANNEL, period, pulse);
while (1)
{
rt_thread_mdelay(50);
if (dir)
{
pulse += 100000;
}
else
{
pulse -= 100000;
}
if (pulse >= period)
{
dir = 0;
}
if (0 == pulse)
{
dir = 1;
}
rt_pwm_set(pwm_dev, PWM_DEV_CHANNEL, period, pulse);
}
}
//导出函数到命令行
MSH_CMD_EXPORT(pwm_sample, channel7 sample);
//-----------------------------pwm测试代码 ---------------结束------------------
2.6 pwm驱动框架学习
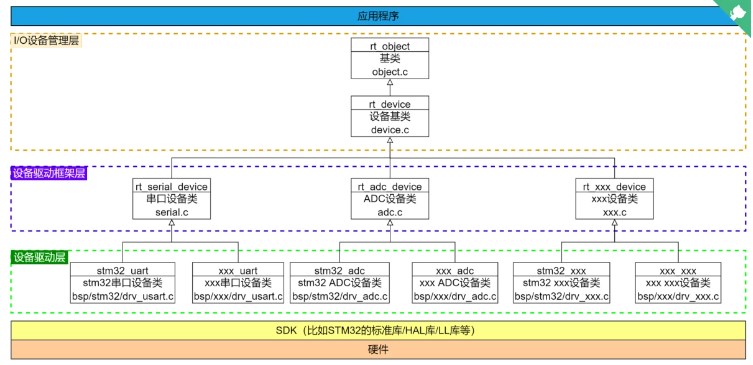
实现pwm控制函数
在控制函数内部根据命令的类型,编写对应的外设控制函数
rt_err_t (control)(struct rt_device_pwm device, int cmd, void *arg);
命令的类型有
#define PWM_CMD_ENABLE (RT_DEVICE_CTRL_BASE(PWM) + 0)
#define PWM_CMD_DISABLE (RT_DEVICE_CTRL_BASE(PWM) + 1)
#define PWM_CMD_SET (RT_DEVICE_CTRL_BASE(PWM) + 2)
#define PWM_CMD_GET (RT_DEVICE_CTRL_BASE(PWM) + 3)
#define PWMN_CMD_ENABLE (RT_DEVICE_CTRL_BASE(PWM) + 4) //互补输出打开
#define PWMN_CMD_DISABLE (RT_DEVICE_CTRL_BASE(PWM) + 5)
#define PWM_CMD_SET_PERIOD (RT_DEVICE_CTRL_BASE(PWM) + 6) //设置周期
#define PWM_CMD_SET_PULSE (RT_DEVICE_CTRL_BASE(PWM) + 7) //设置占空比
#define PWM_CMD_SET_DEAD_TIME (RT_DEVICE_CTRL_BASE(PWM) + 8) //设置死去时间
#define PWM_CMD_SET_PHASE (RT_DEVICE_CTRL_BASE(PWM) + 9)
#define PWM_CMD_ENABLE_IRQ (RT_DEVICE_CTRL_BASE(PWM) + 10)
#define PWM_CMD_DISABLE_IRQ (RT_DEVICE_CTRL_BASE(PWM) + 11)
实现各个控制函数
/*
- rt_pwm_enable pwm使能函数,打开pwm输出
2. rt_pwm_disable 关闭pwm输出
3. rt_pwm_set 设置pwm频率和占空比函数
4. rt_pwm_set_period 设置pwm周期
5. rt_pwm_set_pulse 设置占空比
6. rt_pwm_set_dead_time 设置pwm死区时间
7. rt_pwm_set_phase 设置pwm的输出相位
*/
rt_err_t rt_pwm_enable(struct rt_device_pwm device, int channel);
rt_err_t rt_pwm_disable(struct rt_device_pwm device, int channel);
rt_err_t rt_pwm_set(struct rt_device_pwm device, int channel, rt_uint32_t period, rt_uint32_t pulse);
rt_err_t rt_pwm_set_period(struct rt_device_pwm device, int channel, rt_uint32_t period);
rt_err_t rt_pwm_set_pulse(struct rt_device_pwm device, int channel, rt_uint32_t pulse);
rt_err_t rt_pwm_set_dead_time(struct rt_device_pwm device, int channel, rt_uint32_t dead_time);
rt_err_t rt_pwm_set_phase(struct rt_device_pwm *device, int channel, rt_uint32_t phase);
填充注册前的各个配置结构体的参数
通道
频率
占空比
死区时间
相位调整
互补输出使能
struct rt_pwm_configuration
{
rt_uint32_t channel; / 0 ~ n or 0 ~ -n, which depends on specific MCU requirements这取决于特定的MCU要求 /
rt_uint32_t period; / unit:ns 1ns4.29s:1Ghz0.23h 频率 /
rt_uint32_t pulse; / unit:ns (pulse<=period)占空比 /
rt_uint32_t dead_time; / unit:ns 死区时间设置 /
rt_uint32_t phase; /unit: degree, 0~360, which is the phase of pwm output,其为pwm输出的相位, /
/*
RT_TRUE : 互补输出
RT_FALSE : 正常输出.
*/
rt_bool_t complementary;
};
注册pwm驱动
rt_err_t rt_device_pwm_register(
struct rt_device_pwm *device,
                const char *name,
                const struct rt_pwm_ops *ops,
                const void *user_data); ```
-
飞腾派开发板评测获奖名单公布!!!2024-01-30 0
-
【创客营】新品体验!机器视觉VisionBoard开发板免费试用2024-03-20 0
-
英飞凌PSoC™ 62开发板 -LCD ILI9341 8080 DEMOrx_ted 2024-03-07
-
极客DIY限时挑战 — 12月挑战任务一:用Arty FPGA开发板制作一款无线压强感应垫2016-12-12 0
-
【GD32330C-START开发板申请】基于GD32330C-START开发板的远程开关2018-09-10 0
-
英飞凌电机控制开发板XMC4500 Relax Lite Kit2018-12-12 0
-
Nuvoton M487开发板的USCI外设评测2022-04-21 0
-
NuMaker-M2354开发板外设模块的评测2022-10-28 0
-
新唐 NuMaker-M2354模块评测任务大挑战2021-11-16 1165
-
N32L40XCL-STB 开发板模块评测任务大挑战2023-03-28 660
-
英飞凌开发板模块评测任务大挑战2023-04-11 644
-
RA6M3 HMI Board 评测大挑战,完成任务赢免单!2023-05-31 523
-
N32L40XCL-STB开发板模块评测任务大挑战之UART2023-08-09 549
-
英飞凌开发板模块评测任务大挑战-SPI驱动测试2023-08-10 490
-
【英飞凌开发板模块评测任务大挑战】mdk开发板环境搭建2023-10-27 549
全部0条评论

快来发表一下你的评论吧 !
