

 电子时钟制作(瑞萨RA)(5)----定时器驱动数码管
描述
概述
要想让每个数码管显示不同的数字,但是数码管必须依次地被持续驱动,数码管之间的刷新速度应该足够快,这样就看不出来数码管之间在闪烁。刷新频率可以设置为2ms刷新一次,这样人眼就看不出闪烁了。
硬件准备
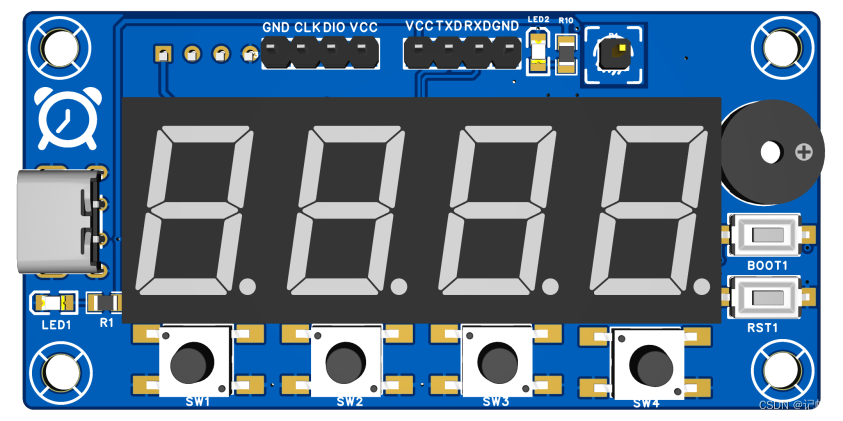
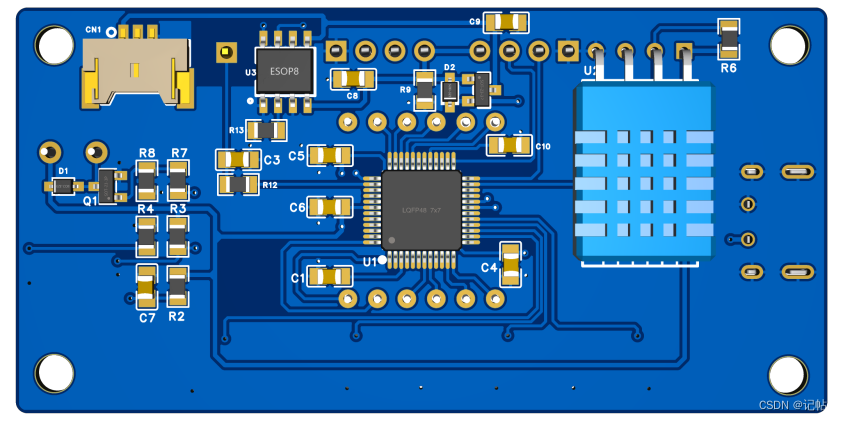
首先需要准备一个开发板,这里我准备的是芯片型号R7FA2E1A72DFL的开发板:
视频教程
https://www.bilibili.com/video/BV1su411L7bQ/
选择定时器
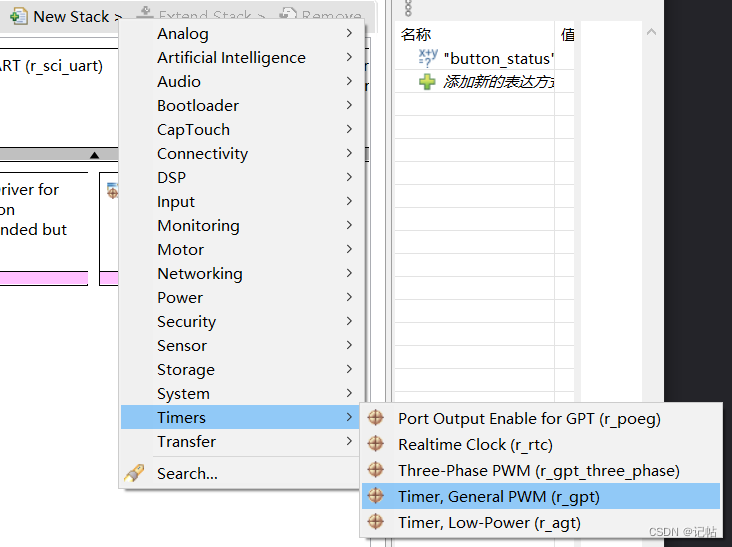
RA MCU 有两个定时器外设:通用 PWM 定时器 (GPT) 和异步通用定时器 (AGT)。在它们之间进行选择时,请考虑以下因素

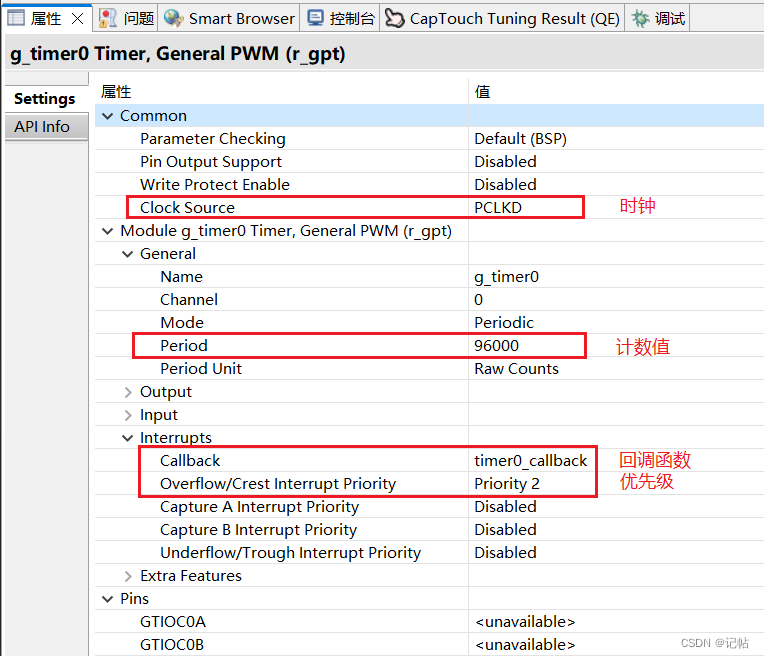
时钟源在这设置的是PCKLD 48M 。 可以通过修改该频率来修改占空比频率。

定时器做计数器配置
点击Stacks->New Stack->Timers->Timer, General PWM (r_gpt)。
设置定时器制作计数器配置,例如2ms产生一个中断,由于不需要对上升沿和下降沿进行捕获,故只需配置为计数模式即可。 设置2ms刷新一次数码管。 频率=时钟源/period,若设置计数时间为2ms一次,频率为500Hz,则period=48M/500=96000
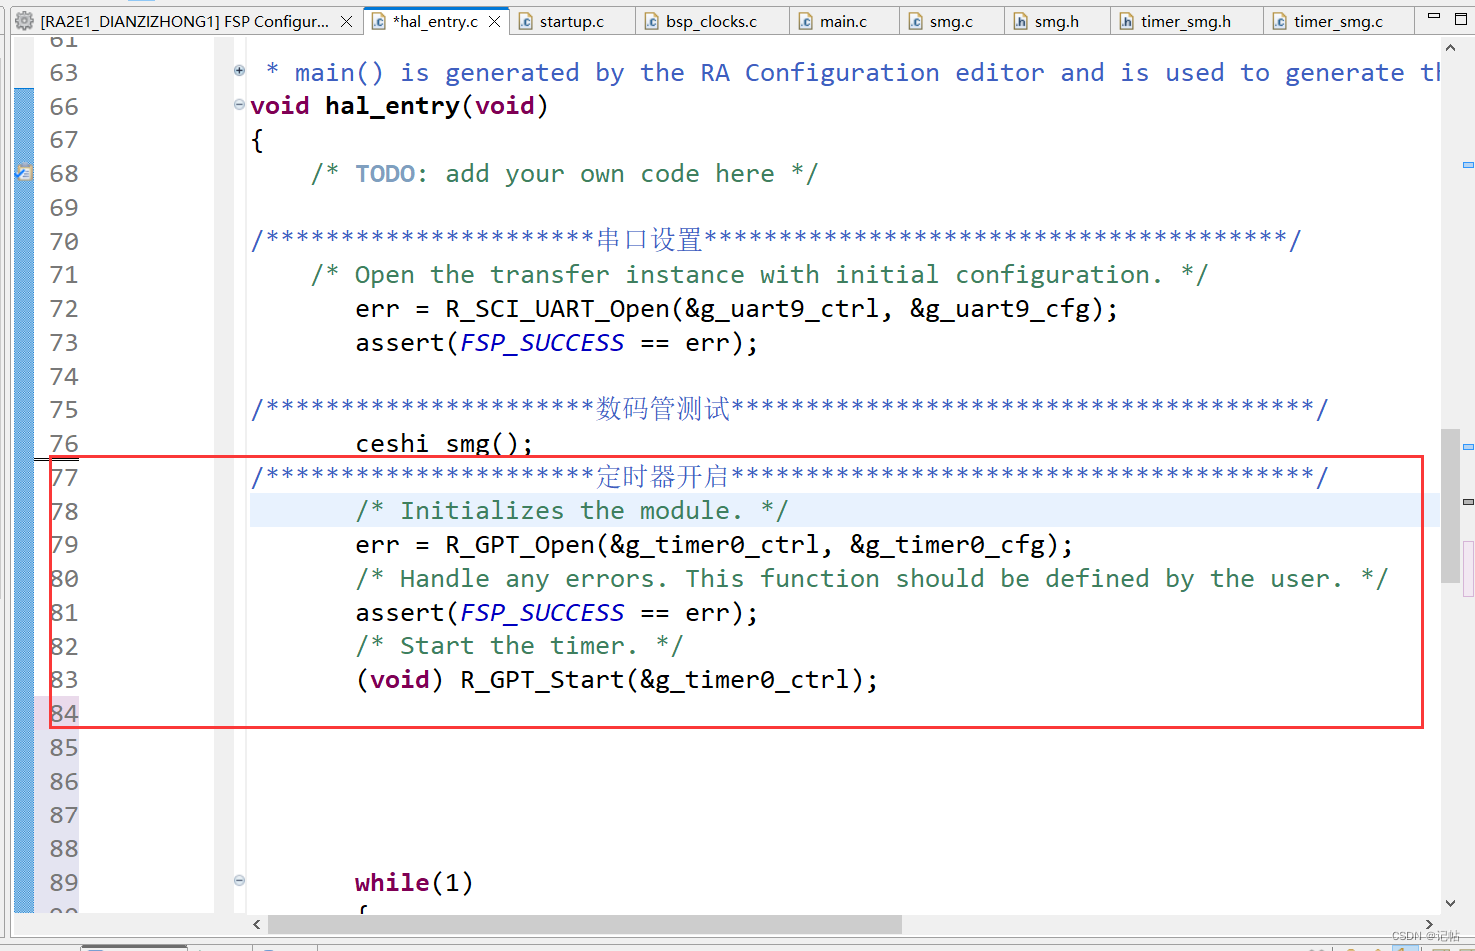
配置完毕之后需要在主程序中开启定时器以及开始计数。
/**********************定时器开启***************************************/
       /* Initializes the module. */
       err = R_GPT_Open(&g_timer0_ctrl, &g_timer0_cfg);
       /* Handle any errors. This function should be defined by the user. */
       assert(FSP_SUCCESS == err);
       /* Start the timer. */
       (void) R_GPT_Start(&g_timer0_ctrl);
定时器回调函数
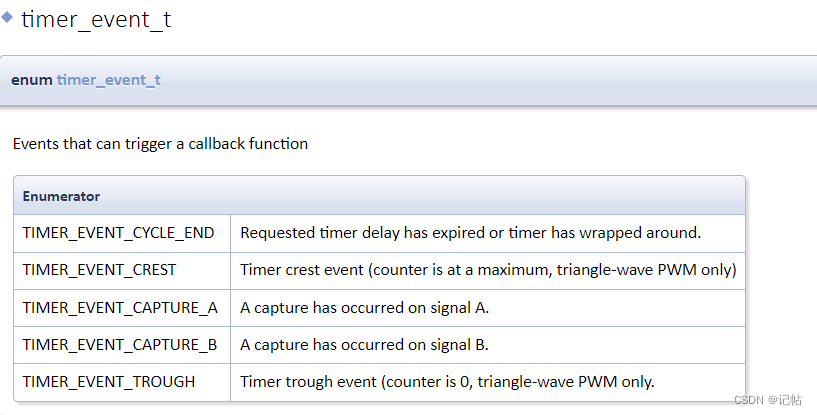
可以触发进入回调函数的事件如下所示,我们主要选择溢出事件TIMER_EVENT_CYCLE_END。
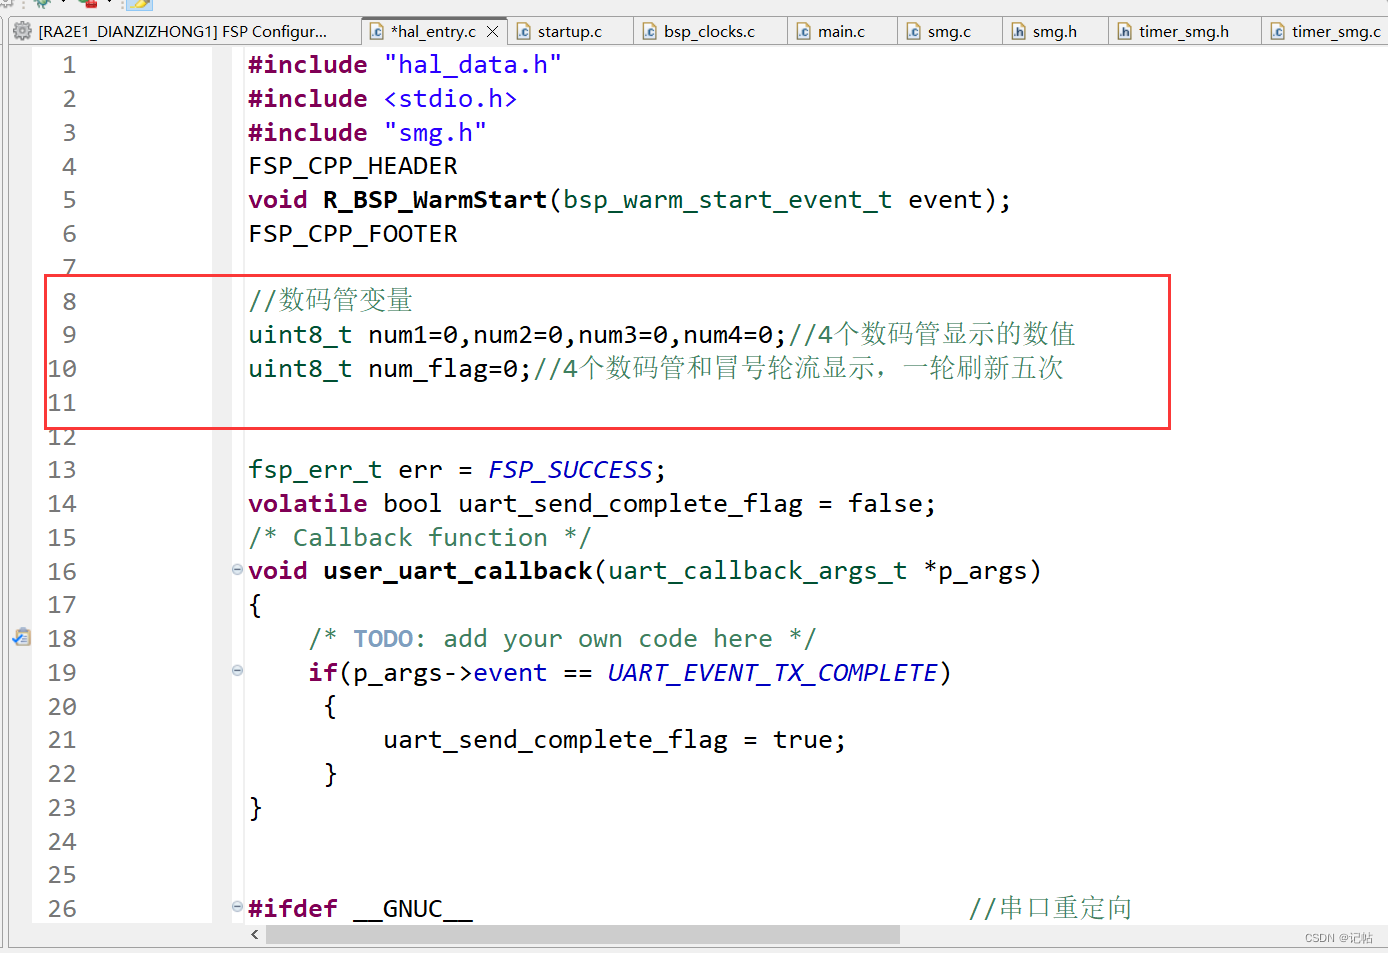
首先定义变量显示数值。
//数码管变量
uint8_t num1=0,num2=0,num3=0,num4=0;//4个数码管显示的数值
uint8_t num_flag=0;//4个数码管和冒号轮流显示,一轮刷新五次
新建timer_smg.c和timer_smg.h文件。 在回调函数中添加如下代码,每隔2ms刷新一次数码管,4个数字与一个冒号,一共要刷新5次。
timer_smg.c
/*
 * timer_smg.c
 *
 *  Created on: 2023年6月29日
 *      Author: a8456
 */
#include "timer_smg.h"
//数码管变量
extern uint8_t num1,num2,num3,num4;//4个数码管显示的数值
extern uint8_t num_flag;//4个数码管和冒号轮流显示,一轮刷新五次

void timer0_callback(timer_callback_args_t *p_args)
{
    /* TODO: add your own code here */
    if (TIMER_EVENT_CYCLE_END == p_args- >event)
    {
        if(num_flag==0)
            smg_1(num1);
        else if(num_flag==1)
            smg_2(num2);
        else if(num_flag==2)
            smg_3(num3);
        else if(num_flag==3)
            smg_4(num4);
        else if(num_flag==4)
            smg_maohao_open(1);   //冒号

        num_flag++;
        if(num_flag==5)
            num_flag=0;
    }
}
timer_smg.h
/*
 * timer_smg.h
 *
 *  Created on: 2023年6月29日
 *      Author: a8456
 */

#ifndef TIMER_SMG_H_
#define TIMER_SMG_H_

#include "hal_data.h"

#endif /* TIMER_SMG_H_ */
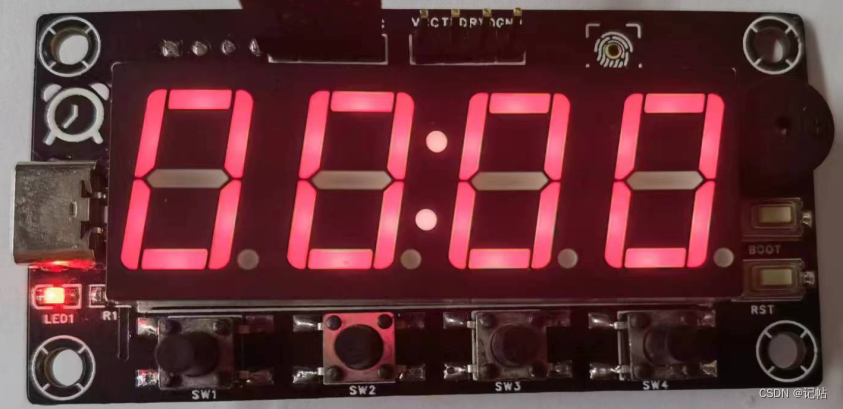
演示效果
主程序
#include “hal_data.h”
#include < stdio.h >
#include “smg.h”
#include “timer_smg.h”

FSP_CPP_HEADER
void R_BSP_WarmStart(bsp_warm_start_event_t event);
FSP_CPP_FOOTER

//数码管变量
uint8_t num1=0,num2=0,num3=0,num4=0;//4个数码管显示的数值
uint8_t num_flag=0;//4个数码管和冒号轮流显示,一轮刷新五次

fsp_err_t err = FSP_SUCCESS;
volatile bool uart_send_complete_flag = false;
void user_uart_callback (uart_callback_args_t * p_args)
{
if(p_args- >event == UART_EVENT_TX_COMPLETE)
{
uart_send_complete_flag = true;
}
}

#ifdef GNUC //串口重定向
#define PUTCHAR_PROTOTYPE int __io_putchar(int ch)
#else
#define PUTCHAR_PROTOTYPE int fputc(int ch, FILE *f)
#endif

PUTCHAR_PROTOTYPE
{
err = R_SCI_UART_Write(&g_uart9_ctrl, (uint8_t *)&ch, 1);
if(FSP_SUCCESS != err) __BKPT();
while(uart_send_complete_flag == false){}
uart_send_complete_flag = false;
return ch;
}

int _write(int fd,char *pBuffer,int size)
{
for(int i=0;i< size;i++)
{
__io_putchar(*pBuffer++);
}
return size;
}

/*******************************************************************************************************************//**

main() is generated by the RA Configuration editor and is used to generate threads if an RTOS is used. This function

is called by main() when no RTOS is used.
*********************************************************************************************************************/
void hal_entry(void)
{
/ TODO: add your own code here */

/* Open the transfer instance with initial configuration. */
err = R_SCI_UART_Open(&g_uart9_ctrl, &g_uart9_cfg);
assert(FSP_SUCCESS == err);

/数码管测试*****************/
ceshi_smg();
/定时器开启*****************/
/* Initializes the module. /
err = R_GPT_Open(&g_timer0_ctrl, &g_timer0_cfg);
/ Handle any errors. This function should be defined by the user. /
assert(FSP_SUCCESS == err);
/ Start the timer. */
(void) R_GPT_Start(&g_timer0_ctrl);

   while(1)
   {
   printf("hello world!123n");
   R_BSP_SoftwareDelay(1000U, BSP_DELAY_UNITS_MILLISECONDS);
   }


#if BSP_TZ_SECURE_BUILD
/* Enter non-secure code */
R_BSP_NonSecureEnter();
#endif
}
审核编辑:汤梓红
声明:本文内容及配图由入驻作者撰写或者入驻合作网站授权转载。文章观点仅代表作者本人,不代表电子发烧友网立场。文章及其配图仅供工程师学习之用,如有内容侵权或者其他违规问题,请联系本站处理。
举报投诉
-
定时器扫描数码管、独立按键,秒表jf_63233237 2023-04-22
-
AT89C51数码管电子时钟源代码2012-08-13 0
-
数码管电子时钟如何用24C02存储数据2012-10-14 0
-
中断,电子时钟,定时器的问题2012-11-13 0
-
LED数码管显示电子钟设计2013-05-31 0
-
关于数码管电子时钟的制作2015-04-11 0
-
数码管时钟2016-12-14 0
-
电子时钟LABVIEW数码显示管制作实例2018-04-18 0
-
初学瑞萨单片机,请教用74HC164D驱动级联数码管2019-09-25 0
-
基于单片机的时钟计时器系统设计与制作 精选资料分享2021-07-21 0
-
基于单片机的电子时钟设计资料分享2021-11-10 0
-
【瑞萨RA MCU创意氛围赛】以RA2E的车载VFD屏幕时钟2023-05-21 0
-
电子时钟制作(瑞萨RA)(4)----驱动LED数码管2023-12-01 242
-
基于RASC的keil电子时钟制作(瑞萨RA)(5)----驱动LED数码管2023-12-01 289
-
基于RASC的keil电子时钟制作(瑞萨RA)(6)----定时器驱动数码管2023-12-01 277
全部0条评论

快来发表一下你的评论吧 !
