

如何基于深度学习模型训练实现圆检测与圆心位置预测
描述
前言
Hello大家好,今天给大家分享一下如何基于深度学习模型训练实现圆检测与圆心位置预测,主要是通过对YOLOv8姿态评估模型在自定义的数据集上训练,生成一个自定义的圆检测与圆心定位预测模型
01制作数据集
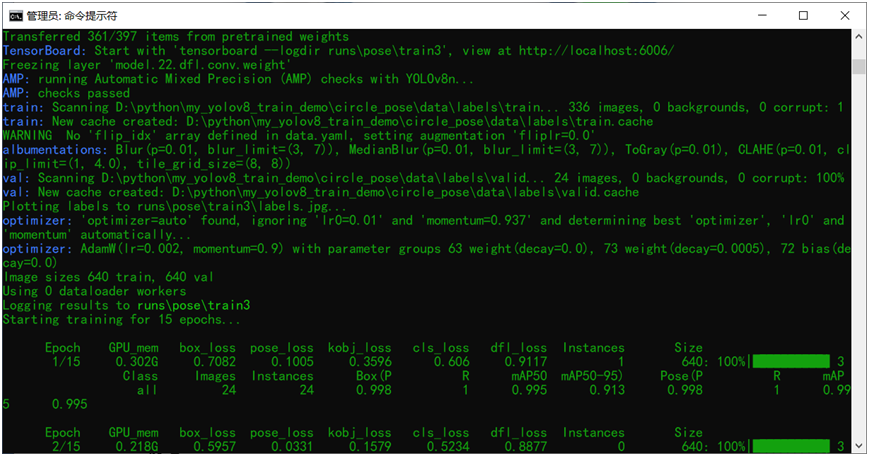
本人从网络上随便找到了个工业工件,然后写代码合成了一些数据,总计数据有360张图像、其中336张作为训练集、24张作为验证集。
其中YOLOv的数据格式如下:
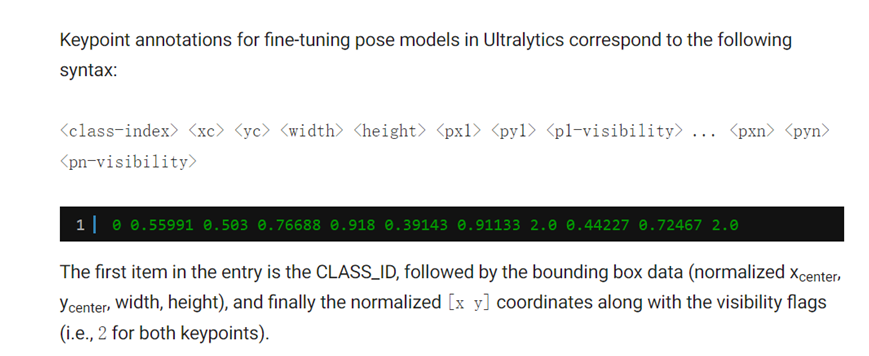
解释一下:
Class-index 表示对象类型索引,从0开始
后面的四个分别是对象的中心位置与宽高 xc、yc、width、height
Px1,py1表示第一个关键点坐标、p1v表示师傅可见,默认填2即可。
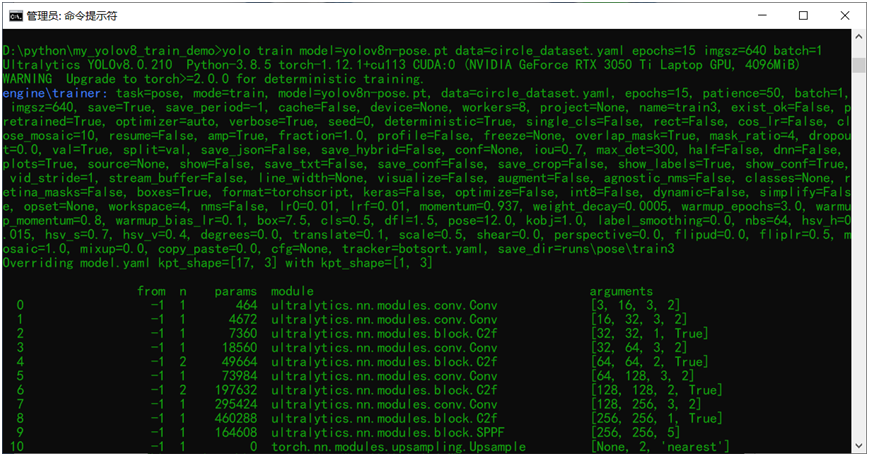
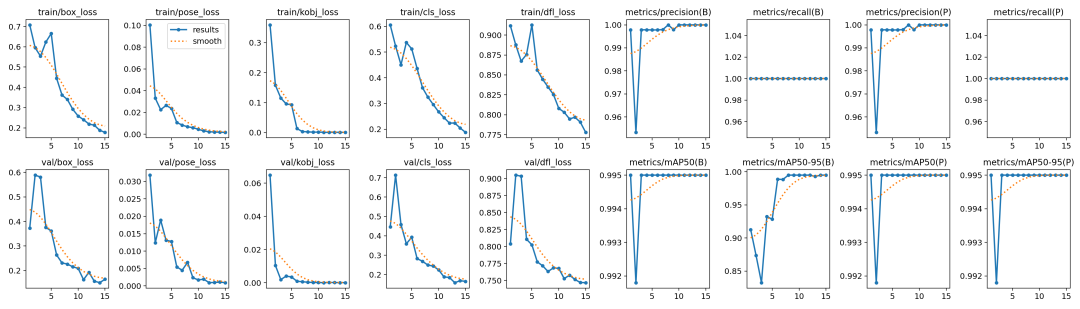
02模型训练
跟训练YOLOv8对象检测模型类似,直接运行下面的命令行即可:
yolo train model=yolov8n-pose.pt data=circle_dataset.yaml epochs=15 imgsz=640 batch=1
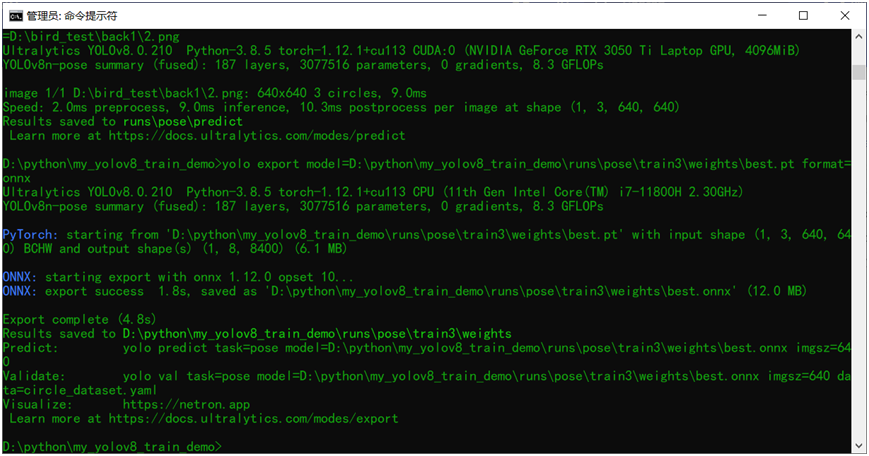
03模型导出预测
训练完成以后模型预测推理测试 使用下面的命令行:
yolo predict model=D:pythonmy_yolov8_train_demo
unspose	rain3weightsest.pt source=D:ird_testack12.png
导出模型为ONNX格式,使用下面命令行即可
yolo export model=D:pythonmy_yolov8_train_demo
unspose	rain3weightsest.pt format=onnx
04部署推理
基于ONNX格式模型,采用ONNXRUNTIME推理结果
ORT相关的推理演示代码如下:
def ort_circle_demo():

    # initialize the onnxruntime session by loading model in CUDA support
    model_dir = "D:/python/my_yolov8_train_demo/circle_detect.onnx"
    session = onnxruntime.InferenceSession(model_dir, providers=['CUDAExecutionProvider'])

    # 就改这里, 把RTSP的地址配到这边就好啦,然后直接运行,其它任何地方都不准改!
    # 切记把 onnx文件放到跟这个python文件同一个文件夹中!
    frame = cv.imread("D:/bird_test/back1/3.png")
    bgr = format_yolov8(frame)
    fh, fw, fc = frame.shape

    start = time.time()
    image = cv.dnn.blobFromImage(bgr, 1 / 255.0, (640, 640), swapRB=True, crop=False)

    # onnxruntime inference
    ort_inputs = {session.get_inputs()[0].name: image}
    res = session.run(None, ort_inputs)[0]

    # matrix transpose from 1x8x8400 => 8400x8
    out_prob = np.squeeze(res, 0).T

    result_kypts, confidences, boxes = wrap_detection(bgr, out_prob)
    for (kpts, confidence, box) in zip(result_kypts, confidences, boxes):
        cv.rectangle(frame, box, (0, 0, 255), 2)
        cv.rectangle(frame, (box[0], box[1] - 20), (box[0] + box[2], box[1]), (0, 255, 255), -1)
        cv.putText(frame, ("%.2f" % confidence), (box[0], box[1] - 10), cv.FONT_HERSHEY_SIMPLEX, .5, (0, 0, 0))
        cx = kpts[0]
        cy = kpts[1]
        cv.circle(frame, (int(cx), int(cy)), 3, (255, 0, 255), 4, 8, 0)

    cv.imshow("Circle Detection Demo", frame)
    cv.waitKey(0)
    cv.destroyAllWindows()


if __name__ == "__main__":
    ort_circle_demo()
审核编辑:汤梓红
声明:本文内容及配图由入驻作者撰写或者入驻合作网站授权转载。文章观点仅代表作者本人,不代表电子发烧友网立场。文章及其配图仅供工程师学习之用,如有内容侵权或者其他违规问题,请联系本站处理。
举报投诉
-
请问怎么根据最小二乘圆的圆心确定最大内接圆的圆心2019-05-12 0
-
labview实现深度学习,还在用python?2020-07-23 0
-
全网唯一一套labview深度学习教程:tensorflow+目标检测:龙哥教你学视觉—LabVIEW深度学习教程2020-08-10 0
-
labview深度学习应用于缺陷检测2020-08-16 0
-
深度学习在预测和健康管理中的应用2021-07-12 0
-
labview深度学习PCB插件光学检测2021-07-13 0
-
深度学习模型是如何创建的?2021-10-27 0
-
深度学习技术的开发与应用2022-04-21 0
-
基于深度学习模型的点云目标检测及ROS实现2018-11-05 17251
-
基于预训练模型和长短期记忆网络的深度学习模型2021-04-20 735
-
大模型为什么是深度学习的未来?2023-02-16 1674
-
深度学习框架区分训练还是推理吗2023-08-17 1031
-
视觉深度学习迁移学习训练框架Torchvision介绍2023-09-22 451
-
深度学习如何训练出好的模型2023-12-07 660
-
如何基于深度学习模型训练实现工件切割点位置预测2023-12-22 346
全部0条评论

快来发表一下你的评论吧 !
