

Nightingale夜莺监控部署安装和使用
描述
1.0 背景介绍
最近在对开源的新型监控做调研,发现Nightingale功能强大,使用效果还不错,并对,并对目前监控做了一个对比
夜莺监控( Nightingale )是一款国产、开源云原生监控分析系统,采用 All-In-One 的设计,集数据采集、可视化、监控告警、数据分析于一体。于 2020 年 3 月 20 日,在 github 上发布 v1 版本,已累计迭代 60 多个版本。从 v5 版本开始与 Prometheus、VictoriaMetrics、Grafana、Telegraf、Datadog 等生态紧密协同集成,提供开箱即用的企业级监控分析和告警能力,已有众多企业选择将 Prometheus + AlertManager + Grafana 的组合方案升级为使用夜莺监控。
2.0 安装部署
2.1 安装依赖组件
# 安装 mysql 数据库
yum -y install mariadb*
systemctl enable mariadb
systemctl restart mariadb
systemctl status mariadb


mysql -e "SET PASSWORD FOR 'root'@'localhost' = PASSWORD('1234');"


# 安装 redis
yum install -y redis
systemctl enable redis
systemctl restart redis
systemctl status redis
2.2安装prometheus,并配置服务启动参数
prometheus官网下载
https://prometheus.io/download/


下载不下来用下面的
链接:https://pan.baidu.com/s/1KSwB0YTWYvnTGH_98dfC6g
提取码:4xpo
mkdir -p /opt/prometheus
wget https://github.com/prometheus/prometheus/releases/download/v2.28.0/prometheus-2.28.0.linux-amd64.tar.gz -O prometheus-2.28.0.linux-amd64.tar.gz
或者
wget https://s3-gz01.didistatic.com/n9e-pub/prome/prometheus-2.28.0.linux-amd64.tar.gz -O prometheus-2.28.0.linux-amd64.tar.gz
下载不下来 用上面的网盘下载 后
上传至服务器后解压缩


tar xf prometheus-2.28.0.linux-amd64.tar.gz
cp -far prometheus-2.28.0.linux-amd64/*  /opt/prometheus/
2.3prometheus服务设置
vim /etc/systemd/system/prometheus.service
如下


[Unit]
Description="prometheus"
Documentation=https://prometheus.io/
After=network.target


[Service]
Type=simple


ExecStart=/opt/prometheus/prometheus  --config.file=/opt/prometheus/prometheus.yml --storage.tsdb.path=/opt/prometheus/data --web.enable-lifecycle --enable-feature=remote-write-receiver --query.lookback-delta=2m


Restart=on-failure
SuccessExitStatus=0
LimitNOFILE=65536
StandardOutput=syslog
StandardError=syslog
SyslogIdentifier=prometheus


[Install]
WantedBy=multi-user.target
2.4prometheus开启服务及开机启动设置
systemctl daemon-reload
systemctl enable prometheus
systemctl restart prometheus
systemctl status prometheus
3.0安装夜莺并配置启动(二进制方式)
mkdir -p /opt/n9e && cd /opt/n9e


# 去 https://github.com/didi/nightingale/releases
我下载的n9e-v6.6.1-linux-amd64.tar.gz


 tar zxvf n9e-v6.6.1-linux-amd64.tar.gz


mysql -uroot -p1234 < docker/initsql/a-n9e.sql


cd /opt/n9e
nohup ./n9e server &> server.log &
nohup ./n9e webapi &> webapi.log &
查看进程
ps -ef | grep n9e server
ps -ef | grep n9e webapi
配置启动
vim /opt/n9e/etc/config.toml
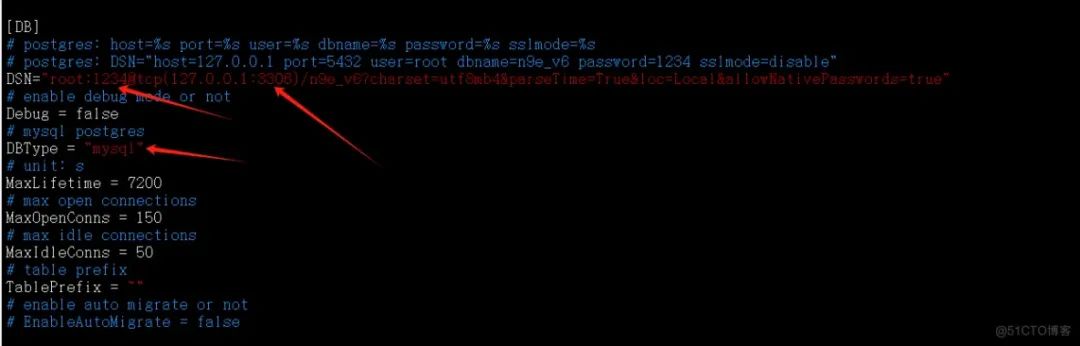
下面更改mysql的信息的真实地址 更改为你的信息 我的是本机部署 不改动 root密码1234 和上面一样 我也不改


[DB]
# postgres: host=%s port=%s user=%s dbname=%s password=%s sslmode=%s
# postgres: DSN="host=127.0.0.1 port=5432 user=root dbname=n9e_v6 password=1234 sslmode=disable"
DSN="root:1234@tcp(127.0.0.1:3306)/n9e_v6?charset=utf8mb4&parseTime=True&loc=Local&allowNativePasswords=true"
# enable debug mode or not
Debug = false
# mysql postgres
DBType = "mysql"
# unit: s
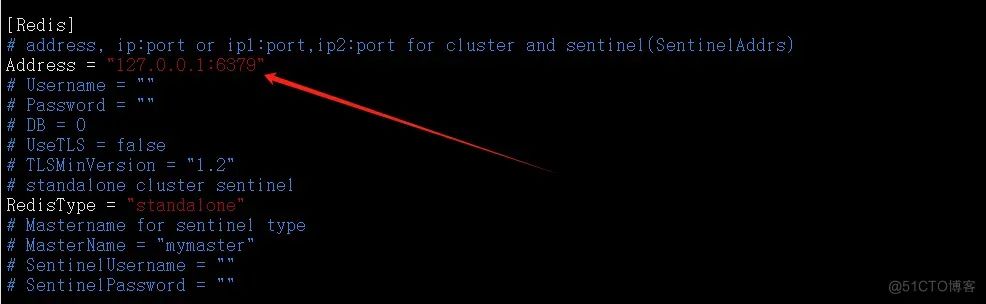
更改redis的地址的真实地址  我是本机部署   我不需要需要更改


[Redis]
# address, ip:port or ip1:port,ip2:port for cluster and sentinel(SentinelAddrs)
Address = "127.0.0.1:6379"
# Username = ""
# Password = ""
# DB = 0
# UseTLS = false
# TLSMinVersion = "1.2"
# standalone cluster sentinel
RedisType = "standalone"
# Mastername for sentinel type
# MasterName = "mymaster"
# SentinelUsername = ""
# SentinelPassword = ""
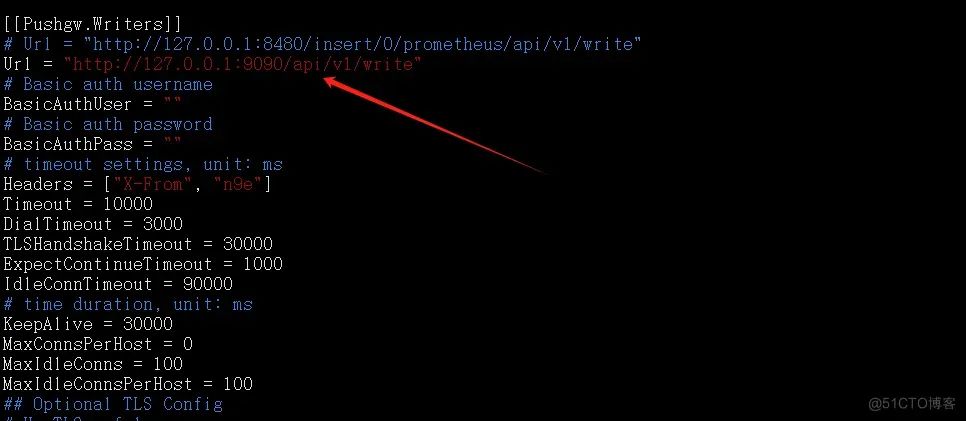
更改prometheus的真实地址 我是本机部署 不更改


[[Pushgw.Writers]]
# Url = "http://127.0.0.1:8480/insert/0/prometheus/api/v1/write"
Url = "http://127.0.0.1:9090/api/v1/write"
# Basic auth username
BasicAuthUser = ""
# Basic auth password
BasicAuthPass = ""
# timeout settings, unit: ms
Headers = ["X-From", "n9e"]
Timeout = 10000
DialTimeout = 3000
TLSHandshakeTimeout = 30000
ExpectContinueTimeout = 1000
IdleConnTimeout = 90000
其他配置保持默认即可,如果启动成功,server 默认会监听在 19000 端口,webapi 会监听在 18000 端口 默认用户是root,密码是root.2020
http://10.10.201.222:17000/
netstat  -tlnp | grep 17000
3.2配置采集器categraf
github地址
https://github.com/flashcatcloud/categraf/releases/tag/v0.2.35
下载二进制包
wge  https://github.com/flashcatcloud/categraf/releases/download/v0.2.35/categraf-v0.2.35-linux-amd64.tar.gz


tar zxvf categraf-0.2.35.tar.gz
mv categraf-0.2.35 categraf
vim /opt/n9e/categraf/conf/config.toml
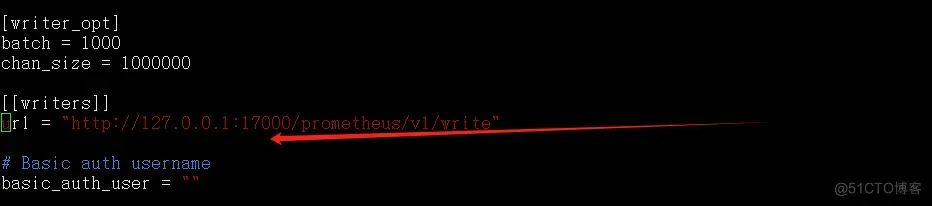
我这里配置的是本机所以是127.0.0.1/其他机器请配置真实ip
[[writers]]
url = "http://127.0.0.1:17000/prometheus/v1/write"
[heartbeat]
enable = true


# report os version cpu.util mem.util metadata
url = "http://127.0.0.1:17000/v1/n9e/heartbeat"

配置systemd 启动管理
vim /etc/systemd/system/categraf.service
如下


[Unit]
Description="Categraf"
After=network.target


[Service]
Type=simple


ExecStart=/opt/n9e/categraf/categraf
WorkingDirectory=/opt/n9e/categraf/


Restart=on-failure
SuccessExitStatus=0
LimitNOFILE=65536
StandardOutput=syslog
StandardError=syslog
SyslogIdentifier=categraf


[Install]
WantedBy=multi-user.target
systemctl daemon-reload
systemctl enable categraf
systemctl enable categraf
systemctl restart categraf
systemctl status categraf
审核编辑:汤梓红
-
没有安装I/O库的C部署2019-04-16 0
-
监控摄像机在家庭监控的安装原理2009-03-13 0
-
监控摄像头如何正确的安装?2018-10-18 0
-
emqttd如何安装与部署2020-05-27 0
-
分享模块化DMM从安装到部署的技巧和窍门2021-05-07 0
-
夜莺600全面拆解评测:美貌与智慧2018-01-24 6704
-
专业节能 新贵小夜莺150拆解功耗评测2018-01-20 457
-
Jenkins详细安装与构建部署使用教程2018-02-06 1639
-
新贵小夜莺150拆解功耗评测 全球最节能最有性价比的鼠标2019-02-12 1412
-
新贵夜莺600拆解 绝对是全球最节能最有性价比的鼠标2019-01-29 2827
-
为什么安装对大型物联网部署如此重要?2021-03-26 1459
-
Nightingale企业级监控解决方案2022-04-25 279
-
NCE光纤传感安装部署及特性分析2022-12-02 372
-
艾睿光电安防视频监控系统:一键安装部署,热成像+可见光实时监控2022-01-24 800
-
linux docker安装部署2023-11-23 457
全部0条评论

快来发表一下你的评论吧 !
