

鸿蒙开发实战:快速上手【万能卡片】
电子说
描述
(一)练习准备
本案例使用HUAWEI DevEco Studio 3.0.0.800,API4-API7都可以体验,由于IDE版本与API不断升级与兼容性等问题,大家练习时可能会遇到一些细节上的差异,整体流程是一致的。
(二)创建项目
1.创建工程项目
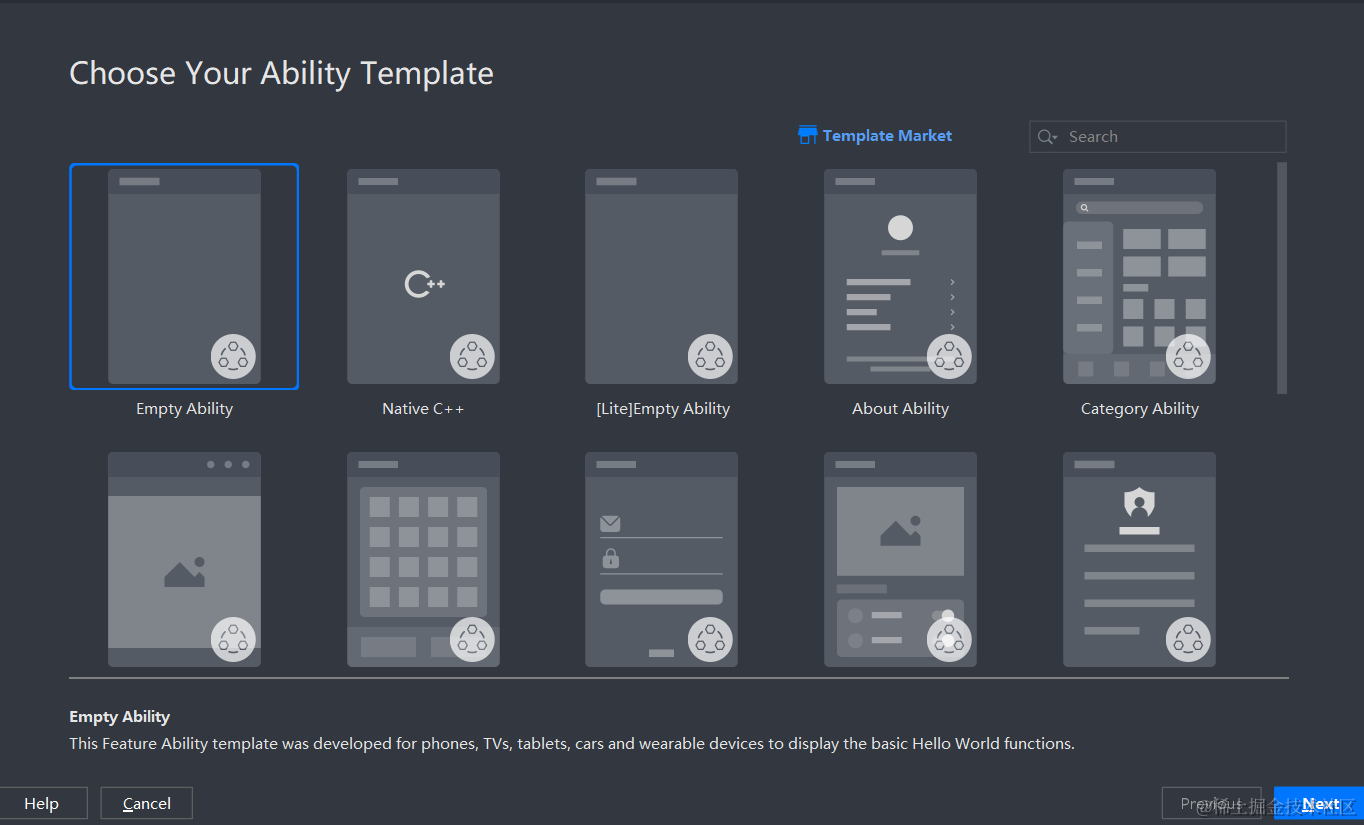
打开DevEco Studio选择你的Ability 模板,这里我们选择Empty Ability模板,然后点击Next进行下一步。如图1所示。
2.配置工程项目
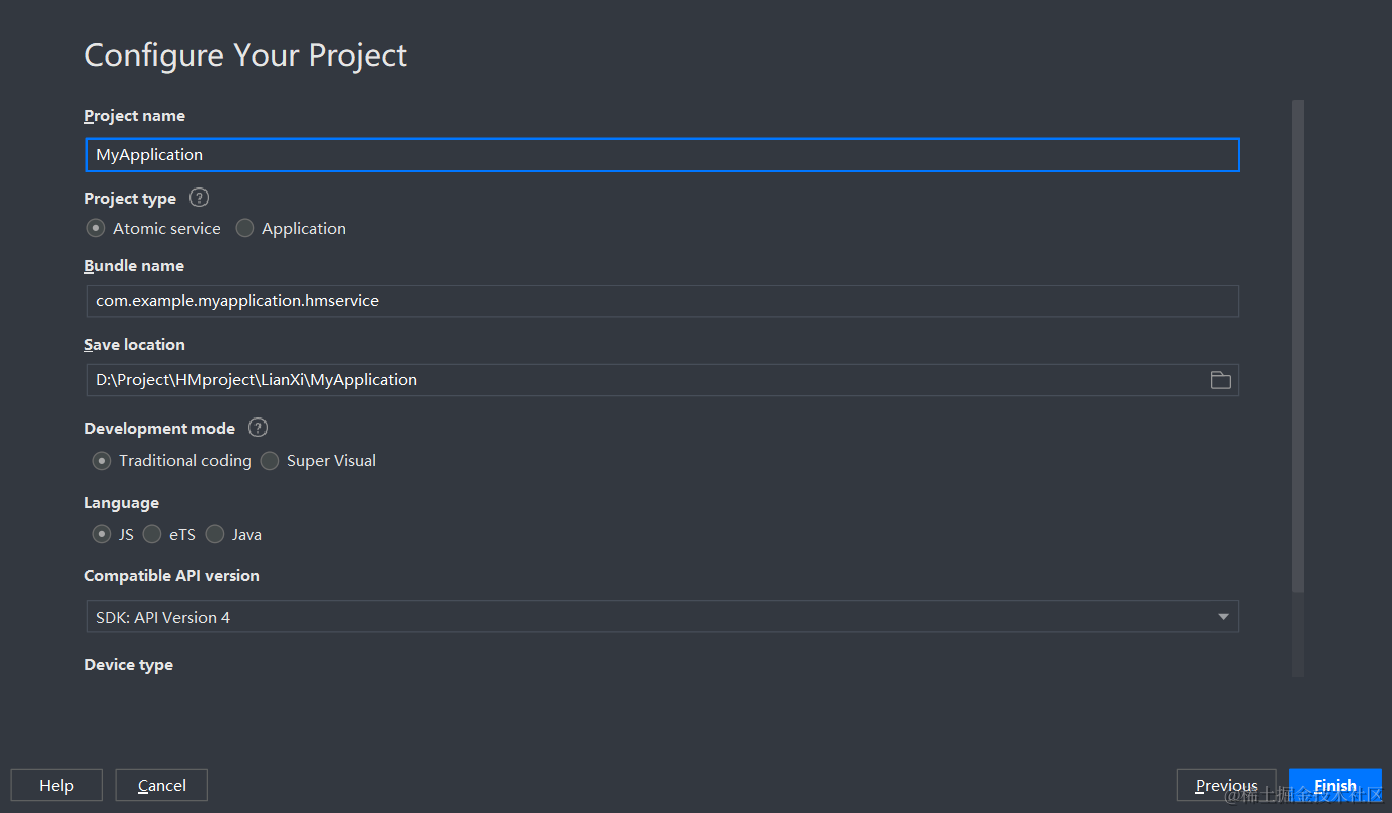
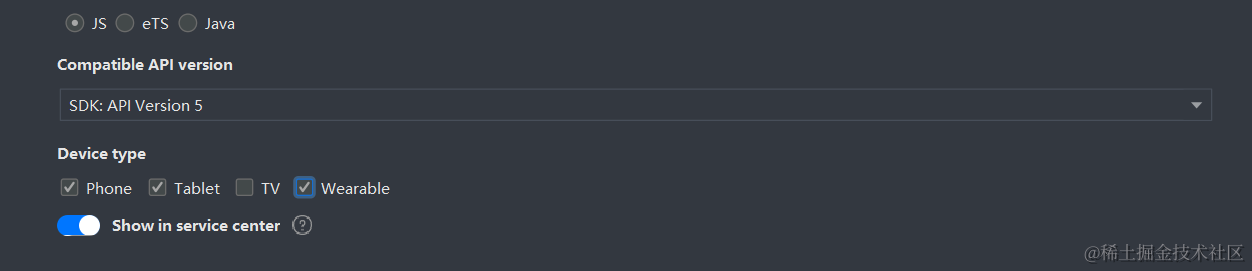
配置的项目工程,如图2和图3所示,然后单击Finish创建。
(三)创建卡片
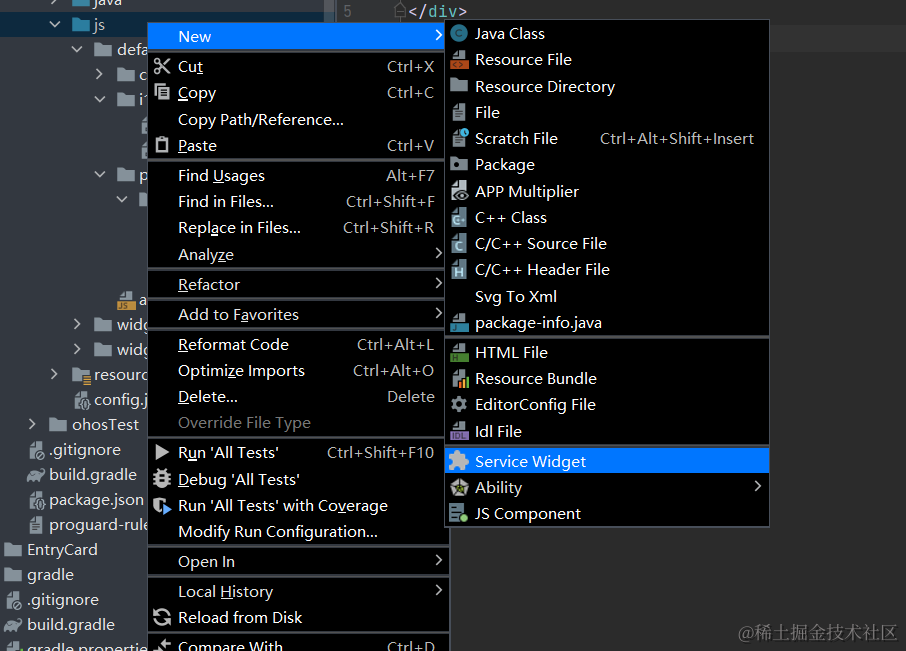
1.找到entry中src->main下的js文件,右击选择new中的Service Widget选项,如图4所示。
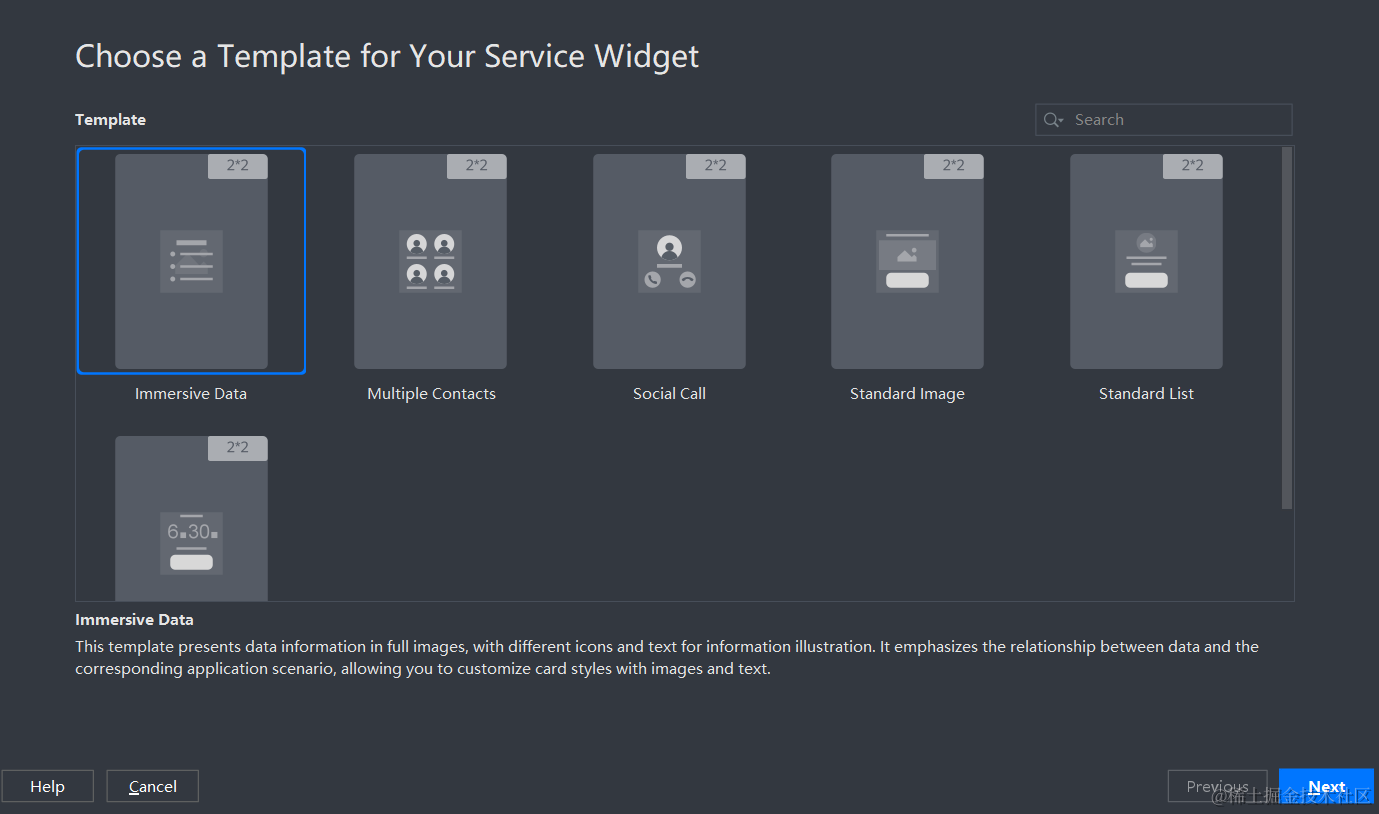
2.选择immersive Data卡片模板,如图5所示,点击Next进行下一步。
3.配置卡片模板信息,如图6,然后点击Finish创建。

(四)修改代码
1.查看js下刚刚创建的卡片,如图7。
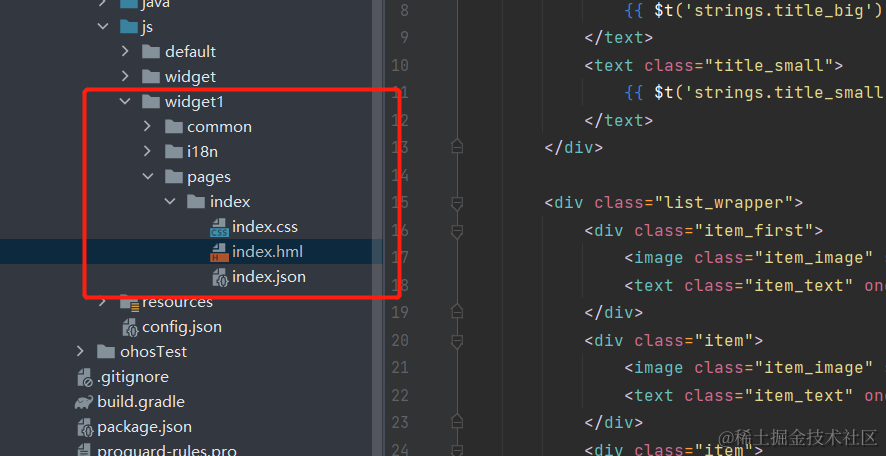
打开该文件下的index.hml文件,修改代码。
< !--    用堆叠stack组件包裹节点div组件-- >
< stack style="background-color: #f5d354;width: 100%;height: 100%;" onclick="routerEvent" >
< !--    右边图片(添加此段代码)-- >
    < div class="right-img" >
        < image class="images" src="/common/ic_default_image.png" alt="img" >< /image >
    < /div >
< !--    标题信息-- >
    < div class="container" >
        < div class="title_wrapper" >
            < text class="title_big" >
                {{ $t('strings.title_big') }}
            < /text >
            < text class="title_small" >
                {{ $t('strings.title_small') }}
            < /text >
        < /div >
< !--    文本信息 (修改text信息,后面加上数字标记1、2、3)-- >
        < div class="list_wrapper" >
            < div class="item_first" >
                < image class="item_image" src='/common/ic_default.png' >< /image >
                < text class="item_text" onclick="routerEvent" >{{ $t('strings.text') }}< /text >
            < /div >
            < div class="item" >
                < image class="item_image" src='/common/ic_default.png' >< /image >
                < text class="item_text" onclick="routerEvent" >{{ $t('strings.text1') }}< /text >
            < /div >
            < div class="item" >
                < image class="item_image" src='/common/ic_default.png' >< /image >
                < text class="item_text" onclick="routerEvent" >{{ $t('strings.text2') }}< /text >
            < /div >
            < div class="item" >
                < image class="item_image" src='/common/ic_default.png' >< /image >
                < text class="item_text" onclick="routerEvent" >{{ $t('strings.text3') }}< /text >
            < /div >
            < div class="item_last" >
                < image class="item_image" src='/common/ic_default.png' >< /image >
                < text class="item_text" onclick="routerEvent" >{{ $t('strings.text4') }}< /text >
            < /div >
        < /div >
    < /div >
< /stack >复制
打开该文件下的index.css文件,修改代码(找到对应修改部分)。
.container {
    flex-direction: column;
    justify-content: space-between;
    align-items: flex-start;
/*注释代码*/
/*    background-color: dodgerblue;*/
/*    background-image: url('/common/ic_default_image@3x.png');*/
/*    background-repeat: no-repeat;*/
/*    background-size: cover;*/
}

/*添加.right-img样式*/
.right-img{
    width: 40px;
    height: 40px;
    position: absolute;
    right: 10px;
    top: 10px;
    border-radius: 12px;
}

/*将.title_big中的font-size: 19px;改为16px*/
.title_big {
    font-size: 16px;
    font-weight: bold;
    color: white;
}

/*适配wearable*/
@media (device-type: wearable) {
    .right-img{
        display: none;
    }
}
复制
打开该文件下的i18n文件,打开.json文件,修改代码。
zh_CN.json:
{
  "strings": {
    "title_big": "标题",
    "title_small": "这里是副标题",
    "text": "文本",
    "text1": "文本1",
    "text2": "文本2",
    "text3": "文本3",
    "text4": "文本4"
  }
}复制
en_US.json:
{
  "strings": {
    "title_big": "Title",
    "title_small": "Text",
    "text": "Text",
    "text1": "Text1",
    "text2": "Text2",
    "text3": "Text3",
    "text4": "Text4"
  }
}复制
2.打开js下的default文件,打开pages文件。
修改代码:
index.hml
< div class="container" >
    < text class="title" >你好,欢迎来到< /text >
    < text class="title" >{{title1}}< /text >
    < text class="title" >{{title2}}< /text >
< /div >复制
index.css
.container {
    flex-direction: column;
    justify-content: center;
    align-items: center;
    width: 100%;
    height: 100%;
}

.title {
    font-size: 30px;
    color: #000000;
    opacity: 0.9;
    margin: 4px 0px;
}

@media screen and (device-type: tablet) and (orientation: landscape) {
    .title {
        font-size: 100px;
    }
}

@media screen and (device-type: wearable) {
    .title {
        font-size: 28px;
        color: #FFFFFF;
    }
}

@media screen and (device-type: tv) {
    .container {
        background-image: url("/common/images/Wallpaper.png");
        background-size: cover;
        background-repeat: no-repeat;
        background-position: center;
    }

    .title {
        font-size: 100px;
        color: #FFFFFF;
    }
}

@media screen and (device-type: phone) and (orientation: landscape) {
    .title {
        font-size: 60px;
    }
}复制
index.js
export default {
    data: {
        title1: "元服务",
        title2: "新应用时代和新世界!"
    },
    onInit() {}
}复制
(五)运行效果
1.打开模拟器,如图9所示

2.进行登录,如图

会自动跳出华为开发者联盟账户,输入账号密码进行登录,登陆成功,然后返回DevEco Studio。
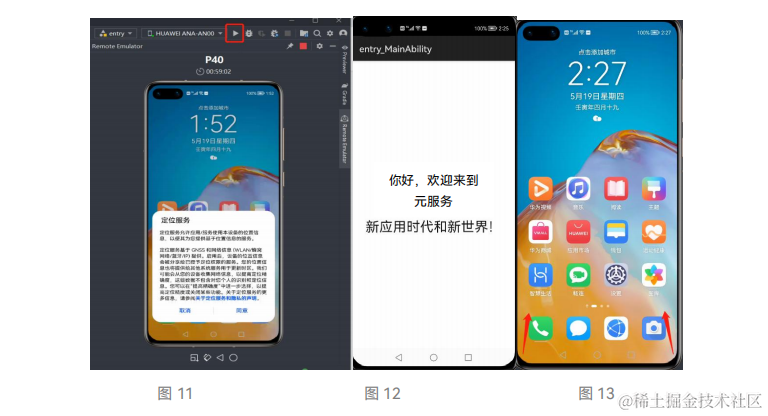
3.选择模拟器中P40设备进行开启。点击小三角运行项目,如图11;运行成功后会出现初始化页面,如图12;点击模拟器中的home键,回到桌面,然后从手机屏幕的左下角或者右下角斜向上滑动,进入服务中心,如图13。
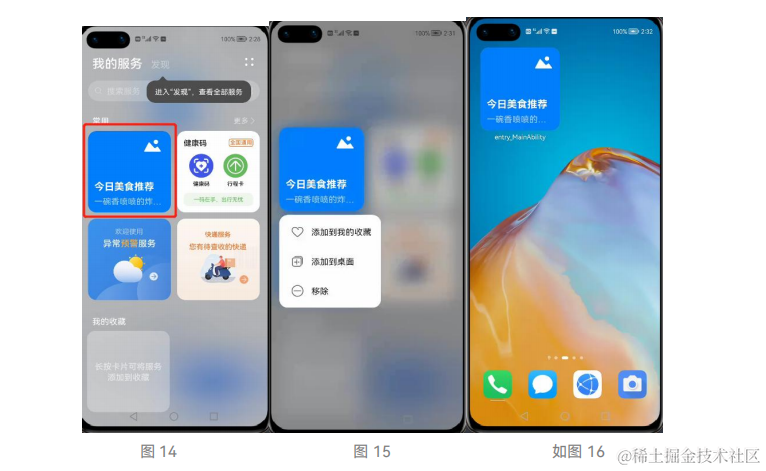
4.进入服务中心后可以看见创建的卡片(这是项目创建初始化自身就有的卡片widget),如图14;轻按卡片,添加至桌面,如图15;卡片成功添加至桌面,如图16。
5.长按桌面卡片,出现弹窗,单击更多万能卡片,选择我们之前新创建的卡片,并且添加至桌面,如图17、图18、图19。
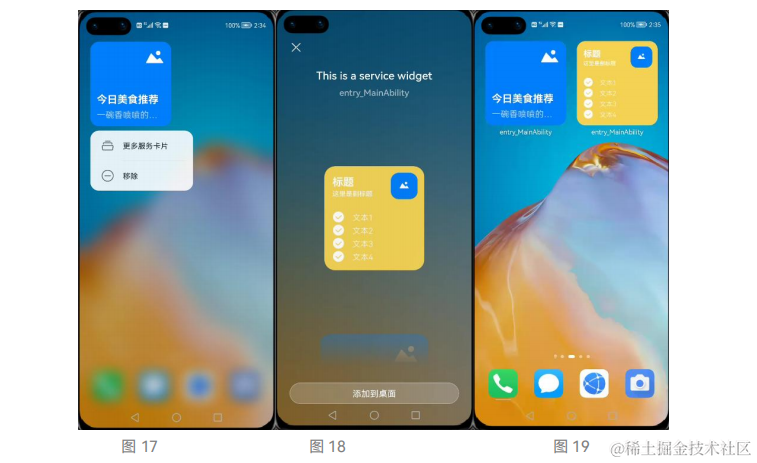
点击新添加至桌面的卡片,回到“你好,欢迎来到元服务应用新时代和新世界!”页面。这里想显示其他模拟器效果,重复以上打开模拟器的步骤即可,本案例支持Phone、Tablet、Wearable卡片效果显示。
审核编辑 黄宇
-
【年度精选】2023年度top5榜单——鸿蒙开发经验2024-01-10 0
-
电子万能试验机与液压万能试验机的区别2013-07-04 0
-
如何快速设计一款万能遥控器产品原型(SoC免开发)2020-06-08 0
-
如何用开发板快速设计一款万能遥控器产品原型(SoC免开发)2020-06-08 0
-
疯壳AI语音及人脸识别开发实战 Ⅰ 快速上手2020-11-05 0
-
如何快速上手PCB的设计2021-11-12 0
-
HarmonyOS万能服务卡片开发尝试历程(一)2022-09-07 0
-
《HarmonyOS原子化服务卡片原理与实战》清华大学出版社李洋著2022-12-29 0
-
李洋:手把手教你开发一个元服务万能卡片2023-03-20 0
-
用HarmonyOS元服务万能卡片训练一下文心一言的AIGC能力2023-04-18 0
-
HarmonyOS开发案例分享:万能卡片也能用来玩游戏2023-12-01 0
-
B站添加鸿蒙服务卡片教程2021-08-12 2407
-
华为开发者大会2021智能硬件开发— 万能卡片的全新升级2021-10-23 1446
-
一款鸿蒙版的哔哩哔哩服务卡片应用案例2022-04-07 436
-
开发案例分享:万能卡片也能用来玩游戏2023-12-15 256
全部0条评论

快来发表一下你的评论吧 !
