

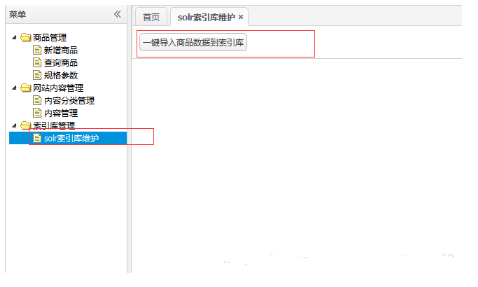
数据库中的数据导入索引库
处理器/DSP
描述
数据库中的数据导入索引库
导入solr索引库需要先在Linux中安装solr并且配置solr
这是在Linux中配置solr的详细步骤地址
https://mp.csdn.net/postedit/80472436
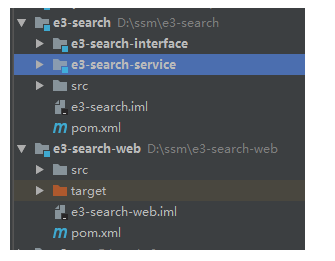
模块划分
SearchItemServiceImpl.java代码实现
/**
* 商品数据索引库Service
*/
@Service
public class SearchItemServiceImpl implements SearchItemService {
@Autowired
private ItemMapper itemMapper;
@Autowired
private SolrServer solrServer;
/**
* 将删商品数据导入索引库
* @return
*/
@Override
public E3Result importItems() {
try {
//查询商品列表
List《SearchItem》 itemList = itemMapper.getItemList();
//导入到索引库
for (SearchItem item :itemList) {
//创建文档对象
SolrInputDocument document=new SolrInputDocument();
//向文档添加域
document.addField(“id”,item.getId());
document.addField(“item_title”,item.getTitle());
document.addField(“item_sell_point”,item.getSell_point());
document.addField(“item_price”,item.getPrice());
document.addField(“item_image”,item.getImage());
document.addField(“item_category_name”,item.getCategory_name());
//写入索引库
solrServer.add(document);
}
//提交
solrServer.commit();
//返回成功
return E3Result.ok();
}catch (Exception e){
e.printStackTrace();
return E3Result.build(500,“商品导入失败!”);
}
}
}
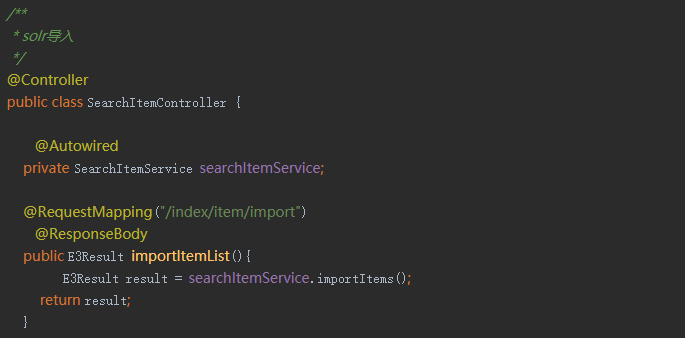
Controller代码

然而我们在添加商品的时候solr库没有添加到该商品的索引,导致我们在搜索时搜索不到该商品的信息,想要同步只有每次添加一个商品,我们就只有去调用点击后台的一键导入solr库才可以将该商品添加到solr库中。这样就感觉很麻烦而且效率非常的低,可用性较差。我们就可以使用activemq消息的方式来解决该方法实现自动同步的效果。每次添加一个商品发送一个消息在添加该商品的信息到solr库中。
实现功能的代码。
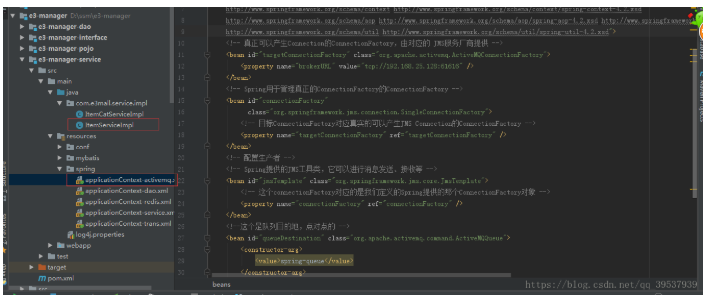
需要修改其中商品管理模块的步骤
添加一个applicationConten-activemq.xml配置文件
2.修改添加实现类中的方法在插入商品信息到数据库中的时候我们就发送一个消息
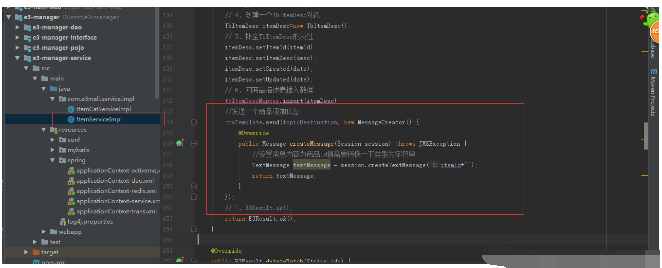
//发送一个商品添加信息
jmsTemplate.send(topicDestination, new MessageCreator() {
@Override
public Message createMessage(Session session) throws JMSException {
//设置消息内容为商品id值需要转换一下类型为字符串
TextMessage textMessage = session.createTextMessage(itemId+“”);
return textMessage;
}
});
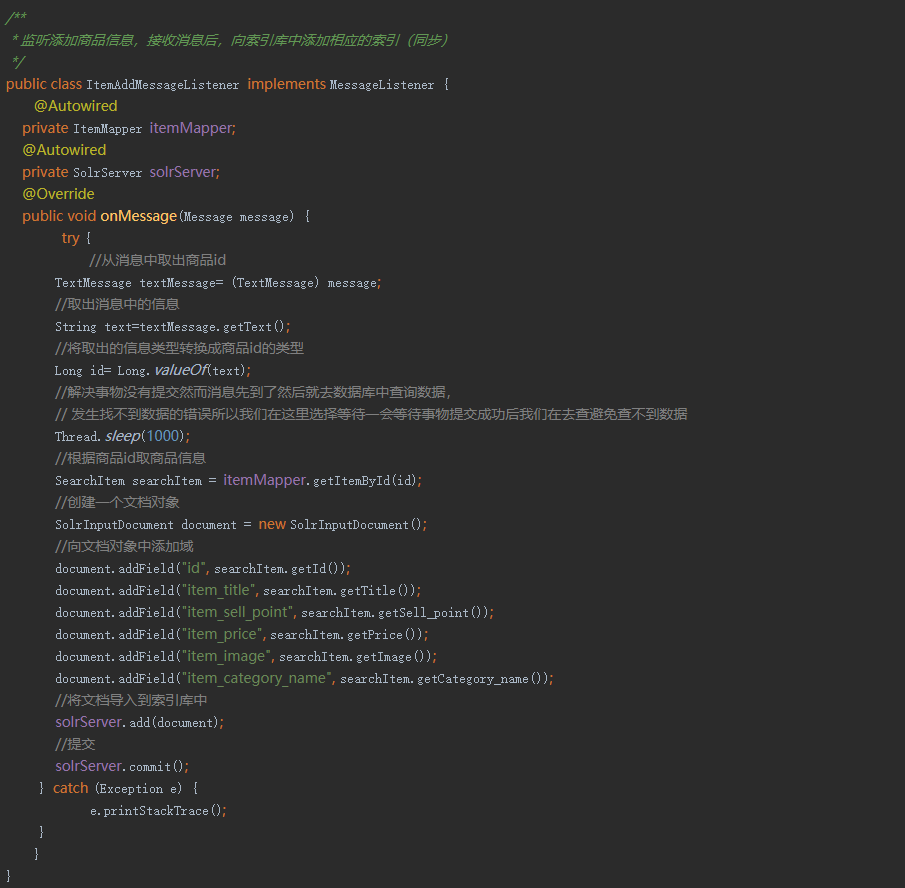
搜索模块
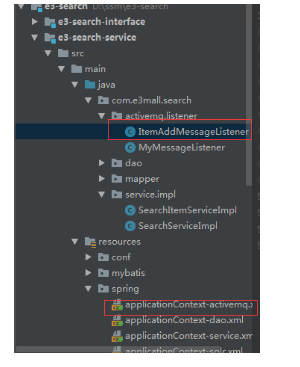
添加一个监听器监听随时监听随时接收消息
ItemAddMessageListener.java
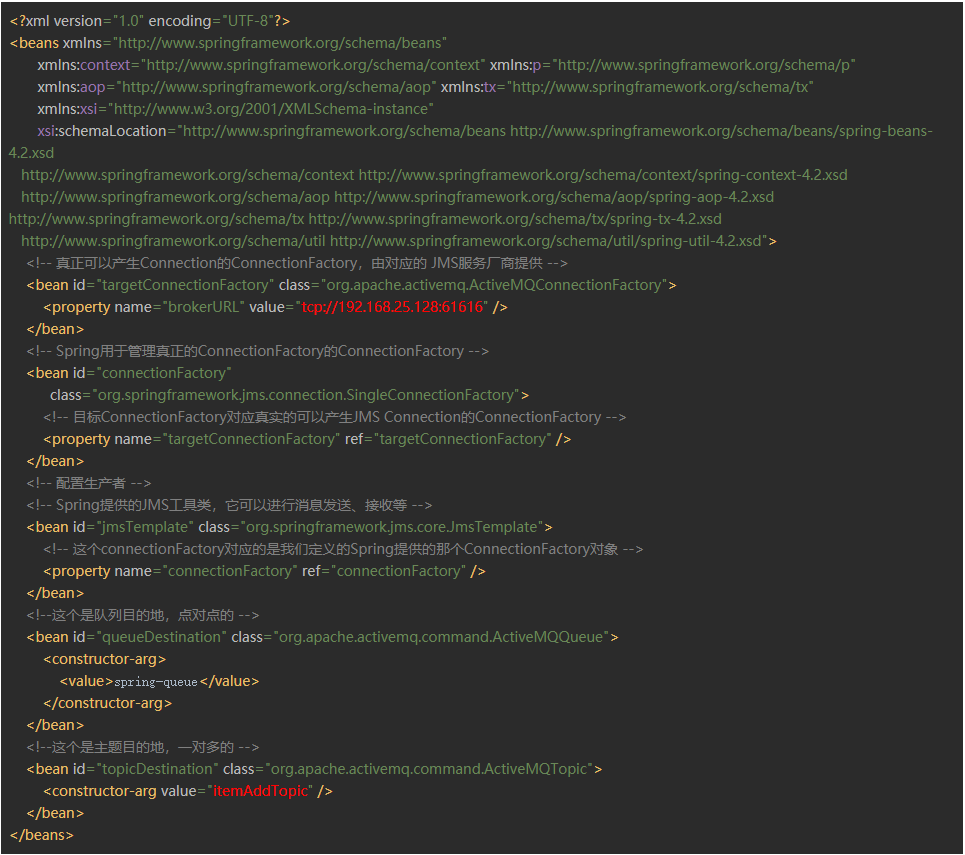
添加applicationConten-activemq.xml配置文件
《?xml version=“1.0” encoding=“UTF-8”?》
《beans xmlns=“http://www.springframework.org/schema/beans”
xmlns:context=“http://www.springframework.org/schema/context” xmlns:p=“http://www.springframework.org/schema/p”
xmlns:aop=“http://www.springframework.org/schema/aop” xmlns:tx=“http://www.springframework.org/schema/tx”
xmlns:xsi=“http://www.w3.org/2001/XMLSchema-instance”
xsi:schemaLocation=“http://www.springframework.org/schema/beans http://www.springframework.org/schema/beans/spring-beans-4.2.xsd
http://www.springframework.org/schema/context http://www.springframework.org/schema/context/spring-context-4.2.xsd
http://www.springframework.org/schema/aop http://www.springframework.org/schema/aop/spring-aop-4.2.xsd http://www.springframework.org/schema/tx http://www.springframework.org/schema/tx/spring-tx-4.2.xsd
http://www.springframework.org/schema/util http://www.springframework.org/schema/util/spring-util-4.2.xsd”》
《!-- 真正可以产生Connection的ConnectionFactory,由对应的 JMS服务厂商提供 --》
《bean id=“targetConnectionFactory” class=“org.apache.activemq.ActiveMQConnectionFactory”》
《property name=“brokerURL” value=“tcp://192.168.25.128:61616” /》
《/bean》
《!-- Spring用于管理真正的ConnectionFactory的ConnectionFactory --》
《bean id=“connectionFactory”
class=“org.springframework.jms.connection.SingleConnectionFactory”》
《!-- 目标ConnectionFactory对应真实的可以产生JMS Connection的ConnectionFactory --》
《property name=“targetConnectionFactory” ref=“targetConnectionFactory” /》
《/bean》
《!--这个是队列目的地,点对点的 --》
《bean id=“queueDestination” class=“org.apache.activemq.command.ActiveMQQueue”》
《constructor-arg》
《value》spring-queue《/value》
《/constructor-arg》
《/bean》
《!--这个是主题目的地,一对多的 --》
《bean id=“topicDestination” class=“org.apache.activemq.command.ActiveMQTopic”》
《constructor-arg value=“itemAddTopic” /》
《/bean》
《!-- 接收消息 --》
《!-- 配置监听器 --》
《bean id=“myMessageListener” class=“com.e3mall.search.activemq.listener.MyMessageListener” /》
《!-- 消息监听容器 --》
《bean class=“org.springframework.jms.listener.DefaultMessageListenerContainer”》
《property name=“connectionFactory” ref=“connectionFactory” /》
《property name=“destination” ref=“queueDestination” /》
《property name=“messageListener” ref=“myMessageListener” /》
《/bean》
《!-- 配置监听器 --》
《bean id=“itemAddMessageListener” class=“com.e3mall.search.activemq.listener.ItemAddMessageListener” /》
《!-- 消息监听容器监听商品添加消息同步索引库 --》
《bean class=“org.springframework.jms.listener.DefaultMessageListenerContainer”》
《property name=“connectionFactory” ref=“connectionFactory” /》
《!--设置我需要的发送消息方式--》
《property name=“destination” ref=“topicDestination” /》
《property name=“messageListener” ref=“itemAddMessageListener” /》
《/bean》
《/beans》
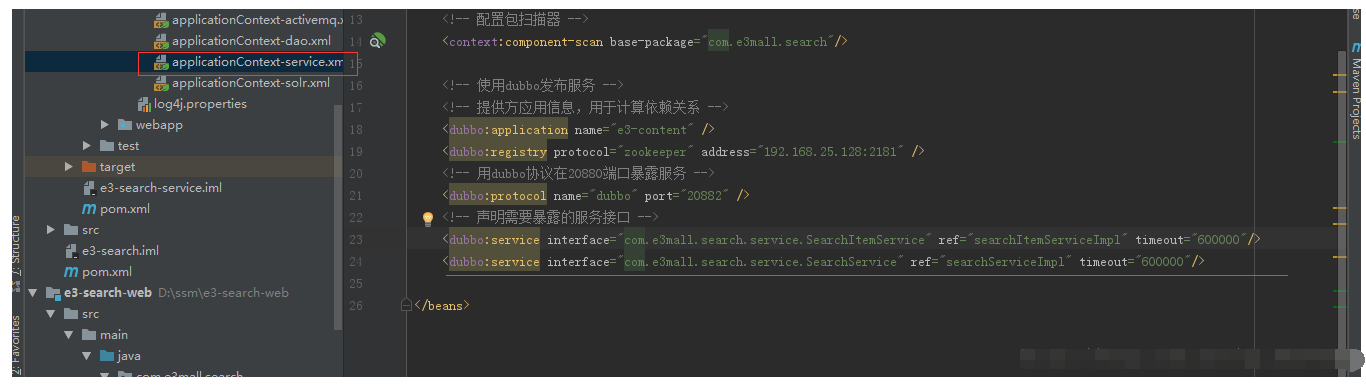
applicationContent-service.xml发布服务
将数据库中的数据导入Solr索引库
在大部分应用中,主要还是使用的是数据库中的数据,因此,这一步还是非常重要的。
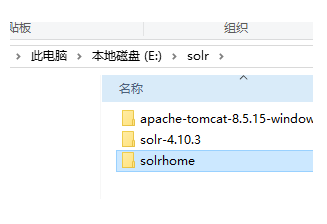
现在目录结构如图所示:
在solr后台管理界面中
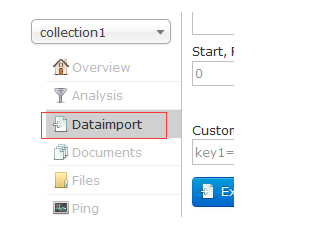
dataimport 负责将数据库中数据导入到索引库中,不过在导入之前,还需要一些相关配置。
1、需要的jar包
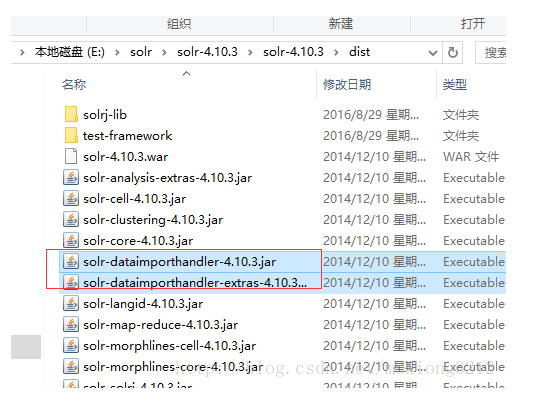
还需要mysql的驱动包
将这3个jar包 放入 E:\solr\solrhome\collection1\lib 下
2.在solrconfig.xml中最后面添加一个requesthandler节点
《requestHandler name=“/dataimport”
class=“org.apache.solr.handler.dataimport.DataImportHandler”》
《lst name=“defaults”》
《str name=“config”》data-config.xml《/str》
《/lst》
《/requestHandler》
其中 data-config.xml 是指关于要导入的数据库的配置信息。
2、在E:\solr\solrhome\collection1\conf 下创建
data-config.xml 文件
《?xml version=“1.0” encoding=“UTF-8” ?》
《dataConfig》
《dataSource type=“JdbcDataSource”
driver=“com.mysql.jdbc.Driver”
url=“jdbc:mysql://localhost:3306/lucene”
user=“root”
password=“root”/》
《document》
《entity name=“product” query=“SELECT pid,name,catalog_name,price,description,picture FROM products ”》
《field column=“pid” name=“id”/》
《field column=“name” name=“product_name”/》
《field column=“catalog_name” name=“product_catalog_name”/》
《field column=“price” name=“product_price”/》
《field column=“description” name=“product_description”/》
《field column=“picture” name=“product_picture”/》
《/entity》
《/document》
《/dataConfig》
数据库和账户密码根据自己的实际情况来写
可以看出,可以在
query=“SELECT pid,name,catalog_name,price,description,picture FROM products ”
指定自己索引库中要存的索引,
《field column=“pid” name=“id”/》
《field column=“name” name=“product_name”/》
可以配置索引中的域名 和 数据库字段的映射关系 ,其中column为字段名,name为域名。
3、在schema.xml中配置自定义域
首先要配置好ik分词器,不会的可以参考下面这篇文章
solr的安装与使用(二)
然后在后面增加自定义域
《field name=“product_name” type=“text_ik” indexed=“true” stored=“true”/》
《field name=“product_price” type=“float” indexed=“true” stored=“true”/》
《field name=“product_description” type=“text_ik” indexed=“true” stored=“false” /》
《field name=“product_picture” type=“string” indexed=“false” stored=“true” /》
《field name=“product_catalog_name” type=“string” indexed=“true” stored=“true” /》
《field name=“product_keywords” type=“text_ik” indexed=“true” stored=“false” multiValued=“true”/》
《copyField source=“product_name” dest=“product_keywords”/》
《copyField source=“product_description” dest=“product_keywords”/》
这里面name 和 data-config.xml中的 name一致。type使用ik分词器定义的type
type=“text_ik”
4、重启tomcat
选中collection1 点击dataimport
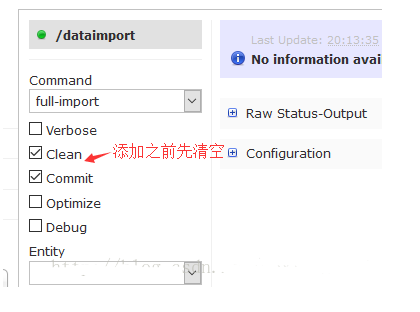
5、点击执行,就可以将数据中数据导入索引库了。
-
用Delphi做中BDE连接SQL数据库(学习Delphi环境中数据库操作的方法和数据库应用程序2009-05-10 0
-
labvies访问数据库2012-08-26 0
-
请教如何将labview中的表格数据 保存到数据库中2012-11-13 0
-
数据库连接2014-06-29 0
-
建立与数据库的连接2014-07-01 0
-
二维数组导入数据库问题2014-10-20 0
-
各位大神,有谁知道怎么使用ladview把excel表格数据导入到SQL数据库中吗?小弟,数据库新手 跪求2018-04-28 0
-
如何用labsql做导入access数据库的功能2019-03-13 0
-
Linux环境下oracle数据库exp命令导出数据及imp命令导入数据2019-07-09 0
-
C#如何实现Excel表格导入数据库2020-07-18 0
-
SQL数据库导入无法从数据库获取字符串?2020-12-02 0
-
什么是时序数据库?2021-07-12 0
-
有个excel数据表 想导入鸿蒙数据库,求sqlite数据使用文档?2022-06-09 0
-
MySQL数据库索引的底层是怎么实现的2022-07-28 0
-
如何将数据库导入移动应用程序?2023-04-06 0
全部0条评论

快来发表一下你的评论吧 !
