

怎样用Arduino和ESP8266模块通过网页控制伺服电机
电子说
描述
将Arduino UNO连接到ESP8266
/b》
网络控制伺服电路图
首先,将ESP8266与Arduino连接。我们使用适配器将esp8266与Arduino连接起来,这将使连接更加容易。适配器具有5至3.3V稳压器,您无需连接任何外部电阻。
将适配器的GND连接到Arduino的GND
将适配器的VCC连接到Arduino的5V电源
将RX从适配器连接到Arduino的引脚2
连接TX引脚从适配器连接到Arduino的引脚3
然后,将伺服电机连接到Arduino。将伺服电机与Arduino连接如下:
伺服电机的黑线连接到Arduino的GND引脚
伺服电机的红线连接到Arduino的5V引脚
伺服电机的黄线到Arduino的引脚8
创建网页
要通过网页控制伺服电机,我们必须使用HTML语言制作网页。我们为项目创建的HTML代码可以从本文末尾下载。如果要重命名文件,请更改文件名,但确保文件名末尾有“.html”。
然后,下载JQUERY文件(也在下面给出)文章)并将此文件放在放置HTML文件的同一文件夹中。之后,打开HTML,网页将如下所示:
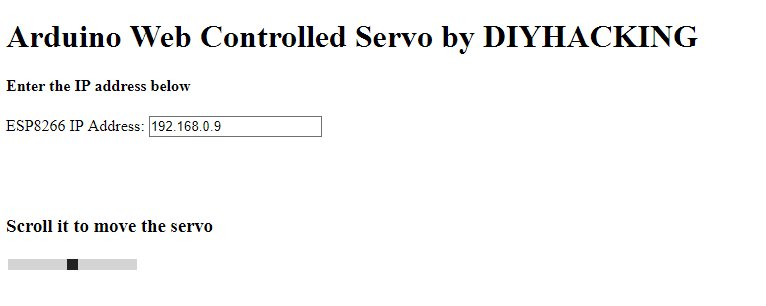
现在,使用Wi更改Arduino代码中的Wi-Fi名称和密码-Fi名称和密码。然后上传代码。打开串口监视器,它将显示IP地址,如下图所示:

在网页上指定的空白处输入此IP地址。现在,当您移动滑块时,伺服电机将移动。
代码
#include
#include
SoftwareSerial esp8266(2,3);
#define DEBUG true
#define sg90_pin 8
Servo sg90;
int current_position = 170;
int vel = 10;
int minimum_position = 20;
int maximum_position = 160;
void setup()
{
sg90.attach(sg90_pin);
sg90.write(maximum_position);
sg90.detach();
Serial.begin(9600);
esp8266.begin(9600);
esp8266Data(“AT+RST ”, 2000, DEBUG); //reset module
esp8266Data(“AT+CWMODE=1 ”, 1000, DEBUG); //set station mode
esp8266Data(“AT+CWJAP=\”Tenda_31BC98\“,\”barcelona\“ ”, 2000, DEBUG); //connect wifi network
while(!esp8266.find(“OK”)) { //wait for connection
}
esp8266Data(“AT+CIFSR ”, 1000, DEBUG);
esp8266Data(“AT+CIPMUX=1 ”, 1000, DEBUG);
esp8266Data(“AT+CIPSERVER=1,80 ”, 1000, DEBUG);
}
void loop()
{
if (esp8266.available())
{
if (esp8266.find(“+IPD,”))
{
String msg;
esp8266.find(“?”);
msg = esp8266.readStringUntil(‘ ’);
String command = msg.substring(0, 3);
String valueStr = msg.substring(4);
int value = valueStr.toInt();
if (DEBUG) {
Serial.println(command);
Serial.println(value);
}
delay(100);
//move servo1 to desired angle
if(command == “sr1”) {
//limit input angle
if (value 》= maximum_position) {
value = maximum_position;
}
if (value 《= minimum_position) {
value = minimum_position;
}
sg90.attach(sg90_pin); //attach servo
while(current_position != value) {
if (current_position 》 value) {
current_position -= 1;
sg90.write(current_position);
delay(100/vel);
}
if (current_position 《 value) {
current_position += 1;
sg90.write(current_position);
delay(100/vel);
}
}
sg90.detach(); //dettach
}
}
}
}
String esp8266Data(String command, const int timeout, boolean debug)
{
String response = “”;
esp8266.print(command);
long int time = millis();
while ( (time + timeout) 》 millis())
{
while (esp8266.available())
{
char c = esp8266.read();
response += c;
}
}
if (debug)
{
Serial.print(response);
}
return response;
}
代码说明
首先,包括软件序列和伺服的库。软件串行库将帮助我们在Arduino的其他引脚上使用TX和RX通信。伺服库将帮助我们轻松移动伺服。之后,我们定义了从ESP8266连接RX和TX的引脚,然后我们定义了连接伺服电机的引脚。
之后,我们定义了从ESP8266连接RX和TX的引脚,然后我们定义了连接伺服电机的引脚。
#include
#include
SoftwareSerial esp8266(2,3);
#define DEBUG true
#define sg90_pin 8
然后在设置功能中,我们告诉Arduino我们将伺服电机连接到哪个引脚,我们将电机移动到最大位置。然后我们设置串行通信的波特率和esp8266的波特率9600.根据esp8266的波特率设置esp8266的波特率。您的esp8266可能具有不同的波特率。
然后我们设置串行通信的波特率和ESP8266的波特率为9600.您需要根据ESP8266的波特率设置ESP8266的波特率。您的ESP8266可能具有不同的波特率。
sg90.attach(sg90_pin);
sg90.write(maximum_position);
sg90.detach();
Serial.begin(9600);
esp8266.begin(9600);
以下命令将ESP8266连接到Wi-Fi网络,并将网络服务器设置为IP地址和端口。它将在上传代码后在串行监视器中显示。
esp8266Data(“AT+RST ”, 2000, DEBUG); //reset module
esp8266Data(“AT+CWMODE=1 ”, 1000, DEBUG); //set station mode
esp8266Data(“AT+CWJAP=\”Tenda_31BC98\“,\”barcelona\“ ”, 2000, DEBUG); //connect wifi network
while(!esp8266.find(“OK”)) { //wait for connection
}
esp8266Data(“AT+CIFSR ”, 1000, DEBUG);
esp8266Data(“AT+CIPMUX=1 ”, 1000, DEBUG);
esp8266Data(“AT+CIPSERVER=1,80 ”, 1000, DEBUG);
Arduino将查看数据是否可用。如果移动了网页上的滑块,则ESP8266会根据移动的滑块将数据发送到Arduino。 Arduino根据ESP8266给出的值移动伺服电机。
if (esp8266.available())
{
if (esp8266.find(“+IPD,”))
{
String msg;
esp8266.find(“?”);
msg = esp8266.readStringUntil(‘ ’);
String command = msg.substring(0, 3);
String valueStr = msg.substring(4);
int value = valueStr.toInt();
以下函数将命令发送到ESP8266,并在串行监视器上打印ESP8266的响应。
String esp8266Data(String command, const int timeout, boolean debug)
{
String response = “”;
esp8266.print(command);
long int time = millis();
while ( (time + timeout) 》 millis())
{
while (esp8266.available())
{
char c = esp8266.read();
response += c;
}
}
可下载代码
jquery.js webservo.html
-
 jf_89281746
2023-02-28
0 回复 举报怎么下载代码 收起回复
jf_89281746
2023-02-28
0 回复 举报怎么下载代码 收起回复
-
如何通过Arduino UNO与ESP8266通信2023-02-08 2881
-
arduino(1)--ESP8266配置2022-11-14 3156
-
怎样用Arduino和esp8266检测WIFI的信号强度呢2022-02-24 2760
-
最简单DIY基于ESP8266的物联网智能小车②(webserver服务器网页高级遥控版)2021-12-29 2005
-
解决 用arduino ide 开发nodemcu 加载ESP8266库的问题2021-12-17 960
-
配置esp8266开发板的Arduino开发环境2021-12-08 2048
-
esp笔记(2)使用Arduino IDE 开发 esp82662021-12-05 1548
-
ESP8266(NodeMCU)建立最简单的网页2021-11-16 1657
-
如何使用Arduino和ESP8266实现网页控制伺服电机?2021-09-28 1374
-
如何使用Arduino和ESP8266实现网页控制伺服电机2021-06-28 2056
-
怎样用ESP8266的Web控制伺服2019-07-30 7645
-
怎样用Arduino蓝牙控制伺服电机2019-07-29 8209
-
远程控制通讯--基于Arduino + ESP8266控制LED灯2018-02-27 41789
全部0条评论

快来发表一下你的评论吧 !
