
激光手套的制作
电子说
描述
第1步:BoM
*泡沫板
*激光指示器
* 2伺服电机
* Arduino
*面包板
* 2电位计
步骤2:取出纸张
*将泡沫板切割成适合您手臂的尺寸有一些余地。
*美元店的泡沫板非常坚硬,所以取下板子一侧的纸层,这样你就可以将它弯曲在你的手臂上。
第3步:翻身
*将它卷起来,用热胶将泡沫粘在一起枪。
步骤4:伺服安装座
*为臂上的伺服安装座制作一个切口。
泡沫板上只安装一个伺服器,因为另一个伺服器将位于第一个伺服器的顶部,以制作激光器的万向节/转塔机构。
步骤5:安装激光器
这种强大的绿色激光器太重,无法用胶水喷射到第二个伺服电机上。所以我们需要添加一些结构支持。
*在第二个伺服电机的伺服喇叭上涂胶 - 未安装在泡沫板上的伺服喇叭。尽可能将激光器固定在中心位置(参考激光器的重心)。
*在干燥时将纱线缠绕在激光指示器和伺服喇叭上,这样纱线也会粘在伺服喇叭上。
步骤6:安装万向节机构
*将第一台伺服电机粘到切出的泡沫板上。
*将第二个伺服电机的主体粘贴到第一个伺服的伺服喇叭上。
第7步:接线
*将面包板和Arduino粘贴到泡沫板护罩上
*将每个电位计的一个外部引脚连接到面包板上的地面导轨上。
*将每个电位器的另一个外部引脚连接到面包板上的电源轨。
*将电源轨连接到3.3V,将GND轨连接到Arduino上的GND 。
*将每个伺服的棕色线连接到地线。
*将每个伺服的红线连接到电源轨。
*将每个伺服的信号引脚分别连接到引脚8和9。
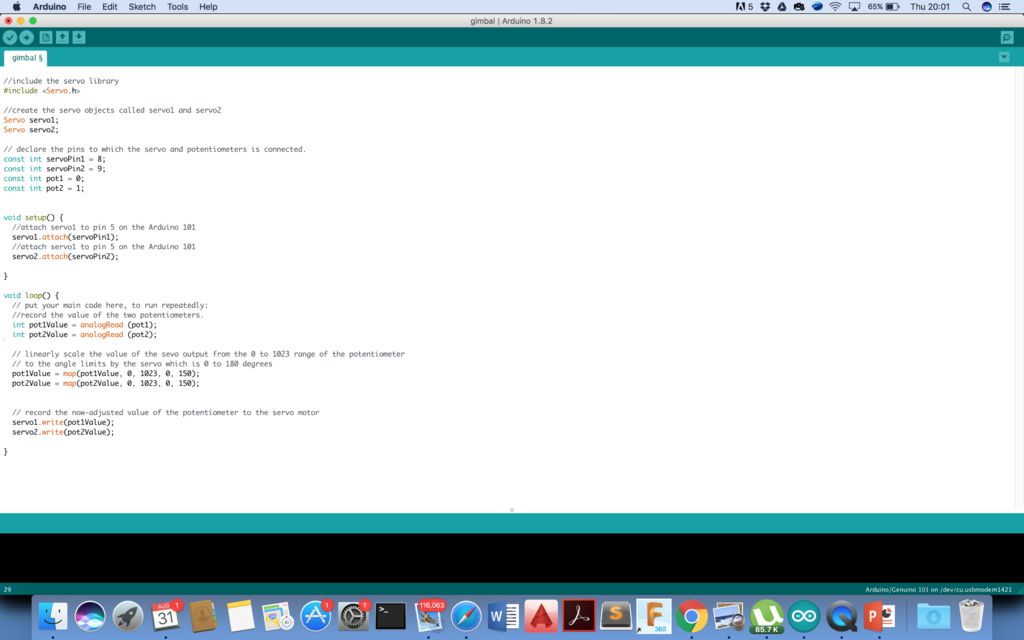
步骤8:代码

//include the servo library
#include //create the servo objects called servo1 and servo2
Servo servo1;
Servo servo2; // declare the pins to which the servo and potentiometers is connected.
const int servoPin1 = 8;
const int servoPin2 = 9;
const int pot1 = 0;
const int pot2 = 1; void setup() {
//attach servo1 to pin 5 on the Arduino 101
servo1.attach(servoPin1);
//attach servo1 to pin 5 on the Arduino 101
servo2.attach(servoPin2); } void loop() {
// put your main code here, to run repeatedly:
//record the value of the two potentiometers.
int pot1Value = analogRead (pot1);
int pot2Value = analogRead (pot2); // linearly scale the value of the sevo output from the 0 to 1023 range of the potentiometer
// to the angle limits by the servo which is 0 to 180 degrees
pot1Value = map(pot1Value, 0, 1023, 0, 150);
pot2Value = map(pot2Value, 0, 1023, 0, 150); // record the now-adjusted value of the potentiometer to the servo motor
servo1.write(pot1Value);
servo2.write(pot2Value); }
步骤9:享受!
-
激光手持焊接机厂家推荐2024-05-21 989
-
3000w激光手持焊接机:从0.5毫米到6毫米的全能表现2024-03-04 2829
-
激光手持焊接机——优势与挑战并存的新型焊接工具2023-12-27 836
-
光纤激光手持焊接头详细介绍2023-12-22 507
-
激光手册 第1分册 激光器2023-10-07 481
-
如何用LED制作的视力扩展闪光手电筒2021-04-22 1075
-
激光近视矫正手术有必要做吗?浅谈其中的利与弊2020-12-25 783
-
怎样用纺织传感器制作手套控制器2019-08-07 3765
-
自制大功率激光手电,laser torch2018-09-20 2635
-
激光手电制作方法2018-09-13 20245
-
自制激光手电教程2018-08-18 26718
-
基于STM32的绿激光手术仪控制系统的设计2017-09-25 912
-
自制大功率激光手电制作及设计2009-12-25 16766
全部0条评论

快来发表一下你的评论吧 !

