

温度报警器的制作
电子说
描述
步骤1:购买产品
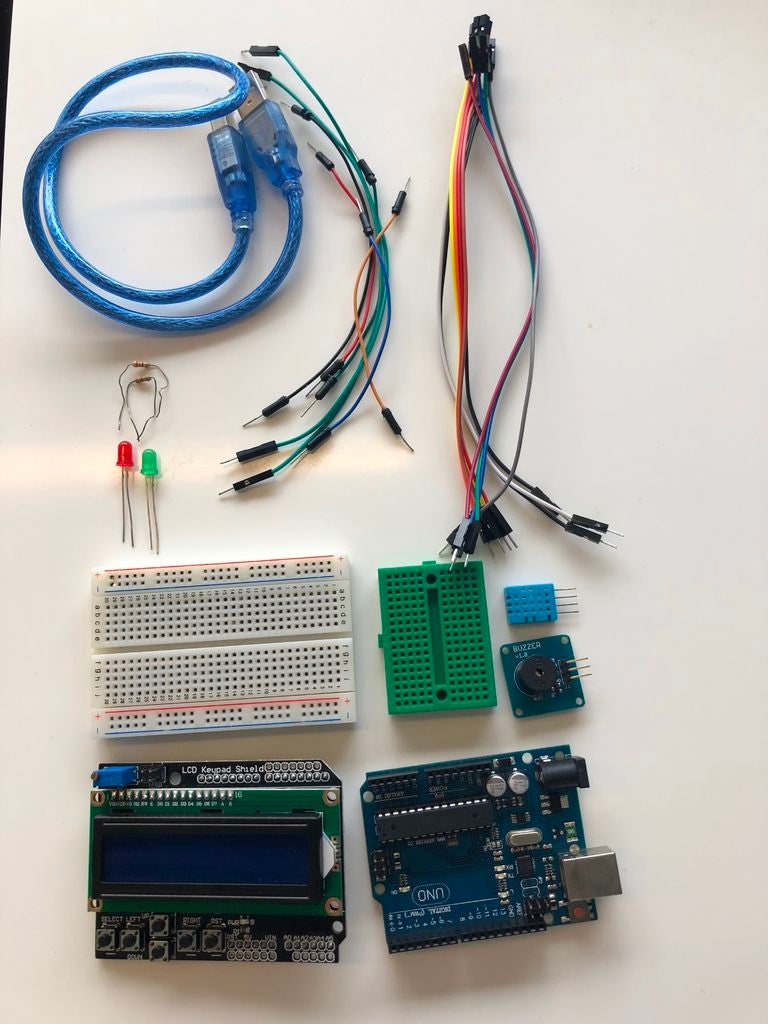
项目列表:
- Arduino Uno
- LCD键盘屏蔽
- 11对公母线
- 7对公对母线
- DHT温度传感器
- 大型面包板
- 小型面包板
- 无源蜂鸣器(5V)
- 绿色LED
- 红色LED
- 2个电阻(330欧姆)
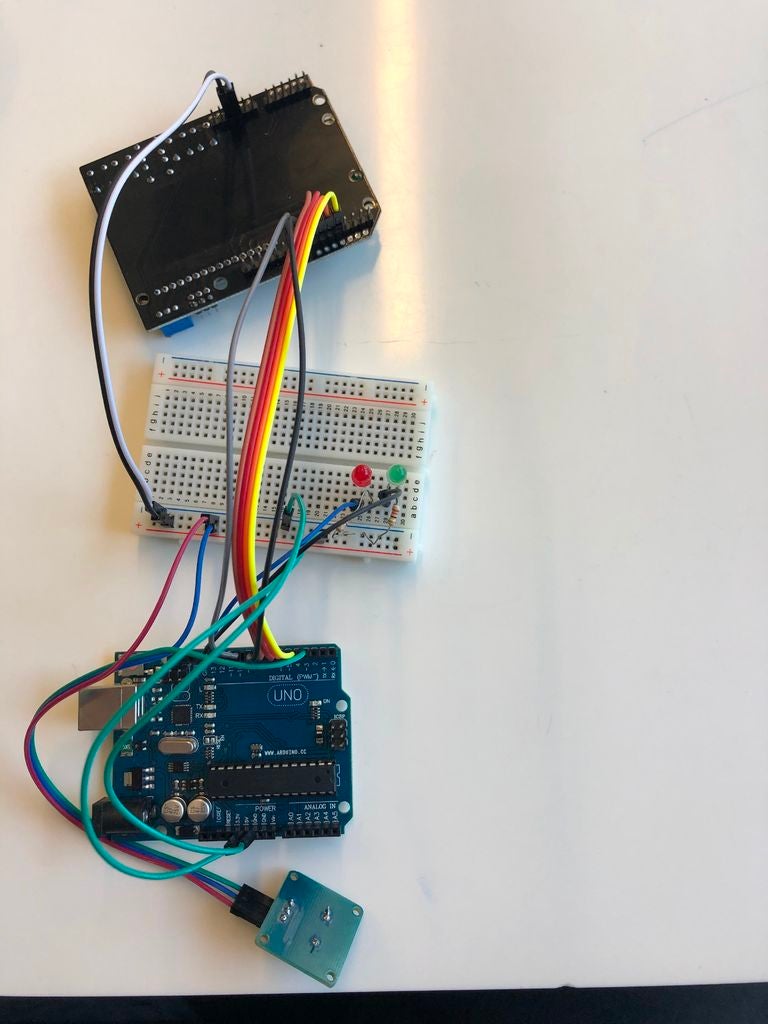
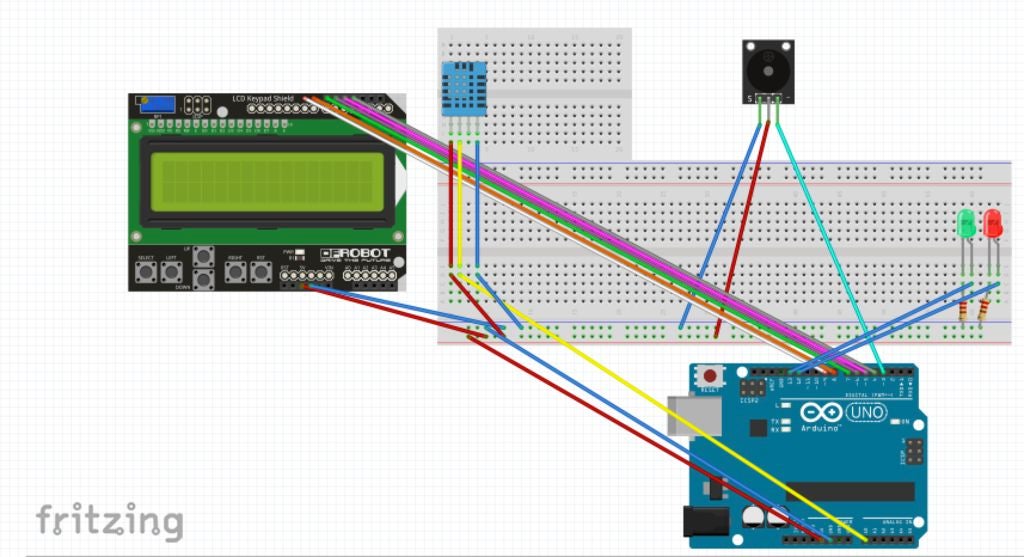
步骤2:组装LCD键盘
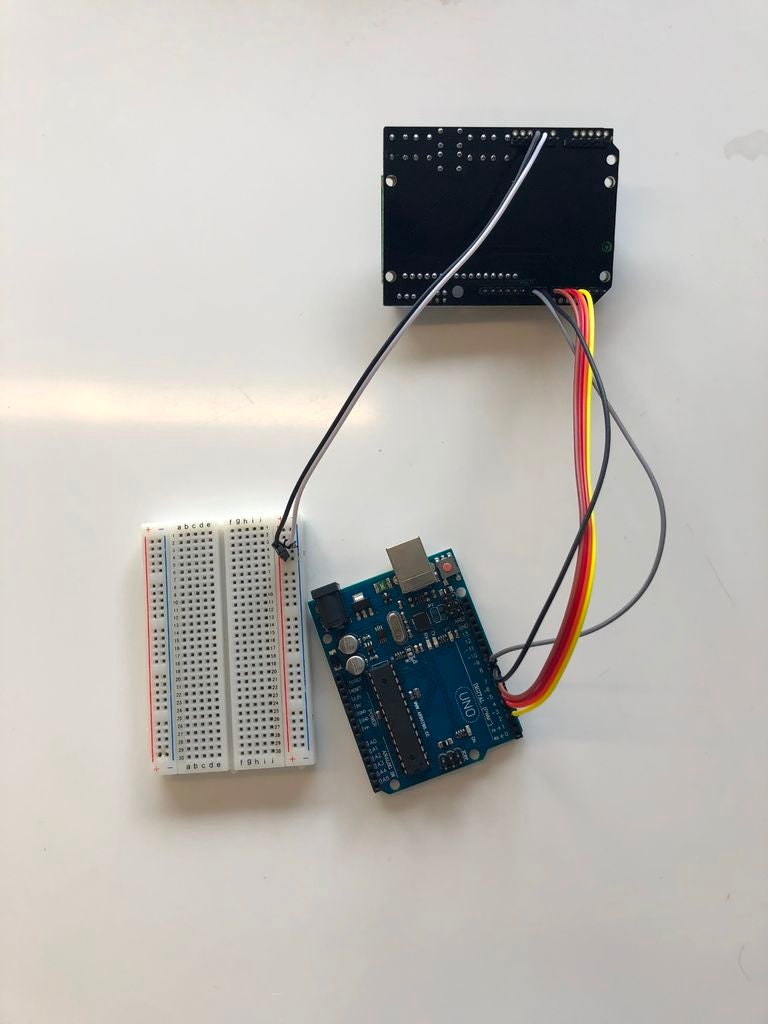
将橙色线放入LCD键盘( 5从右上角开始,另一边进入Arduino板的端口4.
将红线放入LCD键盘(右上角为6),另一端插入端口5 in Arduino板。
将蓝线放入LCD键盘(右上角7个),另一侧插入Ard端口6 uino board。
将粉红色线放入LCD键盘(右上方8个),另一侧放入Arduino板的端口7中。
将灰色线放入LCD键盘(右上角为9),另一端为Arduino板上的端口8.
将白线放入LCD键盘(右上角为10),另一侧为Arduino板上的端口9。
将白线放入LCD键盘(右下角为9),另一侧放入面包板的负极。
放置灰色线进入LCD键盘(右下方10个),另一侧进入面包板正极。
步骤3:无源蜂鸣器组装
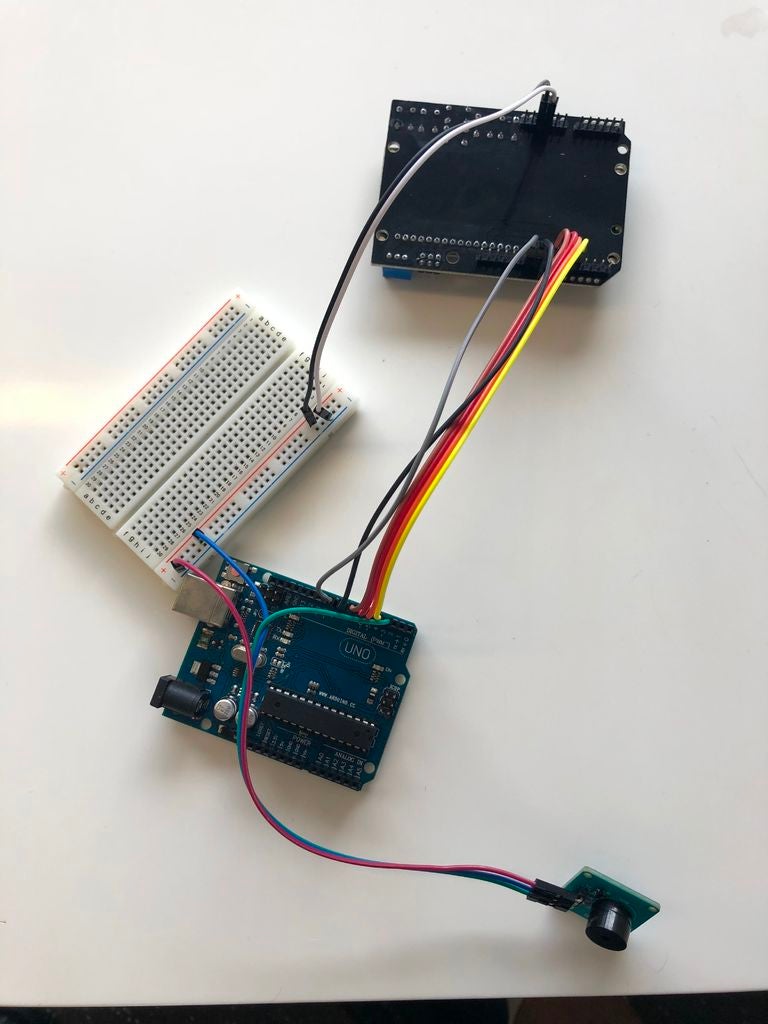
将灰线放入无源蜂鸣器的“SIG”端口,另一端插入Arduino板的端口3.
将蓝线放入‘UCC ’被动蜂鸣器的端口,另一侧进入面包板的正极。
将紫色线放入无源蜂鸣器的“GND”端口,另一端进入面包板的负极。
步骤4:装配DHT温度传感器
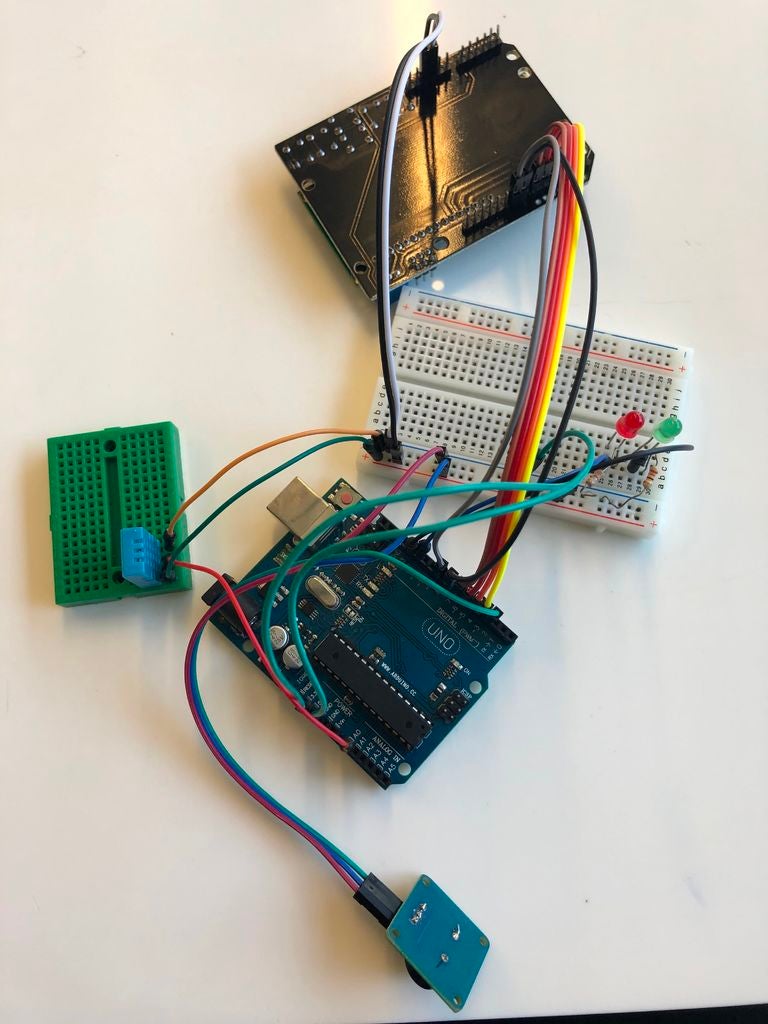
将DHT温度传感器放入H14-H17点。
将橙色线放入位于J14位置的面包板中,将另一端放入面板中的负排。
将白线放入位于J16位置的面包板中,将另一端放入端口A0中。
将灰线放入位于J17位置的面包板中,将另一端放入面包板中的正排。
步骤5:组装LED
将绿色LED的正极线放入D28,将负极线放入D29,放入面包板。
将红色LED的正极线放入D25,将负极线放入D26,放入面包板。
将电阻器的一侧放在位置B29(绿色LED)和另一侧在负排中。
将电阻器的一侧放在位置B26(红色LED)和t在负排的另一侧。
将灰色线放在面包板位置B28,另一侧放入Arduino板的端口13。
将绿色线放入面包板位置B25,另一侧进入Arduino板的端口12。
步骤6:接地和5V端口的组装
将黄线放入面板正面和Arduino板上‘GND’的另一面。
将黄线放入面包板负极,另一面放入Arduino板的“5V”。
第7步:插入代码和打印框
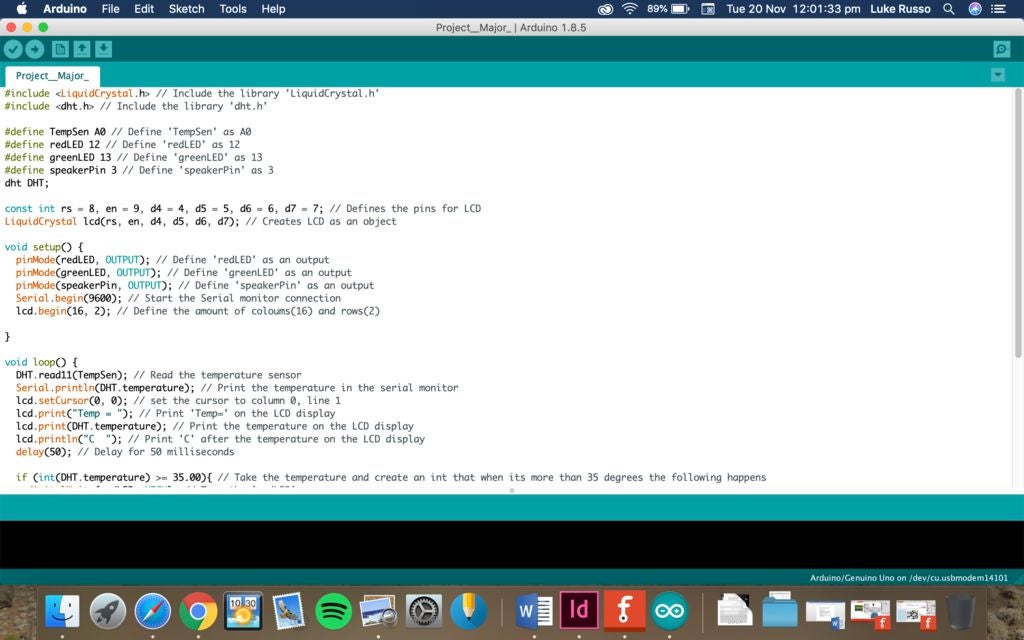
#include // Include the library ‘LiquidCrystal.h’
#include // Include the library ‘dht.h’
#define TempSen A0 // Define ‘TempSen’ as A0
#define redLED 12 // Define ‘redLED’ as 12
#define greenLED 13 // Define ‘greenLED’ as 13
#define speakerPin 3 // Define ‘speakerPin’ as 3
dht DHT;
const int rs = 8, en = 9, d4 = 4, d5 = 5, d6 = 6, d7 = 7; // Defines the pins for LCD
LiquidCrystal lcd(rs, en, d4, d5, d6, d7); // Creates LCD as an object
void setup() {
pinMode(redLED, OUTPUT); // Define ‘redLED’ as an output
pinMode(greenLED, OUTPUT); // Define ‘greenLED’ as an output
pinMode(speakerPin, OUTPUT); // Define ‘speakerPin’ as an output
Serial.begin(9600); // Start the Serial monitor connection
lcd.begin(16, 2); // Define the amount of coloums(16) and rows(2)
}
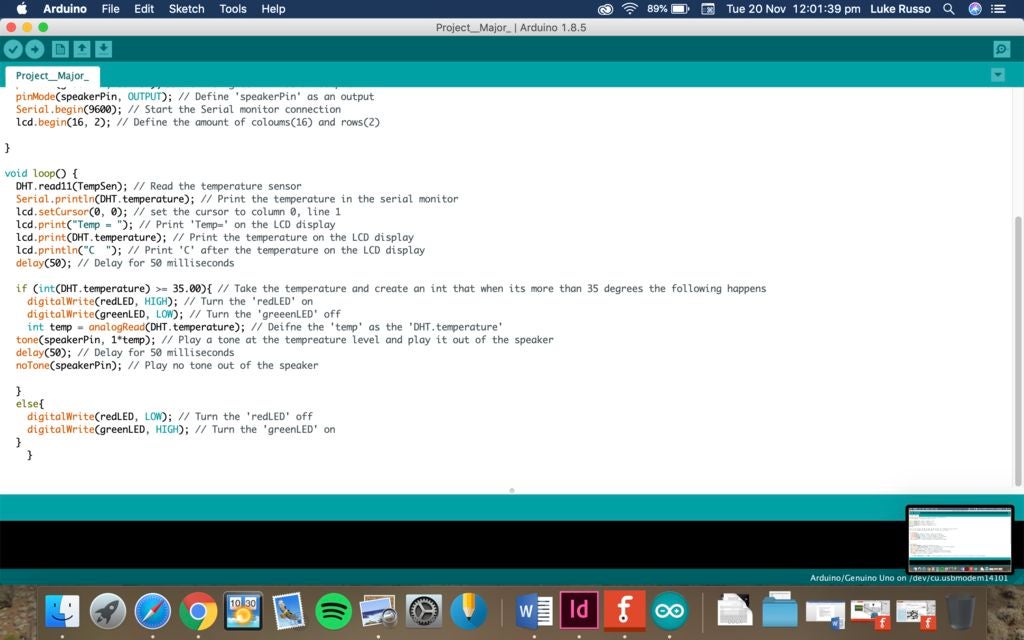
void loop() {
DHT.read11(TempSen); // Read the temperature sensor
Serial.println(DHT.temperature); // Print the temperature in the serial monitor
lcd.setCursor(0, 0); // set the cursor to column 0, line 1
lcd.print(“Temp = ”); // Print ‘Temp=’ on the LCD display
lcd.print(DHT.temperature); // Print the temperature on the LCD display
lcd.println(“C ”); // Print ‘C’ after the temperature on the LCD display
delay(50); // Delay for 50 milliseconds
if (int(DHT.temperature) 》= 35.00){ // Take the temperature and create an int that when its more than 35 degrees the following happens
digitalWrite(redLED, HIGH); // Turn the ‘redLED’ on
digitalWrite(greenLED, LOW); // Turn the ‘greeenLED’ off
int temp = analogRead(DHT.temperature); // Deifne the ‘temp’ as the ‘DHT.temperature’
tone(speakerPin, 1*temp); // Play a tone at the tempreature level and play it out of the speaker
delay(50); // Delay for 50 milliseconds
noTone(speakerPin); // Play no tone out of the speaker
}
else{
digitalWrite(redLED, LOW); // Turn the ‘redLED’ off
digitalWrite(greenLED, HIGH); // Turn the ‘greenLED’ on
}
}
- 相关推荐
- 热点推荐
- 温度报警器
-
温度报警器2023-10-15 782
-
温度报警器的制作与调试过程分析2019-08-02 12552
-
采用热敏电阻制作温度报警器2019-01-29 14289
-
多点温度报警器2016-12-16 715
-
温度报警器的设计2016-07-01 1197
-
基于51单片机的温度报警器设计2015-11-19 4197
-
温度报警器的设计与制作2012-06-01 689
-
火灾报警 温度报警器 短信报警器2010-07-01 1679
-
地震报警器的制作方法(问答式)2009-12-24 6945
-
双限温度报警器电路设计及工作原理2009-08-14 4621
-
防盗报警器电路及制作2009-04-14 1982
-
温度报警器电路图2007-12-08 7089
-
[图文]断线报警器制作2006-04-16 2785
全部0条评论

快来发表一下你的评论吧 !
