

怎样使用RFID RC-522和Arduino创建一个简单的超市应用程序
电子说
描述
步骤1:设置Arduino和RFID RC-522(物理连接)

只需将arduino与RFID连接-RC522,如上图所示。
警告:仅提供3.3V电压,否则模块将烧坏
为Uno/Nano和Mega插脚 strong》
RC522 MODULE Uno/Nano MEGA
SDA D10 D9
SCK D13 D52
MOSI D11 D51
MISO D12 D50
IRQ N/A N/A
GND GND GND
RST D9 D8
3.3V 3.3V 3.3V
第2步:Arduino代码。
复制以下代码,然后将其上传到您的Arduino
/*
PINOUT:
RC522 MODULE Uno/Nano MEGA
SDA D10 D9
SCK D13 D52
MOSI D11 D51
MISO D12 D50
IRQ N/A N/A
GND GND GND
RST D9 D8
3.3V 3.3V 3.3V
*/
/* Include the standard Arduino SPI library */
#include
/* Include the RFID library */
#include
/* Define the DIO used for the SDA (SS) and RST (reset) pins. */
#define SDA_DIO 9
#define RESET_DIO 8
/* Create an instance of the RFID library */
RFID RC522(SDA_DIO, RESET_DIO);
int reader=0;
void setup()
{
Serial.begin(9600);
/* Enable the SPI interface */
SPI.begin();
/* Initialise the RFID reader */
RC522.init();
}
void loop()
{
/* Temporary loop counter */
byte i;
/* Has a card been detected? */
if (RC522.isCard())
{
/* If so then get its serial number */
RC522.readCardSerial();
/* Output the serial number to the UART */
for(i = 0; i 《= 2; i++)
{
Serial.print(RC522.serNum[i],DEC);
//Serial.print(RC522.serNum[i],HEX);
}
Serial.print(“,”);
Serial.print(reader++);
Serial.println();
}
delay(1000);
}
步骤3:设置MySQL
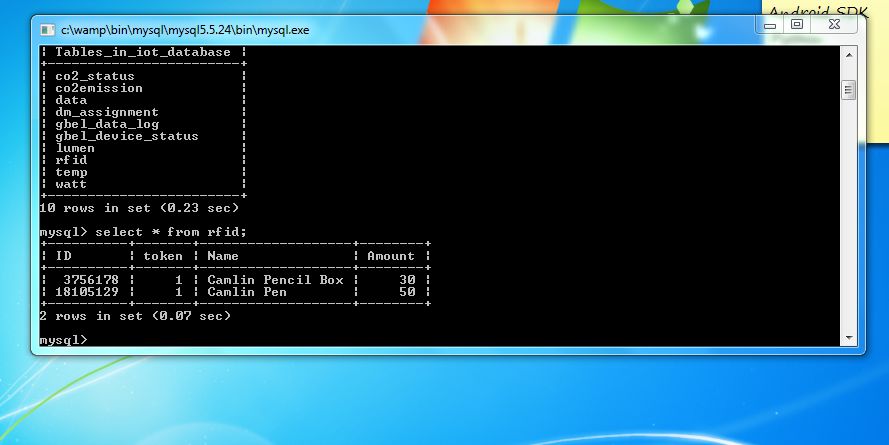
为MySQL安装Wamp服务器并将其配置为存储数据(
运行wamp服务器打开MySQL控制台
选择数据库
然后为您的数据创建表
create table rfid(ID int(8),token int(1),Name varchar(20),Amount int(4));
现在查看此链接以了解如何获取您的RFID标签值,然后使用以下代码插入数据。不要忘记将ID值替换为您的RFID标签值
insert into rfid values(3756178,1,‘Pencil’,20);
使用令牌值作为 1 ,以便在首次读取标签值后,它将自动更改为 2 读取未插入数据库的卡时,不要使用 0 作为令牌值,它将分配0,然后将其显示为“未知卡”。
步骤4:设置处理IDE
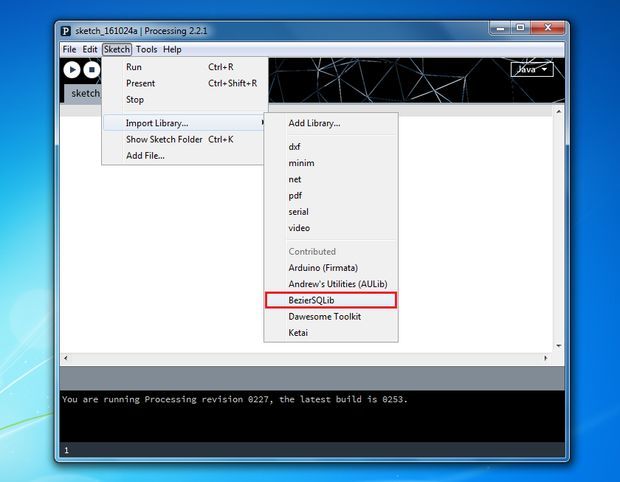
下载并安装处理IDE 2.2.1
将上述给定的ZIP提取到MyDocuments/Processing/Libraries
现在打开处理的IDE,并检查库是否正确安装(如上图所示)
然后复制以下代码进行处理并自行命名
import de.bezier.data.sql.*;
import processing.serial.*;
//import java.math.BigInteger;
// created 2005-05-10 by fjenett
// updated fjenett 20080605
MySQL dbconnection;
String s=“ ”;
int Wheight=700;
int Wwidth=1200;
long ID;
int token;
int Amount;
int Total=0;
String[] a={“NULL”,“NULL”};
int end = 10; // the number 10 is ASCII for linefeed (end of serial.println), later we will look for this to break up individual messages
String serial; // declare a new string called ‘serial’ 。 A string is a sequence of characters (data type know as “char”)
Serial port;
String curr,prev,Name;
PFont f;
void setup()
{
//size( Wwidth,Wheight );
size(700,500);
f=createFont(“Arial”,24,true);
// this example assumes that you are running the
// mysql server locally (on “localhost”)。
//
// replace --username--, --password-- with your mysql-account.
//
String user = “root”;
String pass = “”;
// name of the database to use
//
String database = “IOT_Database”;
// name of the table that will be created
String table = “”;
// connect to database of server “localhost”
dbconnection = new MySQL( this, “localhost”, database, user, pass );
port = new Serial(this, Serial.list()[0], 9600); // initializing the object by assigning a port and baud rate (must match that of Arduino)
port.clear(); // function from serial library that throws out the first reading, in case we started reading in the middle of a string from Arduino
serial = port.readStringUntil(end); // function that reads the string from serial port until a println and then assigns string to our string variable (called ‘serial’)
serial = null;
}
void draw()
{
background(255);
textFont(f,24);
fill(0);
text(“Total Amount Rs:”,400,400);
text(Total,585,400);
data();
while (port.available() 》 0)
{
//as long as there is data coming from serial port, read it and store it
serial = port.readStringUntil(end);
}
if (serial != null)
{
prev=curr;
curr=a[1];
a = split(serial, ‘,’); //a new array (called ‘a’) that stores values into separate cells (separated by commas specified in your Arduino program)
if((curr).equals(prev))
{
//
}
else
{
//println(“curr”,curr);
//println(“Prev”,prev);
function();
}
}
}
void function()
{
if ( dbconnection.connect() )
{
// now read it back out
//
dbconnection.query( “SELECT * from rfid where ID=”+a[0]+“” );
while (dbconnection.next())
{
ID = dbconnection.getInt(“ID”);
token = dbconnection.getInt(“token”);
Amount = dbconnection.getInt(“Amount”);
}
if(token==0)
{
println(“Ok”);
textFont(f,54);
fill(255,0,0,160);
text(“Unknown Item Detected”,50,300);
delay(2000);
}
else if(token==1)
{
Total=Total+Amount;
dbconnection.query(“update rfid set token=2 where ID=”+a[0]+“” );
println(“Ok”);
textFont(f,24);
fill(255,0,0,160);
//text(“Item Added”,10,30);
delay(1000);
}
else if(token==2)
{
Total=Total-Amount;
dbconnection.query(“update rfid set token=1 where ID=”+a[0]+“” );
println(“Ok”);
textFont(f,24);
fill(255,0,0,160);
//text(“Item Removed”,10,30);
delay(1000);
}
else
{
}
dbconnection.close();
}
else
{
// connection failed !
}
}
void data()
{
int position=100;
if ( dbconnection.connect() )
{
dbconnection.query( “SELECT * from rfid where token=2”);
while (dbconnection.next())
{
Name = dbconnection.getString(“Name”);
Amount = dbconnection.getInt(“Amount”);
textFont(f,24);
fill(0,0,255,160);
text(Name,10,position);
fill(0,0,0,160);
text(Amount,215,position);
position=position+30;
}
}
dbconnection.close();
}
第5步:执行程序
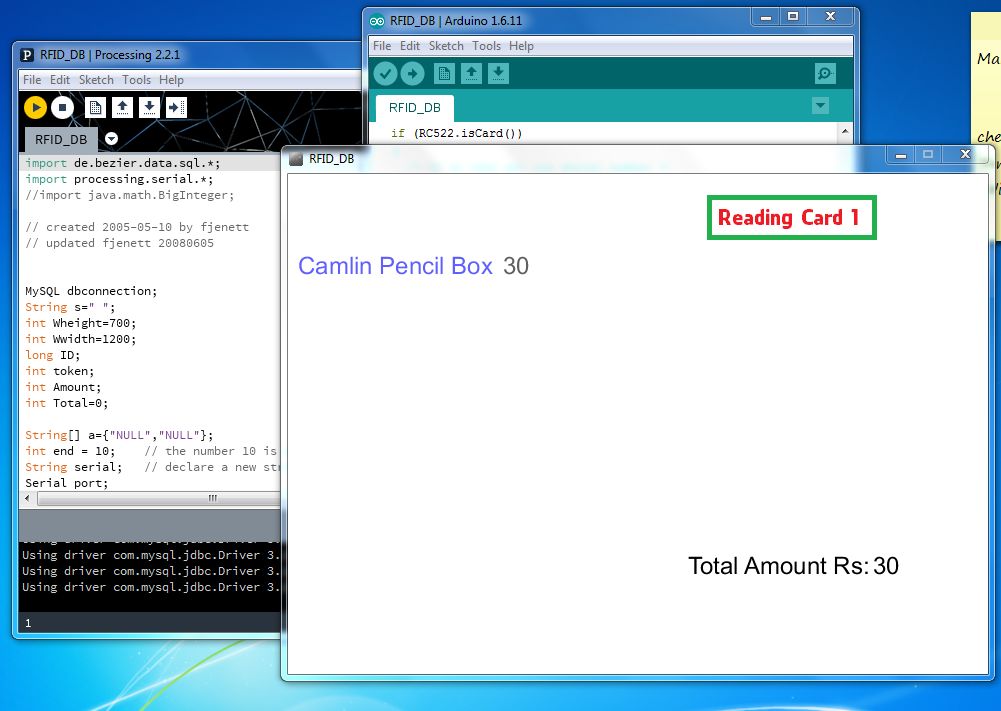
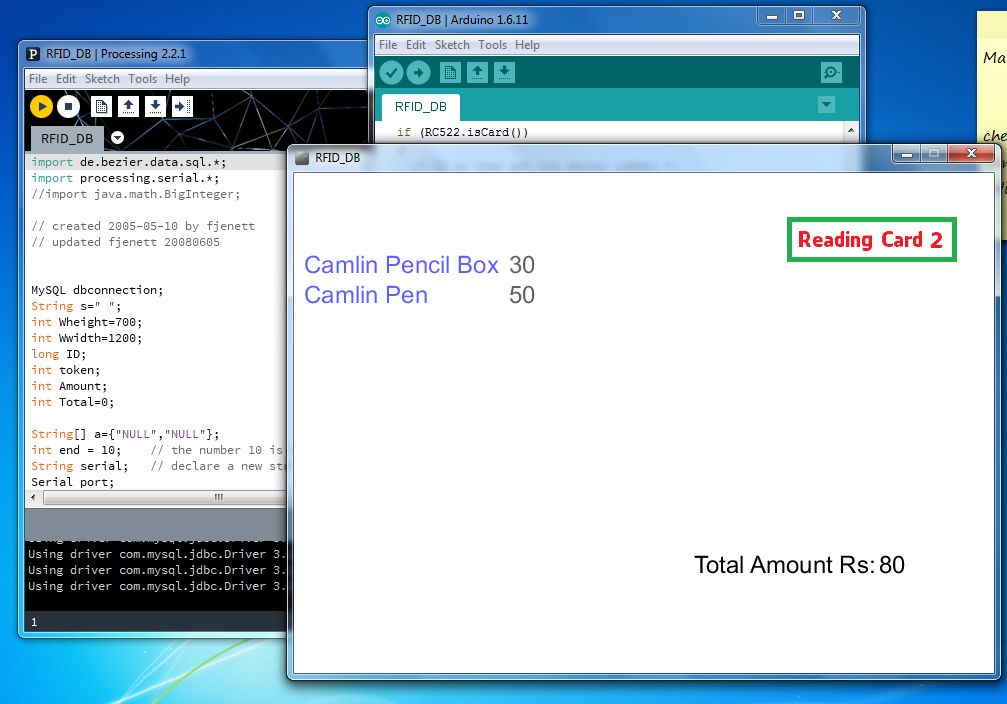
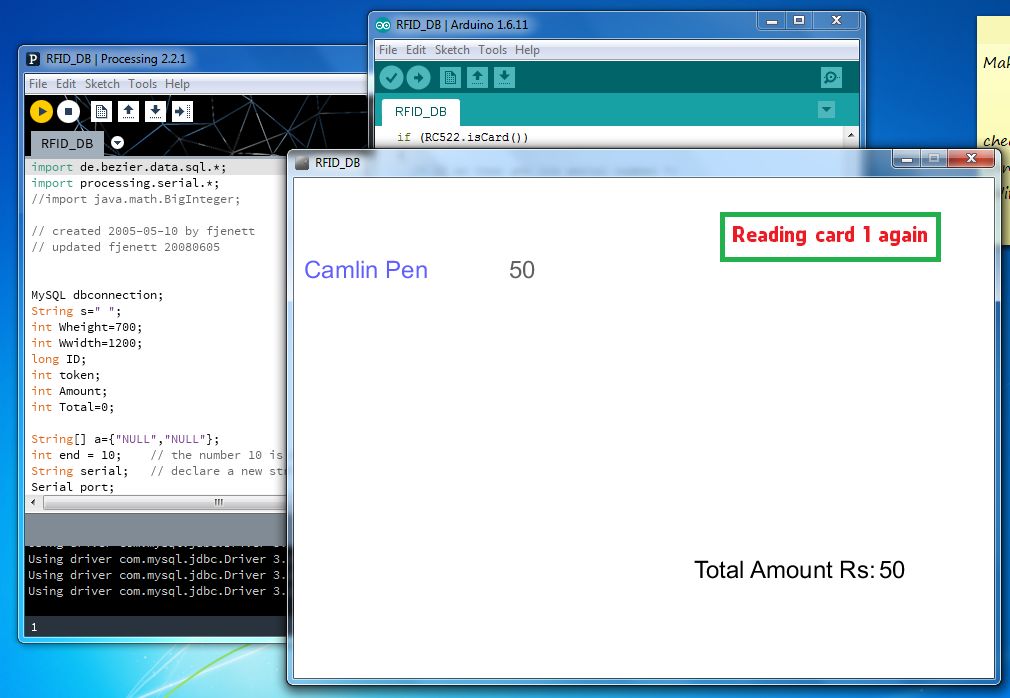
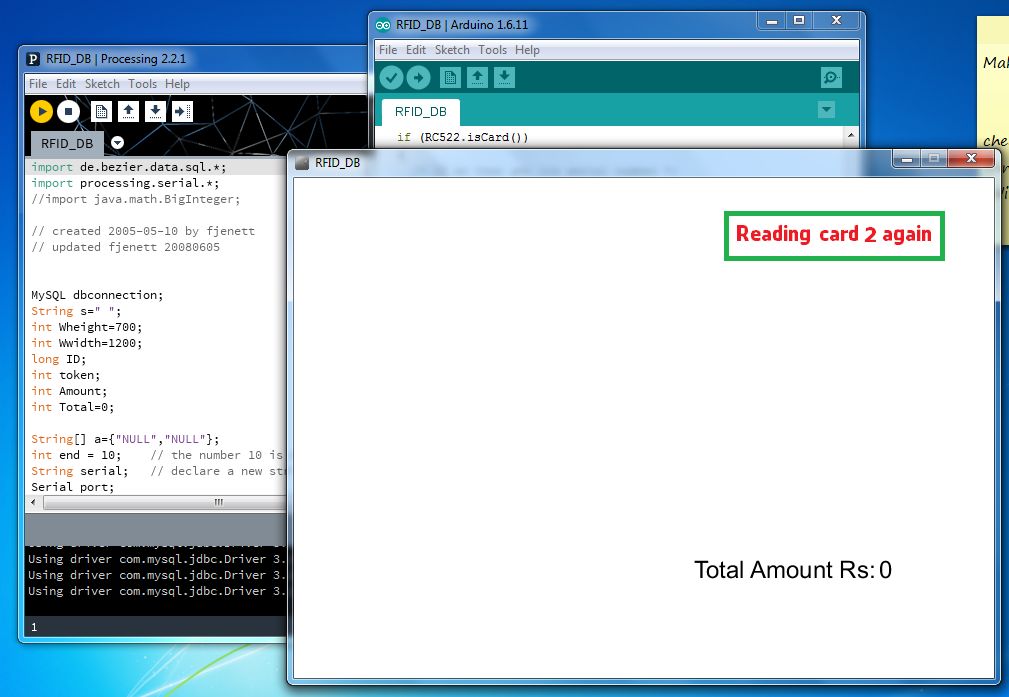
通过单击运行按钮运行程序,请关闭弹出窗口,关闭窗口将停止执行,并在以下查询中查看在MySQL中存储的数据。..
责任编辑:wv
-
RC-522调试2014-10-31 2821
-
请问怎么用Arduino控制RC522刷卡生成坐标?2020-04-02 2116
-
S50(M1)卡是怎样驱动RFID-RC522模块的呢2021-11-15 2317
-
怎样去实现RFID-RC522的ID读取并打印到串口呢2021-12-14 6076
-
SPI时序读写RFID-RC522的方法2022-02-08 2549
-
Arduino RFID模块的使用方法2022-02-15 1168
-
使用RFID-RC522模块与1.8寸TFT实现门禁设计2022-09-05 4109
-
RC522速成教程2016-03-28 1401
-
使用51单片机设计的RFID RC522智能钱包程序免费下载2019-08-28 1716
-
如何创建Windows 10 Arduino应用程序2019-12-03 3324
-
RFID模块RC522的程序和电路图等详细资料合集免费下载2020-03-10 5618
-
基于Arduino Uno开发板与RFID-RC522模块的RFID读卡器设计2021-01-13 14519
-
RC522 RFID 射频模块天线计算工具2020-11-03 3248
-
STM32 Cubemax(十三) ——SPI时序读写RFID-RC5222021-12-04 1892
-
Arduino使用RFID模块来储存卡信息实现智能门锁(MF RC522)2021-12-16 1262
全部0条评论

快来发表一下你的评论吧 !

