

如何制作仅通过树莓派传输猫图片的WiFi网络
电子说
描述
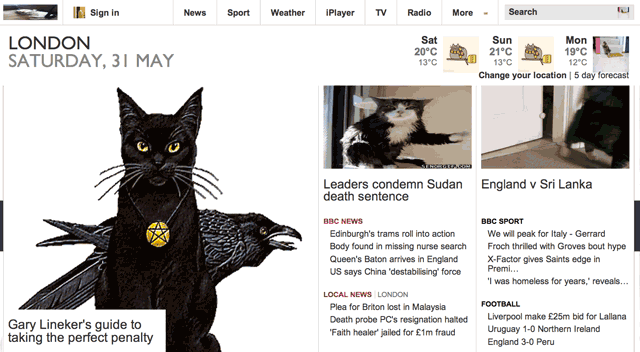
这是一个常见的用例场景:您想广播一个公共WiFi网络供任何人使用,但是您有严格的要求,只允许使用猫图像。好消息:您的Raspberry Pi是完美的 transmoggification 机器。感兴趣吗?继续阅读。
您需要什么
Raspberry Pi模型B (Raspberry Pi的新功能?这是初学者需要了解的一切,都以视频形式)
4GB或更大容量的SD卡
以太网电缆
兼容的WiFi适配器
MicroUSB电源线和适配器
理论
该项目的开始与几周前我们建造的洋葱路由器相同。首先,我们将Raspberry Pi变成标准的WiFi网络,然后在中间放置一个代理。代理将通过Perlscript过滤帖子,它将用TheCatAPI.com的cat GIF替换每个HTTP请求上的图像。看着困惑的用户既极度沮丧,又异常镇定。这是BBC,事后修改。
建立WiFi网络
由于本教程的这一部分完全相同作为DIY OnionRouter,请按照此处的说明进行操作,直到安装Tor 。
我们唯一需要做的小更改就是广播一个开放的WiFi网络而不是一个安全的WiFi网络。使用WPA。完成此处的设置后,请更改/etc/hostapd/hostapd.conf ,并粘贴以下配置。重新开始应用更改。
interface=wlan0
driver=nl80211
ssid=Kittens
hw_mode=g
channel=6
auth_algs=1
wmm_enabled=0
您现在应该在Raspberry Pi上广播一个可以公开访问的无线网络。本指南的其余部分将重点放在使有趣的事情发生上。
如果事情不起作用,请键入:
ifconfig -a
,然后查找wlan0上的IP地址。如果重新启动时未分配,请尝试以下操作:
sudo nano /etc/default/ifplugd
更改以下行:
INTERFACES=“auto”
HOTPLUG_INTERFACES=“all”
至:
INTERFACES=“eth0”
HOTPLUG_INTERFACES=“eth0”
重新启动,并确认您能够连接到WiFi网络并访问Internet。
Squid Proxy and IPTables
从安装先决条件开始,然后创建一个新的路由表。稍后我们将从Raspberry Pi提供图像,因此我们还将需要Apache Web服务器。
sudo apt-get install squid3 bridge-utils apache perl
nano iptables.sh
粘贴以下内容:
iptables -t nat -A POSTROUTING -j MASQUERADE
iptables -t nat -A PREROUTING -i wlan0 -p tcp -m tcp --dport 80 -j DNAT --to-destination 192.168.42.1:3128
iptables -t nat -A PREROUTING -i eth1 -p tcp -m tcp --dport 80 -j REDIRECT --to-ports 3128
保存,然后退出。
chmod +x iptables.sh
sudo cp iptables.sh /etc/init.d/
sudo update-rc.d iptables.sh start 99

忽略警告,仅表示我们还没有遵守某些Debian规则(但没有破坏任何东西)。最后,我们仍然在引导时使用旧的 iptables 规则,因此从/etc/network/interfaces
up iptables-restore 《 /etc/iptables.ipv4.nat
(删除或注释掉)
然后重新启动。接下来,我们将删除默认的Squid代理配置,然后重新制作一个。
sudo rm /etc/squid3/squid.conf
sudo nano /etc/squid3/squid.conf
将以下内容粘贴到空白文件中:
cache_mgr pi
cachemgr_passwd pi all
redirect_program /home/pi/cats.pl
acl manager proto cache_object
acl localhost src 127.0.0.1/32 ::1
acl to_localhost dst 127.0.0.0/8 0.0.0.0/32 ::1
acl localnet src 192.168.42.0/24 # RFC1918 possible internal network
acl SSL_ports port 443
acl Safe_ports port 80 # http
acl Safe_ports port 21 # ftp
acl Safe_ports port 443 # https
acl Safe_ports port 70 # gopher
acl Safe_ports port 210 # wais
acl Safe_ports port 1025-65535 # unregistered ports
acl Safe_ports port 280 # http-mgmt
acl Safe_ports port 488 # gss-http
acl Safe_ports port 591 # filemaker
acl Safe_ports port 777 # multiling http
acl CONNECT method CONNECT
http_access allow manager localhost
http_access deny manager
http_access deny !Safe_ports
http_access deny CONNECT !SSL_ports
http_access allow localnet
http_access allow localhost
http_access deny all
http_port 3128 transparent
umask 022
cache_mem 128 MB
cache_dir ufs /var/spool/squid3 1500 16 256
coredump_dir /var/spool/squid3
refresh_pattern ^ftp: 1440 20% 10080
refresh_pattern ^gopher: 1440 0% 1440
refresh_pattern -i (/cgi-bin/|?) 0 0% 0
refresh_pattern 。 0 20% 4320
保存并退出。使用以下命令初始化缓存目录,然后编辑用于分类所有图像的脚本:
sudo squid3 -z
nano /home/pi/cats.pl
粘贴:
#!/usr/bin/perl
$|=1;
$count = 0;
$pid = $$;
open (DEBUG, ‘》》/tmp/cats.log’);
autoflush DEBUG 1;
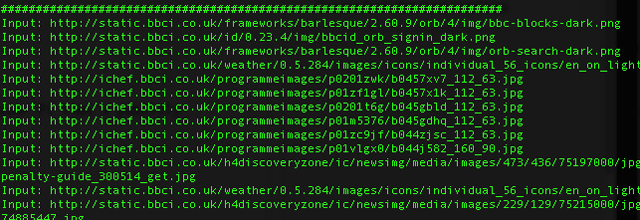
print DEBUG “######################################################################## ”;
while (《》) {
chomp $_;
if (m/nosquid/) {
print DEBUG “Input NOSQUID: $url ”;
print “$_ ”;
print DEBUG “Output NOSQUID: $_ ”;
}
elsif ($_ =~ /(.*.jpg)/i) {
$url = $1;
print DEBUG “Input: $url ”;
system(“/usr/bin/wget”, “-q”, “-O”,“/var/www/images/$pid-$count.gif”, “http://thecatapi.com/api/images/get?format=src&type=gif&nosquid”);
chmod 0777,“/var/www/images/$pid-$count.gif”;
print “http://127.0.0.1/images/$pid-$count.gif ”;
}
elsif ($_ =~ /(.*.gif)/i) {
$url = $1;
print DEBUG “Input: $url ”;
system(“/usr/bin/wget”, “-q”, “-O”,“/var/www/images/$pid-$count.gif”, “http://thecatapi.com/api/images/get?format=src&type=gif&nosquid”);
chmod 0777,“/var/www/images/$pid-$count.gif”;
print “http://127.0.0.1/images/$pid-$count.gif ”;
}
elsif ($_ =~ /(.*.png)/i) {
$url = $1;
print DEBUG “Input: $url ”;
system(“/usr/bin/wget”, “-q”, “-O”,“/var/www/images/$pid-$count.gif”, “http://thecatapi.com/api/images/get?format=src&type=gif&nosquid”);
chmod 0777,“/var/www/images/$pid-$count.gif”;
print “http://127.0.0.1/images/$pid-$count.gif ”;
}
elsif ($_ =~ /(.*.jpeg)/i) {
$url = $1;
print DEBUG “Input: $url ”;
system(“/usr/bin/wget”, “-q”, “-O”,“/var/www/images/$pid-$count.gif”, “http://thecatapi.com/api/images/get?format=src&type=gif&nosquid”);
chmod 0777,“/var/www/images/$pid-$count.gif”;
print “http://127.0.0.1/images/$pid-$count.gif ”;
}
else {
print “$_ ”;
}
$count++;
}
使脚本可执行,我们还希望为其创建一些目录以供使用。
sudo chmod +x cats.pl
sudo mkdir /var/www/images
sudo chmod 777 /var/www/images
sudo usermod -a -G www-data proxy
sudo chown www-data:www-data /var/www
sudo chown www-data:www-data /var/www/images
touch /tmp/cats.log
chmod 777 /tmp/cats.log
您可以随时使用以下内容尾注日志:
tail -f /tmp/cats.log
尝试登录Pinterest,然后突然发现所有这些愚蠢的DIY盆栽植物项目和男士时装精选会更加吸引人。
如果您愿意倒置图片(原始脚本为Ex-Parrot,我只修改为处理一些权限错误),创建 upsidedown.pl 并粘贴以下内容。
#!/usr/bin/perl
$|=1;
$count = 0;
$pid = $$;
while (《》) {
chomp $_;
if ($_ =~ /(.*.jpg)/i) {
$url = $1;
system(“/usr/bin/wget”, “-q”, “-O”,“/var/www/images/$pid-$count.jpg”, “$url”);
system(“/usr/bin/mogrify”, “-flip”,“/var/www/images/$pid-$count.jpg”);
chmod 0777,“/var/www/images/$pid-$count.jpg”;
print “http://127.0.0.1/images/$pid-$count.jpg ”;
}
elsif ($_ =~ /(.*.gif)/i) {
$url = $1;
system(“/usr/bin/wget”, “-q”, “-O”,“/var/www/images/$pid-$count.gif”, “$url”);
system(“/usr/bin/mogrify”, “-flip”,“/var/www/images/$pid-$count.gif”);
chmod 0777,“/var/www/images/$pid-$count.gif”;
print “http://127.0.0.1/images/$pid-$count.gif ”;
}
elsif ($_ =~ /(.*.png)/i) {
$url = $1;
system(“/usr/bin/wget”, “-q”, “-O”,“/var/www/images/$pid-$count.png”, “$url”);
system(“/usr/bin/mogrify”, “-flip”,“/var/www/images/$pid-$count.png”);
chmod 0777,“/var/www/images/$pid-$count.png”;
print “http://127.0.0.1/images/$pid-$count.png ”;
}
elsif ($_ =~ /(.*.jpeg)/i) {
$url = $1;
system(“/usr/bin/wget”, “-q”, “-O”,“/var/www/images/$pid-$count.jpeg”, “$url”);
system(“/usr/bin/mogrify”, “-flip”,“/var/www/images/$pid-$count.jpeg”);
chmod 0777,“/var/www/images/$pid-$count.jpeg”;
print “http://127.0.0.1/images/$pid-$count.jpeg ”;
}
else {
print “$_ ”;;
}
$count++;
}
按照上面的其他步骤,更改文件名,使脚本可执行,然后修改Squid配置,使其指向 upsidedown.pl 而不是 cats.pl 。最后,您需要使用以下命令重新启动Squid:
sudo service squid3 restart
无论哪种情况,结果都很棒。如果您对这些脚本进行了其他修改或改进,使其具有其他功能,请在评论中让我输入,并在您的脚本中添加一个Pastebin链接。
责任编辑:wv
-
树莓派WiFi设置终极指南:分步方法与故障排除技巧!2025-07-10 2508
-
树莓派小技巧:无需键盘或显示器,如何通过WiFi设置树莓派?2025-06-26 2060
-
树莓派4B的WiFi配置过程2024-08-30 5420
-
树莓派zero wh坑分享2022-01-13 1496
-
树莓派Pico:仅4美元的MCU2021-12-04 1012
-
制作一辆简易的树莓派小车2021-09-03 1755
-
树莓派如何与wifi连接?2020-11-09 2190
-
使用树莓派制作HomeKit安防监控2020-05-30 4480
-
【微信精选】如此魔改树莓派?工程师的脑洞不服不行!2019-10-07 1784
-
如此魔改树莓派?工程师的脑洞不服不行!(内附树莓派资料)2019-09-26 3438
-
树莓派3wifi配置_树莓派3开启wifi热点_树莓派3的wifi使用教程2017-12-08 32207
-
树莓派连接WIFI2017-03-09 7186
-
树莓派网络控制的船2016-01-20 17422
-
树莓派力作!树莓派wifi小车。2014-09-02 24126
全部0条评论

快来发表一下你的评论吧 !
