

 RTT大赛作品:AB32VG1开发板—RGB交替闪烁
描述
【RTT大赛作品连载】AB32VG1开发板——RGB交替闪烁
1. 实验目的
让板载 RGB 灯交替闪烁
2. 开发板硬件平台
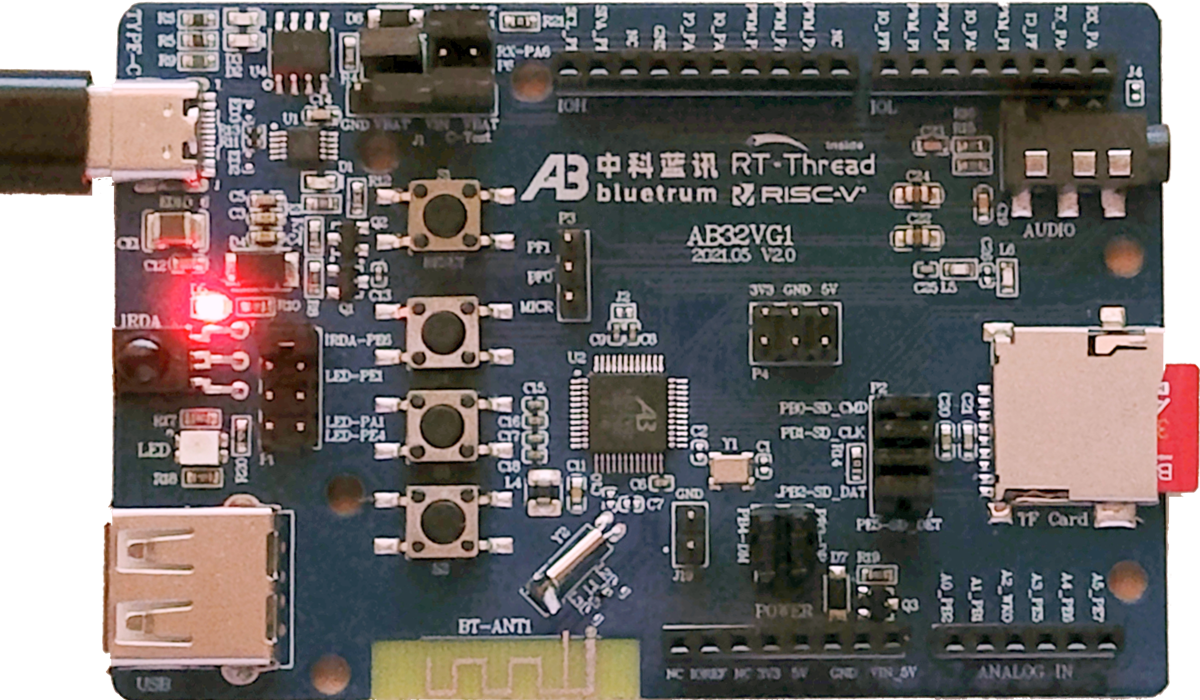
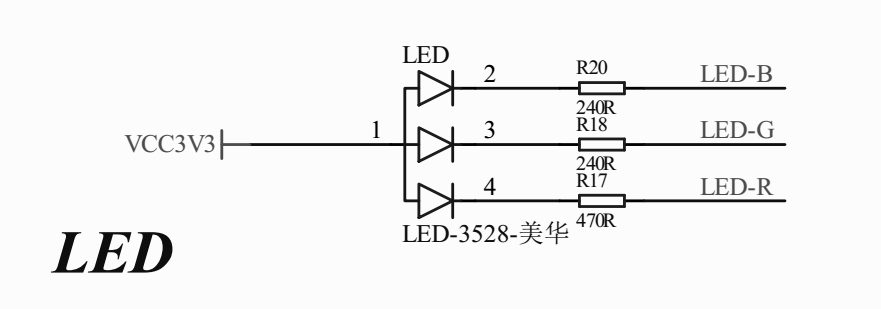
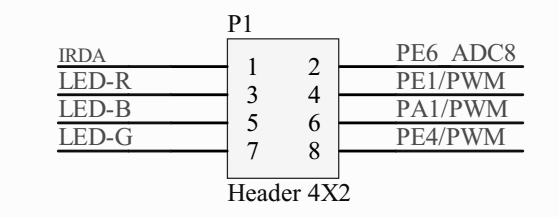
RGB灯硬件电路,可知,使用 RGB 灯组要使用
PE1 —— 红
PA1 —— 蓝
PE4 —— 绿
3. 软件编写
在 application 目录下,新建 rgb.c 和 rgb.h
//rgb.c
/*
 * Copyright (c) 2006-2021, RT-Thread Development Team
 *
 * SPDX-License-Identifier: Apache-2.0
 *
 * Change Logs:
 * Date           Author       Notes
 * 2021-11-06     Administrator       the first version
 */
#include "rgb.h"
#include "rtthread.h"
#include "board.h"

struct Led_s
{
    uint8_t LED_R;
    uint8_t LED_B;
    uint8_t LED_G;
};   //  定义一个 RGB 结构体

struct Led_s Led;
rt_thread_t rgb_thread = RT_NULL;

void RGB_Init(void)
{
    //  获得 led
    Led.LED_R = rt_pin_get("PE.1");
    Led.LED_G = rt_pin_get("PE.4");
    Led.LED_B = rt_pin_get("PA.1");
    //  设置引脚为输出方式
    rt_pin_mode(Led.LED_R, PIN_MODE_OUTPUT);
    rt_pin_mode(Led.LED_G, PIN_MODE_OUTPUT);
    rt_pin_mode(Led.LED_B, PIN_MODE_OUTPUT);

    rt_kprintf("rgb init success\n");
}

//传入参数  on=1:对应亮,on=0:对应灭
//红灯驱动
void RGB_Red(rt_bool_t on)
{
    rt_pin_write(Led.LED_G, PIN_HIGH);
    rt_pin_write(Led.LED_B, PIN_HIGH);
    if (on) {
        rt_pin_write(Led.LED_R, PIN_LOW);
    } else {
        rt_pin_write(Led.LED_R, PIN_HIGH);
    }
}
//蓝灯驱动
void RGB_Blue(rt_bool_t on){
    rt_pin_write(Led.LED_G, PIN_HIGH);
    rt_pin_write(Led.LED_R, PIN_HIGH);
    if (on) {
        rt_pin_write(Led.LED_B, PIN_LOW);
    } else {
        rt_pin_write(Led.LED_B, PIN_HIGH);
    }
}
//绿灯驱动
void RGB_Green(rt_bool_t on)
{
    rt_pin_write(Led.LED_R, PIN_HIGH);
    rt_pin_write(Led.LED_B, PIN_HIGH);
    if (on) {
        rt_pin_write(Led.LED_G, PIN_LOW);
    } else {
        rt_pin_write(Led.LED_G, PIN_HIGH);
    }
}

void rgb_switch(void)
{
    static uint8_t led_num = 0;
    if(led_num == 0)
        RGB_Red(1);
    else if(led_num == 1)
        RGB_Blue(1);
    else if(led_num == 2)
        RGB_Green(1);
    led_num++;
    if(led_num == 3)
        led_num = 0;
}

void rgb_thread_entry(void* p)
{
    RGB_Init();
    while(1)
    {
        rt_thread_mdelay(500);
        rgb_switch();
    }
}

static int Thread_RGB(void)
{
    rgb_thread = rt_thread_create("rgb", rgb_thread_entry, RT_NULL, 512, 10, 10);
    if(rgb_thread == RT_NULL)
    {
        rt_kprintf("Thread_GRB Init ERROR");
        return RT_ERROR;
    }
    rt_thread_startup(rgb_thread);
}

INIT_APP_EXPORT(Thread_RGB);

//rgb.h
/*
 * Copyright (c) 2006-2021, RT-Thread Development Team
 *
 * SPDX-License-Identifier: Apache-2.0
 *
 * Change Logs:
 * Date           Author       Notes
 * 2021-11-06     Administrator       the first version
 */
#ifndef APPLICATIONS_RGB_H_
#define APPLICATIONS_RGB_H_

#endif /* APPLICATIONS_RGB_H_ */
修改main.c
/*
 * Copyright (c) 2020-2021, Bluetrum Development Team
 *
 * SPDX-License-Identifier: Apache-2.0
 *
 * Change Logs:
 * Date           Author       Notes
 * 2020/12/10     greedyhao    The first version
 */

/**
 * Notice!
 * All functions or data that are called during an interrupt need to be in RAM.
 * You can do it the way exception_isr() does.
 */

#include
#include "board.h"

int main(void)
{
    rt_kprintf("Hello, world\n");

    while (1)
    {
        rt_thread_mdelay(500);
        rt_thread_mdelay(500);
    }
}
4. 程序编译下载
编译程序,点击小锤子即可。
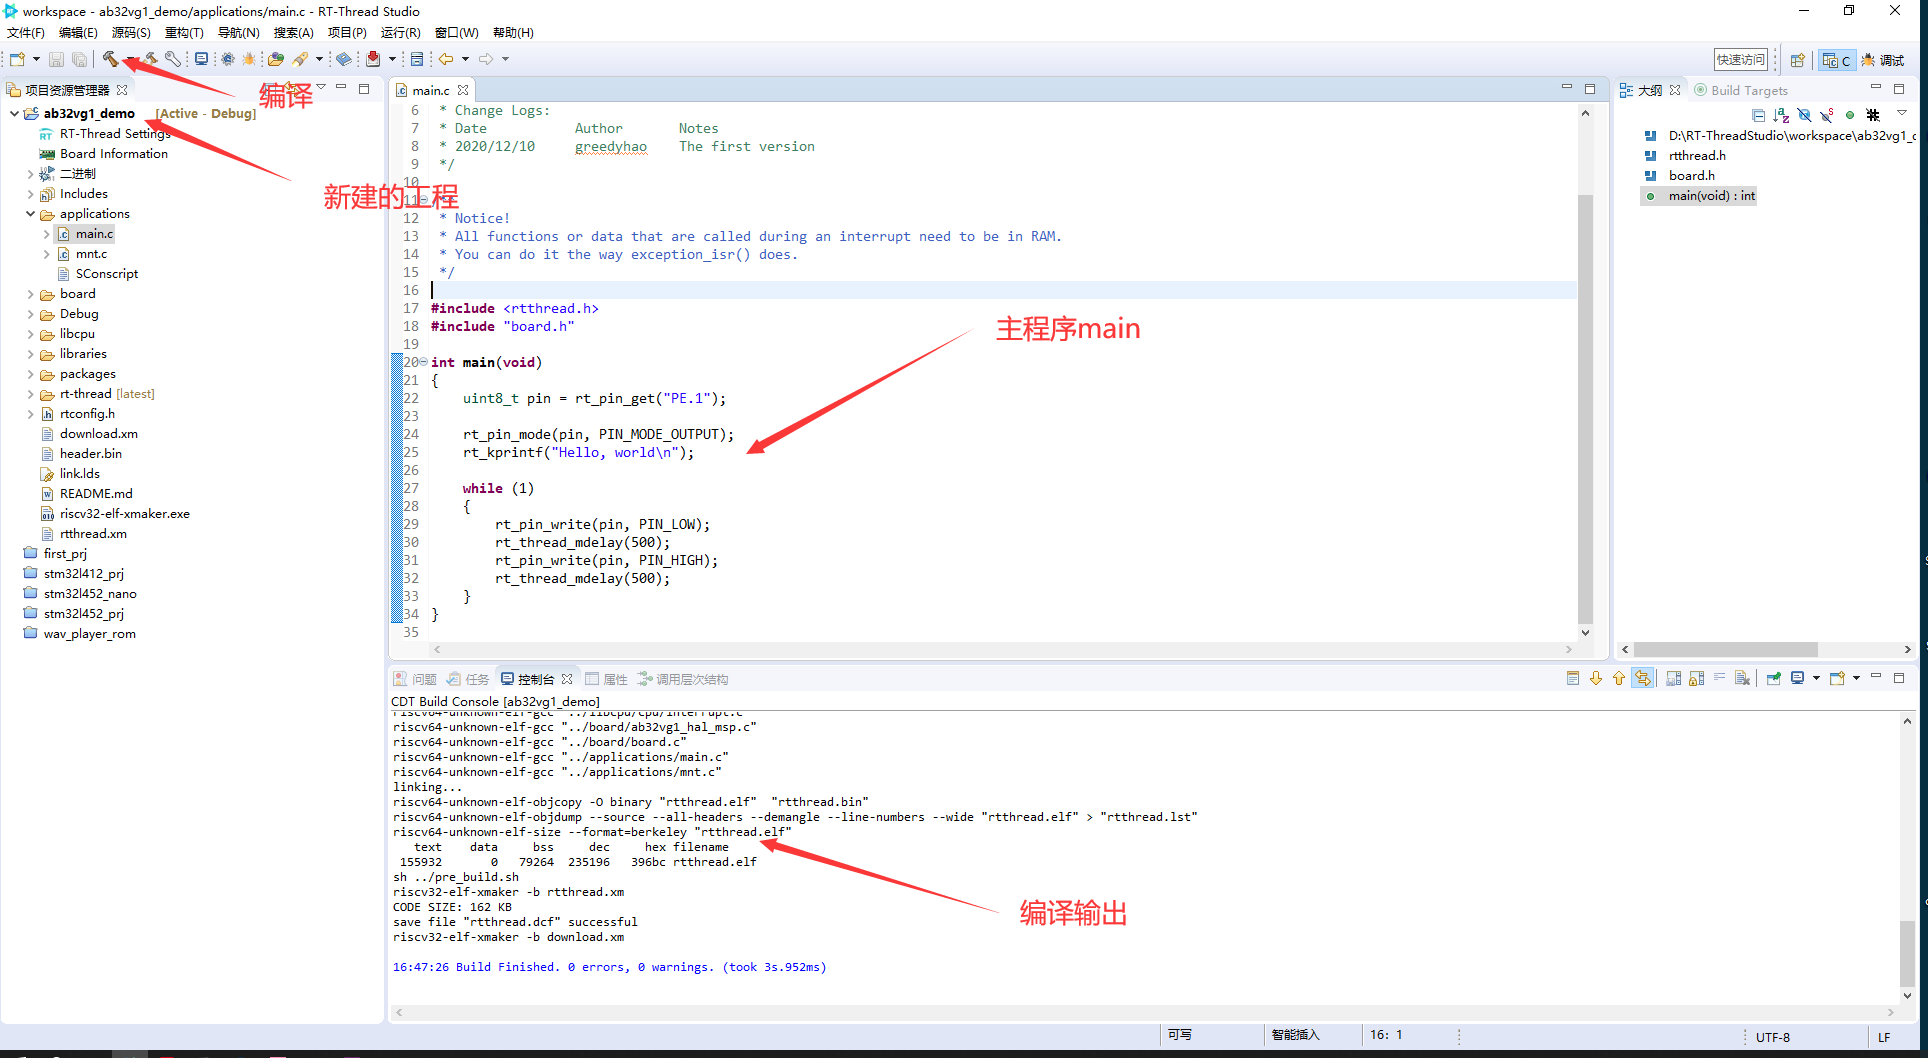
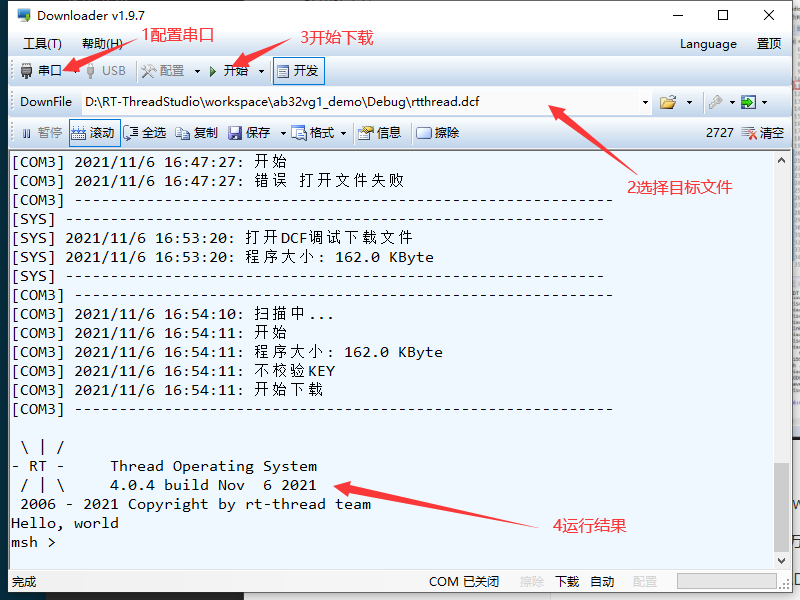
下载程序
打开我们下载的Downloader软件,双击Downloader.exe
配置连接串口,千万不要搞错串口号哦。
选择工程目录下的\Debug\rtthread.dcf,这里我的完整目录是
D:\RT-ThreadStudio\workspace\ab32vg1_demo\Debug\rtthread.dcf
点击开始即可下载成功
5. 实验现象:
download 串口打印 msh 控制台信息。
板载RGB灯,红色绿色蓝色交替闪烁。
6. 总结
每一个伟大的程序员都要从 led 及 helloworld 开始,哈哈。
编辑:fqj
声明:本文内容及配图由入驻作者撰写或者入驻合作网站授权转载。文章观点仅代表作者本人,不代表电子发烧友网立场。文章及其配图仅供工程师学习之用,如有内容侵权或者其他违规问题,请联系本站处理。
举报投诉
-
基于AB32VG1开发板的设备温度检测2022-02-18 2015
-
【RTT大赛作品连载】AB32VG1开发板之开箱篇2022-01-04 5156
-
【RTT大赛作品连载】基于AB32VG1 sdk BLE例程2021-12-06 6147
-
【RTT大赛作品连载】AB32VG1评估板 炫酷音乐播放器2021-11-26 8225
-
【RTT大赛作品连载】AB32VG1的开发环境搭建2021-11-17 10365
-
RTT大赛作品:AB32VG1开发板—按键扫描2021-11-15 5183
-
【RTT大赛作品连载】中科蓝讯AB32VG1开发板开箱篇2021-11-13 13475
-
【RTT大赛作品连载】AB32VG1评估板 音乐播放器2021-11-12 6955
-
【RTT大赛作品连载】AB32VG1评估板到货控制彩灯测试2021-11-07 5869
-
RTT大赛作品:AB32VG1开发板OLED显示实验2021-11-05 7229
-
【RTT大赛作品连载】AB32VG1评估板到货点灯测试2021-11-04 8366
-
RISC-V架构开发板AB32VG1测评之GPIO点灯2021-10-28 9463
-
【文章连载】RT-Thread创新应用大赛文章汇总2021-10-11 6187
全部0条评论

快来发表一下你的评论吧 !

