

一个由Arduino驱动的数字时钟详解
描述
本文要介绍的是一个由Arduino驱动的数字时钟,同时也是一个非常有趣的四冲程发动机模拟器,通过小时和分钟处的数字模拟汽车发动机的活塞运动。
介绍
由Arduino驱动的“四冲程数字时钟”是一个有趣的数字时钟内燃机模拟器。小时和分钟数字代表活塞移动并具有精确的RPM控制(100到800),RPM由显示屏中心的两列显示。
另一个有趣的视觉信息是气缸的点火顺序“1-3-4-2”。当活塞在压缩循环中位于气缸顶部时,火花开始。该项目可以作为学习管理点阵像素和引入简单动画功能的一个很好的练习。
四冲程内燃机
该项目中使用的发动机型号是四冲程循环的I4(直列四缸)。四冲程内燃机分为四个步骤(进气-压缩-燃烧-排气),其中一步如下图所示:
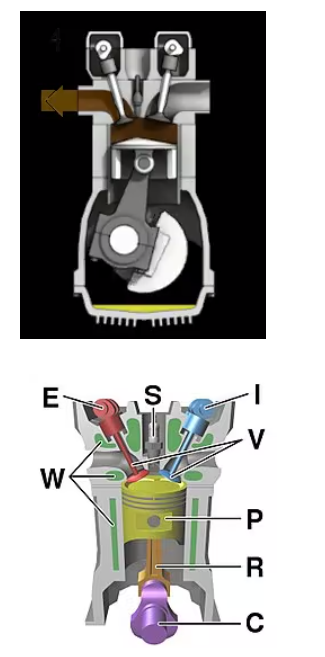
注意:更多内燃机的基本信息可以在维基百科上找到。
时钟
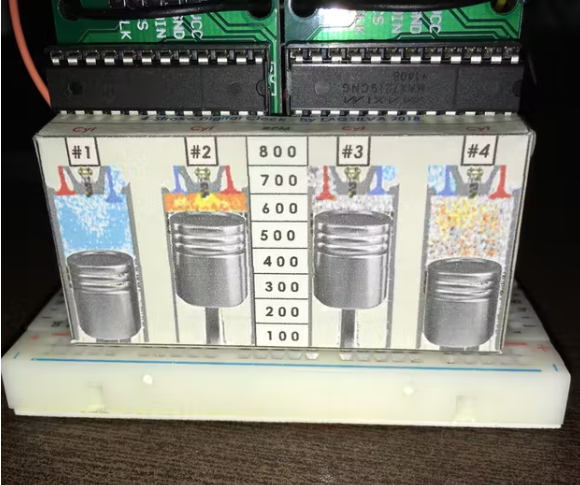
在这个项目中,小时和分钟的数字模拟了活塞的运动,并且所有气缸的火花在正确的时间突出显示。
精确计算旋转以表示实际速度,并通过旋转电位计在100至800RPM(每分钟转数)之间调整该值。
材料清单
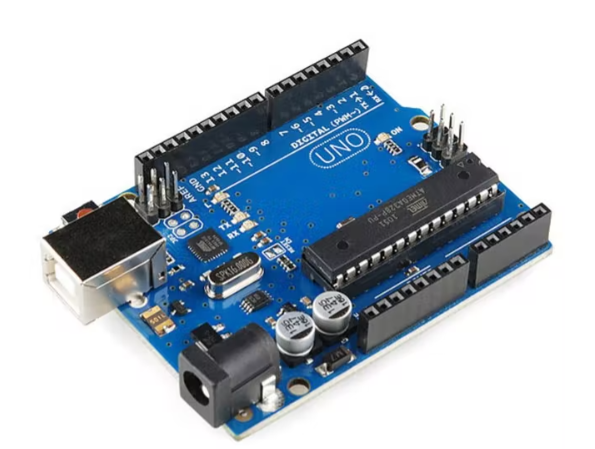
ArduinoUNOR3
LED点阵与MAX7219
DS1307RTC(实时时钟)
旋转电位器-10KOhms
面包板
打印模板
跳线
3D打印文件:
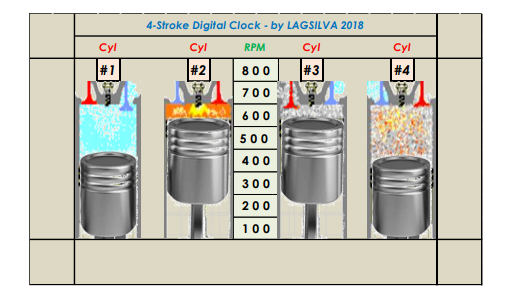
示意图:
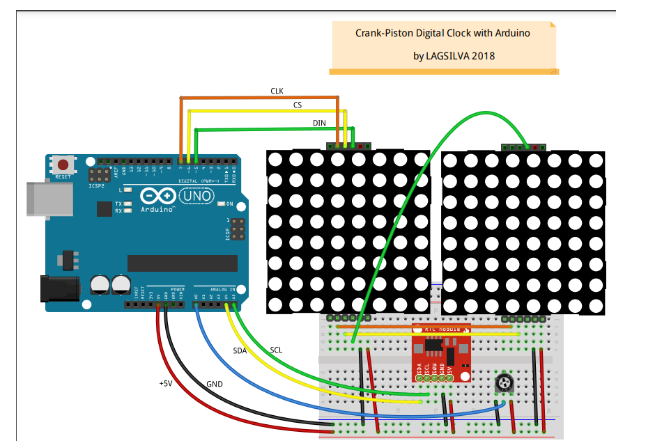
本文所用到代码:
#include // LED 矩阵库 - MAX72XX
#include // DS1307RTC 库 - Arduino UNO 的引脚:A4 (SDA), A5 (SCL)
#include // 实时时钟库
#include // 时间库
#include
// 全局变量
字节 hh, mm ; // 小时,分钟
字节uH,uM,dH,dM ; // 单位小时,单位分钟,青少年小时,青少年分钟
字节p = 0 ; // 绘图模式(数字位置:上/下)
int RPM = 0 , lastRPM = 0 , pinRPM = 0 ; // RPM,RPM 的最后值,RPM 的模拟引脚
字节序列 = 1 ; // 开始火序列
/*
用于连接 MAX72XX的 Arduino 引脚号(带 MAX72XX 控制器的 LED 阵列)
引脚5连接到 DataIn ( DIN )
引脚6连接到负载( CS )
引脚7连接到 CLK ( CLK )
*/
LedControl lc = LedControl ( 5 , 7 , 6 , 2 ) ; // LedControl ( int DIN, int CLK, int CS, int numDevices )
// 数字数组 - ( 0到9 ) - 大小 5x3
字节数[ 10 ] [ 3 ] = {
{ 0xF8, 0x88, 0xF8 } , // 0
{ 0x00, 0xF8, 0x40 } , // 1
{ 0xE8, 0xA8, 0xB8 } , // 2
{ 0xF8, 0xA8, 0x88 } , // 3
{ 0x78, 0x20, 0xE0 } , // 4
{ 0xB8, 0xA8, 0xE8 } , // 5
{ 0xB8, 0xA8, 0xF8 } , // 6
{ 0xC0, 0xB8, 0x80 } , // 7
{ 0xF8, 0xA8, 0xF8 } , // 8
{ 0xF8, 0xA0, 0xE0 } , // 9
};
无效设置() {
setSyncProvider(RTC.get); // Function to read RTC (Real Time Clock)
setSyncInterval(60); // Set the number of seconds between re-sync
//setTime(8, 19, 30, 10, 02, 2018); // Set the Time and Date (hour, minute, second, day, month, year)
//RTC.set(now()); // Set the RTC time
// Setup of Display "0"
lc.shutdown(0, false); // Wakeup Display "0"
lc.setIntensity(0, 4); // Set the Brightness of Display (0 to 15)
lc.clearDisplay(0); // Clear Display "0"
// Setup of Display "1"
lc.shutdown(1, false); // Wakeup Display "1"
lc.setIntensity(1, 4); // Set the Brightness of Display (0 to 15)
lc.clearDisplay(1); // Clear Display "1"
}
void loop() {
hh = hour();
mm = minute();
uH = hh % 10;
dH = hh / 10;
uM = mm % 10;
dM = mm / 10;
// Plot Hours
for (byte k = 0; k < 3; k++) {
lc.setRow(0, k + 5, num[dH][k] >> (p + 2));
lc.setRow(0, k + 1, num[uH][k] >> (3 - p));
}
// Plot Minutes
for (byte k = 0; k < 3; k++) {
lc.setRow(1, k + 4, num[dM][k] >> (3 - p));
lc.setRow(1, k , num[uM][k] >> (p + 2));
}
// Plot Fire Sequence: 1-3-4-2 (4 cyl: 1-3-4-2 or 1-2-4-3 or 1-4-3-2)
if (seq == 1) { // Fire Cyl #1
lc.setLed(0, 6, 0, true);
}
if (seq == 2) { // Fire Cyl #3
lc.setLed(1, 5, 0, true);
}
if (seq == 3) { // Fire Cyl #4
lc.setLed(1, 1, 0, true);
}
if (seq == 4) { // Fire Cyl #2
lc.setLed(0, 2, 0, true);
}
seq = seq % 4 + 1;
// RPM reading
RPM = analogRead(pinRPM); // Potentiometer reading
RPM = map(RPM, 0, 1023, 1, 9);
if (RPM <= 8) {
lc.setLed(1, 7, 8 - RPM, true);
lc.setLed(0, 0, 8 - RPM, true);
delay(300 / RPM); // Speed setup by potentiometer (100 - 800 RPM)
if (lastRPM != RPM) {
lc.setRow(0, 0, 0);
lc.setRow ( 1 , 7 , 0 ) ;
最后转数 =转数;
}
}
p = !p ; // 切换数字位置(上 x 下)
}
-
Arduino CNC电机扩展板详解2021-06-29 2760
-
怎么实现基于Arduino的多功能数字时钟的设计?2021-11-02 1431
-
如何使用Arduino和步进电机制作3D打印装饰时钟2022-06-29 1198
-
基于FPGA的数字集成时钟电路设计方案详解2018-07-12 6415
-
如何利用Arduino UNO设计无RTC模块简单时钟2022-05-14 5606
-
Arduino语法详解含示例详解2022-07-19 753
-
arduino数字LED时钟2022-10-20 708
-
如何使用Arduino和LCD制作数字时钟2022-10-28 798
-
Arduino便宜的最小零件数字时钟2022-10-31 526
-
DIY 3D打印单数字Arduino时钟2022-11-02 796
-
使用Arduino Nano R3进行红外遥控的数字时钟2022-11-03 685
-
基于Arduino UNO的史上最简单数字时钟2022-12-21 1496
-
基于3D打印的Arduino模拟数字时钟2022-12-27 611
-
用Arduino自制一个只有表针的时钟2023-03-09 2372
-
使用Arduino制作简单的数字时钟2023-06-26 686
全部0条评论

快来发表一下你的评论吧 !

