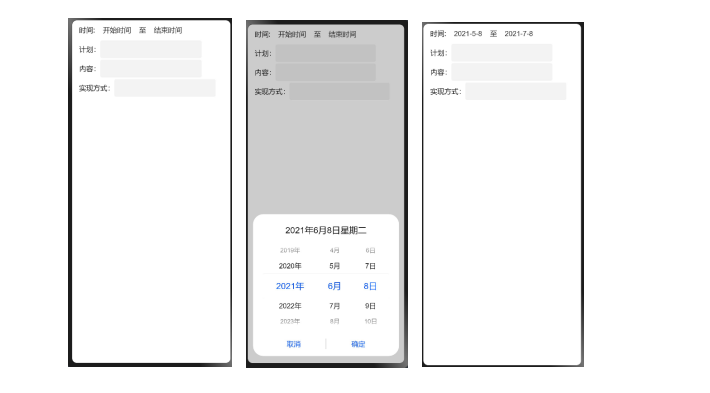
时间:至 计划:内容:实现方式:

 HarmonyOS原子化服务开发案例 计划本的实现
一.创建项目
二.代码示例
hml代码部分
时间:至 计划:内容:实现方式:css代码部分
.container {
    flex-direction: column;
    justify-content: flex-start;
    align-items: center;
    width: 100%;
    height: 100%;
}
.title{
    width: 100%;
    height: 40px;
    font-size: 24px;
    color: #fff;
    text-align: left;
    padding-left: 12px;
    background-color: dodgerblue;
    margin-bottom: 10px;
}
.content{
    flex-direction: column;
    margin-bottom: 10px;
}
.hengStyle{
    flex-direction: row;
    align-items: center;
    justify-content: flex-start;
    width: 100%;
    margin: 2px 0px;
}
.text{
    font-size: 16px;
    padding-left: 16px;
}
.inputDate{
    width: 100px;
    height: 40px;
    font-size: 16px;
    border-radius: 4px;
    background-color: #fff;
    color: #333;
}
.inputTxt{
    width: 64%;
    height: 40px;
    font-size: 16px;
    border-radius: 4px;
}
.inputBtn{
    width: 30%;
    height: 40px;
    font-size: 16px;
    border-radius: 4px;
    background-color: #fff;
    color: #333;
}
js代码部分
export default {
    data: {
        //        学习时间
        dateValue:"",
        startTime: '开始时间',
        endTime: '结束时间',
        selectVal:"2021-06-08",
    },
    startClick(){
        this.$element("startPicker").show();
    },
    endClick(){
        this.$element("endPicker").show();
    },
    startDate(e){
        this.startTime = e.year + "-" + e.month + "-" + e.day;
    },
    endDate(e){
        this.endTime = e.year + "-" + e.month + "-" + e.day;
    },
    input(e){
        let idName = e.target.id;
        if (idName === "school") {
            this.schoolValue = e.value
        }
    },
    inputBtn(){
        this.$element("education").show();
    },
    chooseEducation(e){
        this.educationValue = e.newValue
    }
}
全部0条评论

快来发表一下你的评论吧 !
