

利用M5Stack设计一个BLE保温杯
描述
这个保温瓶可感应内部温度并通过蓝牙将信息发送到接收器。
在本文中,我将向您展示如何在两个 ESP32 板之间传输传感器的蓝牙协议。
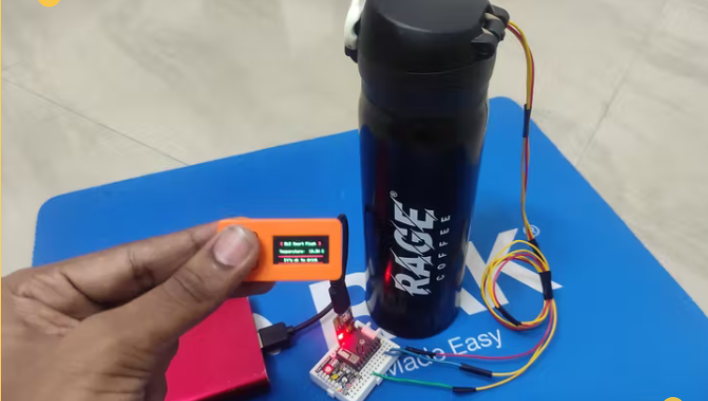
你需要的东西:
M5Stick C
M5Stamp Pico
LM35温度传感器
M5棒C:
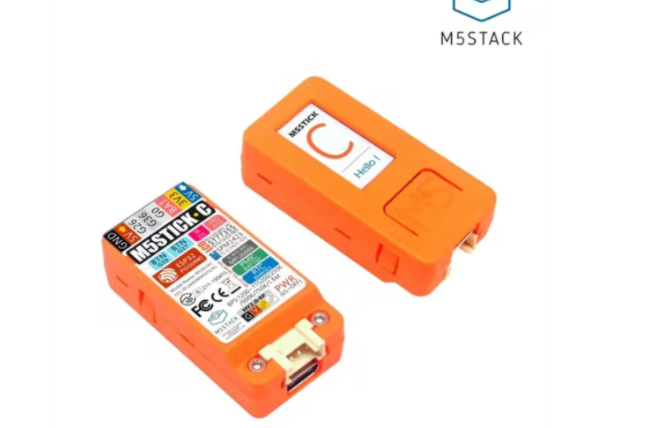
M5StickC 是迷你 M ESP32 提供的。它是一个可以实现你的 Stack55、开源的物联网。它是做什么的? M5stickC是M5Stack产品系列的核心设备之一,并帮助您进行过程中的产品原型设计。
电源开关操作:
引导:长按电源键2秒
电视:长按电源键6秒
注意:
M5StickC支持的波特率:1200~115200、250K、500K、750K、1500K
产品特点
基于ESP32
组合6轴IMU
红色 LED
红外线发射器
麦克风
按钮,LCD(0.96英寸)
压缩锂电池
可伸缩
可穿戴和壁挂式
游戏多平台开发:
UIFlow
微蟒
阿杜诺
.NET纳米框架
M5Stamp Pico:
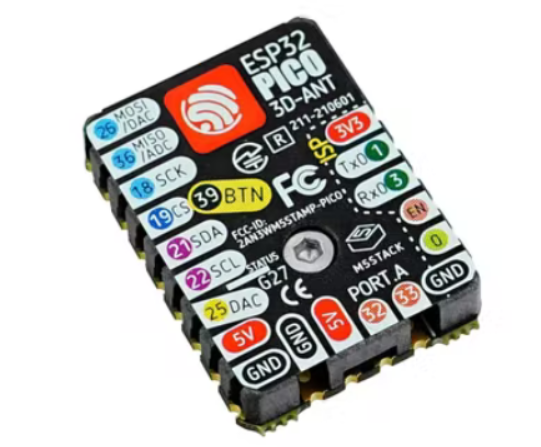
它的 STAMP-P 超设计尺寸,在 PCB 上像具有低 32 位 ICOX 接口的 LXLX 6 微处理器,40MHz 打印机一样精确。例如可穿戴设备、医疗设备、传感器和其他物联网设备。
多种安装方式,实现无限可能!(SMT、DIP、飞线接口),采用耐高温塑料外壳,3D天线和5号天线可以更好的保护。
LOW-CODE DEV OPMENT:STAMP-MP-编程,脚本化编程平台;全面Arduino免编程3-2-微型图形开发等开发平台,快速支持Python等开发、Python等各类应用程序开发。
HIGH: 1P-ICO5V STA->3V DC/MP-1DC/1P-ICO5V STA-3V DC/12GR,全RGB灯,接口x1x1,xx电路,通讯稳定,提供可靠的无线无线。
强大的扩展性:接入M5软硬件生态:丰富的传感器、执行、功能、配件选择,极速系统接入模块。
产品特点:
芯片组:ESP32-PICO-D4(2.4GHz Wi-Fi双模)
支持 UIFlow 图形化编程
多IO引出线,支持多种应用形式(SMT、DIP、fly-by-wire)
集成嵌入式RGB LED和按钮
微型模块
LM35温度传感器:
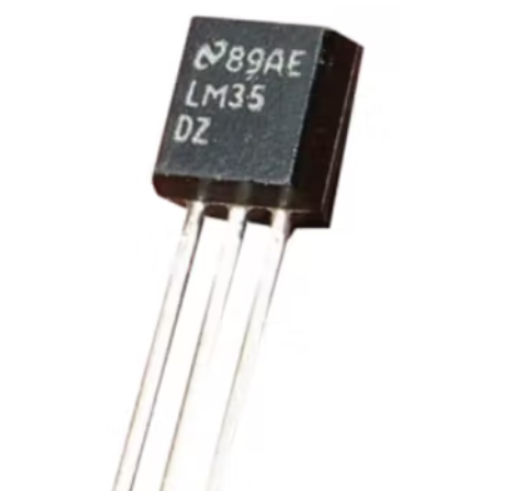
LM35 35 模拟温度模拟输出与成比35,其传感器单独外接LM35 或LM 正时扬声器。专门针对LM35 的外接光源或正向LM 自动精确输出,提供和正常输出和适当的特性35 模拟模拟温度与输出与成比35。控制电路连接。
硬件连接:
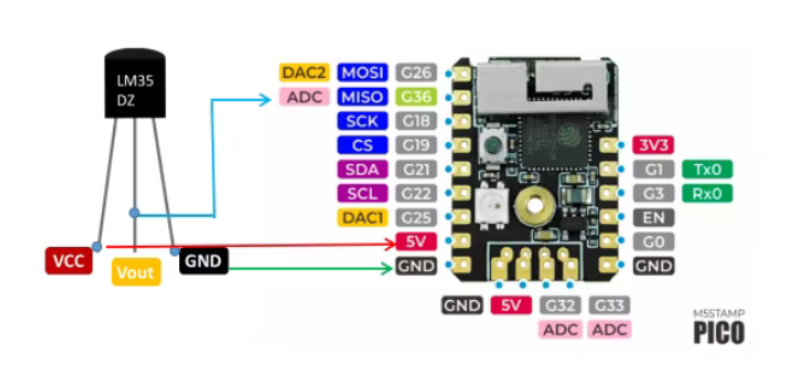
将 GND 的输出端连接到 LM3 的第 36 Stamp 端,将 LM3 的电源连接到 LM3 的 5 V 和 GND。
VOUT -> G36
接地点 - > 接地点
VCC - > 5V
对发射器进行编程:
在本文中,微型发射器将发射器发射到中部,并连接发射器,向发射器发射红外发射器。
#include
#include
#include
#include
#include
// LED 计数
#define NUM_LEDS 1
#define DATA_PIN 27
// 定义 LED 的数组
CRGB leds[NUM_LEDS];
#define Button 39
//BLE 服务器名称
#define bleServerName "M5"
//LM35
#define ADC_VREF_mV 3300.0 // 以毫伏
为单位 #define ADC_RESOLUTION 4096.0
#define PIN_LM35 36 // ESP32 引脚 GIOP36 (ADC0) 连接到 LM35
浮动温度;
浮动温度F;
浮动嗡嗡声;
// 定时器变量
unsigned long lastTime = 0;
无符号长定时器延迟 = 30000;
布尔设备连接 = 假;
#define SERVICE_UUID "91bad492-b950-4226-aa2b-4ede9fa42f59"
// 温度特性和描述符
BLECharacteristic bmeTemperatureCelsiusCharacteristics("cba1d466-344c-4be3-ab3f-189f80dd7518", BLECharacteristic::PROPERTY_NOTIFY);
BLEDescriptor bmeTemperatureCelsiusDescriptor(BLEUUID((uint16_t)0x2902));
//设置回调 onConnect 和 onDisconnect
类 MyServerCallbacks: public BLEServerCallbacks {
void onConnect(BLEServer* pServer) {
deviceConnected = true;
};
无效 onDisconnect(BLEServer* pServer) {
deviceConnected = false;
}
};
void setup() {
// 开始串行通信
Serial.begin(115200);
FastLED.addLeds
pinMode(按钮,输入);
// 创建 BLE 设备
BLEDevice::init(bleServerName);
// 创建 BLE 服务器
BLEServer *pServer = BLEDevice::createServer();
pServer->setCallbacks(new MyServerCallbacks());
// 创建 BLE 服务
BLEService *bmeService = pServer->createService(SERVICE_UUID);
// 创建 BLE 特征并创建 BLE 描述符
bmeService->addCharacteristic(&bmeTemperatureCelsiusCharacteristics);
bmeTemperatureCelsiusDescriptor.setValue("BME 温度摄氏");
bmeTemperatureCelsiusCharacteristics.addDescriptor(&bmeTemperatureCelsiusDescriptor);
// 启动服务
bmeService->start();
// 开始广告
BLEAdvertising *pAdvertising = BLEDevice::getAdvertising();
pAdvertising->addServiceUUID(SERVICE_UUID);
pServer->getAdvertising()->start();
Serial.println("等待客户端连接通知...");
}
无效循环(){
静态布尔状态;
状态 = 数字读取(按钮);
if (State == 0)
{
ESP.restart();
}
if (deviceConnected) {
if ((millis() - lastTime) > timerDelay) {
// 打开 LED,然后暂停
leds[0] = 0xf00000;
FastLED.show();
延迟(2000);
// 从温度传感器读取 ADC 值
int adcVal = analogRead(PIN_LM35);
// 将 ADC 值转换为以毫伏为单位的电压
float milliVolt = adcVal * (ADC_VREF_mV / ADC_RESOLUTION);
// 将电压转换为温度,单位为°C
temp = milliVolt / 10;
静态字符温度CTemp[6];
dtostrf(temp, 6, 2, temperatureCTemp);
//设置温度特征值并通知连接的客户端
bmeTemperatureCelsiusCharacteristics.setValue(temperatureCTemp);
bmeTemperatureCelsiusCharacteristics.notify();
// 现在关闭 LED,然后暂停
leds[0] = 0x00f000;
FastLED.show();
Serial.print("摄氏温度:");
串行打印(温度);
Serial.println("ºC");
最后时间 = 毫秒();
}
}
在此代码中,如果您需要更改 BLE 服务器名称,请根据需要更改此行:

基本代码 LM35 包含读数这行的,不要更改这些。

这是发送器的 BLE 服务 ID:

这是温度数据的服务ID:

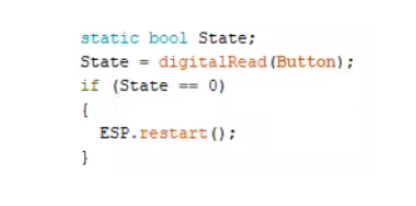
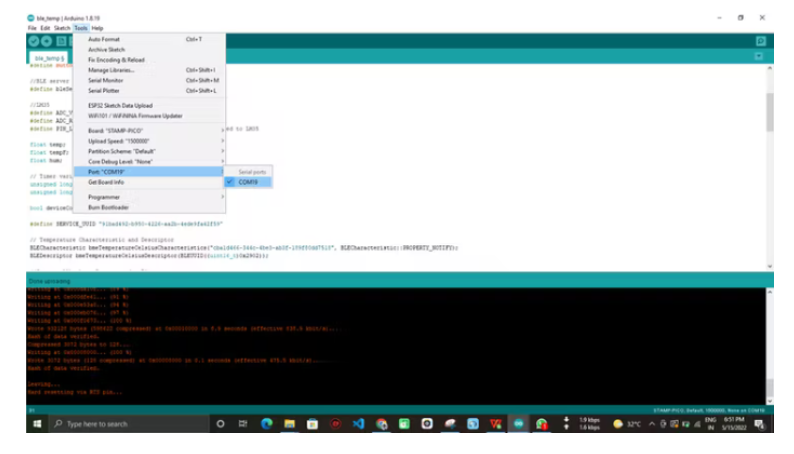
M5 没有使用任何重置按钮,但它有一个在这里定义的按钮,我重置了电路板 Pico。
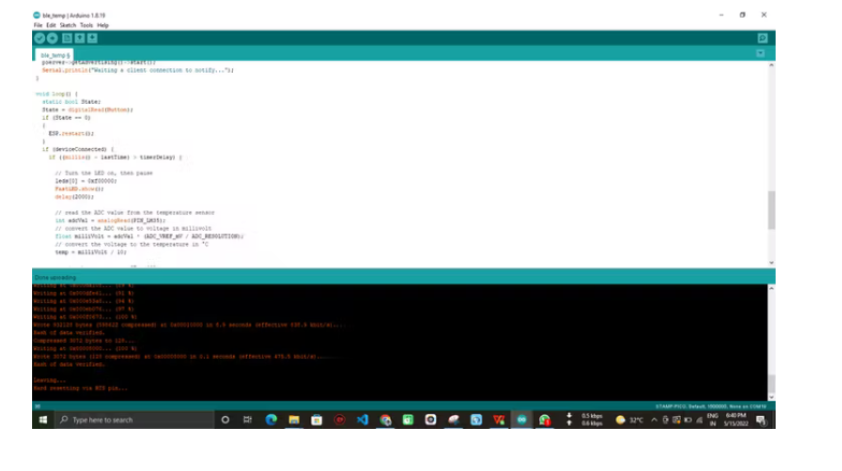
最后,将代码上传到 M5Stamp Pico,确保您选择了正确的板设置:
对预测:
在本文中,将发射器中的5个发射器接收来自发射器的温度。
#include
#include "BLEDevice.h"
//BLE 服务器名称
#define bleServerName "M5"
/* 服务的 UUID,我们要读取的特征 */
// BLE 服务
static BLEUUID bmeServiceUUID("91bad492-b950-4226-aa2b-4ede9fa42f59");
//温度摄氏特性
静态BLEUUID temperatureCharacteristicUUID("cba1d466-344c-4be3-ab3f-189f80dd7518");
//标志说明是否应该开始连接以及连接是否正常
static boolean doConnect = false;
静态布尔连接=假;
//外围设备的地址。地址将在扫描过程中找到...
static BLEAddress *pServerAddress;
//我们要读取的特征
值 static BLERemoteCharacteristic* temperatureCharacteristic;
//激活通知
const uint8_t notificationOn[] = {0x1, 0x0};
const uint8_t notificationOff[] = {0x0, 0x0};
//存储温湿度的变量
char* temperatureChar;
//检查新的温度和湿度读数是否可用的标志
boolean newTemperature = false;
//连接到具有名称、服务和特征的 BLE 服务器
bool connectToServer(BLEAddress pAddress) {
BLEClient* pClient = BLEDevice::createClient();
// 连接到移除的 BLE 服务器。
pClient->connect(pAddress);
Serial.println(" - 连接到服务器");
// 在远程 BLE 服务器中获取对我们所追求的服务的引用。
BLERemoteService* pRemoteService = pClient->getService(bmeServiceUUID);
if (pRemoteService == nullptr) {
Serial.print("未能找到我们的服务 UUID:");
Serial.println(bmeServiceUUID.toString().c_str());
返回(假);
}
// 获取远程BLE服务器服务中的特征引用。
temperatureCharacteristic = pRemoteService->getCharacteristic(temperatureCharacteristicUUID);
if (temperatureCharacteristic == nullptr) {
Serial.print("未能找到我们的特征 UUID");
返回假;
}
Serial.println(" - 找到我们的特征");
//为特征分配回调函数
temperatureCharacteristic->registerForNotify(temperatureNotifyCallback);
返回真;
}
//当收到另一个设备的广告时调用的回调函数
class MyAdvertisedDeviceCallbacks: public BLEAdvertisedDeviceCallbacks {
void onResult(BLEAdvertisedDevice advertisedDevice) {
if (advertisedDevice.getName() == bleServerName) { //检查广告商的名称是否匹配
广告设备.getScan()->stop(); //可以停止扫描,我们找到了我们要找的
东西 pServerAddress = new BLEAddress(advertisedDevice.getAddress()); //广告客户的地址就是我们需要的
那个 doConnect = true; //设置指标,说明我们已经准备好连接
Serial.println("Device found. Connecting!");
}
}
};
//当BLE Server发送一个带有notify属性的新温度读数时
static void temperatureNotifyCallback(BLERemoteCharacteristic* pBLERemoteCharacteristic,
uint8_t* pData, size_t length, bool isNotify) {
//存储温度值
temperatureChar = (char*)pData;
新温度=真;
}
//在 OLED 显示屏中打印最新传感器读数的函数
void printReadings() {
M5.update();
//擦除显示器中之前的内容
M5.Lcd.fillScreen(BLACK);
M5.Lcd.setTextColor(红色);
M5.Lcd.setCursor(20, 18);
M5.Lcd.setTextSize(1.8);
M5.Lcd.print("[");
M5.Lcd.setTextColor(绿色);
M5.Lcd.print("BLE 智能烧瓶");
M5.Lcd.setTextColor(红色);
M5.Lcd.print(" ]");
M5.Lcd.setCursor(18, 40);
M5.Lcd.setTextColor(绿色);
Serial.print("温度:");
M5.Lcd.print("温度:");
Serial.println(温度字符);
M5.Lcd.print(温度字符);
M5.Lcd.print("C");
M5.Lcd.setCursor(15, 55);
M5.Lcd.setTextColor(红色);
M5.Lcd.print("---------");
浮动 x = atof(温度字符);
if (x >= 35.0)
{
Serial.println("可能是过热");
M5.Lcd.setCursor(15, 65);
M5.Lcd.setTextColor(红色);
M5.Lcd.print("可能过热");
}
else {
Serial.println("可以喝");
M5.Lcd.setCursor(30, 65);
M5.Lcd.setTextColor(绿色);
M5.Lcd.print("可以喝了");
}
M5.Lcd.setCursor(15, 75);
M5.Lcd.setTextColor(红色);
M5.Lcd.print("---------");
}
无效设置() {
M5.begin();
M5.Lcd.setRotation(3);
M5.Axp.ScreenBreath(10);
M5.Lcd.setTextColor(RED);
M5.Lcd.setCursor(10, 35);
M5.Lcd.setTextSize(1.8);
//Start serial communication
Serial.begin(115200);
Serial.println("Starting Arduino BLE Client application...");
//Init BLE device
BLEDevice::init("");
BLEScan* pBLEScan = BLEDevice::getScan();
pBLEScan->setAdvertisedDeviceCallbacks(new MyAdvertisedDeviceCallbacks());
pBLEScan->setActiveScan(true);
pBLEScan->start(30);
}
void loop() {
if (doConnect == true) {
if (connectToServer(*pServerAddress)) {
Serial.println("我们现在连接到 BLE 服务器。");
M5.Lcd.print("连接到BLE服务器");
//激活每个Characteristic的Notify属性
temperatureCharacteristic->getDescriptor(BLEUUID((uint16_t)0x2902))->writeValue((uint8_t*)notificationOn, 2, true);
连接=真;
} else {
Serial.println("我们连接服务器失败;重启您的设备再次扫描附近的BLE服务器。");
M5.Lcd.print("未连接");
}
连接 = 假;
}
//如果有新的温度读数可用,则在 OLED 中打印
if (newTemperature) {
newTemperature = false;
打印读数();
}
}
请确保您在此服务名称重命名为与相同的名称,并在设备名称和温度数据 ID 中与匹配匹配。

一些代码行来显示我添加到 TFT 显示器。
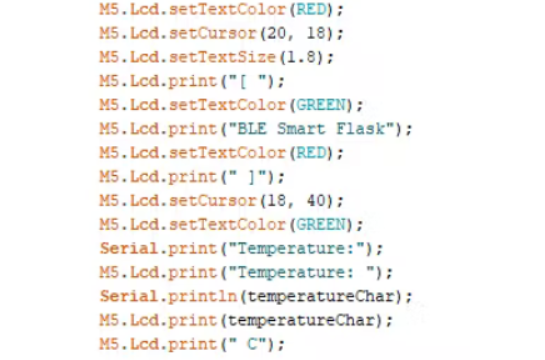
完成后,进行所需的更改,将代码上传到 M5Stick C。
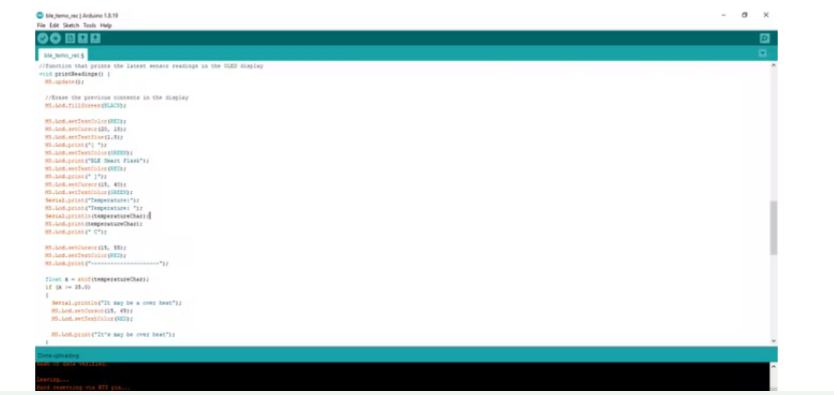
上传一次代码后,就可以点击发射器和器上的按钮并接收监控输出。
-
今天收到Litepoint下载活动的保温杯,有图片哦2014-04-01 3420
-
一个用单片机+NTC来测温的保温杯设计2022-02-28 1386
-
星巴克的杯子多少钱?智能保温杯为什么价值千元2016-11-25 4336
-
如何将ArduinoEsplora和M5Stack组合成一个NES游戏机2019-08-23 6909
-
气密性检测保温杯盖测试实例的介绍2021-01-29 1130
-
简易的电子保温杯pcb设计原理图2020-12-08 14967
-
智能保温杯盖防水检测是如何做到的2021-01-20 1950
-
如何知道保温杯盖的防水性能2021-06-15 1343
-
直线电机模组激光打标技术在保温杯加工中的应用2021-12-29 817
-
智能保温杯的工作原理及功能特点2022-04-22 28692
-
配备M5Stack的智能工厂2022-12-09 636
-
Bareboat Necessities的M5Stack坚韧Arduino船展示2023-06-12 505
-
M5Stack圣诞雪球开源分享2023-06-28 664
-
StickC M5Stack LED闪烁2023-06-29 714
-
保温杯LED屏幕驱动和语音播报二合一芯片方案2025-11-20 226
全部0条评论

快来发表一下你的评论吧 !

