

在ART-Pi Smart上对摄像头采集的数据进行车标识别
汽车电子
描述
本来计划使用 ART-Pi Smart 进行车标识别的,但是现在实际测试发现摄像头采集的数据显示有大概率抖动的现象发生,所以实现了将摄像头采集的数据以 bmp 图片格式存储,然后发送到电脑端使用 tflite 格式的模型数据进行测试。
第一部分,系统概述
该项目实现了在 ART-Pi Smart 上通过 OV5640 摄像头采集视频数据,并以 bmp 格式图片保存在设备端,然后借助 ART-Pi Smart webserver 服务将生成的 bmp 图片下载到 PC,然后在 PC 端使用训练的 tflite 模型对下载的 bmp 图片进行预测输出结果。
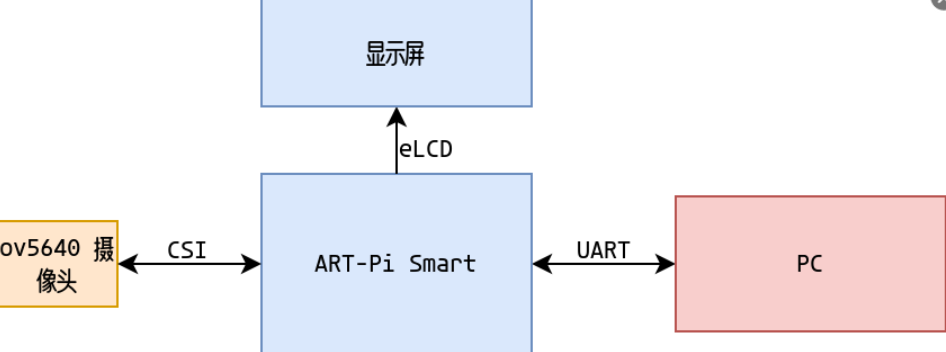
硬件框图:
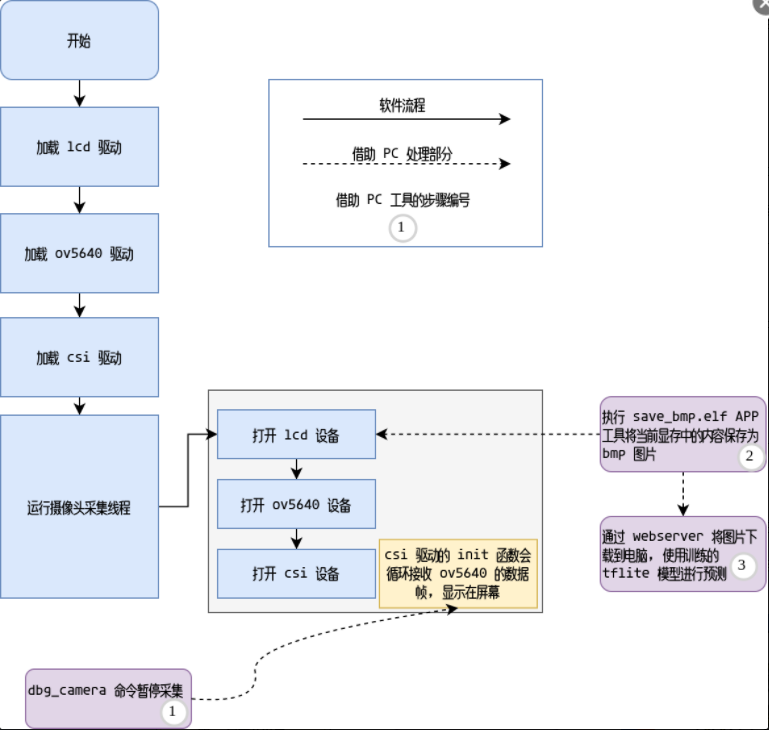
软件框图:
第二部分,系统流程
为了实现预期的目的,将系统流程分为如下几个阶段:
1、使用官方 demo 移植 tflite 到 ART-Pi Smart, 针对这部分内容可以查看文章 在 ART-Pi Smart 上运行 TensorFlow Lite
2、移植 TensorFLow 基础的图像分类 mnist 的 demo 到 ART-Pi Smart,针对这部分内容可以查看文章
3、使用 Kicad 设计 ov5640 转结板,并开发 ov5640 摄像头驱动,在开发这部分软件的过程中,遇到了问题,具体细节可以查看问题ov5640 显示效果不稳定
4、使用摄像头采集数据判断是否有车辆信息
本节重点描述系统流程的第 4 部分,训练自己的模型检测是否有车辆信息,这部分主要分为如下步骤:
1、从网上下载包含有车辆的图片数据集和没有车辆的数据集合(这部分内容,我选择了一些包含有花朵的数据集),通过 python 将其批量转换为屏幕分辨率的图片,这部分代码大概是这样的:
!/usr/bin/env python

源数据的目录
如果指定有源文件目录,使用指定的源文件目录

生成转换后的源文件的目录

最多转换 1000 张图片

修改原始图片的分辨率
for i in range(src_image_len):
current_image_name = src_image_lists[i]
full_current_image_name = os.path.join(WEB_PICS, current_image_name)
target_image_name = current_image_name.split('.')[0]+'_convert.bmp'
full_target_image_name = os.path.join(TAREGT_PICS, target_image_name)
raw_image =Image.open(full_current_image_name)
image_L = raw_image.convert('L')
image = image_L.resize((480,272))
image.save(full_target_image_name)
print(np.array(image, dtype=np.float32, order=’C’).shape)
exit()
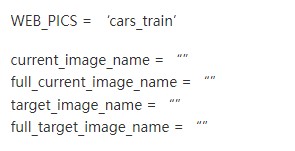
如图所示,四个目录分别是原始带有车辆和没有车辆的数据集目录和转换后的数据集目录。
2.标定带有车辆的图片和没有车辆的图片信息,使用 tensorflow 进行训练,这部分代码大概是这样的:
``` python
#!/usr/bin/env python
# 车标分类算法
from PIL import Image
import os
MODELS_DIR = 'models/'
if not os.path.exists(MODELS_DIR):
os.mkdir(MODELS_DIR)
MODEL_TF = MODELS_DIR + 'model'
MODEL_NO_QUANT_TFLITE = MODELS_DIR + 'model_no_quant.tflite'
MODEL_TFLITE = MODELS_DIR + 'model.tflite'
MODEL_TFLITE_MICRO = MODELS_DIR + 'model.cc'
import tensorflow as tf
from tensorflow import keras
import numpy as np
import matplotlib.pyplot as plt
from sklearn.model_selection import train_test_split
TRAIN_IMAGES_COUNTS = 1000
whole_train_images = np.ones((2 * TRAIN_IMAGES_COUNTS , 480, 272), dtype=np.float32)
whole_train_labels = np.ones((2 * TRAIN_IMAGES_COUNTS , ), dtype=np.float32)
#test_images = np.ones((2 * TEST_IMAGES_COUNTS , 480, 272), dtype=np.float32)
#test_labels = np.ones((2 * TEST_IMAGES_COUNTS , ), dtype=np.float32)
CAR_CONVERT_PICS = 'cars_train_convert_sets'
FLOWER_TAREGT_PICS = 'flowers_convert_sets'
# 矩阵行列交换
def transpose_2d(data):
# transposed = list(zip(*data))
# [(1, 5, 9), (2, 6, 10), (3, 7, 11), (4, 8, 12)]
# 注意 zip 本身返回的数据类型为 tuple 元组
# 其中符号 * 号可以对元素进行解压或展开
transposed = list(map(list, zip(*data)))
return transposed
whole_train_sets_index = 0
def merge_whole_train_sets(src, type):
global whole_train_sets_index
src_image_lists = os.listdir(src)
for i in range(TRAIN_IMAGES_COUNTS):
full_current_image_name = os.path.join(src, src_image_lists[i])
#print(full_current_image_name)
raw_image = Image.open(full_current_image_name)
#print(type(raw_image.convert('RGB')))
temp_whole_train_images = np.array(raw_image, dtype=np.float32)
whole_train_images[whole_train_sets_index] = np.array(transpose_2d(temp_whole_train_images), dtype=np.float32)
whole_train_labels[whole_train_sets_index] = type
whole_train_sets_index = whole_train_sets_index + 1
merge_whole_train_sets(CAR_CONVERT_PICS, 1)
merge_whole_train_sets(FLOWER_TAREGT_PICS, 0)
print(whole_train_labels)
print(type(whole_train_images), whole_train_images.shape)
print(type(whole_train_labels), whole_train_labels.shape)
train_images, test_images = train_test_split(whole_train_images, train_size=0.8, random_state=10)
train_labels, test_labels = train_test_split(whole_train_labels, train_size=0.8, random_state=10)
print(type(train_images), type(train_labels))
print(train_images.shape, train_labels.shape)
class_names = ['nocar', 'car']
if False:
plt.figure(figsize=(10,10))
for i in range(25):
plt.subplot(5,5,i+1)
plt.xticks([])
plt.yticks([])
plt.grid(False)
plt.imshow(train_images[i], cmap=plt.cm.binary)
plt.xlabel(class_names[train_labels[i]])
plt.show()
#exit()
#train_images = train_images
#test_images = test_images
#train_images = np.array(train_images, dtype=np.float32)
#plt.figure(figsize=(10,10))
#for i in range(25):
# plt.subplot(5,5,i+1)
# plt.xticks([])
# plt.yticks([])
# plt.grid(False)
# plt.imshow(train_images[i], cmap=plt.cm.binary)
# plt.xlabel(class_names[train_labels[i]])
#plt.show()
model = tf.keras.Sequential([
tf.keras.layers.Flatten(input_shape=(480, 272)),
tf.keras.layers.Dense(128, activation='relu'),
tf.keras.layers.Dense(2)
])
model.compile(optimizer='adam',
loss=tf.keras.losses.SparseCategoricalCrossentropy(from_logits=True),
metrics=['accuracy'])
# 如果模型已经存在,加载整个模型
if os.path.exists(MODELS_DIR) and os.path.exists(MODEL_TF) and 0 != len(os.listdir(MODEL_TF)):
try:
#model.load_weights(MODEL_TF + 'saved_model.pb')
model = keras.models.load_model(MODEL_TF)
except:
print("load weights failed")
exit()
# 训练模型
else:
print(f"{MODEL_TF} no exist ???")
model.fit(train_images, train_labels, epochs=10)
# 查看 model 概要
print(model.summary())
# 测试模型
test_loss, test_acc = model.evaluate(test_images, test_labels, verbose=2)
print(' Test accuracy:', test_acc)
probability_model = tf.keras.Sequential([model,
tf.keras.layers.Softmax()])
predictions = probability_model.predict(test_images)
print(type(test_images), test_images.shape, " red")
print(predictions[0])
#exit()
# 测试自定义图片
from PIL import Image
import sys
IMG_SRC = 'flowers/image_1111.jpg'
IMG_TARGET = IMG_SRC.split('/')[-1].split('.')[0] + '_gry_test' + '.bmp'
print(IMG_TARGET)
raw_image = Image.open(IMG_SRC)
image = raw_image.resize((480, 272))
image_gray = image.convert('L')
image_gray_array = np.array(image_gray, dtype=np.float32)
image_gray_array = np.array(transpose_2d(image_gray_array), dtype=np.float32).reshape(1,480,272)
#image_gray_array = image_gray_array / 255.0
image_gray.save(IMG_TARGET)
predictions = probability_model.predict(image_gray_array)
print("red prefictions")
print(predictions[0])
plt.figure()
plt.subplot(2,1,1)
plt.imshow(test_images[0], cmap=plt.cm.binary)
print(test_labels[0], "oh no red")
plt.subplot(2,1,2)
plt.imshow(raw_image, cmap=plt.cm.binary)
plt.show()
#exit()
#plt.figure(figsize=(10,10))
#plt.xticks([])
#plt.yticks([])
#plt.grid(False)
#plt.imshow(test_images[0], cmap=plt.cm.binary)
#plt.show()
# Save the model to disk
model.save(MODEL_TF)
# Convert the model to the TensorFlow Lite format without quantization
converter = tf.lite.TFLiteConverter.from_saved_model(MODEL_TF)
model_no_quant_tflite = converter.convert()
# Save the model to disk
open(MODEL_NO_QUANT_TFLITE, "wb").write(model_no_quant_tflite)
# Convert the model to the TensorFlow Lite format with quantization
def representative_dataset():
for i in range(500):
# 强制转换为 float32 类型
array = np.array(train_images[i], dtype=np.float32)
#print(array.shape, "red dbg")
#print(type(train_images[0].dtype), type(array[0].dtype), type(array), len(array))
yield([array])
# Set the optimization flag.
converter.optimizations = [tf.lite.Optimize.DEFAULT]
# Enforce integer only quantization
converter.target_spec.supported_ops = [tf.lite.OpsSet.TFLITE_BUILTINS_INT8]
converter.inference_input_type = tf.float32
converter.inference_output_type = tf.float32
# Provide a representative dataset to ensure we quantize correctly.
converter.representative_dataset = representative_dataset
# 转换为 tflite 模型
model_tflite = converter.convert()
# Save the model to disk
open(MODEL_TFLITE, "wb").write(model_tflite)
该函数可以训练模型导出 model.tflite 到 models 目录:

因为输入的 tensor 有 480*272 个,所以导致模型特别巨大,发现直接编译出的 rtthread.bin 有 16MB 左右,通过 tftp 下载后无法正常运行,就只能使用这个模型在 PC 端对 ov5640 采集的图片进行识别了。
1、开发 save_bmp.elf 工具,支持将当前显存的内容保存到 bmp 图片中,这部分代码大概这样,下述 demo 简单完成了使用显存内容对原始 bmp 图片的重写:
/*
* Copyright (c) 2006-2022, RT-Thread Development Team
*
* SPDX-License-Identifier: GPL-2.0
*
* Change Logs:
* Date Author Notes
* 2022-05-05 iysheng The first version
*/
#include
#include
#include"rtdef.h"
#include
#include"rt_lcd.h"
typedefunsignedcharuint8_t;
typedefunsignedshortuint16_t;
typedefunsignedintuint32_t;
typedefintint32_t;
#define LCD_WIDTH 480
#define LCD_HEIGHT 272
#define LCD_BUF_SIZE (LCD_WIDTH * LCD_HEIGHT)
rt_uint16_t pixel_ptr[LCD_BUF_SIZE];
rt_device_t lcd = NULL;
struct fb_fix_screeninfo f_info;
struct fb_var_screeninfo v_info;
int rt_smart_lcdinit(void)
{
rt_err_t ret =-1;
lcd = rt_device_find("lcd");
if(!lcd)return1;
ret = rt_device_open(lcd, RT_DEVICE_OFLAG_RDWR);
if(-1==ret)return1;
rt_device_control(lcd, FBIOGET_FSCREENINFO,&f_info);
printf("screen: %s - 0x%08x, size %d ", f_info.id,(unsignedint)f_info.smem_start, f_info.smem_len);
rt_device_control(lcd, FBIOGET_VSCREENINFO,&v_info);
printf("screen: bpp %d, width - %d, height - %d ", v_info.bits_per_pixel, v_info.xres, v_info.yres);
return ret;
}
#pragma pack(1)
struct bmp_header {
uint16_t file_type;// File type always BM which is 0x4D42
uint32_t file_size;// Size of the file (in bytes)
uint16_t reserved1;// Reserved, always 0
uint16_t reserved2;// Reserved, always 0
uint32_t offset_data;// Start position of pixel data (bytes from the beginning of the file)
};
struct windows_bmp_info_header {
uint32_t size;// Size of this header (in bytes)
int32_t width;// width of bitmap in pixels
int32_t height;// width of bitmap in pixels
uint16_t planes;// No. of planes for the target device, this is always 1
uint16_t bit_count;// No. of bits per pixel
uint32_t compression;// 0 or 3 - uncompressed. THIS PROGRAM CONSIDERS ONLY UNCOMPRESSED BMP images
uint32_t size_image;// 0 - for uncompressed images
int32_t x_pixels_per_meter;
int32_t y_pixels_per_meter;
uint32_t colors_used;// No. color indexes in the color table. Use 0 for the max number of colors allowed by bit_count
uint32_t colors_important;// No. of colors used for displaying the bitmap. If 0 all colors are required
};
#define RED_TFLITE_CONVERT 10
int get_bmp_at(struct fb_fix_screeninfo *finfo,struct fb_var_screeninfo *vinfo,struct windows_bmp_info_header *header,uint8_t*buffer,uint8_t bytes)
{
int32_t x, y, i =0;
uint16_t pix_tmp =0;
vinfo->xres =0;
vinfo->yres =0;
for(y = header->height; y >0; y--)
{
for(x =0; x < header->width; x++)
{
if(1== bytes)
{
buffer[i++]=*((uint16_t*)finfo->smem_start +(y -1+ vinfo->yres)* LCD_WIDTH + vinfo->xres + x);
}
elseif(2== bytes)
{
pix_tmp =*((uint16_t*)finfo->smem_start +(y -1+ vinfo->yres)* LCD_WIDTH + vinfo->xres + x);
buffer[i]= pix_tmp;
buffer[i +1]= pix_tmp >>8;
i +=2;
}
else
{
printf("error: no support this format ");
return-1;
}
}
}
/* TODO flush */
rt_device_control(lcd, RED_TFLITE_CONVERT, NULL);
return0;
}
void show_hex(uint8_t* buffer,uint16_t buffer_len,char*title)
{
uint16_t i =0;
printf("[%s](%hu)", title, buffer_len);
for(i =0; i < buffer_len; i++)
{
printf("%x ", buffer[i]);
}
printf(" ");
}
uint8_t bmp9696[480*272*2];
int main(int argc,char**argv)
{
FILE *fp;
/* 屏幕显示起始地址 */
__attribute__((unused))int display_pos;
struct bmp_header t_bmp_header;
struct windows_bmp_info_header t_bmp_info_header;
int num;
if(0!= rt_smart_lcdinit())
{
printf("Failed init lcd. ");
return-3;
}
else
{
printf("init lcd ok ");
}
if(argc ==2)
{
printf("use default display width height and addr ");
}
elseif(argc ==3)
{
printf("ruse default display width height ");
}
elseif(argc ==4)
{
printf("use default display addr ");
}
elseif(argc ==5)
{
display_pos = atoi(argv[4]);
}
else
{
printf("Usage:show_bmp xxx.bmp 96 96 [pos]! ");
return-1;
}
fp = fopen(argv[1],"r+");
if(!fp)
{
printf("Failed open file:%s as:r+ ", argv[1]);
return-2;
}
num = fread(&t_bmp_header,1,sizeof(t_bmp_header), fp);
if(num !=sizeof(t_bmp_header))
{
printf("Read data len mismatch, please check:%d ", num);
return-3;
}
else
{
show_hex((uint8_t*)&t_bmp_header, num,"dbg_header");
printf("size=%u offset=%u ", t_bmp_header.file_size, t_bmp_header.offset_data);
}
display_pos = t_bmp_header.offset_data;
printf("size header:%u infoheader:%u ",sizeof(t_bmp_header),sizeof(t_bmp_info_header));
num = fread(&t_bmp_info_header,1,sizeof(t_bmp_info_header), fp);
if(num !=sizeof(t_bmp_info_header))
{
printf("Read data len mismatch, please check:%d ", num);
return-4;
}
else
{
printf("width=%u height=%u ", t_bmp_info_header.width, t_bmp_info_header.height);
}
/* seek offset positon */
fseek(fp, t_bmp_header.offset_data, SEEK_SET);
get_bmp_at(&f_info,&v_info,&t_bmp_info_header, bmp9696, t_bmp_info_header.bit_count /8);
num = fwrite(bmp9696,1, t_bmp_info_header.width * t_bmp_info_header.height * t_bmp_info_header.bit_count >>3, fp);
if(num != t_bmp_info_header.width * t_bmp_info_header.height * t_bmp_info_header.bit_count >>3)
{
printf("bmp raw data mismatch. ");
return-5;
}
else
{
printf("save bmp ok");
fclose(fp);
}
return0;
}
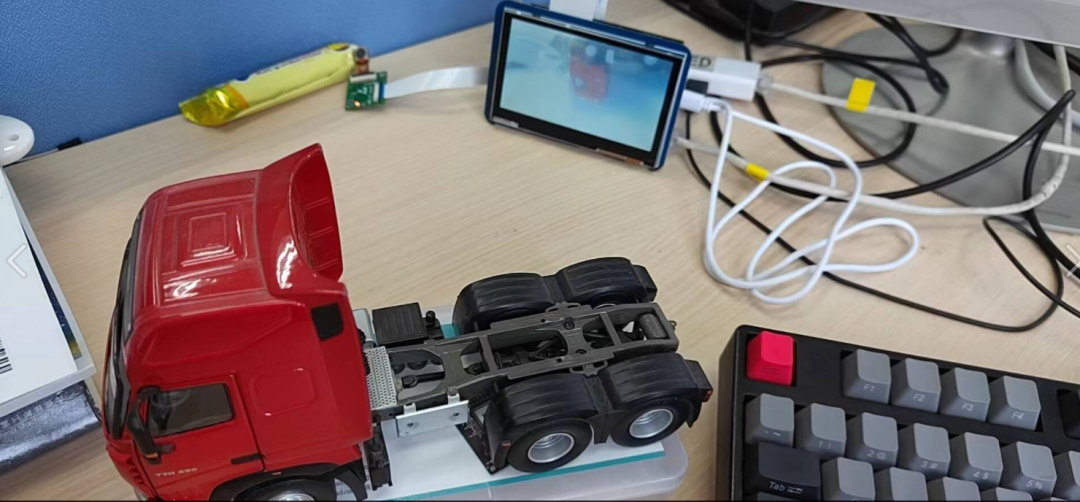
2、实验,我使用了一个卡车模型进行采集,现场是这样的:
采集回来的图片是这样的:
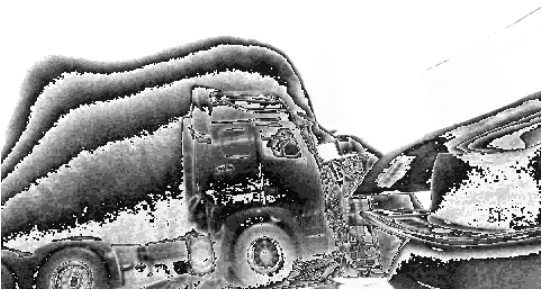
隐约可以从这个灰度图中看出来卡车模型的轮廓,接下来使用 tflite 的模型对这个图片进行预测,结果可以看出来识别到这个图片中包含有车:

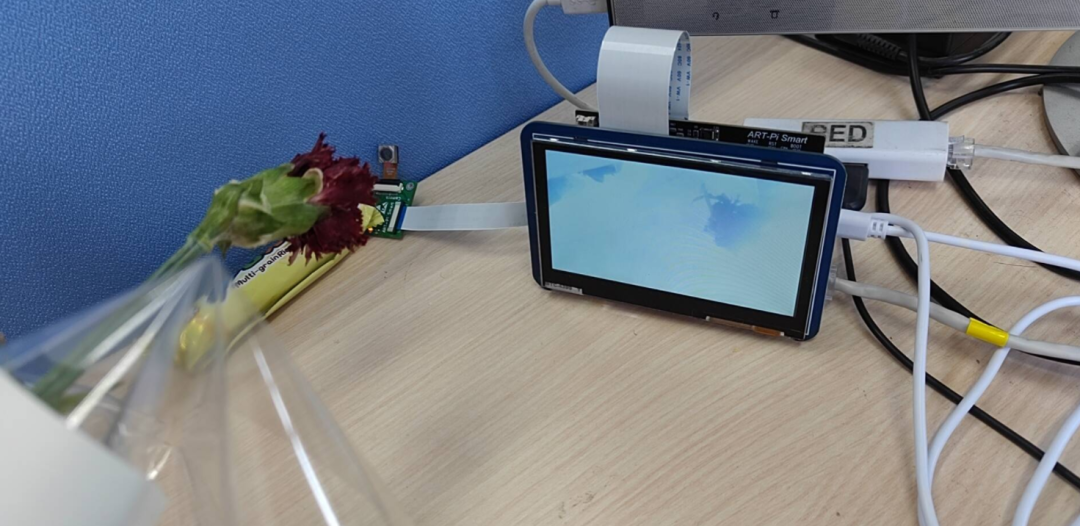
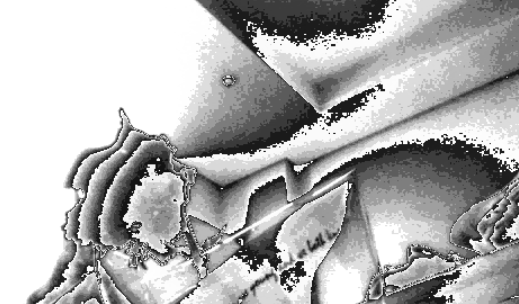
为了做对比,再采集一张有花朵的图片,进行预测,现场是这样的:
对摄像头采集的图片进行捕捉,保存到一个灰度 bmp 图片:
结果是:

可以看出正确识别除了是花还是汽车。
至此本次项目暂时告一段落了,通过这次试用,主要收获有两个方面:
1、通过实际对机器学习迁移到嵌入式设备端这个过程的接触,对在边缘节点进行机器学习有了一个基础的认识;
2、通过这次对 ov5640 摄像头的调试,对 CSI 接口摄像头的图像采集以及显示有了一个更深入的理解;
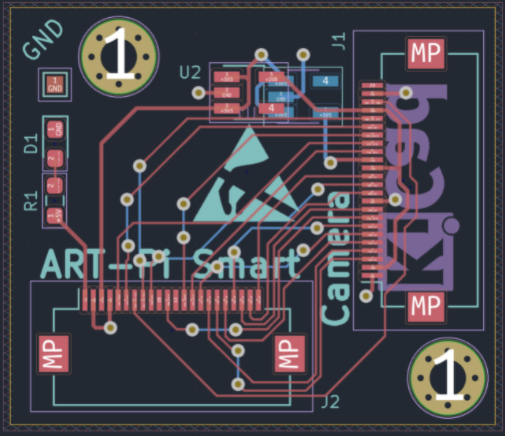
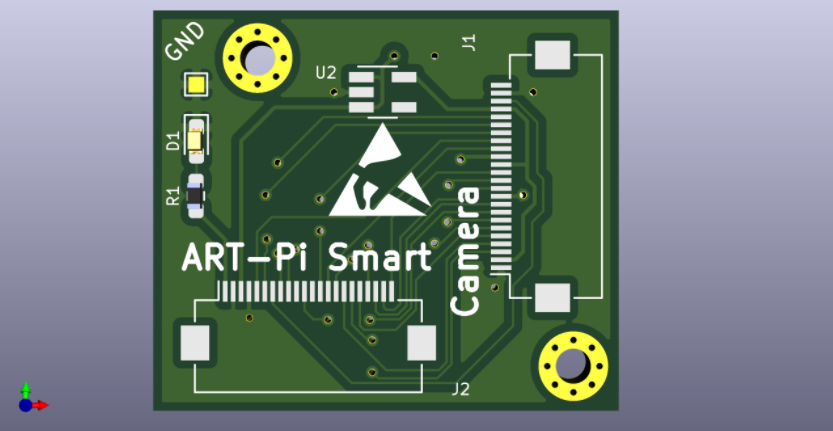
目前还有部分未完成的工作,对摄像头采集的图像效果不是特别满意,目前分析可能是 ART-Pi Smart 到转接板之间排线有点长(我选的是10cm的)对显示信号(有高频 50MHz 附近的 PCLK 时钟)有干扰,转接板没有处理好高频信号导致的,看一下转接板 PCB 和 3D 是这样的。
审核编辑:刘清
-
ART-Pi Smart开发板开箱及爱之初次体验2022-05-03 6959
-
ART-Pi Smart开发板开箱体验2022-07-07 1846
-
基于ART-PI的数字图像处理与识别方案资料2020-12-21 5059
-
ART-PI重力感应无线智能小车设计实现2022-02-10 1065
-
怎样在ART-Pi H750上移植TouchGFX呢2022-02-22 1321
-
基于ART-Pi Smart平台的设计方案推荐2022-03-24 2321
-
ART-PI在MDK中使用SDIO设备的方法2022-04-11 2041
-
在Linux环境下对ART-Pi Smart进行固件烧录的方法2022-04-21 2545
-
配置ART-Pi Smart开发板的启动方式资料推荐2022-05-05 3850
-
分享一种在ART-Pi Smart上进行车标识别的设计方案2022-06-02 2801
-
使用ART-PI获取OV7670的图像来做图像处理和图像识别2022-08-31 2312
-
可以在ART-PI smart上试试C++编程吗2022-09-13 1986
-
在ART-Pi上完成带有人像识别功能的趣味AI相机实验2021-01-13 4845
-
RT-Thread联合百问科技出品ART-Pi Smart开发板2021-11-16 4660
-
【STM32H750】玩转ART-Pi(一)——使用STM32CUBMX生成TouchGFX工程2021-12-28 1360
全部0条评论

快来发表一下你的评论吧 !
