

AWTK控件serial_widget的使用方法
电子说
1.4w人已加入
描述
把串口做成一个控件并不新鲜,在VB里有个通信组件,就是用来简化串口编程的。最近AWTK也提供了这样一个控件serial_widget,本文介绍一下它的使用方法。
基本功能
我们编写一个简单的应用程序,它有两个功能:
- 把收到的数据显示出来。
- 把界面输入的数据发送给对方。
UI 界面描述文件
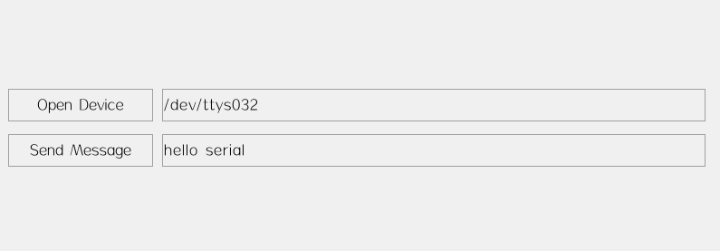
"open" text="Open Device" x="10" y="100" w="160" h="36" />"device" x="180" y="100" w="-200" h="36" text="/dev/ttys032" />"send" text="Send Message" x="10" y="150" w="160" h="36" />"send_msg" x="180" y="150" w="-200" h="36" text="hello serial" />"recv_msg" x="c" y="b:100" w="90%" h="100" />"serial" />
接收数据
• 先注册数据事件的处理函数。
widget_child_on(win, "serial", EVT_DATA, on_data, win);
• 在处理函数中读取数据并显示到界面上。
static ret_t on_data(void* ctx, event_t* e) { char text[128] = {0}; widget_t* win = WIDGET(ctx); serial_widget_t* serial = SERIAL_WIDGET(e->target); widget_t* label = widget_lookup(win, "recv_msg", TRUE); int32_t len = tk_istream_read(serial->istream, text, sizeof(text)-1); if(len > 0) {text[len] = '0';widget_set_text_utf8(label, text);} return RET_OK;}
发送数据
从界面读取数据,并发送到串口。
static ret_t on_send(void* ctx, event_t* e) { char text[128] = {0}; widget_t* win = WIDGET(ctx); serial_widget_t* serial = SERIAL_WIDGET(widget_lookup(win, "serial", TRUE)); widget_t* edit = widget_lookup(win, "send_msg", TRUE);widget_get_text_utf8(edit, text, sizeof(text)-1);tk_ostream_write_len(serial->ostream, text, strlen(text), 3000); return RET_OK;}
完整代码请参考 serial 可以下载 awtk-c-demos 编译运行。
./bin/demo_serial
测试
下面操作是在 Linux/MacOS 上测试的,Windows 下需要安装虚拟串口软件,具体做法有些不同,请自行调整。
• 使用 socat 创建虚拟串口
socat -d -d pty,raw,echo=0 pty,raw,echo=0
该命令会生成两个设备文件,对应串口的两端(每次生成的设备名可能不同)。
2022/07/08 16:32:33 socat[1879] N PTY is /dev/ttys0322022/07/08 16:32:33 socat[1879] N PTY is /dev/ttys0332022/07/08 16:32:33 socat[1879] N starting data transfer loop with FDs [5,5] and [7,7]
• 在 AWTK 这端我们使用设备 /dev/ttys032• 在另外一端读取数据
打开一个新的终端,并运行下面的命令(有数据时自动显示出来):
cat /dev/ttys033
• 在另外一端发送数据
打开一个新的终端,并运行下面的命令(发送当前时间字符串):
date >/dev/ttys033
使用 fscript 进行串口编程
"打开设备" x="16" y="15" w="76" h="34" >"on:click">var device = widget_get('device', 'text')widget_set('serial','device', device)"device" x="119" y="13" w="178" h="38" text="/dev/ttys028" />"recv" x="5" y="123" w="303" h="101" />"send" text="hello serial" x="5" y="273" w="200" h="34" />"button" tr_text="send" x="220" y="274" w="81" h="34" >"on:click">var os = widget_get('serial','ostream')var msg = widget_get('send', 'text')ostream_write_string(os, msg)"serial">"on:data">var is = widget_get('self','istream')var msg = istream_read_string(is, 100, 0)widget_set('recv', 'text', msg)
在 AWTK 根目录下可以运行该例子,测试方法与前面相同。
./bin/preview_ui design/default/ui/serial.xml
移植
目前串口只实现了Windows, Linux, MacOS, Android 和 AWorks 等平台,其它平台需要自己移植。
请参考AWorks平台的移植:
src/platforms/aworkslp/serial_helper.c
审核编辑:汤梓红
声明:本文内容及配图由入驻作者撰写或者入驻合作网站授权转载。文章观点仅代表作者本人,不代表电子发烧友网立场。文章及其配图仅供工程师学习之用,如有内容侵权或者其他违规问题,请联系本站处理。
举报投诉
-
AWTK 最新动态:支持浏览器控件2024-11-20 1430
-
【AWTK最新动态】AWTK 1.8版本发布2024-08-30 2041
-
图片动画控件和Video image控件的使用方法2024-08-06 3022
-
【AWTK使用经验】如何实现序列帧动画2024-07-18 1784
-
【AWTK使用经验】如何播放视频或摄像头画面2024-07-04 2703
-
AWTK 开源智能串口屏方案2023-12-02 2312
-
【Z站推荐】AWTK最新动态:使用serial_widget简化串口编程2022-08-08 1941
-
AWTK基本性能测试及在Linux下AWTK与Qt的性能对比2020-03-09 7917
-
关于表格控件的一些使用方法2018-09-20 7776
-
emWin实例速成教程007_Graph波形曲线图形控件使用方法2017-11-09 8144
-
实现iOS-Widget的方法详解2017-09-25 721
-
急求labview中表格控件的使用方法2013-08-22 4786
全部0条评论

快来发表一下你的评论吧 !
