

关于我在MDK中部署LVGL只用了10分钟这件小事
描述
【说在前面的话】
说实话,LVGL这么有牌面的项目,其维护者居然没听说过cmsis-pack,这着实让我略为破防:

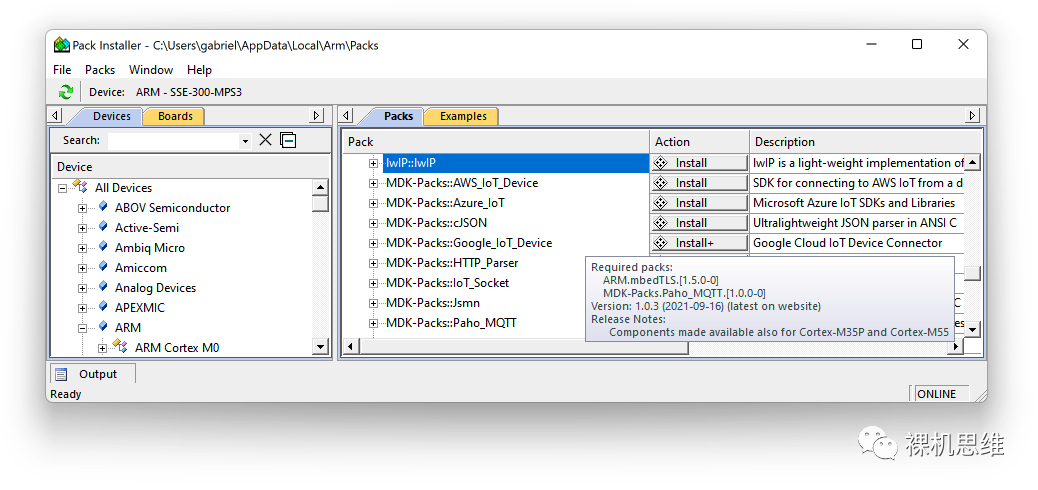
对这样的嵌入式开源界的“世界级明星白菜”,难得遇到一个“染指”的机会,怎能不“拱”一下呢?
省略一万字的过程描述……
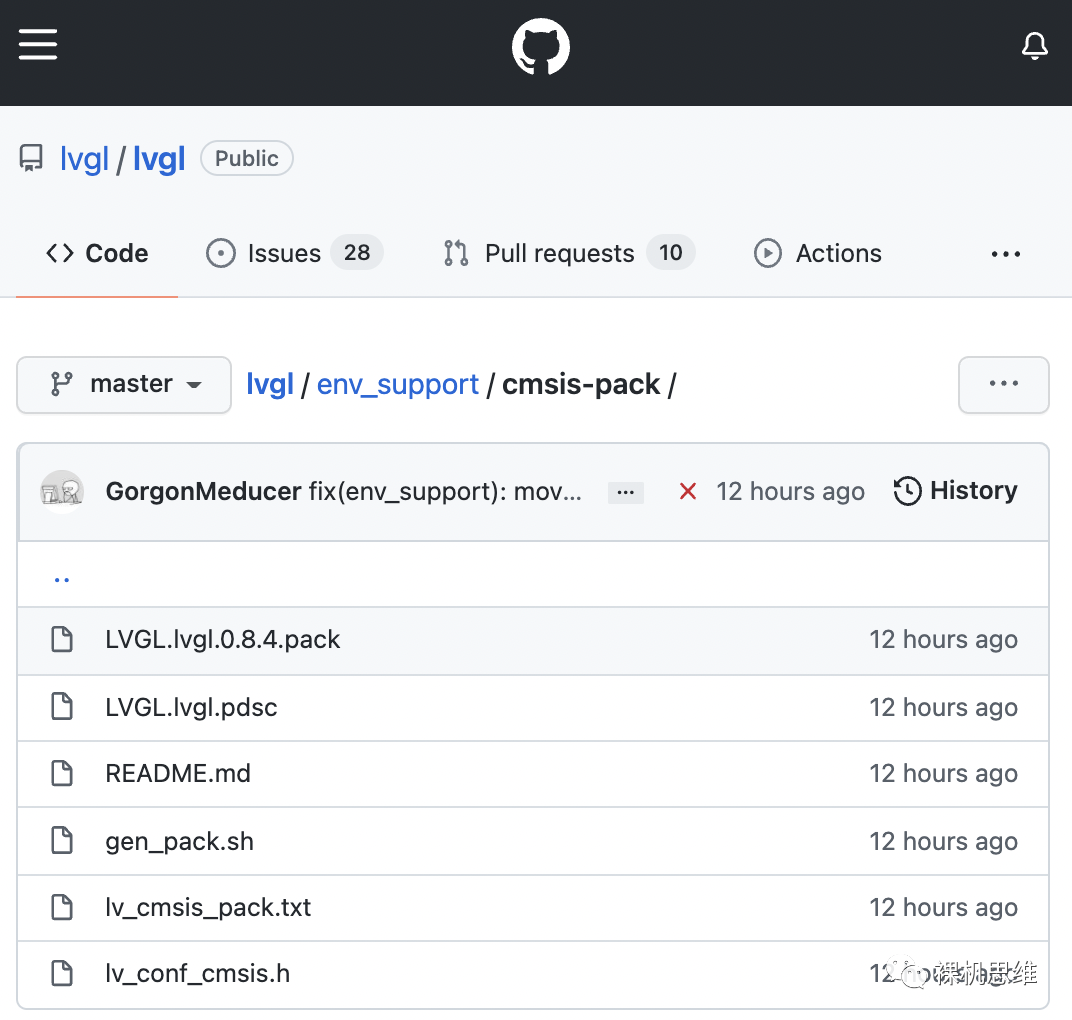
我为LVGL做的CMSIS-Pack终于被合并入仓库主线啦!
【如何获取 LVGL cmsis-pack】
1、用户可以通过LVGL在Github的仓库直接下载:
https://github.com/lvgl/lvgl/tree/master/env_support/cmsis-pack2、不久的将来,应该可以直接通过MDK的Pack-Installer进行直接安装,就像lwIP那样:
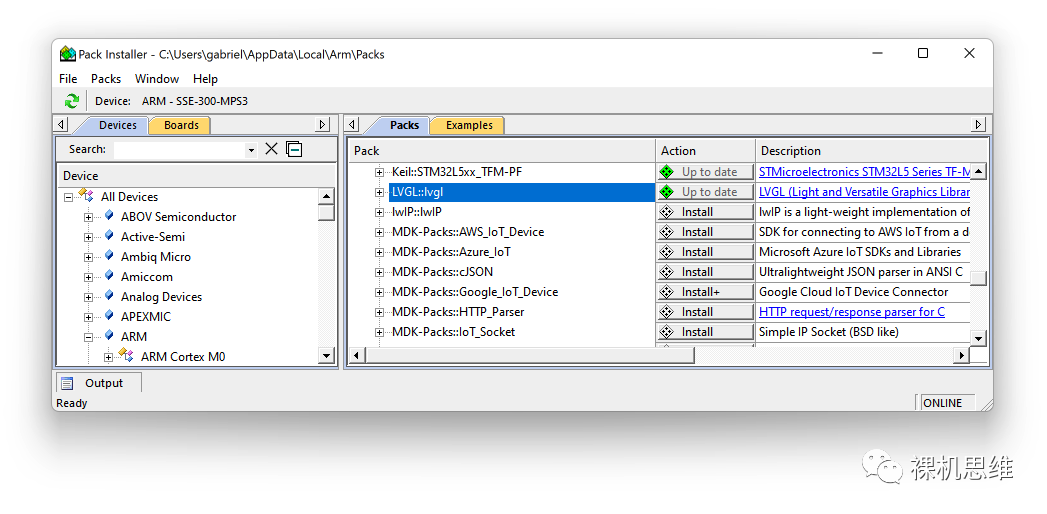
无论采用哪种方法,一旦完成安装,以后就可以通过Pack-Installer来获取最新版本啦。
【如何在MDK中部署LVGL】
步骤一:配置RTE
在MDK中通过菜单 Project->Manage->Run-Time Enviroment 打开RTE配置窗口:
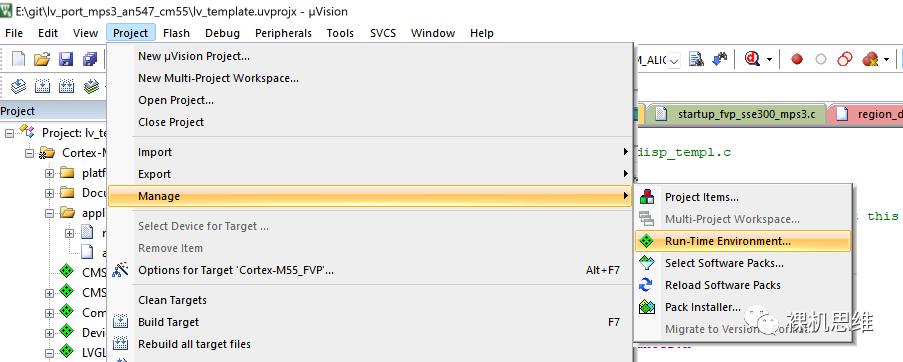
在RTE配置界面中找到LVGL,将其展开:
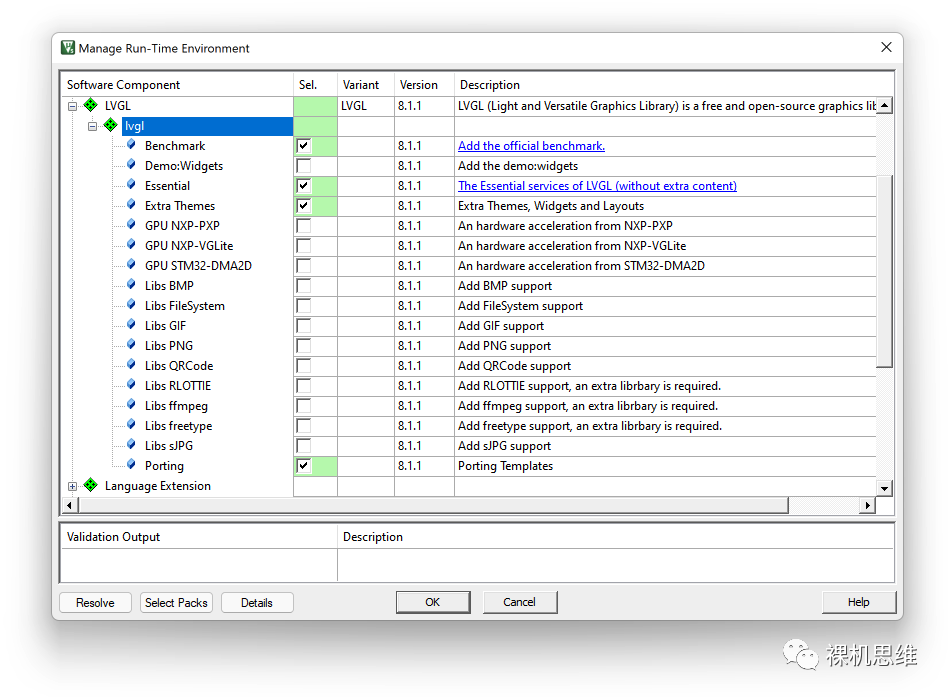
与其它平台下部署LVGL不同,cmsis-pack允许大家像点菜那样只将所需的模块(或者功能)加入到工程中。
注意,这里必点的是“Essential”,它是LVGL的核心服务。一般来说,为了使用LVGL所携带的丰富控件(Widgets),我们还需要选中“Extra Themes”。如果你是第一次为当前硬件平台进行LVGL移植,则非常推荐加点“Porting”——它会为你添加移植所需的模板,非常方便。 单击“OK”关闭RTE配置窗口,我们会看到LVGL已经被加入到工程列表中了:
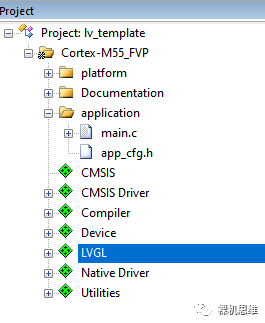
此时,我们就已经可以成功编译了。
步骤二:配置LVGL
将LVGL展开,找到配置头文件 lv_conf_cmsis.h:
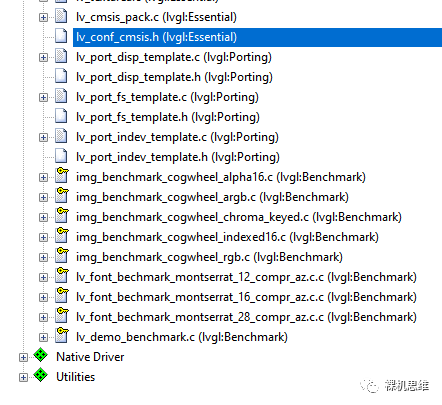
该文件其实就是LVGL官方移植文档中所提到的lv_conf.h,它是基于lv_conf_template.h 修改而来。值得说明的是,一些模块的开关宏都被删除了,例如:
LV_USE_GPU_STM32_DMA2DLV_USE_GPU_NXP_PXP……
这是因为,当我们在RTE配置窗口中勾选对应选项时,cmsis-pack就会自动把对应的宏定义加入到 RTE_Components.h 里——换句话说,再也不用我们手动添加啦!
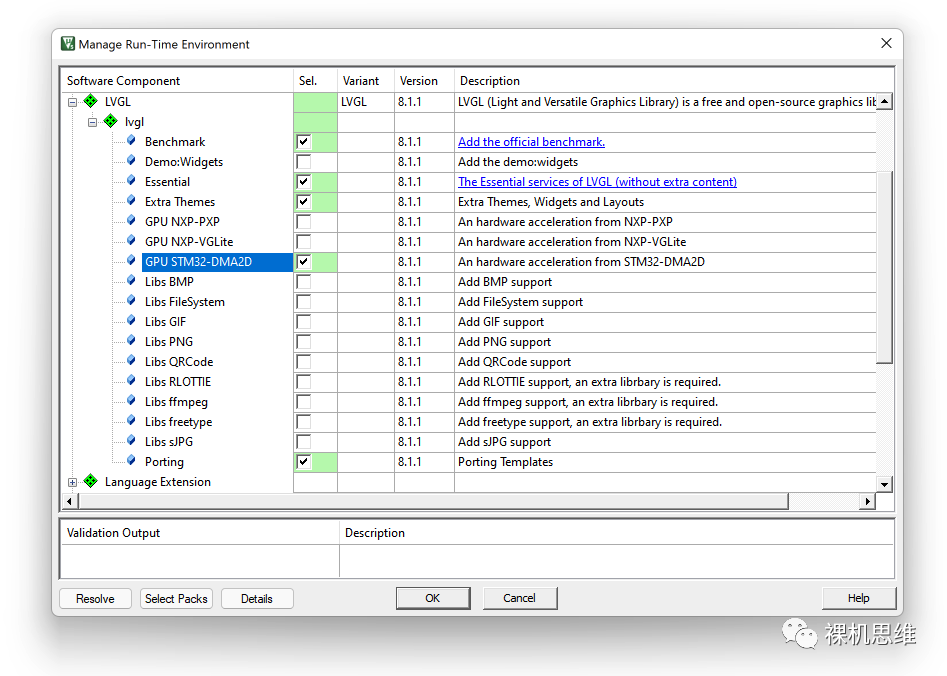
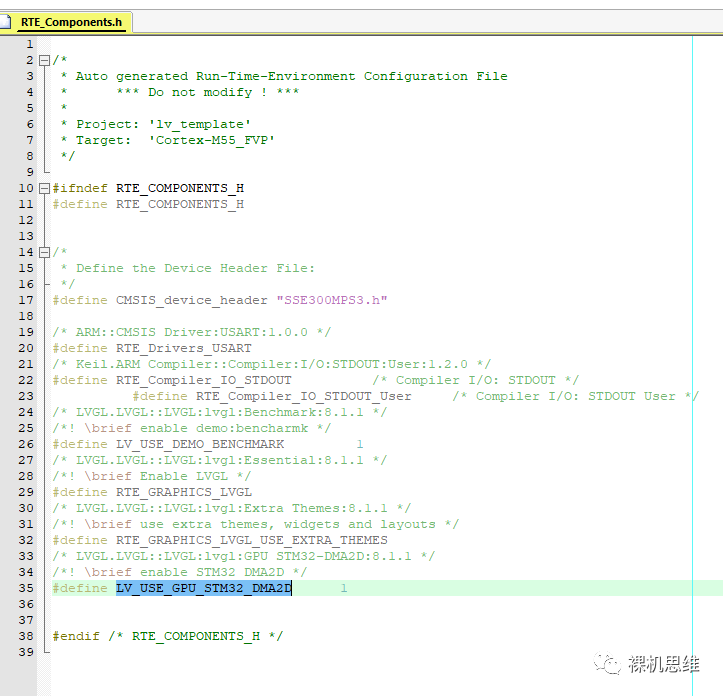
其它对LVGL的配置,请参考官方文档,这里就不再赘述。
步骤三:使用模板进行移植
当我们在RTE中选择了porting模块后,三个移植模板会被加入到工程列表中。
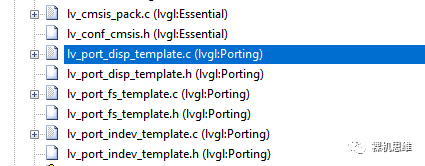
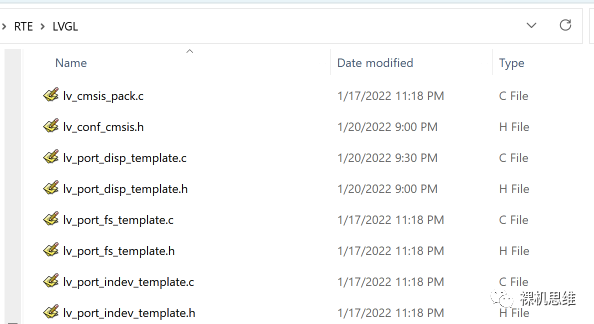
这些模板极大的简化了我们的驱动移植过程,下面,我们将以lv_port_disp_template为例,为大家介绍这些模板的使用方法:
1、打开 lv_port_disp_template.h,将开头处 #if 0 修改为 #if 1,使整个头文件生效:

2、更新对 lvgl.h 头文件的引用路径,从 "lvgl/lvgl.h" 改为 "lvgl.h"
/********************** INCLUDES*********************/#include "lvgl.h"
这是因为cmsis-pack已经为 lvgl.h 添加了引用路径,因此在整个工程的任意地方都可以直接使用 #include "lvgl.h" 。
3、补充对 lv_port_disp_init() 函数的声明:
/*********************** GLOBAL PROTOTYPES**********************/extern void lv_port_disp_init(void);
4、打开 lv_port_disp_template.c,将开头处 #if 0 修改为 #if 1,使整个远文件生效。并以与步骤2相同的方式处理好对 lvgl.h 的引用。

5、根据官方 porting 文档的指导,根据你的硬件实际情况,在三种缓冲模式中做出选择:

需要特别强调的是:如果你的系统没有 DMA或者替用户完成Frame Buffer刷新的专门LCD控制器,那么双缓冲其实是没有意义的(因为无论如何都是CPU在干活,因此不会比单缓冲模式有任何性能上的本质不同)。
6、找到 disp_init() 函数,并在其中添加LCD的初始化代码。 该函数会被 lv_port_disp_init() 调用。
7、找到 disp_flush()函数,并根据你的硬件实际情况,将其改写。比如这是使用 GLCD_DrawBitmap进行实现的参考代码:
/*Flush the content of the internal buffer the specific area on the display*You can use DMA or any hardware acceleration to do this operation in the background but*'lv_disp_flush_ready()' has to be called when finished.*/static void disp_flush(lv_disp_drv_t * disp_drv, const lv_area_t * area, lv_color_t * color_p){GLCD_DrawBitmap(area->x1, //!< xarea->y1, //!< yarea->x2 - area->x1 + 1, //!< widtharea->y2 - area->y1 + 1, //!< height(const uint8_t *)color_p);/*IMPORTANT!!!*Inform the graphics library that you are ready with the flushing*/lv_disp_flush_ready(disp_drv);}
GLCD_DrawBitmap 用于将给定的显示缓冲区刷新到LCD,其函数原型如下:
/**\fn int32_t GLCD_DrawBitmap (uint32_t x, uint32_t y, uint32_t width, uint32_t height, const uint8_t *bitmap)\brief Draw bitmap (bitmap from BMP file without header)\param[in] x Start x position in pixels (0 = left corner)\param[in] y Start y position in pixels (0 = upper corner)\param[in] width Bitmap width in pixels\param[in] height Bitmap height in pixels\param[in] bitmap Bitmap data\returns- \b 0: function succeeded- \b -1: function failed*/int32_t GLCD_DrawBitmap (uint32_t x,uint32_t y,uint32_t width,uint32_t height,const uint8_t *bitmap)
这里,5个参数之间的关系如下图所示:
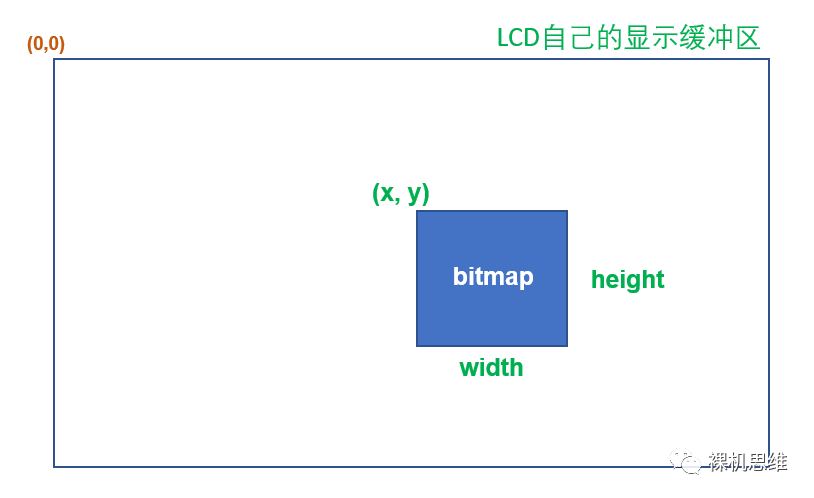 简单来说,这个函数就是把 bitmap 指针所指向的“连续存储区域” 中保存的像素信息拷贝到LCD的一个指定矩形区域内,这一矩形区域由位置信息(x,y)和体积信息(width,height)共同确定。
很多LCD都支持一个叫做“操作窗口”的概念,这里的窗口其实就是上图中的矩形区域——一旦你通过指令设置好了窗口,随后连续写入的像素就会被依次自动填充到指定的矩形区域内(而无需用户去考虑何时进行折行的问题)。
此外,如果你有幸使用带LCD控制器的芯片——LCD的显示缓冲区被直接映射到Cortex-M芯片的4GB地址空间中,则我们可以使用简单的存储器读写操作来实现上述函数,以STM32F746G-Discovery开发板为例:
//! STM32F746G-Discovery#define GLCD_WIDTH 480#define GLCD_HEIGHT 272#define LCD_DB_ADDR 0xC0000000#define LCD_DB_PTR ((volatile uint16_t *)LCD_DB_ADDR)int32_t GLCD_DrawBitmap (uint32_t x,uint32_t y,uint32_t width,uint32_t height,const uint8_t *bitmap){volatile uint16_t *phwDes = LCD_DB_PTR + y * GLCD_WIDTH + x;const uint16_t *phwSrc = (const uint16_t *)bitmap;for (int_fast16_t i = 0; i < height; i++) {memcpy ((uint16_t *)phwDes, phwSrc, width * 2);phwSrc += width;phwDes += GLCD_WIDTH;}return 0;}
7、在 main.c 中加入对 lv_port_disp_template.h 的引用:
8、在main()函数中对LVGL进行初始化:
int main(void){...lv_init();lv_port_disp_init();...while(1) {}}
至此,我们就完成了LVGL在MDK工程的部署。是不是特别简单?
【时间相关的移植】
根据官方移植文档的要求,我们实际上还需要处理两个问题:
-
让 lvgl 知道从复位开始经历了多少毫秒
-
以差不多5ms为间隔,调用函数 lv_timer_handler() 来进行事件处理(包括刷新)
依据平台的不同,小伙伴们当然有自己的解决方案。这里,我推荐一个MDK环境下基于perf_counter的方案,它更通用,也更简单。关于它的使用文章,小伙伴可以参考《【喂到嘴边了的模块】超级嵌入式系统“性能/时间”工具箱》,这里就不再赘述。 步骤一:获取 perf_counter 的cmsis-pack
关注公众号【裸机思维】后,向后台发送关键字“perf_counter” 获取对应的cmsis-pack网盘链接。下载后安装。
步骤二:在工程中部署 perf_counter
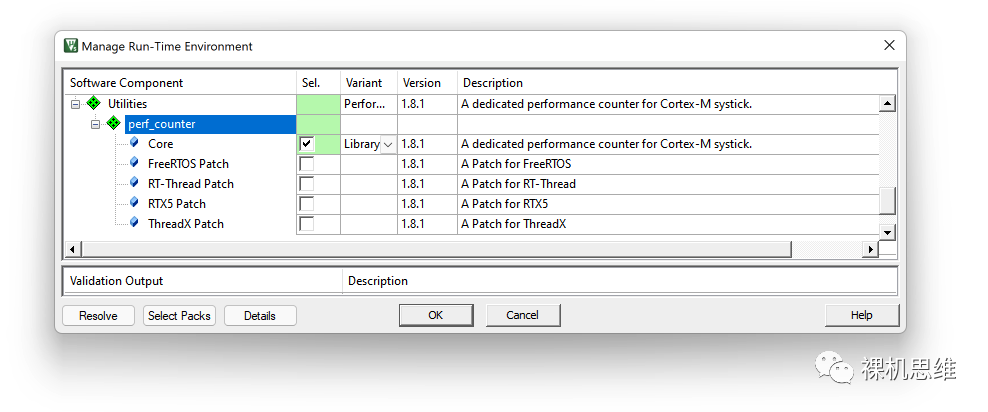
打开RTE配置窗口,找到 Utilities 后展开,选中 perf_counter的 Core:
int main(void){/* 配置 MCU 的系统时钟频率 *//* 重要:更新 SystemCoreClock 变量 */SystemCoreClockUpdate();/* 初始化 perf_counter */init_cycle_counter(true);...while(1) {}...}
需要特别说明的是:
-
调用 init_cycle_counter() 之前,最好通过 SystemCoreClockUpdate() 来将当前的系统频率更新到关键全局变量 SystemCoreClock 上。你当然也可以自己用赋值语句来做,比如:
extern uint32_t SystemCoreClock;SystemCoreClock = 72000000ul; /* 72MHz */
-
如果你已经有应用或者RTOS占用了SysTick(一般都是这样),则应该将 true 传递给 init_cycle_counter() 作为参数——告诉 perf_counter SysTick已经被占用了;反之则应该传递 false,此时 perf_counter 会用最大值 0x00FFFFFF来初始化SysTick。
步骤三:更新 lv_conf_cmsis.h
打开 lv_conf_cmsis.h,找到宏 LV_TICK_CUSTOM 所在部分:/*Use a custom tick source that tells the elapsed time in milliseconds.*It removes the need to manually update the tick with `lv_tick_inc()`)*/
将其替换为:
/*Use a custom tick source that tells the elapsed time in milliseconds.*It removes the need to manually update the tick with `lv_tick_inc()`)*/extern uint32_t SystemCoreClock;(get_system_ticks() / (SystemCoreClock / 1000ul))
步骤四:处理 lv_timer_handler()
虽然 LVGL 的官方文档中专门指出过 lv_timer_handler()-
不是线程安全的
-
应该放在较低优先级的中断处理程序中
-
在RTOS中使用时,应该考虑通过互斥量来建立临界区来避免与 lv_tick_inc() 产生“冲突”
然而,使用 perf_counter() 进行部署时,由于我们避开了lv_tick_inc() ,因此上述限制就都“烟消云散”了,我们完全可以将 lv_timer_handler() 简单的放置到 SysTick_Handler中,比如:
void SysTick_Handler(void){//! 典型的 1ms 中断static uint8_t s_chDivider = 0;if ((++s_chDivider) >= 5) {s_chDivider = 0;//! 每 5ms 处理一次lv_timer_handler();}/*! \note please do not put following code here*!*! lv_tick_inc(5);*!*! Use a custom tick source that tells the elapsed time in milliseconds.*! It removes the need to manually update the tick with `lv_tick_inc()`)*! #define LV_TICK_CUSTOM 1*! #if LV_TICK_CUSTOM*! extern uint32_t SystemCoreClock;*! #define LV_TICK_CUSTOM_INCLUDE "perf_counter.h"*! #define LV_TICK_CUSTOM_SYS_TIME_EXPR \*! (get_system_ticks() / (SystemCoreClock / 1000ul))*! #endif*/}
当然,以上处理只是一种“偷懒”,实际上,考虑到LVGL的绘图过程可能会“耗时过长”,如果SysTick还有别的功能,那么直接将 lv_timer_handler() 放置在SysTick_Handler中其实并不是一个值得推荐的方案,裸机环境下,一个更为实用的方案是:
static volatile bool s_bLVTMRFlag = false;void SysTick_Handler(void){//! 典型的 1ms 中断static uint8_t s_chDivider = 0;if ((++s_chDivider) >= 5) {s_chDivider = 0;//! 每 5ms 处理一次s_bLVTMRFlag = true;}/*! \note please do not put following code here*!*! lv_tick_inc(5);*!*! Use a custom tick source that tells the elapsed time in milliseconds.*! It removes the need to manually update the tick with `lv_tick_inc()`)*! #define LV_TICK_CUSTOM 1*! #if LV_TICK_CUSTOM*! extern uint32_t SystemCoreClock;*! #define LV_TICK_CUSTOM_INCLUDE "perf_counter.h"*! #define LV_TICK_CUSTOM_SYS_TIME_EXPR \*! (get_system_ticks() / (SystemCoreClock / 1000ul))*! #endif*/}int main(void){SystemCoreClockUpdate();init_cycle_counter(true);...lv_init();lv_port_disp_init();...while(1) {...do {bool bLVFlag;//! 原子保护__IRQ_SAFE {bLVFlag = s_bLVTMRFlag;s_bLVTMRFlag = false;};if (bLVFlag) {lv_timer_handler();}} while(0);}}
【跑分从未如此简单】
完成移植后,也许你会急于想知道当前环境下自己的平台能跑出怎样的帧率吧?别着急,LVGL的cmsis-pack已经为您最好了准备。打开RTE配置窗口,勾选benchmark:

在 main.c 中加入对 lv_demo_benchmark.h 的引用:
在 LVGL 初始化代码后,加入benchmark 无脑入口函数:
int main(void){lv_init();lv_port_disp_init();lv_demo_benchmark();while(1) {}}
编译,运行,走起:
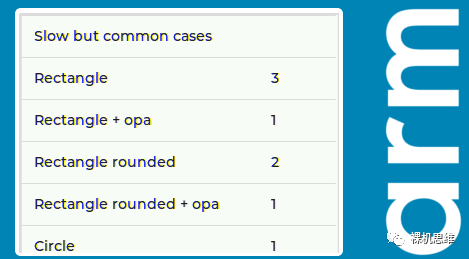
嗯…… Slow but common case……
【装逼从未如此简单】
完成移植后,也许你“又”会急于想知道当前环境下自己的平台能跑出怎样的效果吧?(咦?为什么要说又?)别着急,LVGL的cmsis-pack已经为您最好了准备。打开RTE配置窗口,勾选 Demo:Widgets:

在 main.c 中加入对 lv_demo_widgets.h 的引用:
在 LVGL 初始化代码后,加入 Demo Widgets 的无脑入口函数:
int main(void){lv_init();lv_port_disp_init();lv_demo_benchmark();lv_demo_widgets();while(1) {}}
需要特别注意的是:要跑这个Demo,Stack(栈)和 Heap(堆)各自都不能小于 4K,切记,切记!
编译,运行,走起:

【说在后面的话】
能参与像 LVGL 这样的项目,且在PR在三天内就并入主线,是我始料未及的。不得不佩服项目维护者的心胸和效率。 虽然很多人因为API兼容性的问题仍然在坚守 LVGL 7.x,但我相信随着cmsis-pack大幅降低了 MDK 用户的部署门槛后,应该会有越来越多的用户在新项目中使用 LVGL 8——毕竟MCU每个项目基本都是“新建文件夹”——也不能说没有历史传承,只能说基本没有……
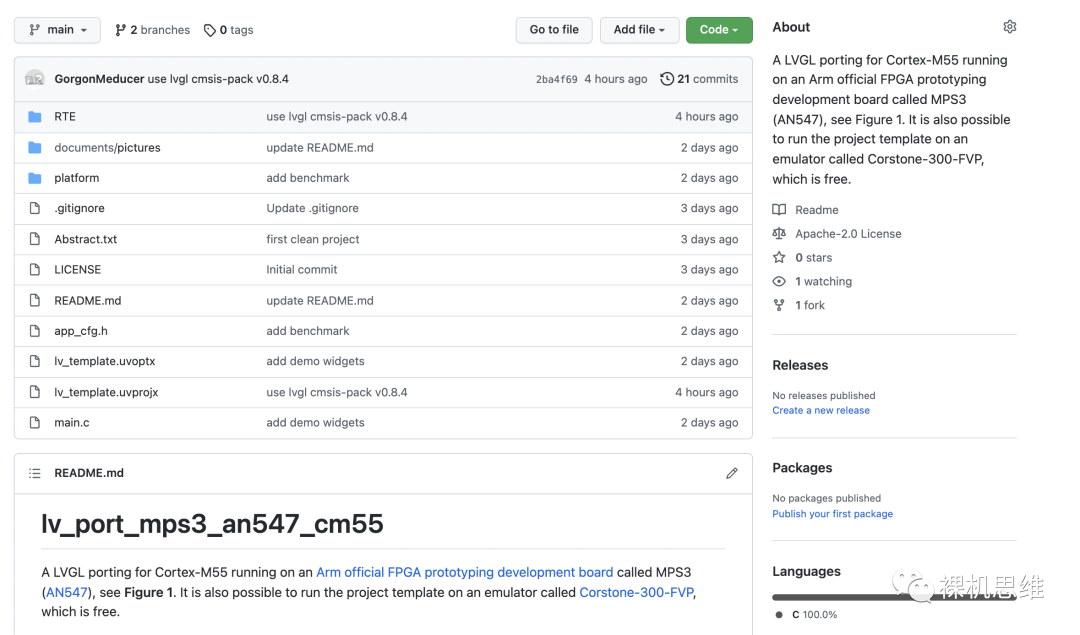
最后,对在MDK中用cmsis-pack来部署LVGL的过程感到好奇,但又想有个参考的小伙伴,可以关注下面这个开源项目: https://github.com/GorgonMeducer/lv_port_mps3_an547_cm55 如果他对你有所帮助的话,还请赏赐个Star呀。
审核编辑 黄昊宇
-
高考AI智能机器人比拼:10分钟完成数学答卷2017-06-09 2321
-
10分钟上手睿擎平台GUI开发:第一个LVGL图形应用2025-06-06 2414
-
LM358只用了一个通道,不适用的运放如何处理?2024-08-09 866
-
如何在低成本ARM平台部署LVGL免费图形库,基于全志T113-i2024-10-29 997
-
编译vision_board_mipi_2.0inch_lvgl工程,cpu能跑到100%,竟然需要41分钟,怎么解决?2025-08-29 200
-
ADC实验中,只用了通道0,为什么还设置了通道1-3?2020-05-29 1578
-
在嵌入式环境中部署环境的相关资料分享2021-10-27 658
-
如何在esp8266 Node MCU的硬件上部署LVGL2021-12-08 2501
-
乐视股东大会:一场15分钟草草结束的会议,让我们回忆起贾跃亭的豪言2017-07-18 720
-
ZAO只用了4天时间被追捧、封杀,反转来得未免太快了一点2019-09-05 4864
-
七星级服务:半个月没干成,卡萨帝只用了90分钟2021-11-19 366
-
10分钟网络部署、5分钟故障定位、千兆Wi-Fi体验!好网络就用华为云Wi-Fi!2023-04-08 1001
-
如何在MDK中部署LVGL2023-07-27 2417
-
重大更新,LVGL有UI编辑器用了,2秒内加载,快到飞起!2025-10-21 1304
全部0条评论

快来发表一下你的评论吧 !

