

VSCode搭建STM32开发环境的一些常规且使用的功能
描述
众所周知,Keil是一款收费软件,虽然可以Po解使用,但很多公司还是有点害怕,想必有不少读者都收到过**函。
之前,开发单片机项目,可以说 Keil 是最佳选择之一,但VSCode横空问世之后,这种格局被打破。
因为 VSCode 免费且好用,可以安装各种插件,很多工程师逐渐从Keil 转向了 VSCode。而且,VSCode还能实现 Keil 不能实现的一些功能。
 下面就给大家分享一下 VSCode 搭建 STM32 开发环境的一些常规且使用的功能。
 我们选择使用ST-link,SWD接口,目标芯片为stm32f1x。 (PS:这里注释掉了SWD接口,如果采用Jlink 则需要SWD接口)。这样,我们连好板子上好电,直接在终端里敲openocd,即可启动。
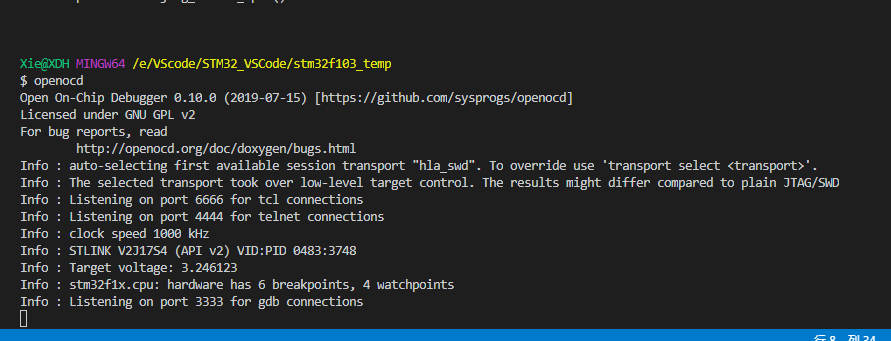 openocd运行时,这个shell终端就被占用了,我们一会要新开一个终端。
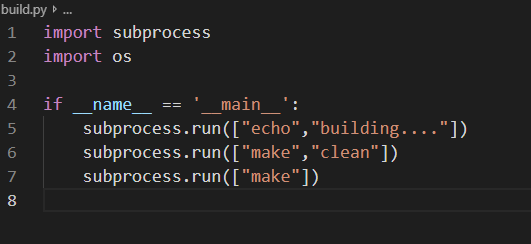
下面就给大家分享一下 VSCode 搭建 STM32 开发环境的一些常规且使用的功能。
01
需要的软件和工具- 下载最新版VS Code: 安装好插件,具有良好的代码补全与调试功能。
VS Code下载地址:https://code.visualstudio.com/
- 下载 LLVM:用于代码补全,其实可以理解为 Clang。因为VS Code 中“C/C++”插件的自动补全功能不太好用。STM32中好多库函数都补全不出来。记得按照好之后,将路径添加到环境变量里。
LLVM下载地址:http://releases.llvm.org/download.html
- 下载安装 Git for Windows: 提供Git支持和MINGW64指令终端。
Git下载地址:https://gitforwindows.org/
-
下载安装 arm-none-eabi-gcc:选择
gcc-arm-none-eabi-5\_4-2016q3-20160926-win32.exe(md5)这里是一个2016年的,我目前也是用的这个,好像还有其他的新版的下载,GNU Arm Embedded Toolchain。正常安装后,记得需要将软件的安装目录下的bin文件夹设置进入环境变量PATH中。
arm-none-eabi-gcc下载地址:https://launchpad.net/gcc-arm-embedded/+download
- 下载 OpenOCD for Windows:一个开源的片上调试器(Open On-Chip Debugger)。在Windows下自己编译可能有问题 。所以,我们选择编译好的。下载后的文件不是安装包,把程序文件夹放入自己的软件安装目录下,将软件的bin文件夹路径加入用户环境变量PATH中。
OpenOCD下载地址:http://gnutoolchains.com/arm-eabi/openocd/
- STM32CubeMX:用于生成带makefile的工程。这样我们就可以不用自己写MakeFile了。套用他的模板,然后修改为自己的目录就可以。
STM32CubeMX链接:http://www.stm32cube.com/
02
搭建编译环境1. 用STM32Cube创建工程。
STM32CubeMX生成的是用HAL库开发的项目,具体怎么配置这里就不介绍了,只介绍与主题有关的部分。(1)STM32CubeMx芯片包(固件库)下载,注意事项:
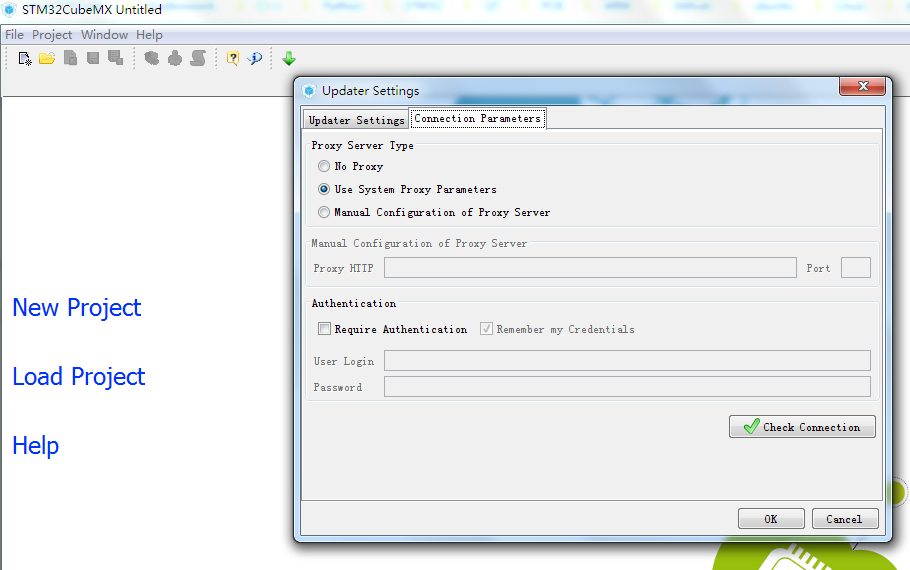
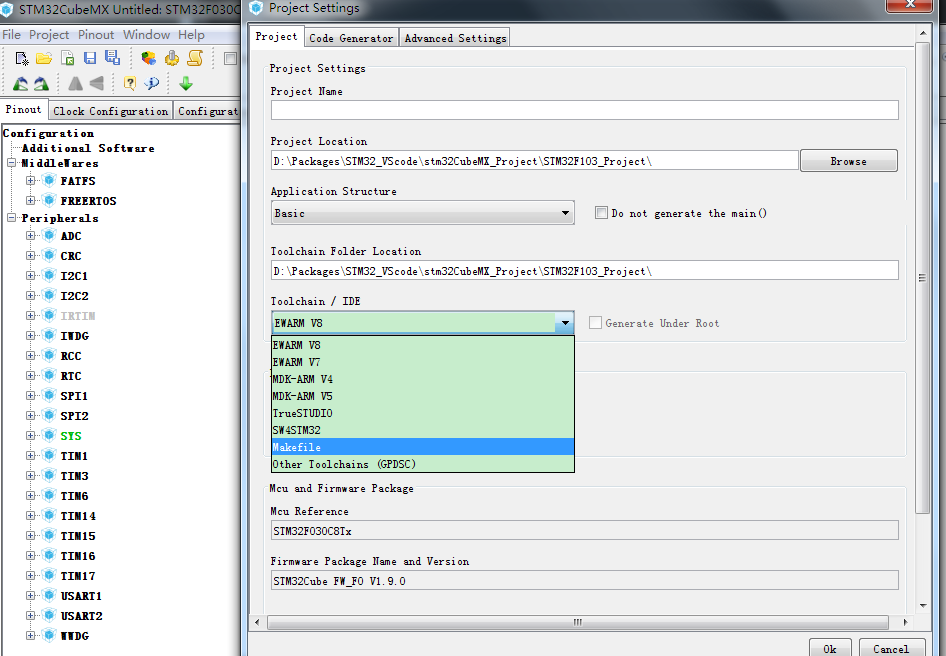
help -> updater settings ->Connection Parameters设置好网络后,才能下载固件包。(2)生成工程。选择MakeFile选项。注意: 4.18.0以下的版本是没有Makefile这个选项的。最后下载一个中间版本,因为5.0以上的版本界面很乱。我选择的是 4.27.0.
2.配置VS Code
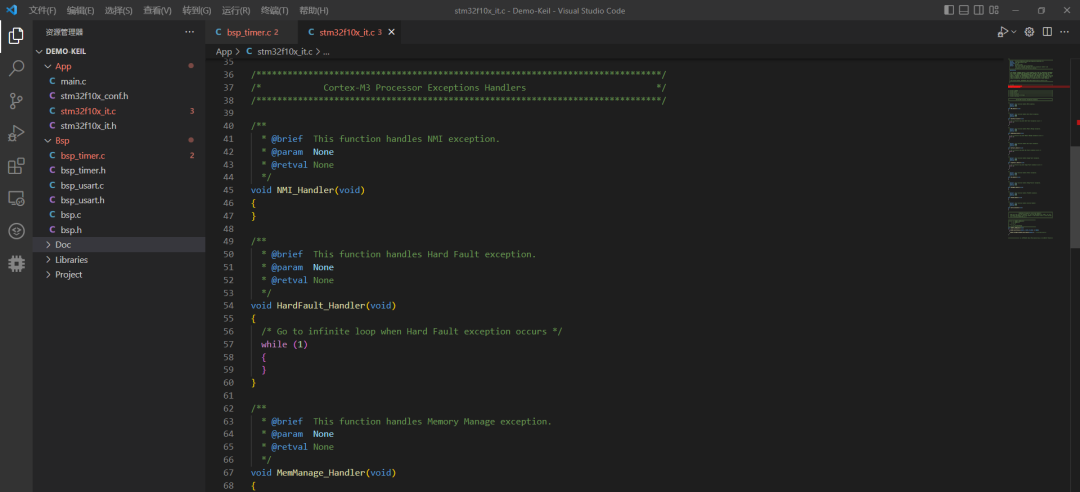
(1)打开工程所在的文件夹。在右键“用VS Code打开工程文件夹”,
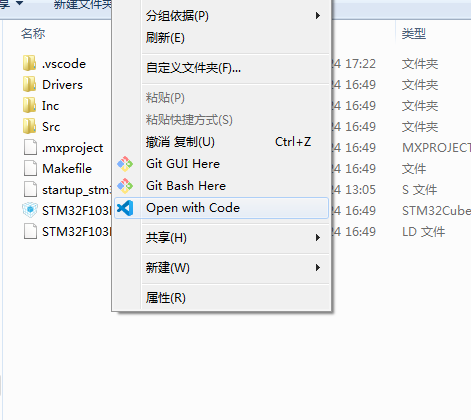
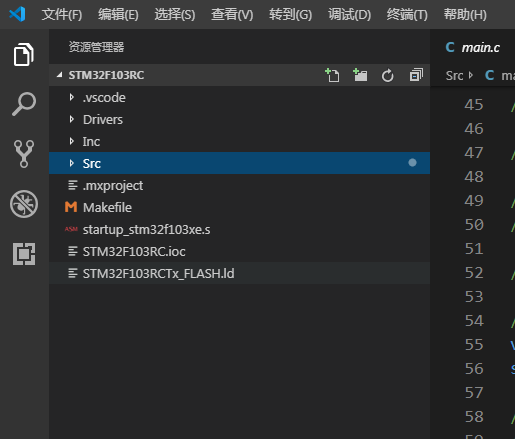
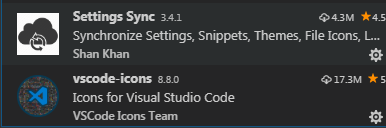
.ioc文件是STM32Cube的工程文件,Inc和Src是供用户修改的源码,Driver里是STM32和ARM CMSIS的库,最好不要修改。不过,如果你要采用标准库开发的话,就修改为标准库的Driver.(2)安装VS Code插件,需要这几样:

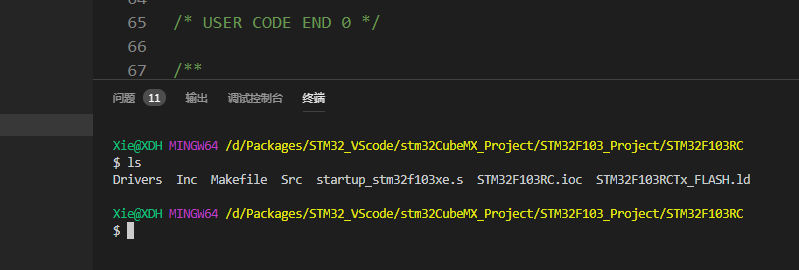
(3)配置VS Code内置终端
这里将我们上面安装的 Git for Windows 设置为VScode 的内置终端。文件–首选项–设置,搜索terminal,设置内置终端的Shell为Bash(安装VS Code的时候它会推荐你安装Git,里面有这个Bash)。或者打开 Settings.json添加下面两句。"terminal.integrated.shell.windows": "D:\Program Files\Git\bin\bash.exe", "terminal.external.windowsExec": "D:\Program Files\Git\bin\bash.exe" 然后按Ctrl+` 就可以打开终端,看到Bash了
(4)配置智能补全、智能感知插件。
前面我们安装了 LLVM 用它来实现智能补全,与纠错,自然就需要一个路径去寻找这些文件。因此我们需要一个。c\_cpp\_properties.json文件的配置文件。我们在当前目录的.vscode文件夹下创建c\_cpp\_properties.json配置文件,用来告诉VS Code我们定义的宏与文件的路径。{ "configurations": [ { "name": "Win32", "browse": { "path": [ "${workspaceFolder}/", "${workspaceFolder}/Drivers/CMSIS", "${workspaceFolder}/Drivers/FWlib/inc", "${workspaceFolder}/Drivers/CMSIS/startup", "${workspaceFolder}/User/inc", "${workspaceFolder}/User", "${workspaceFolder}/ThirdParty/crclib/include" ], "limitSymbolsToIncludedHeaders": true }, "includePath": [ "${workspaceFolder}/", "${workspaceFolder}/", "${workspaceFolder}/Drivers/CMSIS", "${workspaceFolder}/Drivers/FWlib/inc", "${workspaceFolder}/Drivers/CMSIS/startup", "${workspaceFolder}/User/inc", "${workspaceFolder}/User", "${workspaceFolder}/ThirdParty/crclib/include" ], "defines": [ "_DEBUG", "UNICODE", "_UNICODE", "__CC_ARM", "USE_STDPERIPH_DRIVER", "STM32F10X_HD" ], "compilerPath": "C:\Program Files\LLVM\bin\clang-format.exe", "cStandard": "c11", "cppStandard": "c++17", "intelliSenseMode": "clang-x64" } ], "version": 4 } 注意:如果提示
variable “uint32\_t” is not a type name不是一个type类型。则需要 添加宏定义\_\_CC\_ARM,如果没有该宏定义,则uint32\_t类型会报错。并且结构体中使用了uint32\_t定义的成员,也会补全不了。(5)编译程序
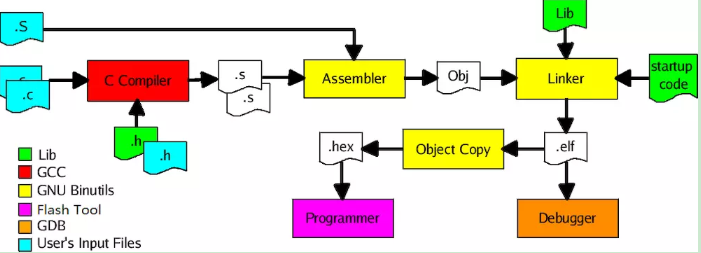
gcc下编译过程如下图所示:
-
.c文件 经过arm-none-eabi-gcc编译成.o文件 -
.s文件 经过arm-none-eabi-as编译成.o文件 -
.o文件 和.a文件 经过arm-none-eabi-ld链接成.elf文件 -
.elf文件 经过arm-none-eabi-objcopy和arm-none-eabi-objdump转换成 hex文件/dis文件 -
arm-none-eabi-gdb使用.elf文件 进行debug
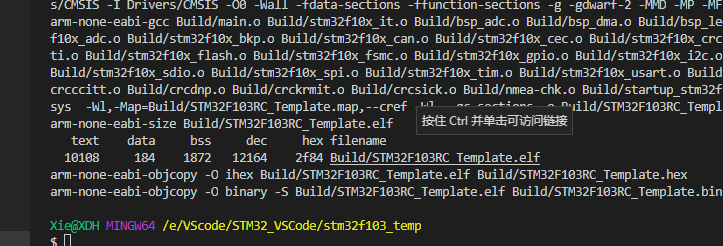
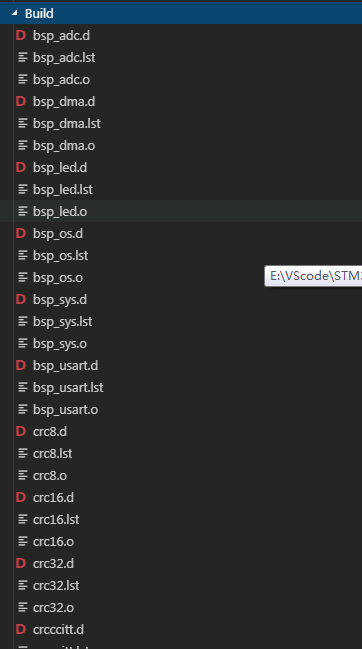
在Terminal下输入make指令,即会开始build程序
编译完成后,生成的所有文件都会放在Build文件夹下.

03
布局搭建调试环境
1.配置openocd。
要运行openocd这个gdb server,需要配置如下几个参数:- 用什么仿真器?(J-link, ST-link…)
- 用什么接口?(JTAG, SWD…)
- 目标芯片是什么?(STM32F4x, tm4c123g…)
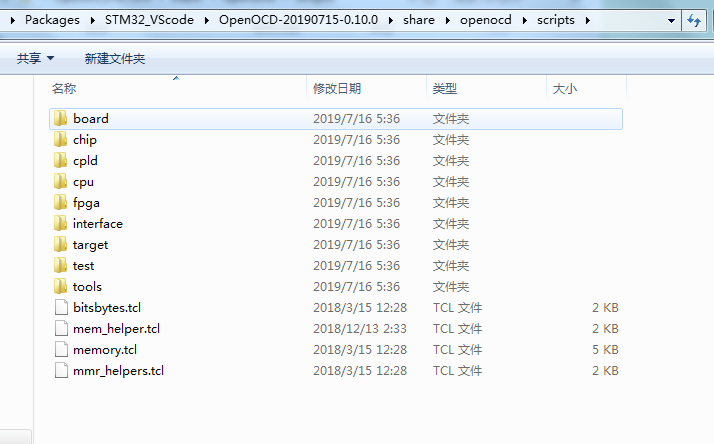
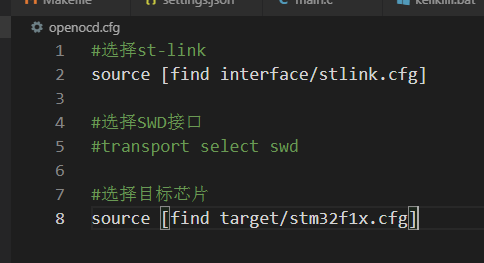
openocd –f interface/stlink.cfg –f target/stm32f4.cfg 【注】配置仿真器的参数必须在配置目标MCU的参数之前,否则将报错。如果我们不带参数启动,openocd就会自动查找当前目录下有没有名为openocd.cfg的文件,并把它作为配置文件来启动。因此,我们就在当前工程下创建一个名为openocd.cfg的文件。
我们选择使用ST-link,SWD接口,目标芯片为stm32f1x。 (PS:这里注释掉了SWD接口,如果采用Jlink 则需要SWD接口)。这样,我们连好板子上好电,直接在终端里敲openocd,即可启动。openocd运行时,这个shell终端就被占用了,我们一会要新开一个终端。2.用gdb连接上openocd
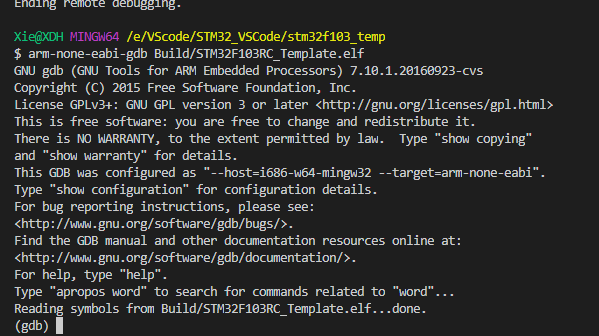
(1)直接启动gdb,参数为编译好的调试文件(.elf)
target remote localhost:3333

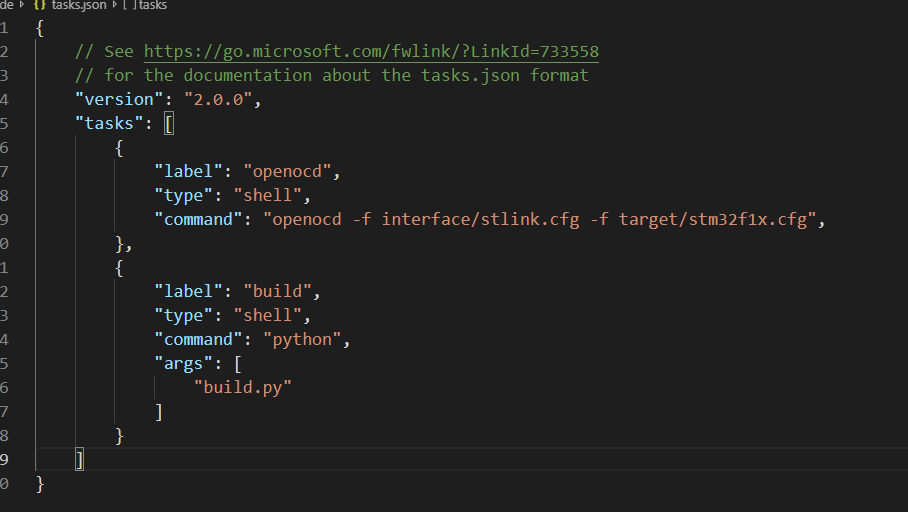
3.配置openocd任务与build任务
为了避免每次都在终端输入 make 和 make clean ,与 openocd 。我们可以在VSCode 中,建立一个 Task 来帮我们完成这个任务,(1)在当前目录下创建build.py的文件。
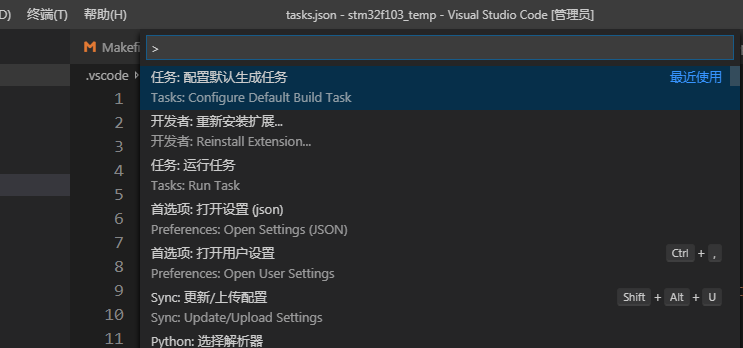
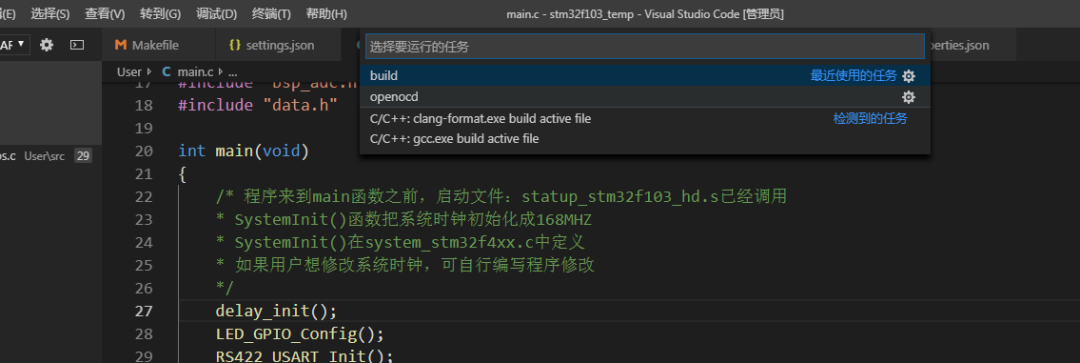
(2)在VSCode界面下,单击“任务”,选择“配置任务”
按 F1,选择"配置任务" .vscode目录下就会创建一个tasks.json配置文件.
4.配置VS Code的调试功能
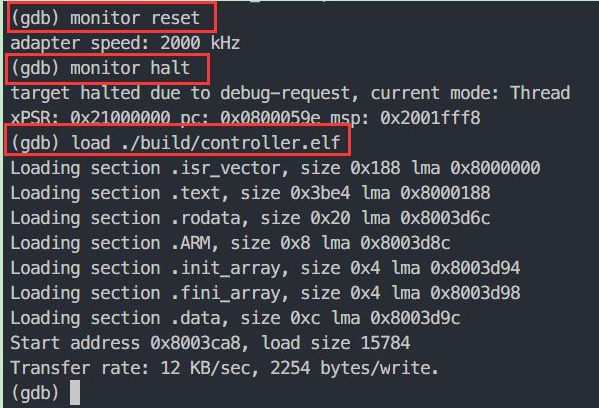
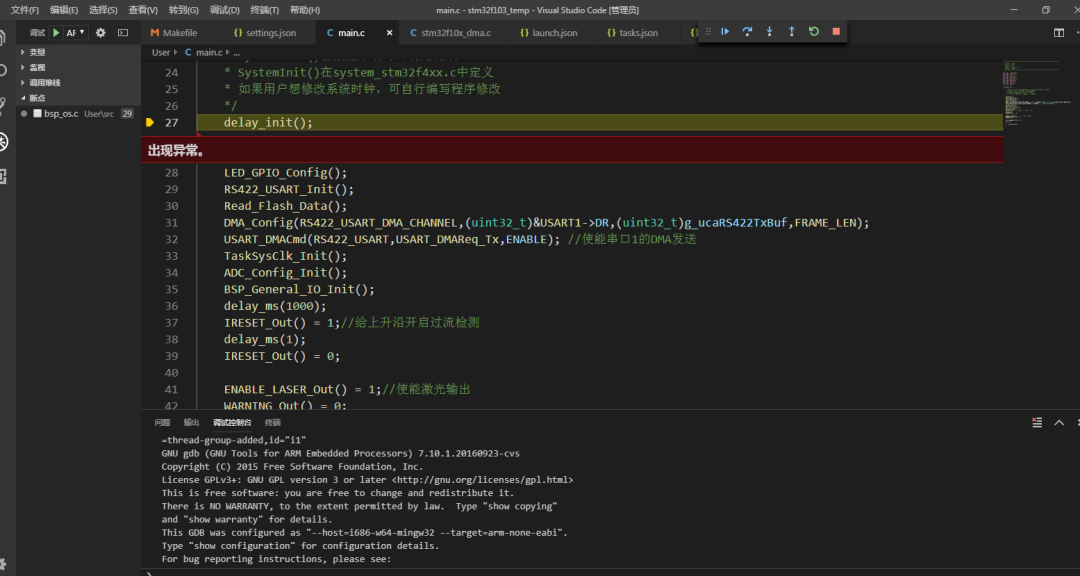
使用VS Code,肯定是图方便,图好看。所以我肯定不会让大家靠敲命令来调试,这样岂不是开倒车,还不如用keil。因此,这里要配置VS Code的调试功能,相当于对gdb的一个图形化吧。在VS Code内选择debug(就是左边那个虫子图标),选择“添加配置”,类型为GDB。就会在.vscode文件夹下生成launch.json配置文件。 按照下面来配置:{ "version": "0.2.0", "configurations": [ { "name": "ARM Debug", "type": "cppdbg", "request": "launch", "program": "${workspaceFolder}/Build/STM32F103RC_Template.elf", "args": [], "stopAtEntry": false, "cwd": "${workspaceFolder}", "environment": [], "externalConsole": false, "MIMode": "gdb", "miDebuggerPath": "C:\Program Files (x86)\GNU Tools ARM Embedded\5.4 2016q3\bin\arm-none-eabi-gdb.exe", "targetArchitecture": "arm", "setupCommands": [ { "description": "选择调试文件(.elf)到gdb", "text": "file E:/VScode/STM32_VSCode/stm32f103_temp/Build/STM32F103RC_Template.elf", "ignoreFailures": false }, { "description": "连接GDB Server", "text": "target remote localhost:3333", "ignoreFailures": false }, { "description": "Reset MCU", "text": "monitor reset", "ignoreFailures": false }, { "description": "Halt", "text": "monitor halt", "ignoreFailures": false }, { "description":"下载代码到MCU", "text": "load" , "ignoreFailures": false } ], "preLaunchTask": "build", } ] } 可以看到,setupCommands里面就是我们之前试用gdb时操作过的流程:连接GDB Server——reset——halt——下载代码。而preLaunchTask中是我们之前在tasks.json中配置的build任务。它可以让我们每次调试时都先编译一遍。保存后,随便打几个断点,按下F5,就可以快乐调试了。可以看到功能还是很齐全的。
审核编辑 :李倩
声明:本文内容及配图由入驻作者撰写或者入驻合作网站授权转载。文章观点仅代表作者本人,不代表电子发烧友网立场。文章及其配图仅供工程师学习之用,如有内容侵权或者其他违规问题,请联系本站处理。
举报投诉
-
VScode+keil开发环境搭建安装使用过程2022-10-21 7499
-
如何在vscode上面开发stm322022-10-08 3345
-
如何搭建VSCode开发环境?2022-02-11 1735
-
基于vscode编辑器的stm32 Arduino开发环境如何去搭建呢2022-01-24 1640
-
STM32 搭建开发环境2021-12-08 1179
-
arduino / VScode+platformIO搭建esp32/esp8266编译环境(一篇足矣)2021-12-05 2788
-
VScode + keil开发环境搭建2021-11-30 1693
-
在VSCode上搭建类似Keil的开发环境2021-11-19 1635
-
使用 rust 开发 stm32:开发环境搭建2021-11-18 1918
-
VSCode搭建STM32单片机开发环境2021-11-13 1352
-
STM32常用的一些开发工具汇总2021-11-06 6782
-
求大佬分享基于IoT Link的VSCODE+STM32开发环境搭建方式2021-10-11 1994
-
VSCode搭建STM32开发环境2021-08-24 1736
-
VSCODE+STM32开发环境搭建方式2021-08-03 1983
全部0条评论

快来发表一下你的评论吧 !
