

【武汉芯源CW32F003FXSTARTKI开发板免费试用体验】大王叫我来点灯.嵌入式点灯工程师来点个灯
描述
本文来源电子发烧友社区,作者:爱的世界abc, 帖子地址:https://bbs.elecfans.com/jishu_2297433_1_1.html
上一步点灯前提https://bbs.elecfans.com/jishu_2296576_1_1.html工作已经做好了,这次开始点灯了.
点灯程序如下(在官方提供的demo基础上直接使用): 会玩stm32的真的可以直接玩这个了,和stm32差不多.
/*******************************************************************************
*
- 代码许可和免责信息
- 武汉力源半导体有限公司授予您使用所有编程代码示例的非专属的版权许可,您可以由此
- 生成根据您的特定需要而定制的相似功能。根据不能被排除的任何法定保证,武汉力源半
- 导体有限公司及其程序开发商和供应商对程序或技术支持(如果有)不提供任何明示或暗
- 含的保证或条件,包括但不限于暗含的有关适销性、适用于某种特定用途和非侵权的保证
- 或条件。
- 无论何种情形,武汉力源半导体有限公司及其程序开发商或供应商均不对下列各项负责,
- 即使被告知其发生的可能性时,也是如此:数据的丢失或损坏;直接的、特别的、附带的
- 或间接的损害,或任何后果性经济损害;或利润、业务、收入、商誉或预期可节省金额的
- 损失。
- 某些司法辖区不允许对直接的、附带的或后果性的损害有任何的排除或限制,因此某些或
- 全部上述排除或限制可能并不适用于您。
*/
/
-
Include files
/
#include "main.h"
/ -
Local pre-processor symbols/macros ('#define')
******************************************************************************/
/******************************************************************************
-
Global variable definitions (declared in header file with 'extern')
******************************************************************************/
/******************************************************************************
-
Local type definitions ('typedef')
/
typedef enum {FAILED = 0, PASSED = !FAILED} TestStatus;
/ -
Local function prototypes ('static')
******************************************************************************/
void RCC_Configuration(void);
void GPIO_Configuration(void);
void NVIC_Configuration(void);
/******************************************************************************
-
Local variable definitions ('static') *
******************************************************************************/
//KEY
volatile uint8_t gKey1Status,gKey2Status; /* set to 1 after User Button interrupt */
/******************************************************************************
-
Local pre-processor symbols/macros ('#define')
******************************************************************************/
/*****************************************************************************
-
Function implementation - global ('extern') and local ('static')
******************************************************************************/
/**
** brief Main function of project
**
** return uint32_t return value, if needed
**
** SPI FLASH(W25Q64)
** Success LED1亮
** Error LED2亮
**
** 引脚连接
** SPI SCK -- FLASH CLK
** SPI MOSI -- FLASH DI
** SPI MISO -- FLASH DO
** SPI CS -- FLASH NCS
**
******************************************************************************/
int32_t main(void)
{
//配置RCC
RCC_Configuration();
InitTick( 24000000 ); //24000000
//配置GPIO
GPIO_Configuration();
/* NVIC Configuration */
NVIC_Configuration();
gKey1Status = 0;
gKey2Status = 0;

while(1)
{

	LED1_ON;
	SysTickDelay(100);	//200ms.
	LED1_OFF;
	SysTickDelay(100);	//200ms.
//
LED2_ON;
	SysTickDelay(100);	//200ms.
	LED2_OFF;
	SysTickDelay(100);	//200ms.


}
}
/**
- [url=home.php?mod=space&uid=2666770]@Brief[/url] 配置RCC
*/
void RCC_Configuration(void)
{
//SYSCLK = HSI = 24MHz = HCLK = PCLK
RCC_HSI_Enable(RCC_HSIOSC_DIV2);
/* 使能所有外设时钟*/
CW_SYSCTRL->AHBEN = 0xFFFFFFFF;
CW_SYSCTRL->APBEN1 = 0xFFFFFFFF;
CW_SYSCTRL->APBEN2 = 0xFFFFFFFF;
}
/**
- [url=home.php?mod=space&uid=2666770]@Brief[/url] 配置GPIO
*/
void GPIO_Configuration(void)
{
GPIO_InitTypeDef GPIO_InitStructure;
//LED1
GPIO_InitStructure.Pins = LED1_GPIO_PIN;
GPIO_InitStructure.Mode = GPIO_MODE_OUTPUT_PP;
GPIO_InitStructure.IT = GPIO_IT_NONE;
GPIO_Init(LED1_GPIO_PORT, &GPIO_InitStructure);
//LED2
GPIO_InitStructure.Pins = LED2_GPIO_PIN;
GPIO_InitStructure.Mode = GPIO_MODE_OUTPUT_PP;
GPIO_InitStructure.IT = GPIO_IT_NONE;
GPIO_Init(LED2_GPIO_PORT, &GPIO_InitStructure);
//KEY1
GPIO_InitStructure.Pins = KEY1_GPIO_PIN;
GPIO_InitStructure.Mode = GPIO_MODE_INPUT_PULLUP;
GPIO_InitStructure.IT = GPIO_IT_FALLING;
GPIO_Init(KEY1_GPIO_PORT, &GPIO_InitStructure);
//KEY2
GPIO_InitStructure.Pins = KEY2_GPIO_PIN;
GPIO_InitStructure.Mode = GPIO_MODE_INPUT_PULLUP;
GPIO_InitStructure.IT = GPIO_IT_FALLING;
GPIO_Init(KEY2_GPIO_PORT, &GPIO_InitStructure);
//LED灭
LED1_ON;
LED2_OFF;
}
/**
- @brief Configure the nested vectored interrupt controller.
- [url=home.php?mod=space&uid=3142012]@param[/url] None
-
@retval None
*/
void NVIC_Configuration(void)
{
__disable_irq();
GPIOB_INTFLAG_CLR( 0xFFFF ); //clear GPIOB ALL INT FLAG
NVIC_EnableIRQ(GPIOB_IRQn);
__enable_irq();
}
/******************************************************************************
-
EOF (not truncated)
****************************************************************************/
#ifdef USE_FULL_ASSERT
/ - @brief Reports the name of the source file and the source line number
-
where the assert_param error has occurred. - [url=home.php?mod=space&uid=3142012]@param[/url] file: pointer to the source file name
- @param line: assert_param error line source number
-
@retval None
*/
void assert_failed(uint8_t file, uint32_t line)
{
/ USER CODE BEGIN 6 /
/ User can add his own implementation to report the file name and line number,
tex: printf("Wrong parameters value: file %s on line %drn", file, line) /
/ USER CODE END 6 /
}
#endif / USE_FULL_ASSERT */
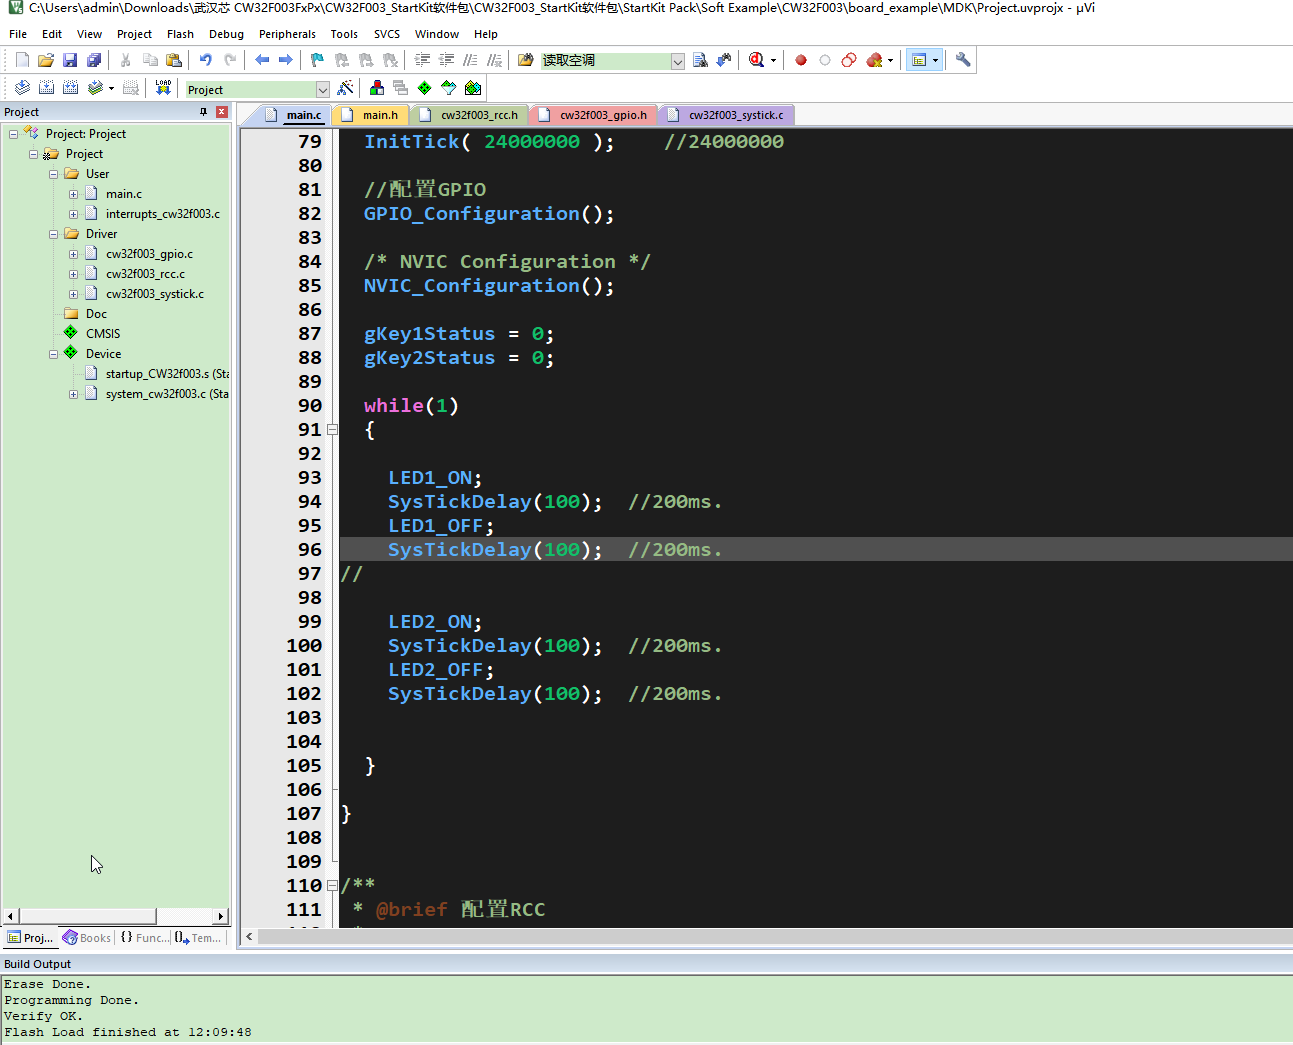
然后编译 0错误0警告 ok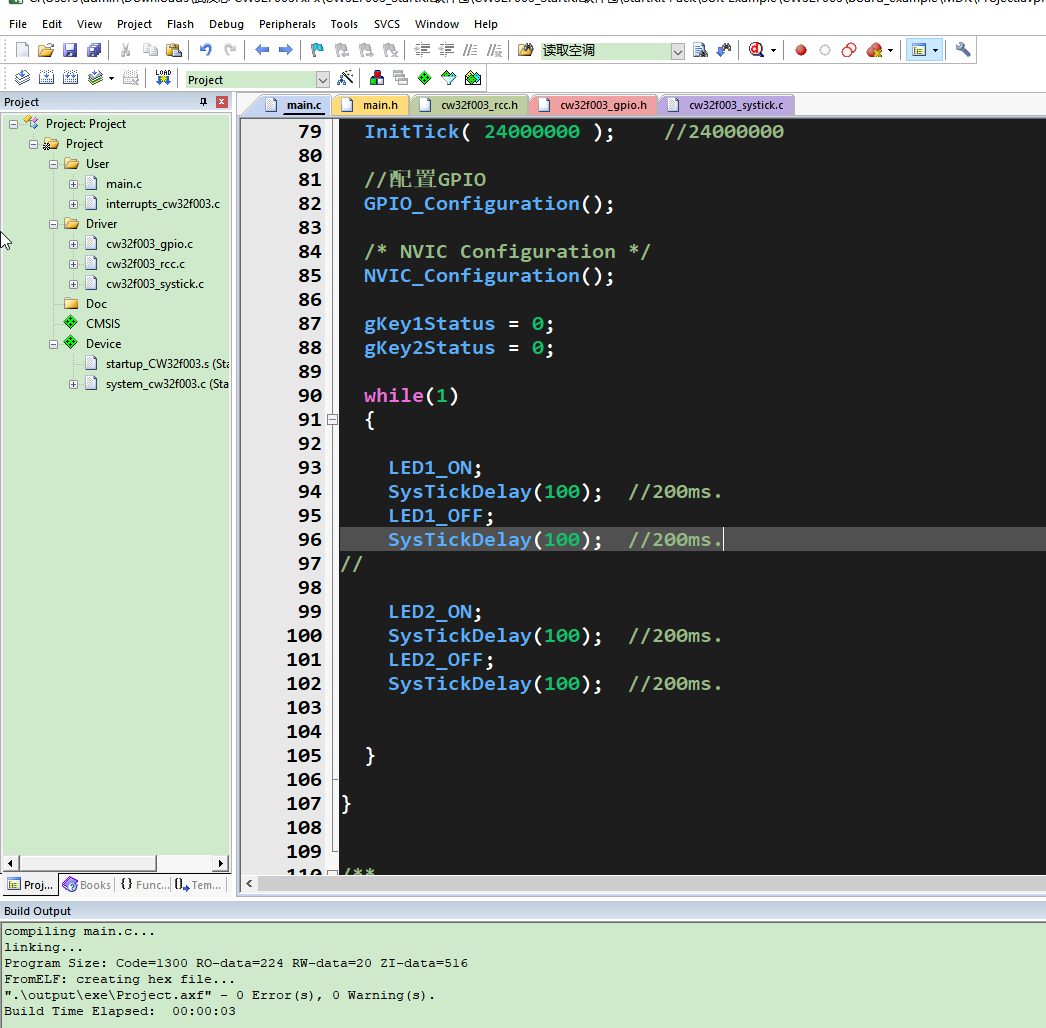
把板子通过烧录工具与电脑连接并进行程序烧录:
我是用的SWD方式,用到的引脚就4个,分别是ST Link V2上的 vcc、gnd、DIO、CLK这4个引脚。
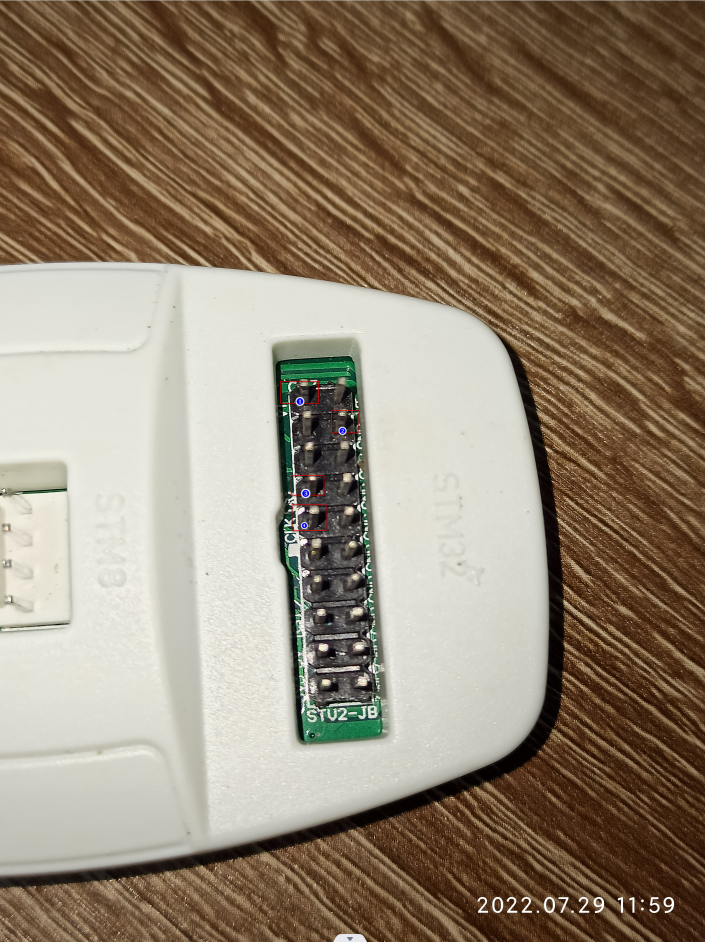
开发板上的引脚和ST Link上的引脚对应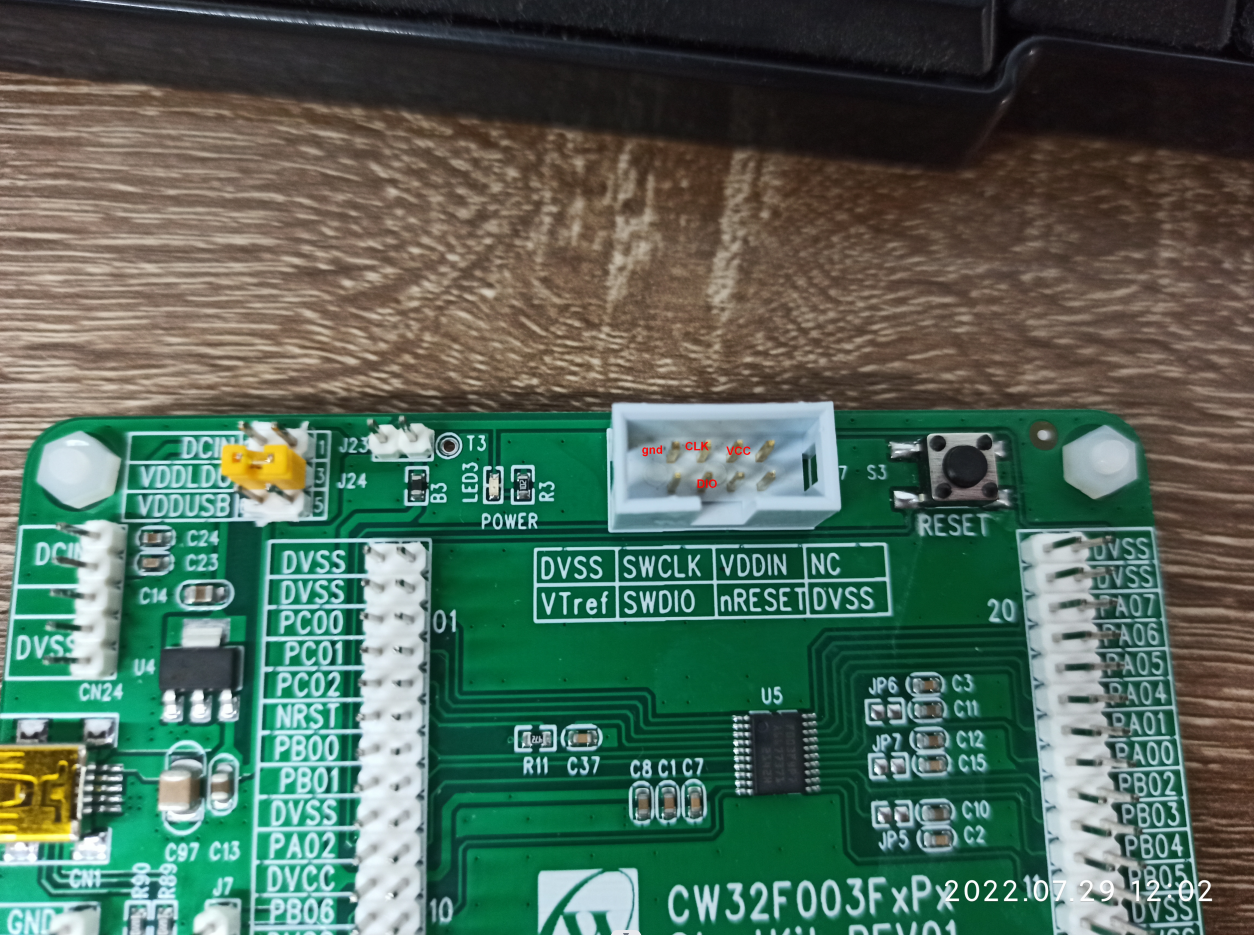
最后接线图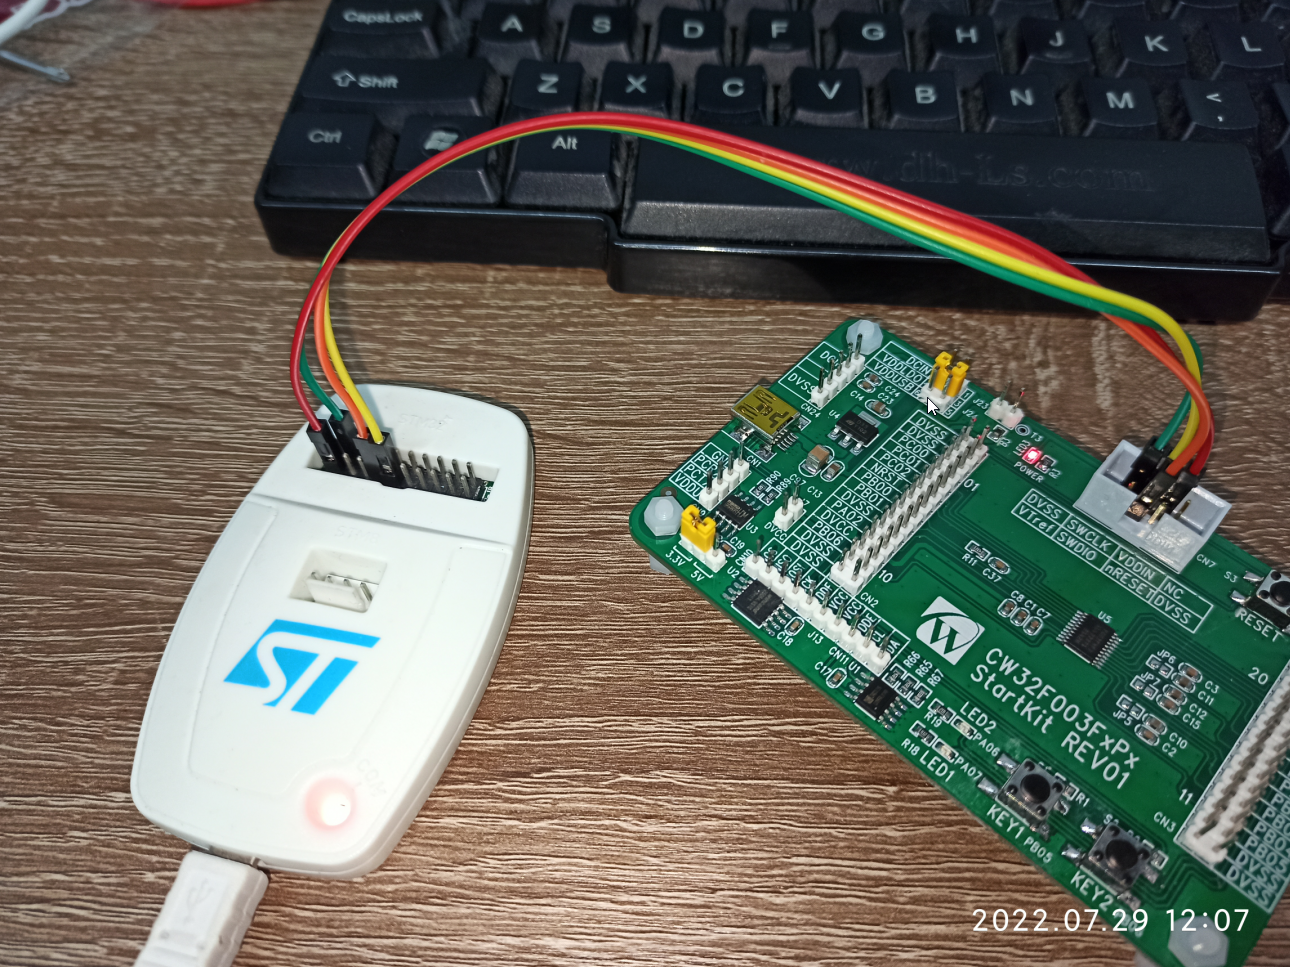
然后点MDK上的下载按钮进行程序下载。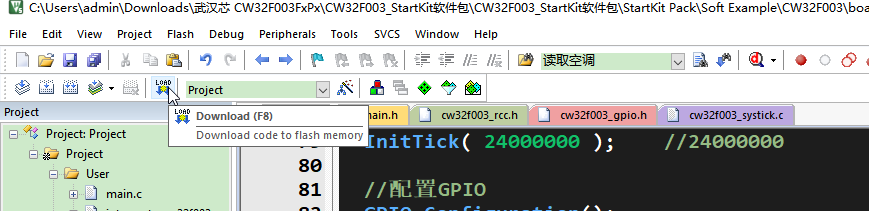
下一步看
https://bbs.elecfans.com/jishu_2297427_1_1.html
【武汉芯源CW32F003FXSTARTKI开发板免费试用体验】让芯片运行用户程序(从flash启动)
附上开发板体验视频,详细见作者原帖子。
-
代码+案例+生态:武汉芯源半导体CW32嵌入式开发实战正式出版2025-03-03 1063
-
【RA-Eco-RA2E1-48PIN-V1.0开发板试用】先来点个灯2024-10-18 1895
-
【武汉芯源CW32F003FXSTARTKI开发板免费试用体验】ISP下载+12864软件模拟驱动2022-10-21 2453
-
【武汉芯源CW32F003FXSTARTKI开发板免费试用体验】试用心得2022-08-29 1111
-
嵌入式工程师点个灯、牛刀小试,芯片运行程序就得这么玩!2022-08-08 1648
-
【武汉芯源CW32F003FXSTARTKI开发板免费试用体验】快速开发体验(资料手册软件开发环境规范,值得好评)2022-08-06 24161
-
【武汉芯源CW32F003FXSTARTKI开发板免费试用体验】大王叫我来点灯.嵌入式点灯工程师来点个灯2022-08-03 1483
-
IAR Embedded Workbench集成开发环境已全面支持武汉芯源CW32 MCU系列2022-07-11 2069
-
【MCU专题】武汉芯源CW32F030CX STARTKIT开发板试用2022-06-30 10458
-
【武汉芯源】IAR Embedded Workbench®集成开发环境已全面支持武汉芯源CW32 MCU系列2022-06-14 10681
-
究竟会怎样来点这个开发板上的灯呢?2021-07-14 399
全部0条评论

快来发表一下你的评论吧 !
