

【飞凌RZ/G2L开发板试用体验】2. 开箱及联网显示
描述
本文来源电子发烧友社区,作者:voidpbq, 帖子地址:https://bbs.elecfans.com/jishu_2295571_1_1.html
一、前言
本章介绍开箱、运行helloworld、联网及网页测试。
二、开箱及启动设备
1. 开箱
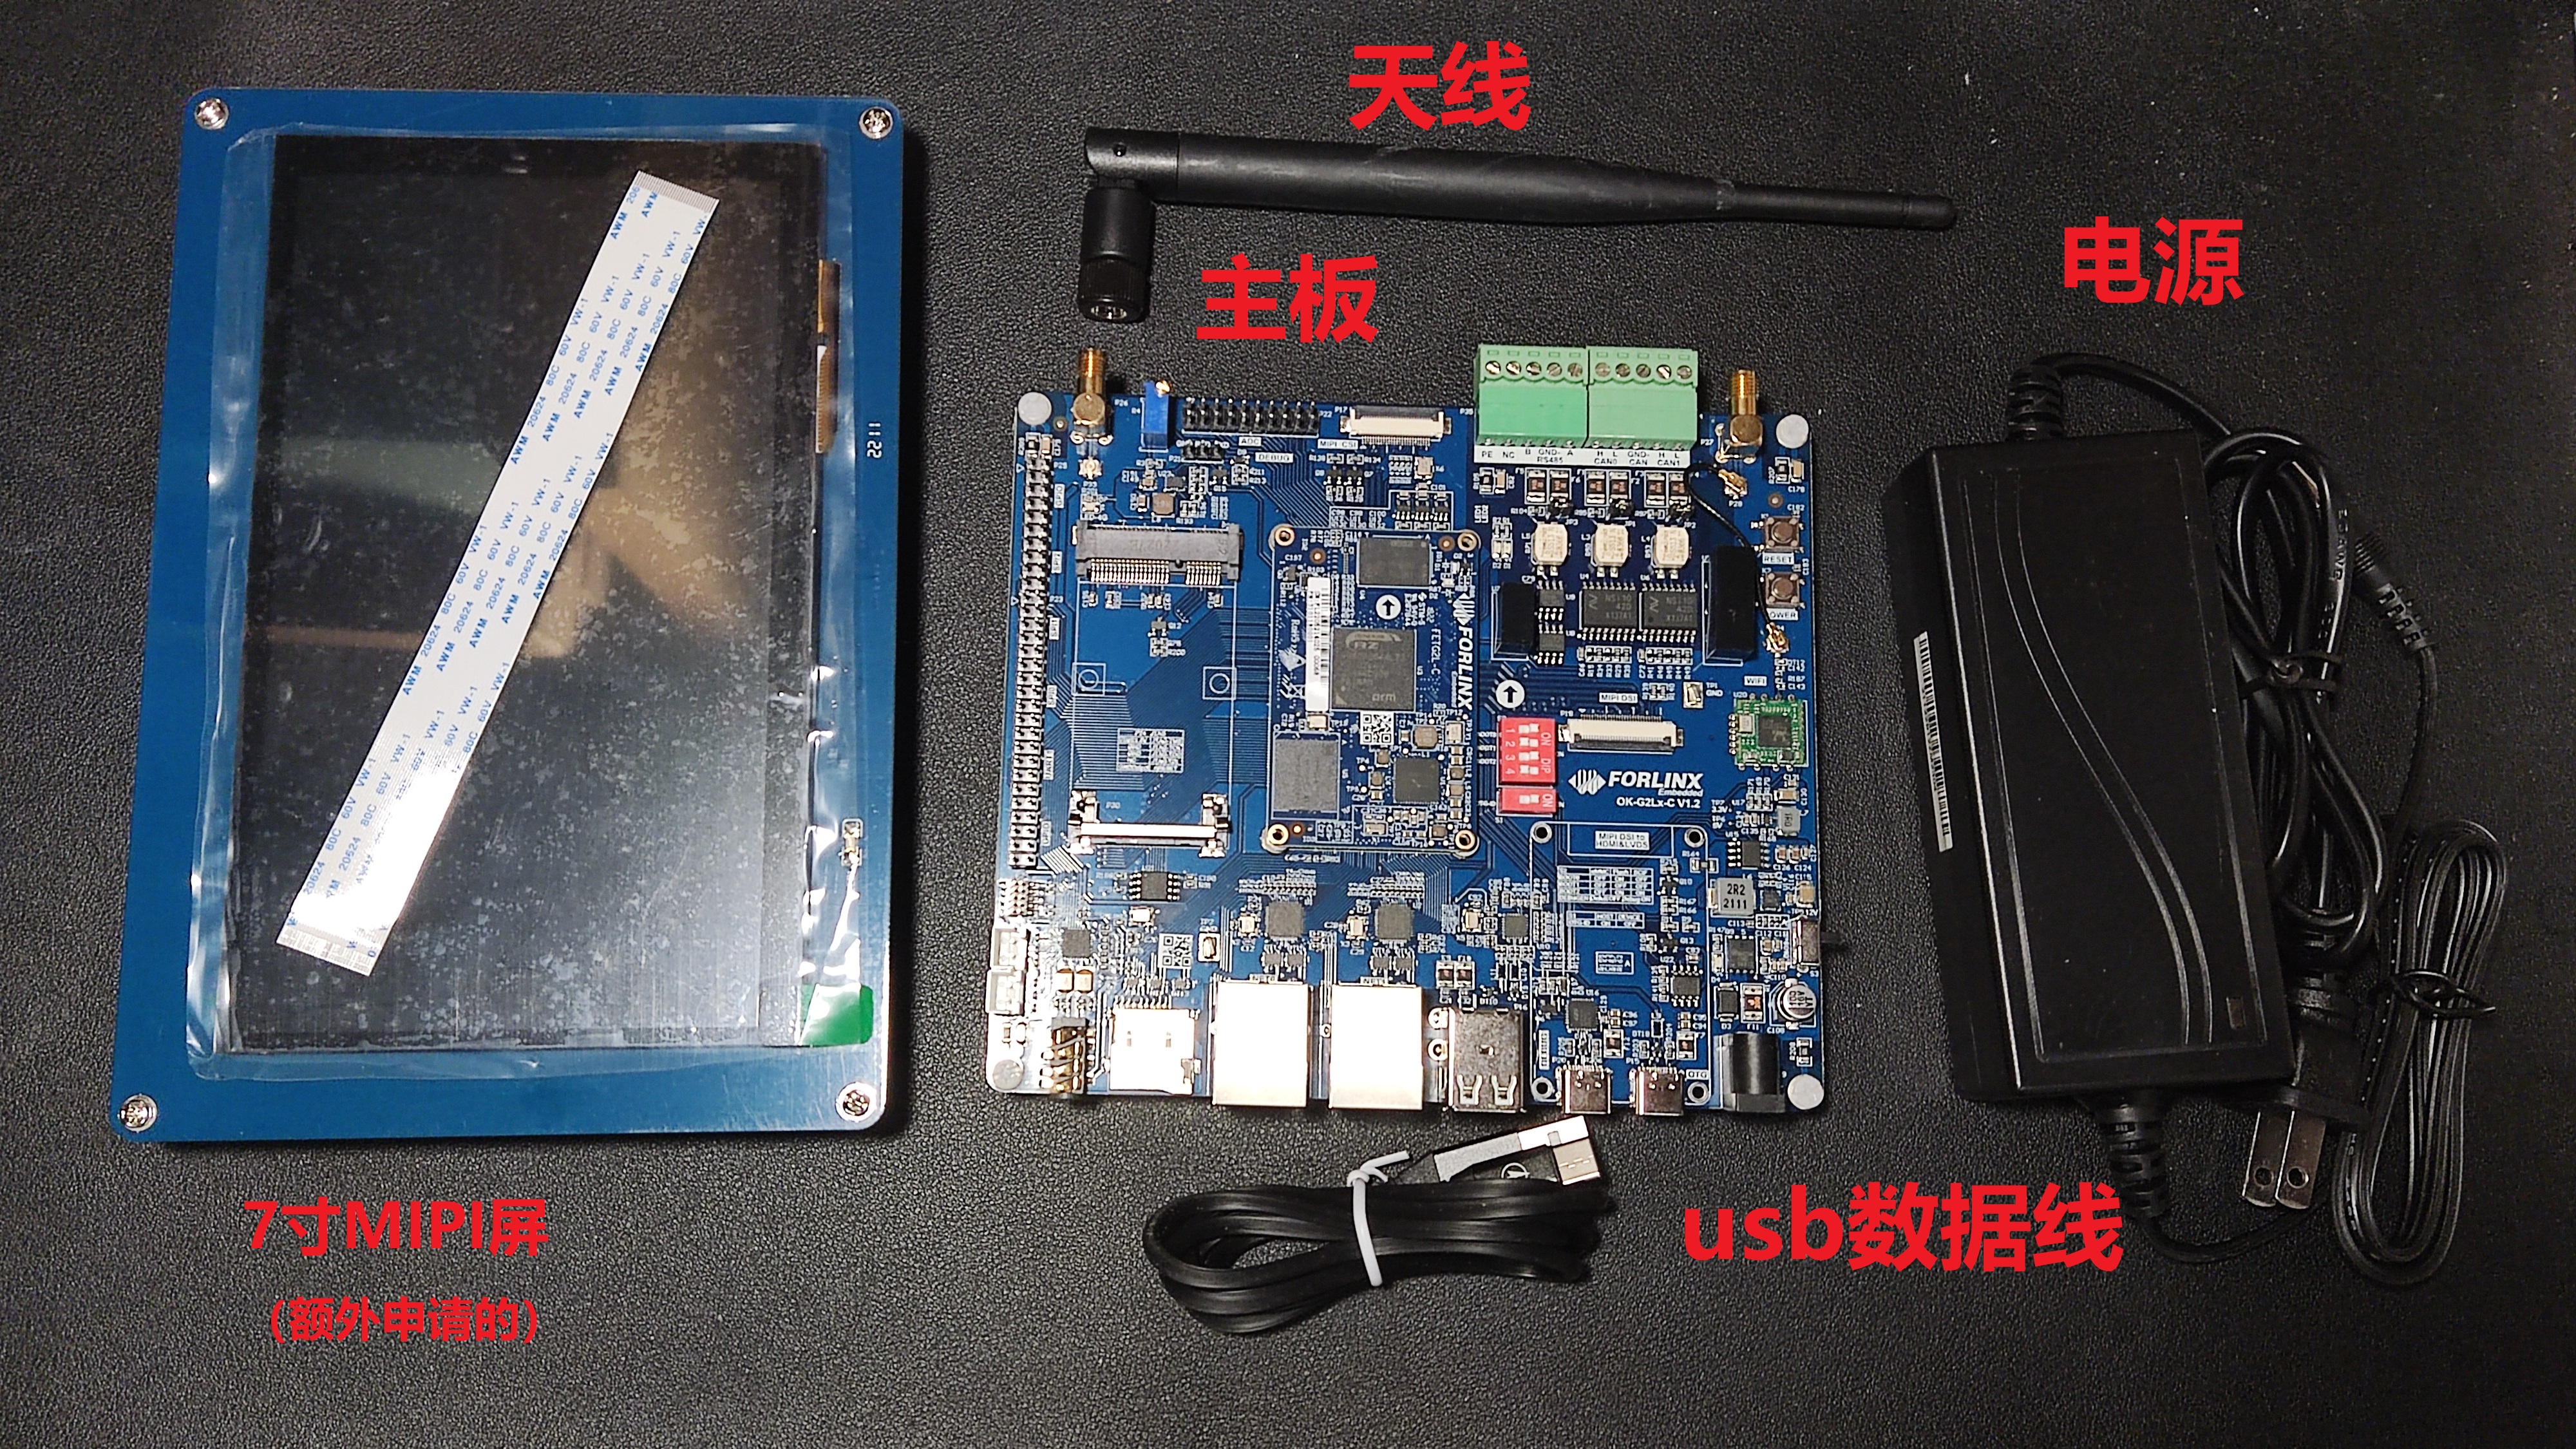
官方提供的试用板是主板、天线、电源、usb数据线。
我额外申请了一个匹配的7寸MIPI屏幕。
不过如果没用屏幕也可以通过网页进行访问(参见第四章)。
2. 启动设备
设备接上电源,usb线typec端连接Debug,typeA端连电脑。
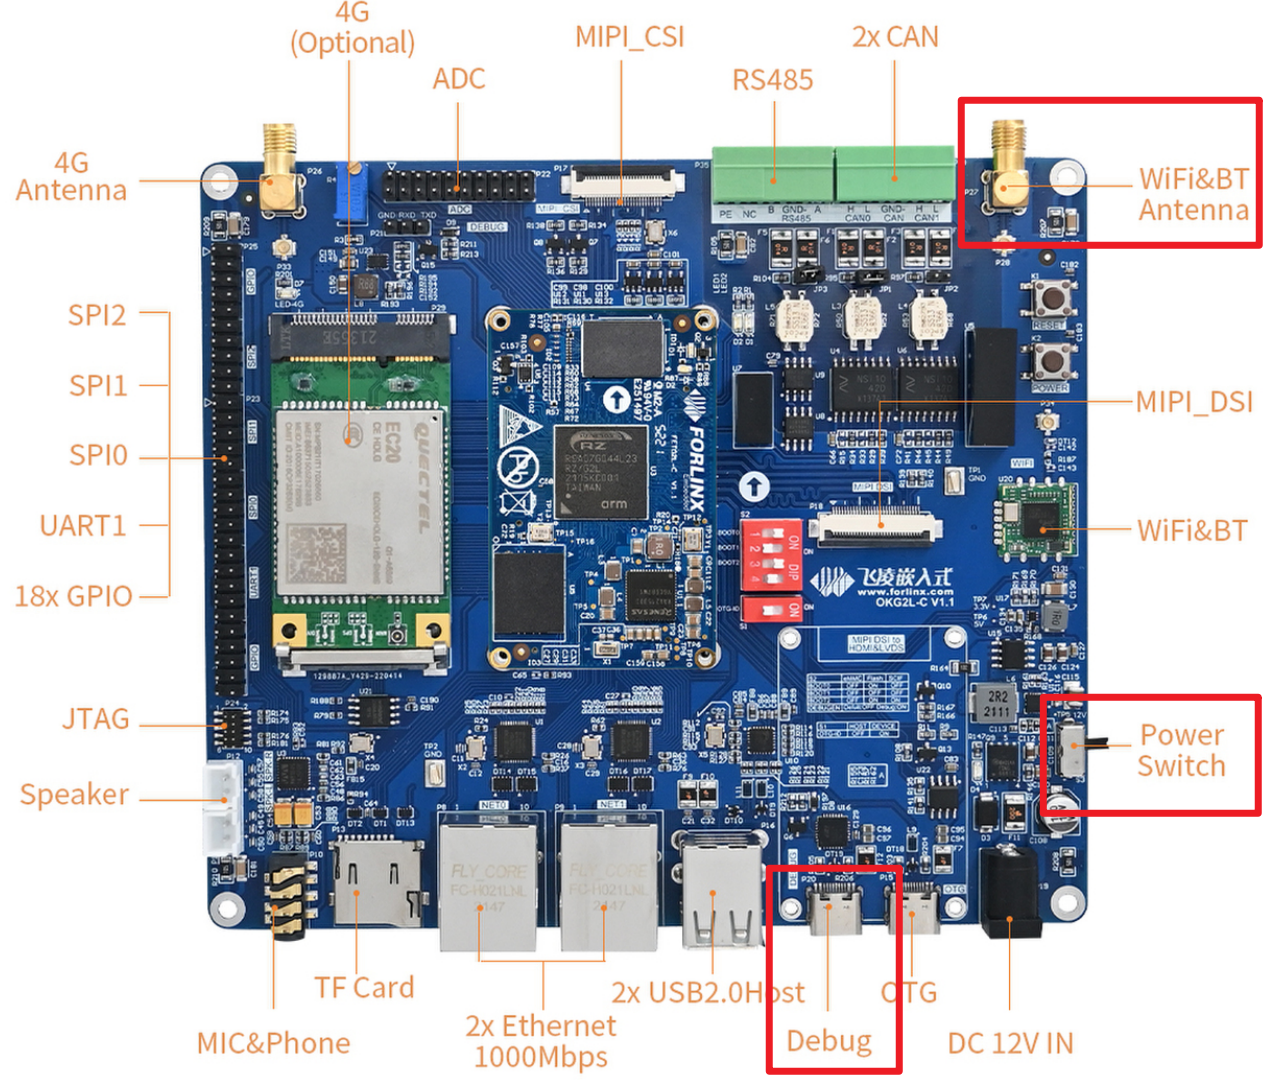
电脑识别到端口。
PS:这里和文档上的有差异,正常。
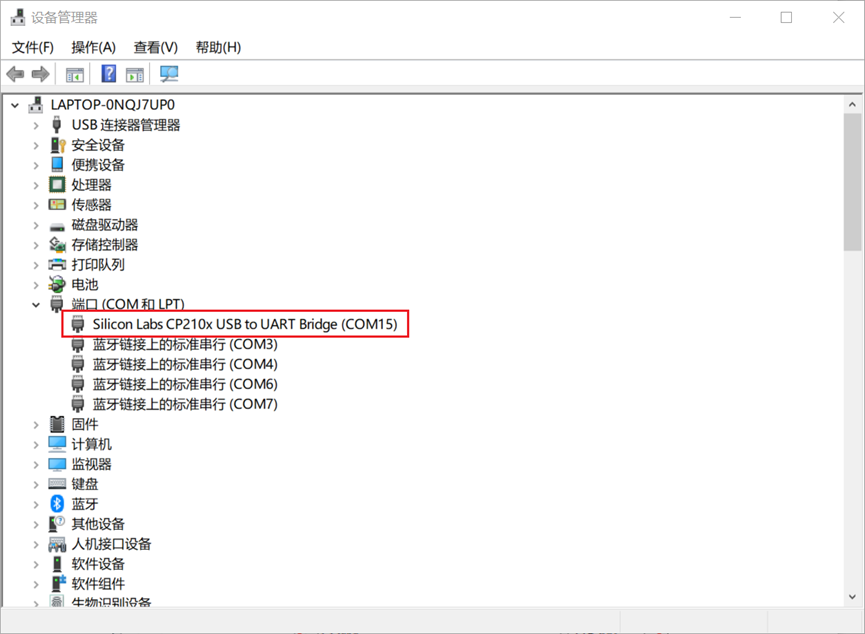
注意,需要手动上电,板子右侧有一个power switch的按钮,向下拨即可实现上电。
3. putty登录
putty输入对应的com端口号,注意波特率设为115200.
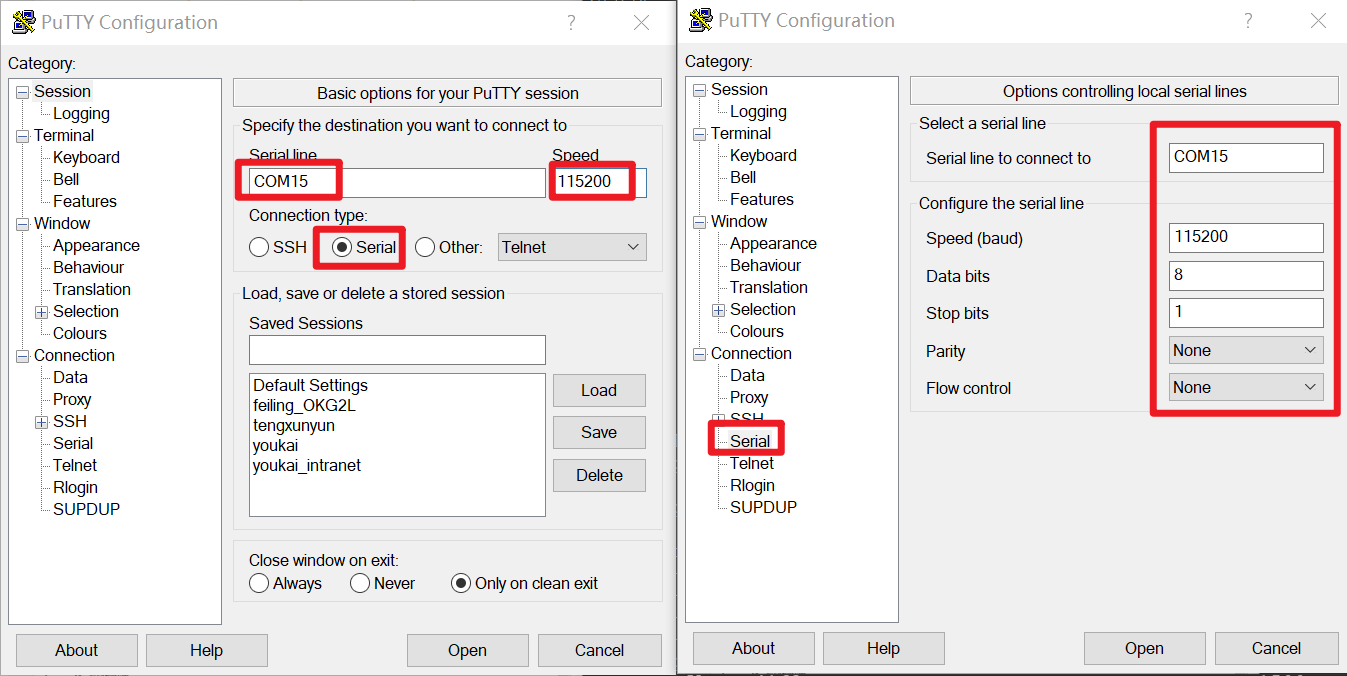
三、运行helloworld
将编译的helloworld存入tf卡或者u盘,将u盘插入板子。
设备的/run/media/sda目录即为u盘路径。
【命令】mkdir /temp/
【命令】cd /run/media/sda
【命令】cp helloworld /temp/
【命令】cd /temp
【命令】./helloworld

四、wifi联网
1. 联网——开发板设置
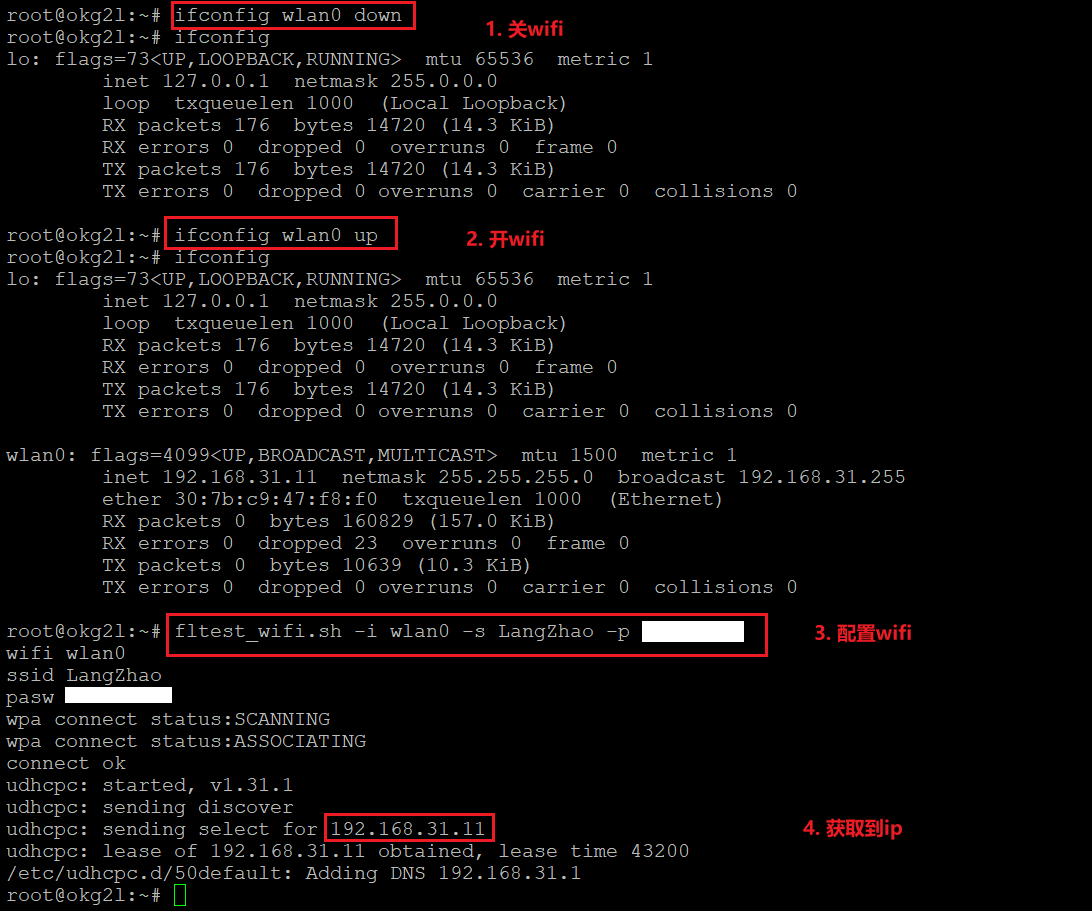
【命令】ifconfig wlan0 down
【命令】ifconfig wlan0 up
【命令】fltest_wifi.sh -i wlan0 -s wlan_name -p wlan_password
【命令】ifconfig
开发板的设置好了,可以在windows上通过ping命令查看是否可以联通。
2. 联网——测试ping
【命令】ping IP
这里的ip是通过ifconfig查看到的。

3. 网页
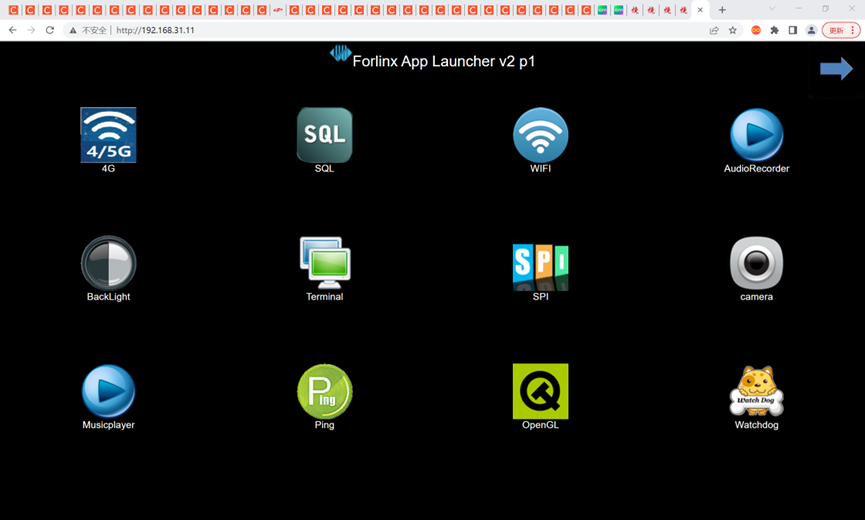
打开浏览器,直接输入前文的ip
4. 文件传输(未实现)
用户创建
【命令】groupadd temp
【命令】useradd temp -g temp
-g表示给这个temp群组创建用户。
【命令】passwd temp
输入密码

local_root=/temp/ftp
anon_root=/temp/ftp/anon
无法连接,后续再看。
五、小结
本章实现了设备联网以及显示,后续再创建qt应用。
存疑:ftp无法实现。
-
【米尔瑞萨RZ/G2L开发板-试用体验】开箱2023-05-14 3522
-
【飞凌RZ/G2L开发板试用体验】第一篇 飞凌RZ/G2L开发板初体验2022-10-25 1909
-
【飞凌RZ/G2L开发板试用体验】飞凌RZ/G2L的开发板试用测评报告二 — 视频采集开发2022-10-24 2316
-
【飞凌RZ/G2L开发板试用体验】飞凌RZ/G2L的开发板试用测评报告三 -- 实时视频编码推流设计与实现2022-10-21 2072
-
【飞凌RZ/G2L开发板】飞凌RZ/G2L开发板试用测评报告2022-08-29 1869
-
【飞凌RZ/G2L开发板试用体验】+01.开箱(zmj)2022-08-28 1374
-
【飞凌RZ/G2L开发板试用体验】开箱帖子,飞凌质量YYDS2022-08-15 1580
-
【飞凌RZ/G2L开发板试用体验】2. 开箱及联网显示2022-07-25 1238
全部0条评论

快来发表一下你的评论吧 !

