
seL4微内核入门-代码下载运行及资料
电子说
描述
不废话,老一套:编译环境准备,代码下载,代码编译,qemu代码运行。本文介绍的内容都是好东西,提供全方位的微内核入门指导,就看毅力怎么样了,就像那句话:笨鸟先飞。
1. sel4简介
sel4是微内核操作系统,号称世界上最安全,最高效的微内核。提供非posix兼容的编程接口,它只提供了少量的服务,创建和管理虚拟地址空间、线程以及进程间通信(IPC)。亮点是capability机制,管理每个进程所拥有的资源。这个机制的引入也导致了sel4较难理解和应用开发。关于微内核的介绍参考上一篇:
2. Turorial练习
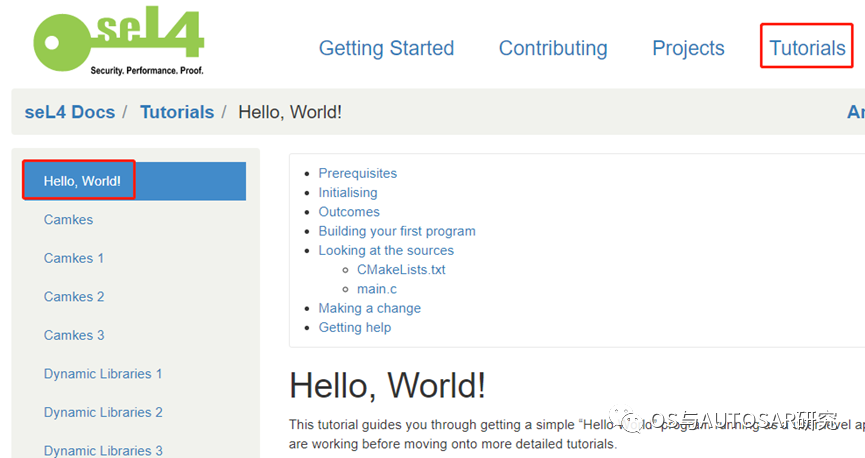
从官网提供的学习教程hello world开始练习,
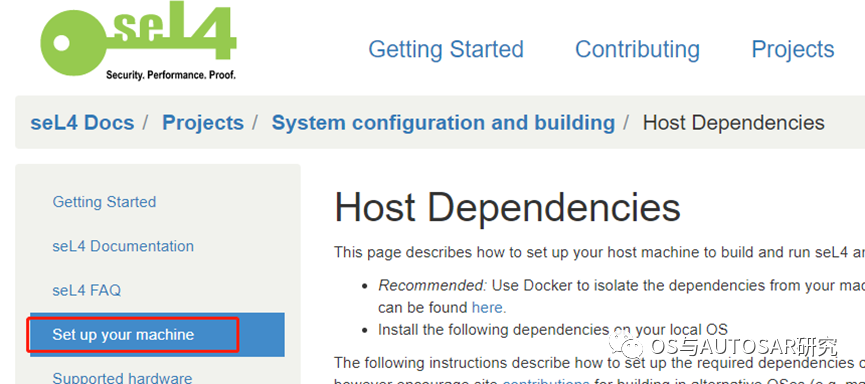
2.1 环境准备
这里同样,采用的开发方式为VitrualBox+Ubuntu,下载VitrualBox和Ubuntu镜像(版本>= 20.04),安装虚拟机,具体不再描述。

环境搭建是否正常,以能运行第一个helloworld工程为准,详细步骤为:
1)repo工具安装
mkdir ~/binPATH=~/bin:$PATH curl https://storage.googleapis.com/git-repo-downloads/repo > ~/bin/repochmod a+x ~/bin/repo2)lib依赖库和编译工具安装
#The basic build package on Ubuntu is the build-essential package. To install run:sudo apt-get updatesudo apt-get install build-essential #Additional base dependencies for building seL4 projects on Ubuntu include installing:sudo apt-get install cmake ccache ninja-build cmake-curses-guisudo apt-get install libxml2-utils ncurses-devsudo apt-get install curl git doxygen device-tree-compilersudo apt-get install u-boot-toolssudo apt-get install python3-dev python3-pip python-is-python3sudo apt-get install protobuf-compiler python3-protobuf sudo apt-get install qemu-system-arm qemu-system-x86 qemu-system-miscsudo apt-get install gcc-arm-linux-gnueabi g++-arm-linux-gnueabisudo apt-get install gcc-aarch64-linux-gnu g++-aarch64-linux-gnu3)Python 依赖库
pip3 install--user setuptoolspip3 install--user sel4-deps# Currently we duplicate dependencies for python2 and python3 as a python3 upgrade is in processpip install--user setuptoolspip install--user sel4-deps4) 编译库依赖
sudo apt-get install clang gdbsudo apt-get install libssl-dev libclang-dev libcunit1-dev libsqlite3-devsudo apt-get install qemu-kvm5)证明依赖
sudo apt-get installpython3 python3-pip python3-dev gcc-arm-none-eabi build-essential libxml2-utils ccache ncurses-dev librsvg2-bin device-tree-compiler cmake ninja-build curl zlib1g-dev texlive-fonts-recommended texlive-latex-extra texlive-metapost texlive-bibtex-extra mlton-compiler haskell-stack
2.2 下载代码 下载代码前安装python依赖用于编译教程
pip install --user aenumpip install --user pyelftools下载代码前配置repo邮箱信息
git config --global user.email "you@example.com"git config --global user.name "Your Name"下载代码(这里使用sel4官方的代码进行练习,从github上下载)
mkdir sel4-tutorials-manifestcd sel4-tutorials-manifestrepo init -u https://github.com/seL4/sel4-tutorials-manifestrepo sync2.3 Hello World应用生成 初始化hello-world文件夹
./init --tut hello-world --solutionhello-world是示例名字,练习其他示例更换这个名字就可以,命令加 --solution后缀,可以补全代码。可以看到生成了下面的hello-world文件夹,里面有c代码。

2.4 代码编译
cd hello-world_buildninja编译成功后显示:

2.5 代码运行
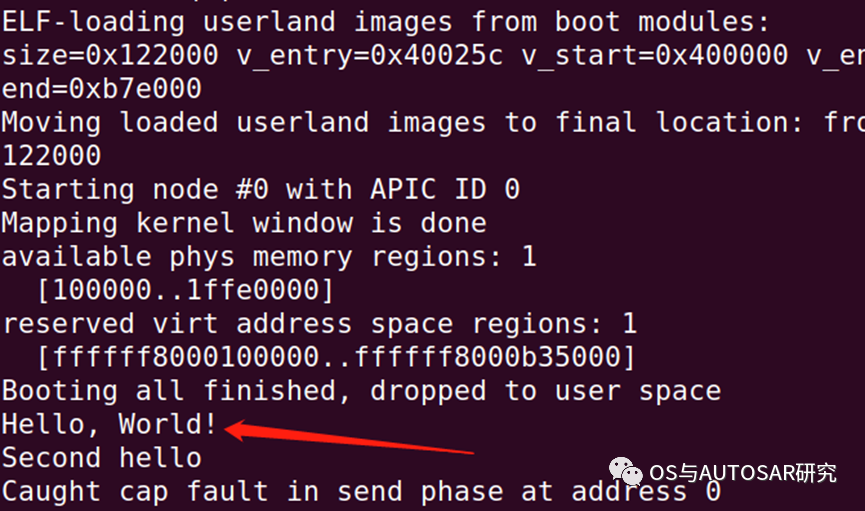
# In build directory, hello-world_build./simulate成功后显示:

运行后Ctrl-A, X退出qemu模拟工具。
3. Hello World代码分析
编译的时候,我们使用了ninja这个命令,Ninja 是Google的一名程序员推出的注重速度的构建工具,一般在Unix/Linux上的程序通过make/makefile来构建编译,而Ninja通过将编译任务并行组织,大大提高了构建速度。
可见ninja跟makefile同级别的都是构建工具,生成编译器使用的规则。
在sel4-tutorials-manifest/hello-world_build/build.ninja文件中可以看到

执行ninja命令就会通过这个build.ninja进行编译,会找到hello-world的代码

cmake是makefile之上的一层封装。
CMakeLists.txt – cmake使用的脚本,将根任务合并到更广泛的 seL4 构建系统中的文件。
src/main.c - 初始任务的单个源文件。
hello-world.md - 为教程生成的自述文件。
int main(int argc, char *argv[]) {     printf("Hello, World!
");      printf("Second hello
");    return  0;}
如果修改了应用的源码,重新运行重建项目:
Bash# In build directory, hello-world_buildninja然后再运行simulator:
# In build directory, hello-world_build./simulate4. 学习资料
sel4原理熟悉,主要从两条路进行学习:
一边是sel4的参考手册,另一边就是基于Tutorials教程开始一步一步的做实验,这样可以做到理论和实践结合。
(turorials中camkes相关的例子可以先不学习)

辅助库介绍:
tutorials工程中,其他辅助库的介绍,除了sel4微内核之外,还需要提供一些库,才能让你的应用程序运行起来。
sel4内核:首先是sel4内核。单单的一个内核运行起来,是没法运行一个例如hello world这样的程序的,因为这个程序需要链接其他的库,比如stdio中的printf,而且该程序和内核交互,就需要知道内核提供的标准API有哪些。
libsel4:sel4内核提供的api都用内核源码工程里面的libsel4这个库来描述。里面是sel4内核支持的标准api。
sel4_libs:当一个程序连接了这个libsel4之后,就可以使用sel4内核的标准api了,这个和Linux内核提供的标准api类似,是和操作系统密切关联的。非posix标准的。另外这个libsel4库不是很好用,因此在这之上又堆叠了一个sel4_libs库,这个库是对sel4标准api的进一步功能性的封装,比如分配一个cap对象,调用者无需知道更下层的sel4标准api调用的细节。
musllibc:这个是开源的一个libc库,和sel4是没有直接关系的。用到这个工程里面来,主要是提供标准的符合posix标准的api,其他的操作系统也是可以使用的。因此应用程序可以直接使用libsel4中的函数,也可以使用sel4_libs中的函数,比较标准的功能就可以使用muscllibc中的功能了。为了打通muslibc和sel4_libs,sel4_libs中提供了一个libsel4muslcsys这样的一个库,muslibc中的一些功能通过sys call的方式调用到libsel4muslcsys这个接口库中,这个接口库就会调用sel4_libs中的相应函数。当然muslibc中的有些函数可能会直接调用libsel4的函数接口(目前还没有看到muslibc中或者libsel4中有对这两个库的对接口的实现,可能这个猜测不对)
sel4runtime:一般程序里面都有一个main函数,作为该程序的入口位置,但是,这个程序的运行并不是从main开始的,在运行main之前,其实还做了其他的一些工作,比如堆栈指针的设置,环境变量的获取,其他的一些准备工作等等。一般编译器,比如gcc编译器编译一个比如hello world这样的一个代码的时候,会指定该程序的入口地址是 _start, 就是会找寻源码,把 _start开始的代码放在该程序代码段的最开始位置,hello_world.c源码中并没有 _start这个函数或者标号,所以这个标号是其他地方的,且是会被hello_world.c链接进来的源码,在sel4 tutorial工程里,我们用sel4runtime(里面是源码)和lshello_world.c一起编译,链接。这个sel4runtime工程里面提供了各个架构的 _start入口标号,该标号紧跟着的是该架构的一些汇编语言,处理堆栈等等,之后跳转到一个简单的c函数处,该c函数收集环境变量,传入参数等,并最终调用main函数。
-
seL4操作系统内核2022-04-18 1063
-
bsp制作下载运行出错怎么解决?2025-09-11 119
-
最近写了一个lcd的驱动,每次下载运行的结果2013-11-09 2419
-
将seL4移植到Xilinx Zynq UltraScale + MPSoC,以实现极高的硬件安全性2020-08-20 5227
-
HarmonyOS学习之十:HarmonyOS微内核技术2020-11-30 2207
-
RK3399(内核入门篇)通过sysfs清楚了解设备的系统状况2021-12-16 4164
-
AT32 MCU Cortex M4内核入门指南2023-10-25 804
-
基于内核入侵的木马设计与实现2009-09-05 773
-
OK Labs推出可供下载的移动安全内核OKL4 Verified2011-01-28 1320
-
linux内核入门教材之linux内核设计与实现第二版中文版免费下载2018-10-15 1109
-
SEL-SPC5 SEL-SPC5智能选择微32位Power架构产品2020-05-20 539
-
鉴释宣布加入RISC-V基金会、Linux基金会、seL4基金会与ioXt联盟,旨在实现静态代码分析服务的全方位赋能2021-07-27 9161
-
seL4内核参考⼿册中⽂翻译版2022-01-21 719
-
什么叫变压器的空载运行、负载运行及超负荷运行?2024-01-26 9778
全部0条评论

快来发表一下你的评论吧 !

