

openeuler安装教程四:openeuler安装方法使用kickstart自动化安装
描述
使用kickstart自动化安装
使用kickstart自动化安装
总体介绍
概述
优缺点对比
背景知识
半自动化安装指导
环境要求
操作步骤
全自动化安装指导
环境要求
操作步骤
总体介绍
概述
用户可以使用kickstart工具进行openEuler系统的自动化安装,包括如下两种方式:
半自动化安装:安装人员不需要手动设定操作系统的键盘、语言、分区等具体属性(通过kickstart实现自动化),但是需要手动指定kickstart文件的位置。
全自动化安装:实现操作系统的安装过程全自动化。
优缺点对比
使用kickstart工具进行半自动化安装和全自动化安装的优缺点对比如表1所示,用户可以自行选择安装方式。
表 1 优缺点对比
| 安装方式 | 优点 | 缺点 |
|---|---|---|
| 半自动化安装 | 不需要准备tftp,pxe,dhcp等服务 | 需要手动指定kickstart文件的位置 |
| 全自动化安装 | 操作系统的全自动化安装 | 需要配置tftp,dhcp,pxe等服务 |
背景知识
kickstart
kickstart是一种无人值守的安装方式。它的工作原理是在安装过程中记录典型的需要人工干预填写的各种参数,并生成一个配置文件(ks.cfg),在安装过程中,安装程序首先会去查找ks配置文件,如果找到合适的参数,就采用所找到的参数;如果没有找到合适的参数,便需要安装者手动设定。所以,如果kickstart文件涵盖了安装过程中需要设定的所有参数,安装者只需要告诉安装程序从何处取ks.cfg文件,就能实现系统安装的自动化。
kickstart 安装提供一个安装过程自动化的方法,可以是部分自动化,也可以是完全自动化。
PXE
PXE(Pre-boot Execution Environment,预启动执行环境),工作于Client/Server的网络模式,支持PXE的客户端在启动过程中,能够从DHCP服务器获取IP,结合TFTP(trivial file transfer protocol)等协议可以实现客户端的网络引导和安装。
TFTP
TFTP(Trivial File Transfer Protocol,简单文件传输协议),该协议用来实现客户机与服务器之间的简单文件传输,它提供不复杂、开销不大的文件传输服务。
半自动化安装指导
环境要求
使用kickstart进行openEuler系统的半自动化安装的环境要求如下:
物理机/虚拟机(虚拟机创建可参考对应厂商的资料):包括使用kickstart工具进行自动化安装的计算机和被安装的计算机。
httpd:存放kickstart文件。
ISO: openEuler-20.03-LTS-aarch64-dvd.iso
操作步骤
使用kickstart进行openEuler系统的半自动化安装的操作步骤如下:
环境准备

说明:
安装之前,请确保http服务器的防火墙处于关闭状态。关闭防火墙可参照如下命令:
""iptables -F
安装并启动httpd。
""# dnf install httpd -y # systemctl start httpd # systemctl enable httpd
准备kickstart文件。
""# mkdir /var/www/html/ks # vim /var/www/html/ks/openEuler-ks.cfg ===>根据已安装openEuler系统自动生成的anaconda-ks.cfg修改得到,也可以使用system-config-kickstart工具做成 ==================================== ***以下内容需要根据实际需求进行修改*** #version=DEVEL ignoredisk --only-use=sda autopart --type=lvm # Partition clearing information clearpart --none --initlabel # Use graphical install graphical # Use CDROM installation media cdrom # Keyboard layouts keyboard --vckeymap=cn --xlayouts='cn' # System language lang zh_CN.UTF-8 # Network information network --bootproto=dhcp --device=enp4s0 --ipv6=auto --activate network --hostname=openeuler.com # Root password rootpw --iscrypted $6$fQE83lxEZ48Or4zc$j7/PlUMHn29yTjCD4Fi44WTZL/RzVGxJ/7MGsZMl6QfE3KjIVT7M4UrhFXbafvRq2lUddAFcyWHd5WRmXfEK20 # Run the Setup Agent on first boot firstboot --enable # Do not configure the X Window System skipx # System services services --disabled="chronyd" # System timezone timezone Asia/Shanghai --isUtc--nontp %packages @^minimal-environment @standard %end %anaconda pwpolicy root --minlen=8 --minquality=1 --notstrict --nochanges --notempty pwpolicy user --minlen=8 --minquality=1 --notstrict --nochanges --emptyok pwpolicy luks --minlen=8 --minquality=1 --notstrict --nochanges --notempty %end %post #enable kdump sed -i "s/ ro / ro crashkernel=1024M,high /" /boot/efi/EFI/openEuler/grub.cfg %end =====================================
说明:
密码密文生成方式:
# python3
Python 3.7.0 (default, Apr 1 2019, 00:00:00)
[GCC 7.3.0] on linux
Type “help”, “copyright”, “credits” or “license” for more information.
>>> import crypt
>>> passwd = crypt.crypt(“myPasswd”)
>>> print(passwd)
$6$63c4tDmQGn5SDayV$mZoZC4pa9Jdt6/ALgaaDq6mIExiOO2EjzomB.Rf6V1BkEMJDcMddZeGdp17cMyc9l9ML9ldthytBEPVcnboR/0
将ISO镜像文件挂载到需要安装openEuler计算机的光驱上。
另外,也可以选择NFS等网络安装,kickstart文件中需要指定安装源位置(默认是cdrom)。
安装系统
启动系统进入安装选择界面。
在“启动安装”中的“安装引导界面”中选择“Install openEuler 20.03 LTS”,并按下“e”键。
启动参数中追加“inst.ks=http://server ip/ks/openEuler-ks.cfg”。
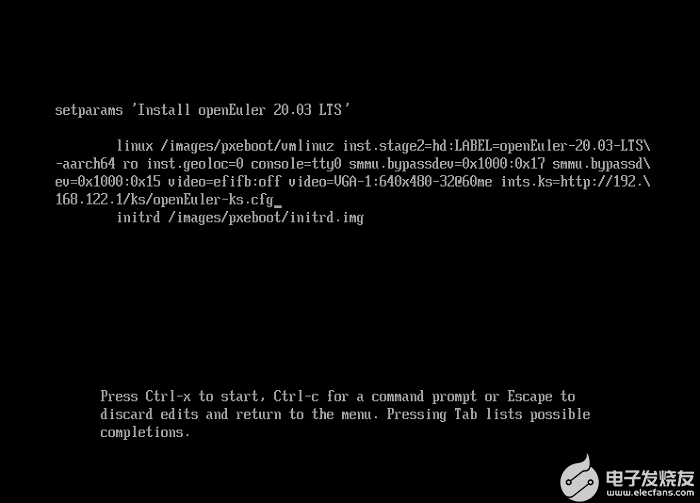
按“Ctrl+x”,开始系统的自动安装。
确认系统安装完毕。
系统安装完毕以后会自动重启,如果优先从光驱启动,会再次进入到安装界面,此时关闭计算机,调整启动顺序(优先从硬盘启动)。

全自动化安装指导
环境要求
使用kickstart进行openEuler系统的全自动化安装的环境要求如下:
物理机/虚拟机(虚拟机创建可参考对应厂商的资料):包括使用kickstart工具进行自动化安装的计算机和被安装的计算机。
httpd:存放kickstart文件。
tftp:提供vmlinuz和initrd文件。
dhcpd/pxe:提供DHCP服务。
ISO:openEuler-20.03-LTS-aarch64-dvd.iso。
操作步骤
使用kickstart进行openEuler系统的全自动化安装的操作步骤如下:
环境准备
说明:
安装之前,请确保http服务器的防火墙处于关闭状态。关闭防火墙可参照如下命令:
""iptables -F
安装并启动httpd。
""# dnf install httpd -y # systemctl start httpd # systemctl enable httpd
安装并配置tftp。
""# dnf install tftp-server -y # vim /etc/xinetd.d/tftp service tftp { socket_type = dgram protocol = udp wait = yes user = root server = /usr/sbin/in.tftpd server_args = -s /var/lib/tftpboot disable = no per_source = 11 cps = 100 2 flags = IPv4 } # systemctl start tftp # systemctl enable tftp # systemctl start xinetd # systemctl status xinetd # systemctl enable xinetd
安装源的制作。
""# mount openEuler-20.03-LTS-aarch64-dvd.iso /mnt # cp -r /mnt/* /var/www/html/openEuler/
设置和修改kickstart配置文件 openEuler-ks.cfg,参考3安装源的目录,此处选择http安装源。
""#vim /var/www/html/ks/openEuler-ks.cfg ==================================== ***以下内容根据实际需求进行修改*** #version=DEVEL ignoredisk --only-use=sda autopart --type=lvm # Partition clearing information clearpart --none --initlabel # Use graphical install graphical # Keyboard layouts keyboard --vckeymap=cn --xlayouts='cn' # System language lang zh_CN.UTF-8 #Use http installation source url --url=//192.168.122.1/openEuler/ %post #enable kdump sed -i "s/ ro / ro crashkernel=1024M,high /" /boot/efi/EFI/openEuler/grub.cfg %end ...
修改pxe配置文件grub.cfg, 可参考如下内容。
""# cp -r /mnt/images/pxeboot/* /var/lib/tftpboot/ # cp /mnt/EFI/BOOT/grubaa64.efi /var/lib/tftpboot/ # cp /mnt/EFI/BOOT/grub.cfg /var/lib/tftpboot/ # ls /var/lib/tftpboot/ grubaa64.efi grub.cfg initrd.img TRANS.TBL vmlinuz # vim /var/lib/tftpboot/grub.cfg set default="1" function load_video { if [ x$feature_all_video_module = xy ]; then insmod all_video else insmod efi_gop insmod efi_uga insmod ieee1275_fb insmod vbe insmod vga insmod video_bochs insmod video_cirrus fi } load_video set gfxpayload=keep insmod gzio insmod part_gpt insmod ext2 set timeout=60 ### BEGIN /etc/grub.d/10_linux ### menuentry 'Install openEuler 20.03 LTS' --class red --class gnu-linux --class gnu --class os { set root=(tftp,192.168.1.1) linux /vmlinuz ro inst.geoloc=0 console=ttyAMA0 console=tty0 rd.iscsi.waitnet=0 inst.ks=http://192.168.122.1/ks/openEuler-ks.cfg initrd /initrd.img }
DHCP的配置(可以使用dnsmasq代替 )。
""# dnf install dhcp -y # # DHCP Server Configuration file. # see /usr/share/doc/dhcp-server/dhcpd.conf.example # see dhcpd.conf(5) man page # # vim /etc/dhcp/dhcpd.conf ddns-update-style interim; ignore client-updates; filename "grubaa64.efi"; # pxelinux 启动文件位置; next-server 192.168.122.1; # (重要)TFTP Server 的IP地址; subnet 192.168.122.0 netmask 255.255.255.0 { option routers 192.168.111.1; # 网关地址 option subnet-mask 255.255.255.0; # 子网掩码 range dynamic-bootp 192.168.122.50 192.168.122.200; # 动态ip范围 default-lease-time 21600; max-lease-time 43200; } # systemctl start dhcpd # systemctl enable dhcpd
安装系统
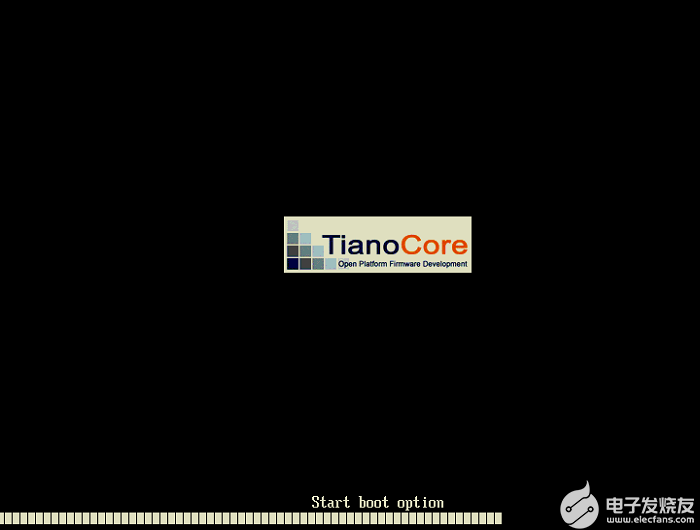
在“Start boot option”界面按下“F2”选择从网络pxe启动,开始自动化安装。
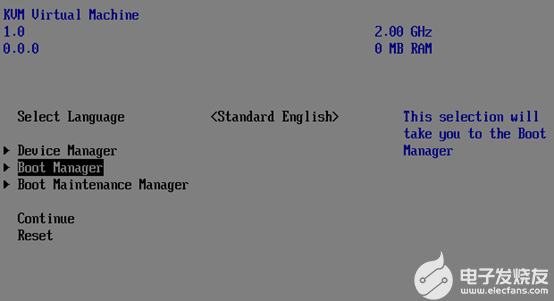
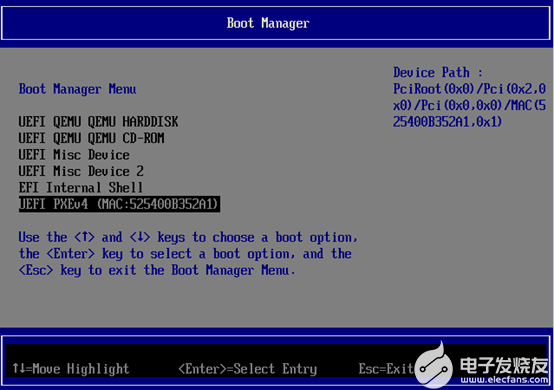
进入系统全自动化安装界面。
确认系统安装完毕。
- 相关推荐
- 热点推荐
- openEuler
-
在VisionFive上安装OpenEuler (By Samuel)的步骤2026-03-31 98
-
请问在Vision Five2上怎样安装openeuler24.03 LTS SP1?2025-07-29 290
-
如何使用openEuler WSL sideload2023-07-15 1959
-
openeuler安装教程一:openeuler安装准备2022-12-06 14071
-
化工自动化仪表安装,需要做好哪些准备工作2022-10-28 2059
-
一次 Rancher 和 openEuler 的上云之旅2022-09-29 17447
-
如何在笔记本上安装openEuler 22.03 LTS2022-09-02 9551
-
使用 Canonical MAAS 部署 openEuler 测试2022-08-24 3660
-
非标自动化设备的安装调试2018-06-27 33618
-
自动化仪表安装所要做的准备以及安装流程解析2018-01-18 7850
-
工业自动化仪表安装施工规范2015-12-03 1113
全部0条评论

快来发表一下你的评论吧 !
