
Java中Get和Post的使用
电子说
1.4w人已加入
描述
1 Get请求数据
项目地址:https://github.com/Snowstorm0/learn-get-post
1.1 Controller
文件名MyController,内容为:
@RestController
@RequestMapping("/homepage")
public class MyController {
    @Autowired
    MyService myService;

    @GetMapping("/learnGet")
    public String learnGet(){
        return myService.learnGet();
    }
}
1.2 Service
文件名MyService,内容为:
@Service
@EnableScheduling
public class MyService {
    public String learnGet(){
        Long timeLong = System.currentTimeMillis();
        SimpleDateFormat timeFormat = new SimpleDateFormat("yyyy-MM-dd HH:mm:ss"); //设置格式
        String timeString = timeFormat.format(timeLong);
        return timeString;
    }
}
1.3 Application
在application.properties配置:
# 设置端口号
server.port=8888
1.4 Postman
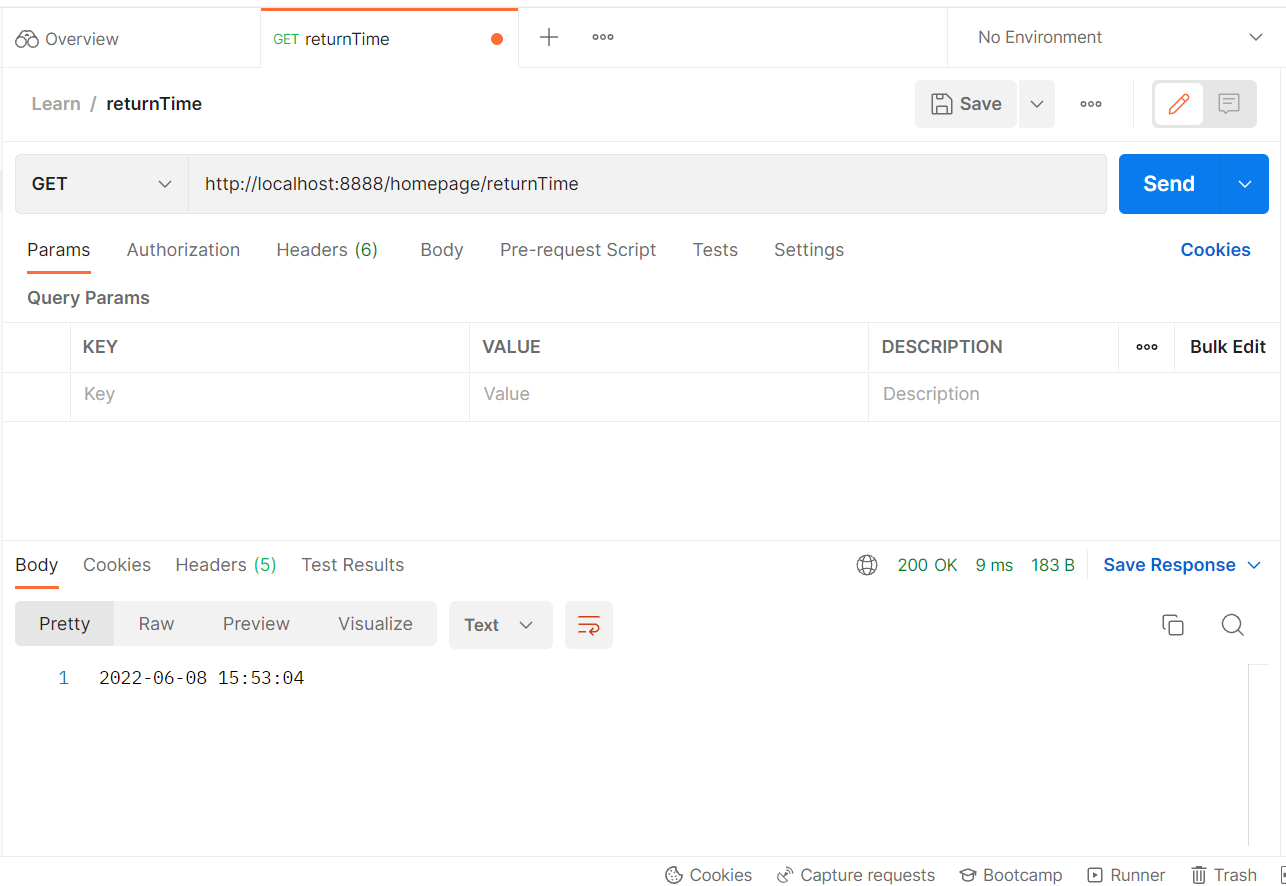
配置Get,地址为: http://localhost:8888/homepage/returnTime 。
即可获得当前时间戳。

2 Post接收数据
项目地址:https://github.com/Snowstorm0/learn-get-post
2.1 Controller
文件名MyController,内容为:
@RestController
@RequestMapping("/homepage")
public class MyController {
    @Autowired
    MyService myService;
    @PostMapping("/postReceive")
    public Map postReceive(@RequestParam("number") int number, @RequestParam("name") String name) {
        return myService.postReceive(number, name);
    }
    @PostMapping("/postReceiveByMap")
    public Map postReceiveByMap(@RequestParam Map map) {
        System.out.println("map:" + map + "\\n");
        return myService.postReceiveByMap(map);
    }
}
2.2 Service
文件名MyService,内容为:
@Service
@EnableScheduling
public class MyService {
public Map postReceive(int number, String name) {
Map res = new HashMap<>();
res.put("number", number);
res.put("name", name);
return res;
}
public Map postReceiveByMap(Map map) {
int number = map.get("number") == null ? 0 : Integer.parseInt((String) map.get("number"));
String name = map.get("name") == null ? "" : (String)map.get("name");
Map res = new HashMap<>();
res.put("number", number);
res.put("name", name);
System.out.println("map:" + map + "\\n");
System.out.println("res:" + res + "\\n");
return res;
}
2.3 Application
在application.properties配置:
# 设置端口号
server.port=8888
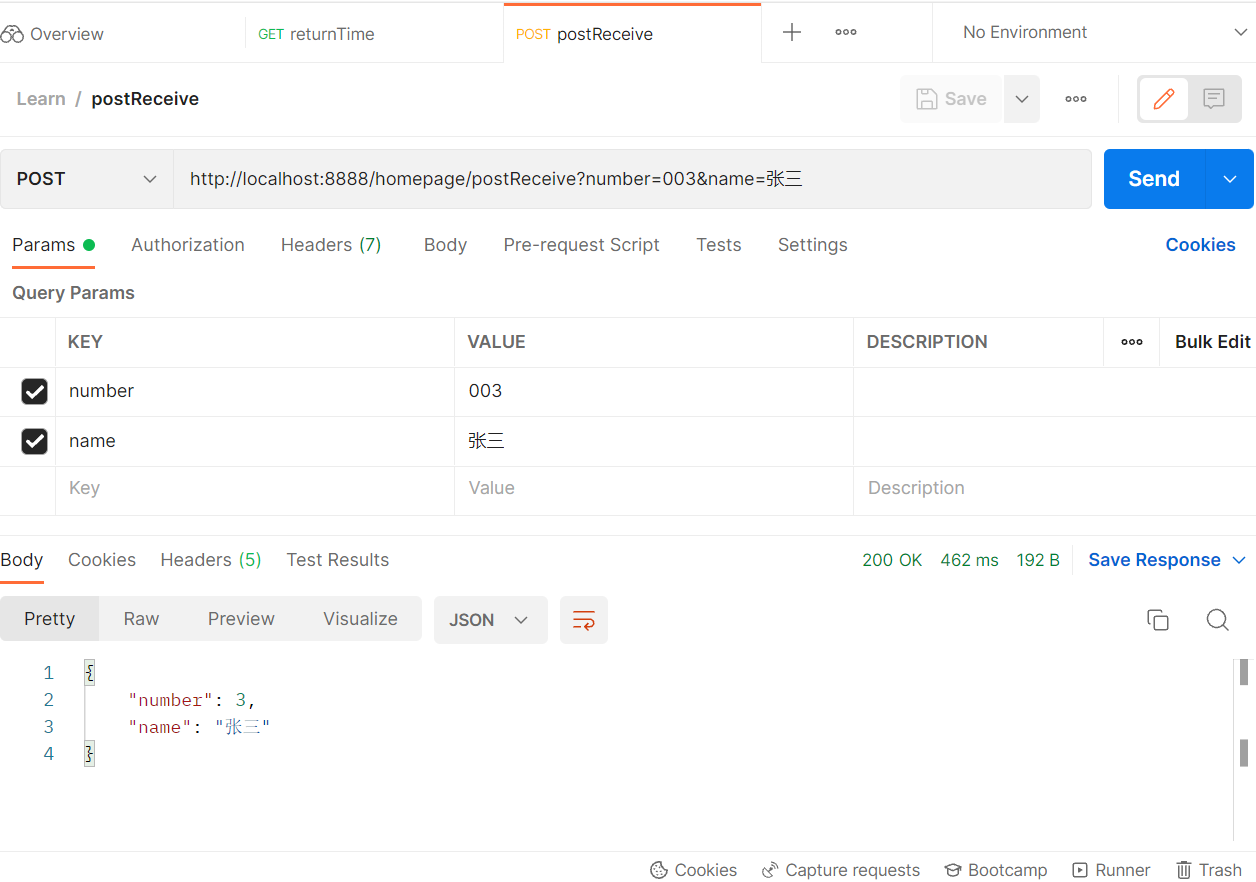
2.4 Postman
配置Get,地址为: http://localhost:8888/homepage/returnTime 。
即可获得输出。

3 Post发送数据
项目地址:https://github.com/Snowstorm0/learn-post-send
需要注意,RestTemplate在postForObject时,用MultiValueMap,不可使用HashMap。
3.1 Controller
文件名MyController,内容为:
@RestController
@RequestMapping("/homepage")
public class MyController {

    @Autowired
    MyService myService;

    @PostMapping("/postSend")
    public Map postSend() {
        return myService.postSend();
    }
}
3.2 Service
文件名MyService,内容为:
@Service
@EnableScheduling
public class MyService {
@Resource
private RestTemplate restTemplate;
String URL = "http://localhost:8888/homepage/postReceiveByMap";
public Map postSend() {
Map sendData = new HashMap<>();
sendData.put("number", 3);
sendData.put("name", "张三");
ResponseEntity responseData = restTemplate.postForEntity(URL, sendData, ResponseResult.class);
Map returnData = new HashMap<>();
returnData.put("StatusCode:", responseData.getStatusCode());
returnData.put("Body:", responseData.getBody());
return returnData;
}
}
3.3 ResponseResult
public class ResponseResult {

    private int number;
    private String name;

    public ResponseResult(){
    }

    public int getNumber() {
        return number;
    }
    public void setNumber(int number) {
        this.number = number;
    }
    public String getName() {
        return name;
    }
    public void setName(String name) {
        this.name = name;
    }

    @Override
    public String toString() {
        return "ResponseResult [number=" + number + ",name=" + name + "]";
    }
}
3.4 Config
@Configuration
public class Config {
    @Bean
    public RestTemplate restTemplate(RestTemplateBuilder builder){
        return builder.build();
    }
}
3.5 Application
在application.properties配置:
# 设置端口号
server.port=8889
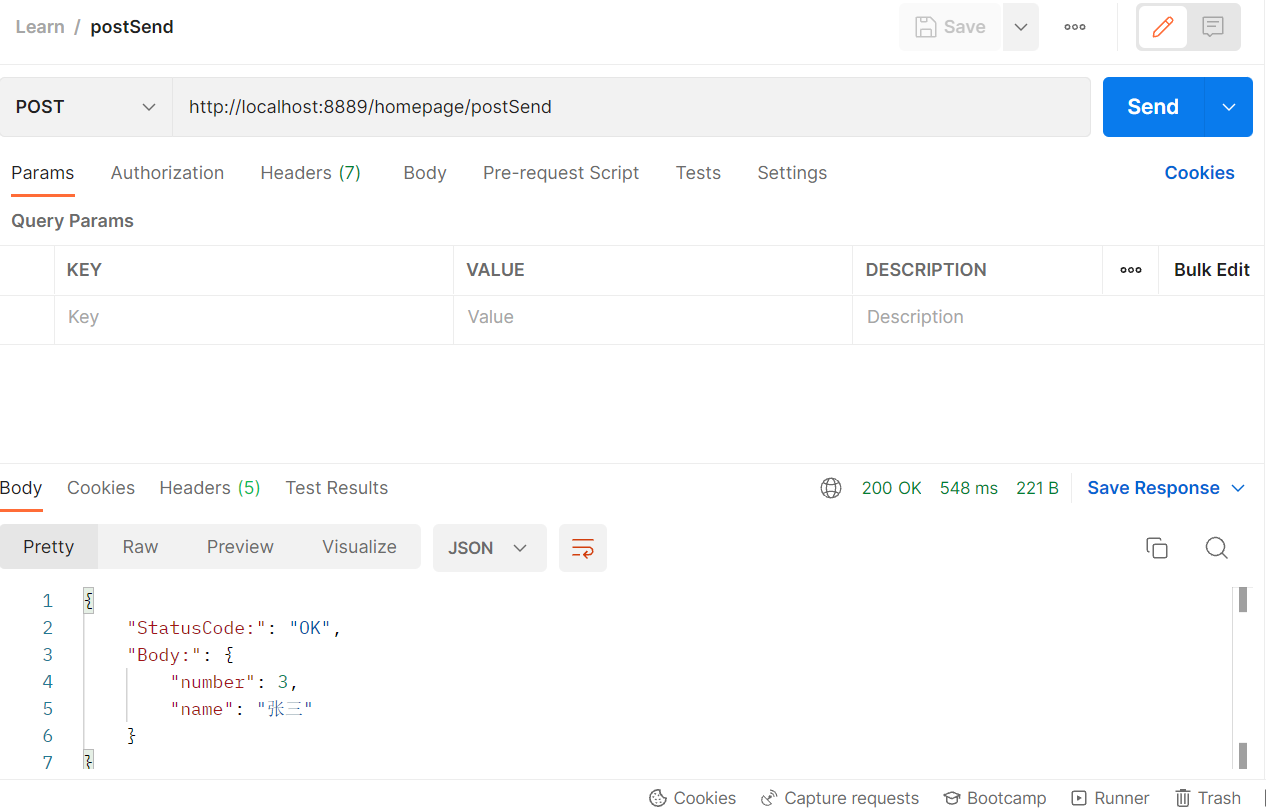
3.6 Postman
配置Post,地址为: http://localhost:8889/homepage/postSend
即可获得输出。

审核编辑:汤梓红
声明:本文内容及配图由入驻作者撰写或者入驻合作网站授权转载。文章观点仅代表作者本人,不代表电子发烧友网立场。文章及其配图仅供工程师学习之用,如有内容侵权或者其他违规问题,请联系本站处理。
举报投诉
- 相关推荐
- 热点推荐
- JAVA
- Controller
- GitHub
-
请问GSM模块POST方式发送数据失败,GET请求却成功了是怎么回事?2019-06-11 1924
-
labview实现登录微信(不用Python节点,直接面向底层post协议)2019-06-20 9709
-
GET和POST的请求示例流程2021-04-02 3681
-
如何通过GET和POST请求控制pwm占空比?2023-02-28 437
-
如何在POST标注中设置正文?2023-05-08 295
-
ESP8266 AT模式开发GET和POST怎么填写?2023-11-09 397
-
什么是POST2009-05-24 7920
-
http请求 get post2017-09-27 1077
-
PHP中REQUEST和POST及GET有什么区别2019-02-19 1330
-
get与post的请求一些区别2022-09-07 1959
-
Java中restTemplate携带Header请求2023-03-09 2023
-
HTTP请求报文:GET和POST的区别2023-04-10 3159
-
HTTP中GET与POST的区别是什么?2023-08-05 819
-
所有接口都用post请求的原因2023-08-24 728
-
HTTP 中GET 和 POST 的区别2023-11-11 1675
全部0条评论

快来发表一下你的评论吧 !

