

PyQT5中常用的布局管理方式运行与代码
人工智能
643人已加入
描述
QGridLayout介绍
之前的文章介绍了PyQT5的水平与垂直两种布局方式,本文介绍网格布局方式,网格布局同样是PyQT5中常用的布局管理方式之一,网格布局方式支持相同尺寸网格跟自定义网格大小。按顺序填充每个网格,从左到右、从上到下
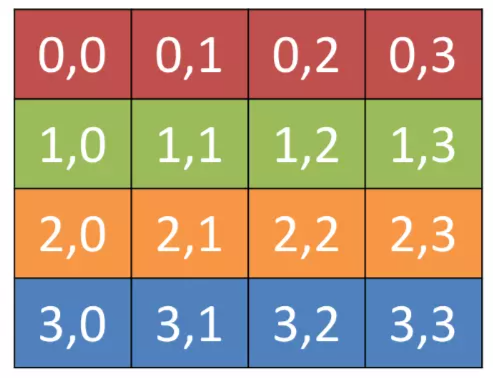
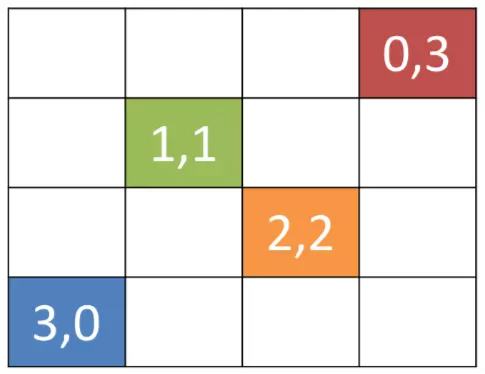
还可以选择性填写部分网格,生产错位的组件排列,QGridLayout也支持一下的组件布局方式:
QGridLayout类与方法

往QGridLayout网格布局中添加QWidget对象的函数为:
QtWidgets.QGridLayout.addWidget(widget, row, column)
 默认添加到网格中的每个网格大小一致。可以调用行跟列的比率设置函数设置行或者列的按比率显示,这样可以实现不同网格大小。相关支持函数如下:
void setColumnStretch ( int column, int stretch )
void setRowStretch ( int row, int stretch )
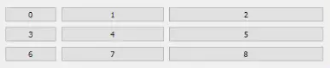
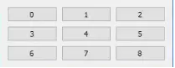
上图是每一列设置不同显示比率,以此类推对行也可以这样设置。
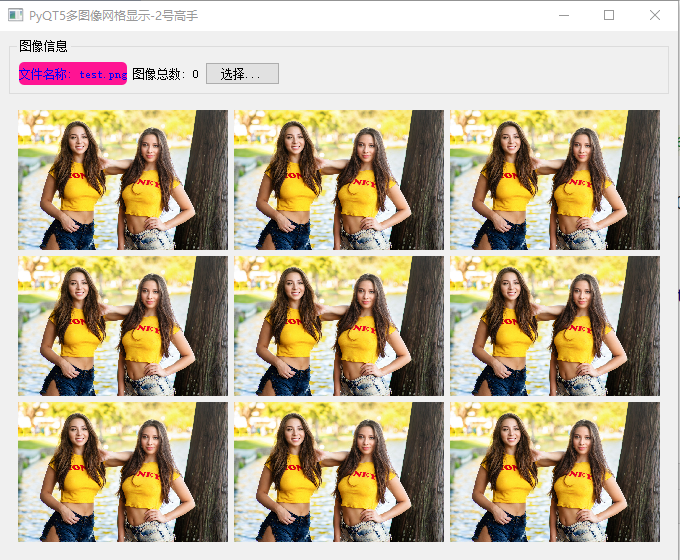
运行演示与代码
代码实现部分,通过一个自定义GridLayout布局支持的面板,结合QLabel组件,完成了个多图像大图预览的布局排序。主要代码可以参考这里:
PyQT5开发案例之简易图像浏览器
运行结果演示
GridLayout面板界面类代码如下
import os

from PyQt5 import QtWidgets, QtCore, QtGui
import sys


class ImageBrowserPanel(QtWidgets.QWidget):
    def __init__(self, parent=None):
        super().__init__(parent)
        self.image_files = []
        self.current_index = -1
        self.grid_labels = []
        # 文本标签
        self.pathLabel = QtWidgets.QLabel()
        self.pathLabel.setText("文件名称: test.png")
        self.pathLabel.setStyleSheet("background-color:deeppink; color: blue; border-radius:5px")
        self.pathLabel.setAlignment(QtCore.Qt.AlignCenter)
        # 图像总数
        self.numLabel = QtWidgets.QLabel()
        self.numLabel.setText("图像总数: 0")
        self.pathLabel.setStyleSheet("background-color:deeppink; color: blue; border-radius:5px")
        self.numLabel.setAlignment(QtCore.Qt.AlignCenter)

        fileBtn = QtWidgets.QPushButton("选择...")
        hbox_layout = QtWidgets.QHBoxLayout()
        hbox_layout.addWidget(self.pathLabel)
        hbox_layout.addWidget(self.numLabel)
        hbox_layout.addWidget(fileBtn)
        hbox_layout.addStretch(1)
        panel1 = QtWidgets.QGroupBox("图像信息")
        panel1.setLayout(hbox_layout)

        # 图像标签
        panel3 = QtWidgets.QWidget()
        grid_layout = QtWidgets.QGridLayout()
        for i in range(9):
            item_label = QtWidgets.QLabel()
            item_label.setStyleSheet("background-color:royalblue; border-radius:5px")
            pixmap = QtGui.QPixmap("test3.png")
            pix = pixmap.scaled(QtCore.QSize(210, 160), QtCore.Qt.KeepAspectRatio)
            item_label.setPixmap(pix)
            item_label.setAlignment(QtCore.Qt.AlignCenter)
            grid_layout.addWidget(item_label, int(i/3), int(i%3))
            self.grid_labels.append(item_label)
        panel3.setLayout(grid_layout)

        # 添加到布局管理器中
        vbox_layout = QtWidgets.QVBoxLayout()
        vbox_layout.addWidget(panel1)
        vbox_layout.addWidget(panel3)
        vbox_layout.addStretch(1)

        # 面板容器
        self.setLayout(vbox_layout)

        # setup listener
        fileBtn.clicked.connect(self.on_select_image_dir)

    def on_select_image_dir(self):
        img_dir = QtWidgets.QFileDialog.getExistingDirectory(self, "图像文件夹", ".")
        files = os.listdir(img_dir)
        self.image_files.clear()
        self.current_index = -1
        for f in files:
            if f.endswith(".png") or f.endswith(".jpg") or f.endswith(".bmp"):
                self.image_files.append(os.path.join(img_dir, f))
        if len(self.image_files) > 0:
            self.current_index = 0
            self.numLabel.setText("图像总数: " + str(len(self.image_files)))
            for im_file in self.image_files:
                pixmap = QtGui.QPixmap(im_file)
                pix = pixmap.scaled(QtCore.QSize(210, 160), QtCore.Qt.KeepAspectRatio)
                self.grid_labels[self.current_index % 9].setPixmap(pix)
                self.current_index = self.current_index + 1
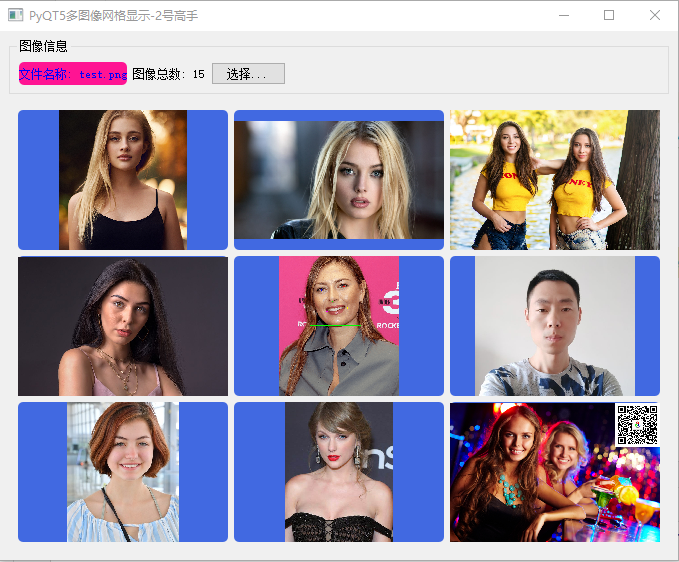
选择一个文件夹之后运行结果如下:
总结
本文主要是演示了PyQT5网格布局使用,同时结合多个QLabel,显示更新多张图像。实现了图像的网格化显示预览功能。
编辑:黄飞
声明:本文内容及配图由入驻作者撰写或者入驻合作网站授权转载。文章观点仅代表作者本人,不代表电子发烧友网立场。文章及其配图仅供工程师学习之用,如有内容侵权或者其他违规问题,请联系本站处理。
举报投诉
-
使用PyQt5自动初始化OpenVINO™环境出现报错怎么解决?2025-03-07 355
-
在全志H616核桃派开发板上进行PyQt5的代码编写和运行2024-05-13 1130
-
可视可交互!H618上用OpenCV读取图像显示到PyQt5窗口上2024-01-10 1633
-
基于PyQT5与ONNXRUNTIME实现风格迁移应用2023-10-25 1426
-
使用pycharm开发上位机配置pyqt5的环境2023-05-29 885
-
鲁班猫0 ubuntu20 解决python3.10安装pyqt52023-04-09 894
-
请问PyQT5是如何构建YOLOv8界面应用程序的2023-02-14 2603
-
PyQT5中的QPainter类支持与图元支持实现图形绘制2023-02-10 3674
-
如何使用Python配合PyQT5模块来开发图形化应用程序2021-12-24 1519
-
利用PyQt5编辑软件界面的简单步骤2021-09-16 1536
-
PyQt5的中文教程电子书免费下载2020-08-06 2160
-
【Firefly RK3399试用体验】PyQt5信号检测系统(结项)2017-07-13 4540
-
【Firefly RK3399试用体验】第二篇:PyQt5大战点灯2017-06-12 7268
-
Python PyQt5工具在Windows平台上的安装方法2017-02-13 3564
全部0条评论

快来发表一下你的评论吧 !
