

用Raspberry Pi和SensorMedal制作IoT跳绳设备:用SensorMedal检测跳跃次数并在显示器上显示
电子说
描述
第一部分:用跳绳测试仪解决运动不足问题!
大家好,我是吉田!
在第一部分中,我们简要介绍了本项目以及所需的准备工作,从第二部分开始,我们将着手制作这款旨在解决运动不足问题的跳绳设备。首先,让我们尝试在跳绳上附加SensorMedal,并检测跳跃次数吧。在四位显示器上以数字形式显示次数,可以方便您随时查看跳跃次数。
本部分所需部件
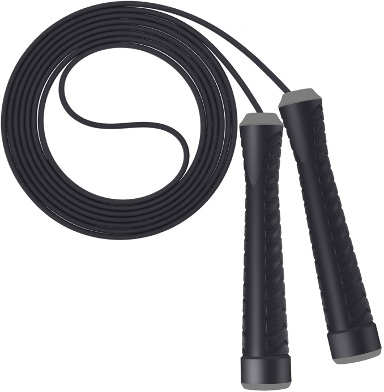
跳绳
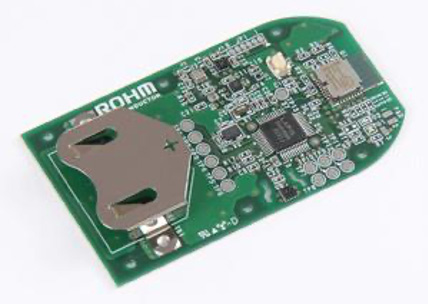
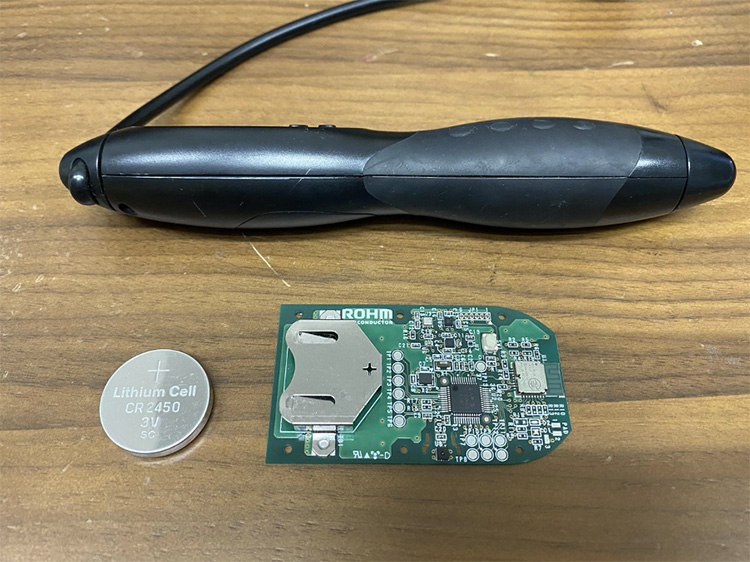
ROHM SensorMedal(SensorMedal-EVK-002)
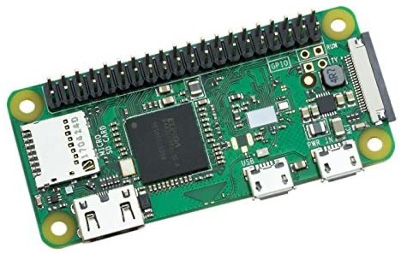
Raspberry Pi zero(Raspberry Pi Zero W)
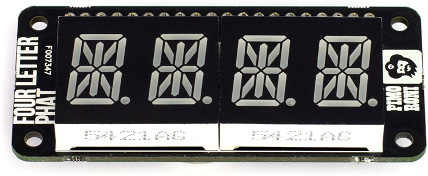
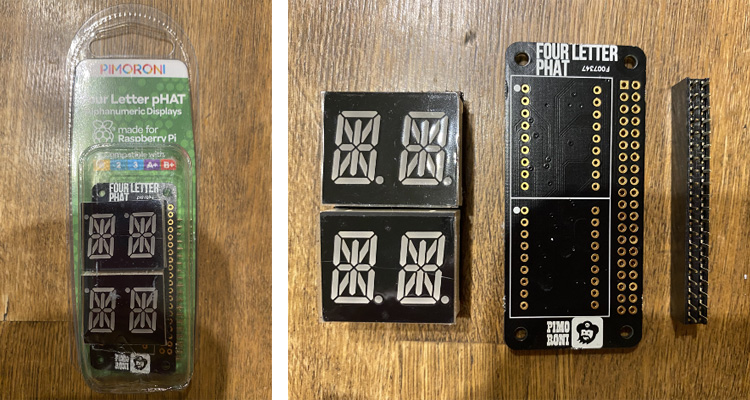
FOUR LETTER LED PHAT
本部分的流程
用SensorMedal进行跳绳计数
在四位显示器上显示
跳绳并显示次数
总结
1. 用SensorMedal进行跳绳计数
在制作跳绳设备时,需要准备一根跳绳。对跳绳没有格外要求,如果可能的话,最好使用手柄较粗较长的,这样更容易操作。
然后,考虑计算跳跃次数的方法。最直接的办法就是对跳绳旋转部分每转一圈计一次这样进行计数。这个可以通过将磁铁等连接到跳绳的旋转端并用霍尔传感器对其进行检测来实现。然而,在旋转部分安装霍尔传感器并安装用来获取检测结果的电路,还涉及到空间问题,难度较高。
这次我们使用SensorMedal的加速度传感器来检测跳绳手柄部分的加速度,并作为跳跃次数来计数。这样的话,还可以捕捉双飞和双臂交叉跳等的动作,也许还可以检测出跳法。
现在,我们先将纽扣电池CR2450装入SensorMedal中并打开电源。用扎带等将已经接通电源的SensorMedal连接到跳绳的手柄上。SensorMedal很轻,而且尺寸不大,所以我认为装上它并不会妨碍跳绳。
接下来,准备用Raspberry Pi Zero来接收这个SensorMedal的传感器值。另外,安装一个名为“bluepy”的库,以便用蓝牙将Raspberry Pi和SensorMedal连接起来。
然后,使用Github(http://github.com/bokunimowakaru/SensorMedal2)上的便利程序来显示从SensorMedal接收到的数值。使用“git clone”下载程序。
运行示例程序ble_logger_SensorMedal2.py。
pi@raspizero:~ $ sudo pip3 install bluepy
Looking in indexes: https://pypi.org/simple, https://www.piwheels.org/simple
Collecting bluepy
Installing collected packages: bluepy
Successfully installed bluepy-1.3.0

pi@raspizero:~ $ sudo git clone http://github.com/bokunimowakaru/SensorMedal2
Cloning into 'SensorMedal2'...
Unpacking objects: 100% (78/78), done.

pi@raspizero:~ $ cd SensorMedal2/
pi@raspizero:~/SensorMedal2 $ sudo python3 ble_logger_SensorMedal2.py
Device c5:xx:yy:zz::d0 (random), RSSI=-65 dB
  Short Local Name = ROHMMedal2_0107_01.00
  Flags = 06
  Incomplete 16b Services = 0000180a-0000
  Manufacturer = 0100c86abcdef
    ID            = 0x1
    SEQ           = 188
    Temperature   = 27.99 ℃
    Humidity      = 71.52 %
    Pressure      = 998.578 hPa
    Illuminance   = 93.3 lx
    Accelerometer = 1.453 g ( 0.062 0.844 1.181 g)
    Geomagnetic   = 92.6 uT ( -15.8 -58.0 -70.4 uT)
    Magnetic      = 0x3
    Steps         = 8 歩
    Battery Level = 90 %
    RSSI          = -65 dB
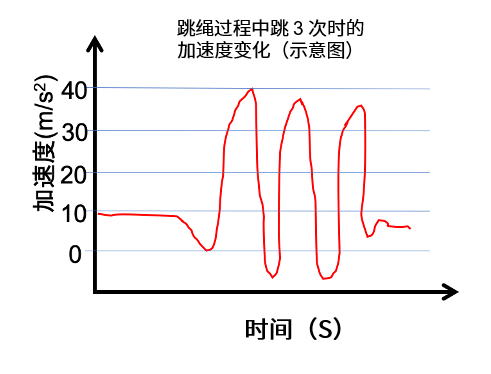
作为加速度,SensorMedal输出Accelerometer上的x、y 、z轴的加速度,以及合成的重力加速度(g)。在前面的图中,跳绳时的重力加速度为2〜4g,SensorMedal以相似的形式,检测到一定的重力加速度,并输出Steps的值。这次我们将使用这个数值作为跳绳时的跳跃次数。
另外,还需要计算一下跳绳时消耗的卡路里。在第一部分的文章中,提到过通过卡路里计算,可知每分钟跳100次左右、跳30分钟消耗的卡路里是270大卡,所以我们直接使用这个数值。
(每跳一次消耗的卡路里=270大卡/30*100次≒0.1大卡/次)
使用了该数值的Python程序ble_jump.py如下:
pi@raspizero:~/SensorMedal2 $ sudo cp ble_logger_SensorMedal2.py ../Programs/ble_jump.py

--- 下面的第5〜7、第12、第16〜18、第42〜55行是更改或添加部分 ---

interval = 1 #动作间隔
start_seq = 0
jump_cnt = 0

---
    # 每个BLE设备的接收数据处理
    for dev in devices:
        # print("nDevice %s (%s), RSSI=%d dB" % (dev.addr, dev.addrType, dev.rssi))
        isRohmMedal = False
        sensors = dict()
        for (adtype, desc, val) in dev.getScanData():
            # print("  %s = %s" % (desc, val))
            if desc == 'Short Local Name' and val[0:18] == 'ROHMMedal2_xxxx_xx': # 在xxxx_xx中输入您使用的SensorMedal编号
                print(“JUMP!”)
                isRohmMedal = True
            if isRohmMedal and desc == 'Manufacturer':
---
               # 在显示器上显示
                print('    ID            =',sensors['ID'])
                print('    SEQ           =',sensors['SEQ'])
                “”” print('    Temperature   =',round(sensors['Temperature'],2),'℃')
                print('    Humidity      =',round(sensors['Humidity'],2),'%')
                print('    Pressure      =',round(sensors['Pressure'],3),'hPa')
                print('    Illuminance   =',round(sensors['Illuminance'],1),'lx')
                print('    Accelerometer =',round(sensors['Accelerometer'],3),'g (',
                                            round(sensors['Accelerometer X'],3),
                                            round(sensors['Accelerometer Y'],3),
                                            round(sensors['Accelerometer Z'],3),'g)')
                print('    Geomagnetic   =',round(sensors['Geomagnetic'],1),'uT (',
                                            round(sensors['Geomagnetic X'],1),
                                            round(sensors['Geomagnetic Y'],1),
                                            round(sensors['Geomagnetic Z'],1),'uT)')
                print('    Magnetic      =',sensors['Magnetic'])
                print('    Steps         =',sensors['Steps'],'歩')
                print('    Battery Level =',sensors['Battery Level'],'%')
                print('    RSSI          =',sensors['RSSI'],'dB') ”””

                SEQ = sensors['SEQ']
                jump_cnt = sensors['Steps']

                if SEQ in [0,1] and jump_cnt == 0:
                    start_seq+= 1
                    print(“START!")
                else:
                    last_cnt = jump_cnt

                if start_seq >= 1:
                    cur_cnt = jump_cnt
                    cur_cal = round(cur_cnt*0.1,1)
                    jump_text= str(cur_cnt)+" Jump "+str(cur_cal)+" Cal"
                    print(jump_text)

               '''
                for key, value in sorted(sensors.items(), key=lambda x:x[0]):
                    print('    ',key,'=',value)
                '''
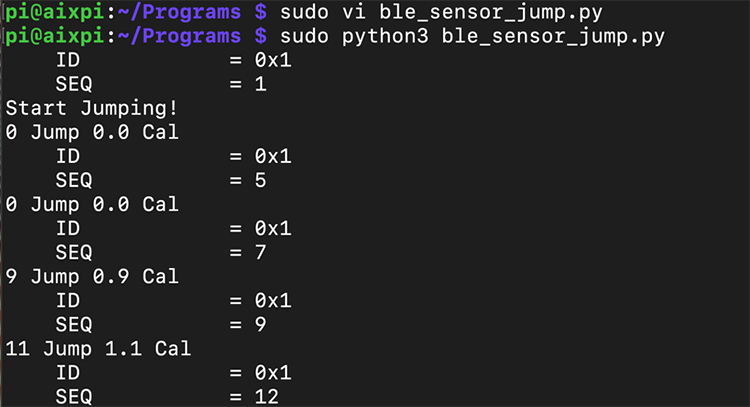
像sudo python3 ble_jump.py一样运行这个程序后,按一下SensorMedal上的开关。现在,可以跳绳了!您看到如下显示的跳跃次数和燃烧的卡路里了吗?
2. 在四位显示器上显示
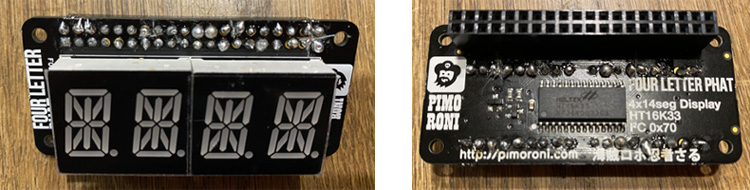
获得跳跃次数后,我们尝试在手边显示该数值吧。这次我们使用可与Raspberry Pi Zero完美兼容的Pimoroni的四位显示器。这个显示器由每个字符的显示器和电路板组成,所以需要把它们焊接起来。
下面的照片是焊接好的状态(焊得有点粗糙)。
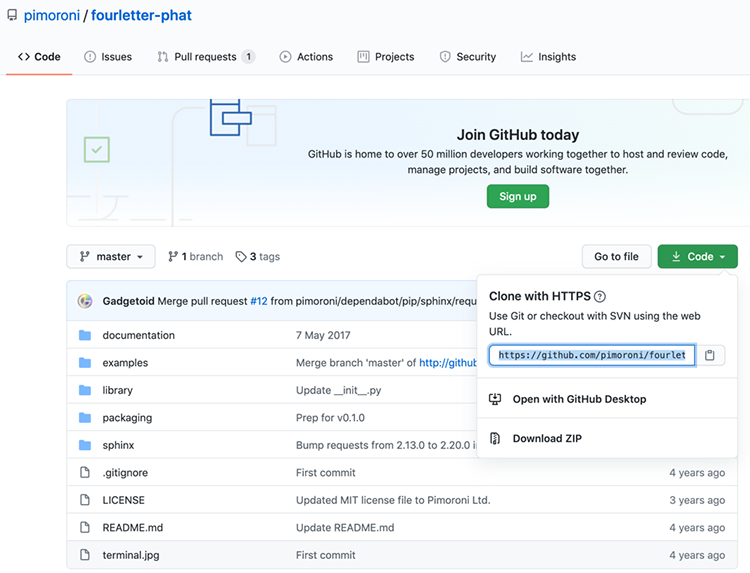
焊接完成后,将Pimoroni提供的库安装到Raspberry Pi上。请访问下面的Github:
[ Pimoroni 四位显示器的 Github https://github.com/pimoroni/fourletter-phat ]
或者只需使用Raspberry Pi运行以下命令进行安装:
$ curl https://get.pimoroni.com/fourletterphat | bash
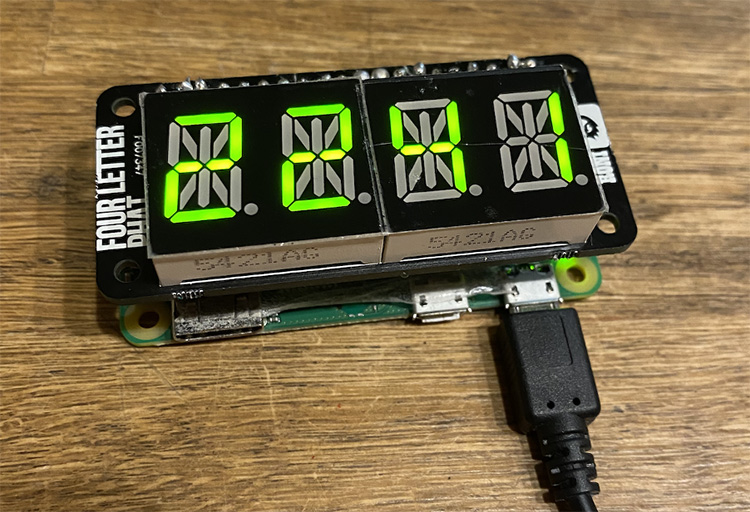
安装完成后,将会在名为“Pimoroni”的目录下找到一个名为“fourletter-phat”的显示示例程序。在这个示例程序中,让我们运行一下程序 (clock.py),显示当前时间作为时钟。
$ python ~/Pimoroni/fourletter-phat/examples/clock.py
当前时间显示如下:
3. 跳绳并显示次数
我们已经实现了四位数字的显示,现在我们尝试显示跳绳时的跳跃次数。只需复制ble_jump.py并添加下面的浅蓝色部分即可创建为ble_jump_4d.jpy。
pi@raspizero:~/Programs $ sudo cp ble_jump.py ble_jump_4d.py

--- 下面的第4、11、12行为更改或添加部分 ---
import fourletterphat
---
                if start_seq >= 1:
                    cur_cnt = jump_cnt
                    cur_cal = round(cur_cnt*0.1,1)
                    jump_text= str(cur_cnt)+" Jump "+str(cur_cal)+" Cal"
                    print(jump_text)
                    fourletterphat.print_number_str(cur_cnt)
                    fourletterphat.show()
               '''
                for key, value in sorted(sensors.items(), key=lambda x:x[0]):
                    print('    ',key,'=',value)
                '''
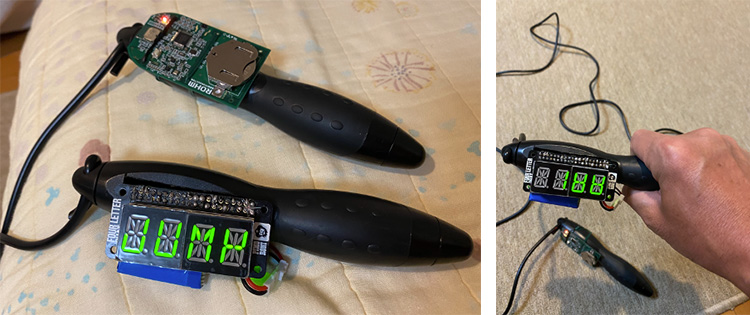
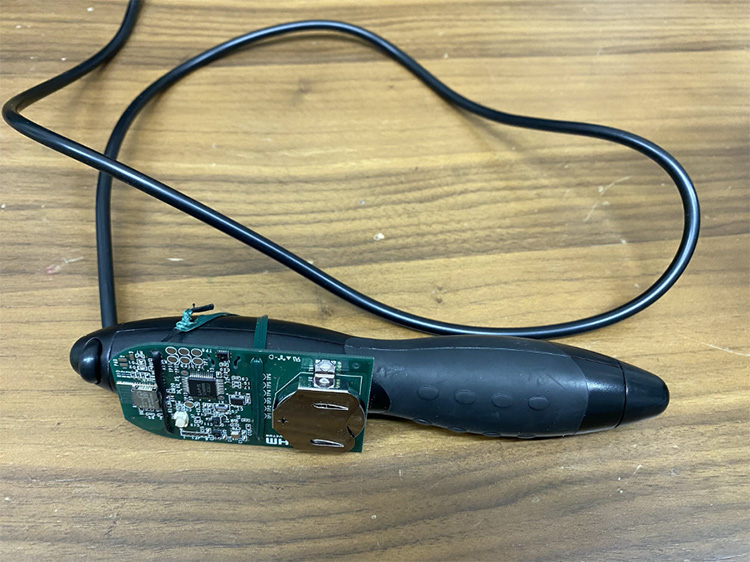
最后,让我们更细致地安装SensorMedal和Raspberry Pi。首先,我决定将它们安装到跳绳手柄上方相对平坦的位置。使用较大刀具等在上部开一个孔,以便Raspberry Pi Zero的引脚正好嵌入进去。在开孔位置的背面安装Raspberry Pi,正面安装四位显示器。
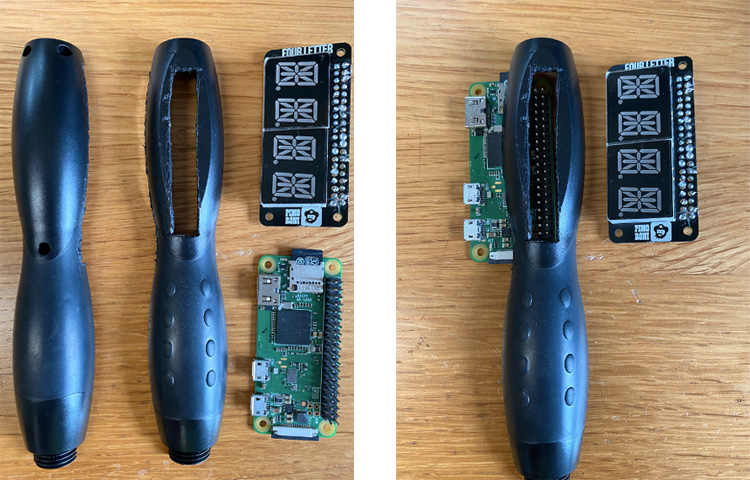
注意不要让它们干涉绳索部分,将Raspberry Pi和四位显示器固定在开孔的两面安装好之后,跳绳设备就制作完成啦!

现在让我们运行ble_jump_4d.py并开始跳绳吧!

4. 总结
至此,我们成功地使用Raspberry Pi和SensorMedal实现了跳绳的数字化,并关联物联网。当初的计划是制作一款通过轻松的跳绳运动来助力解决运动不足问题的设备。
我们已经实现了基本的功能:跳跃次数计量和显示次数。您可以试用一下这款跳绳,看看它是否能够正确计数。
在下一部分中,我们会将创建激发动力的机制,将跳绳连接到互联网,以保存和显示以往的次数和消耗的卡路里。
敬请期待!
本系列连载一览
第一部分:用跳绳测试仪解决运动不足问题!
第二部分:用SensorMedal检测跳跃次数并在显示器上显示(本章)
第三部分:连接Google Drive,保存并查看跳绳结果
第四部分:在设备上安装显示器以增加动力!
审核编辑 黄宇
- 相关推荐
- 热点推荐
- 测试仪
- Raspberry Pi
-
工业用触摸屏显示器怎么用2023-07-31 4809
-
为Raspberry Pi添加15美元的显示器2023-06-20 677
-
用Raspberry Pi和SensorMedal制作IoT跳绳设备 第四部分:在设备上安装显示器以增加动力2023-03-23 2378
-
一款用Raspberry Pi和传感器制作的可穿戴式小型健康管理设备!第四部分•剧终篇2023-02-24 3373
-
用Raspberry Pi和SensorMedal制作IoT跳绳设备:连接Google Drive,保存并查看跳绳结果2023-02-20 1925
-
用Arduino和16x2 LCD显示器制作倒计时继电器2023-02-06 678
-
用Raspberry Pi和圆形樱桃派计算Pi2022-12-30 845
-
可以检测鸽子并在Raspberry Pi上运行的系统2022-12-14 913
-
OLED显示器如何与Raspberry Pi一起使用?2022-11-17 6855
-
用Raspberry Pi和Arduino Micro制作的虚拟窥视孔2022-11-11 930
-
如何在Raspberry Pi Pico中使用OLED显示器2022-10-18 2509
-
如何在Raspbian上设置没有显示器和键盘的Raspberry Pi2022-09-22 2631
-
用ATtiny13制作一个PoV显示器2022-07-15 1107
全部0条评论

快来发表一下你的评论吧 !
