

AI分割一切——用OpenVINO™加速Meta SAM大模型
描述
ChatGPT的火爆让大家看到了通用AI大模型的威力,也带动了近期一批自然语言处理(NLP)领域大模型的不断被推出。你方唱罢我登场,最近,计算机视觉领域也迎来了自己的物体分割大模型,由Meta开源的 “万物可分割 (Segment Anything Model, SAM)”物体分割模型。
物体分割是计算机视觉中的核心任务之一,旨在识别图像中属于特定对象的像素。通常实现图像分割的方法有两种,即交互式分割和自动分割。交互式分割可以对任何类别的对象进行分割,但需要人工引导,并通过反复精细化掩码来完成。而自动分割可以对预定义的特定对象类别进行分割,但需要大量手动标注的对象进行训练,同时需要大量的计算资源和具有技术专业知识的人员来训练分割模型。然而,这两种方法都没有提供一种通用的、完全自动的分割方法。
SAM是这两种方法的泛化,它是一个单一的模型,可以轻松地执行交互式分割和自动分割。SAM可以从输入提示(例如点或框)生成高质量的对象掩码,并且可以用于生成图像中所有对象的掩码。它已经在一个包含1.1亿个掩码的1100万个图像数据集上进行了训练,并且在各种分割任务上具有较强的零样本性能。它创建了一个通用的物体分割模型,可以在从分析科学图像到编辑照片各种应用程序中使用。

图1. SAM推理结果示例
这个强大的通用分割模型,我们的OpenVINO 当然也是可以对它进行优化以及推理的加速,使其可以方便快速地在英特尔 的CPU上部署运行起来。为了方便各位开发者的使用,我们同样提供了Jupyter Notebook形式的源代码,大家只需要跟随我们代码里的步骤,就可以在自己的机器上运行SAM,对图像进行任意分割了。
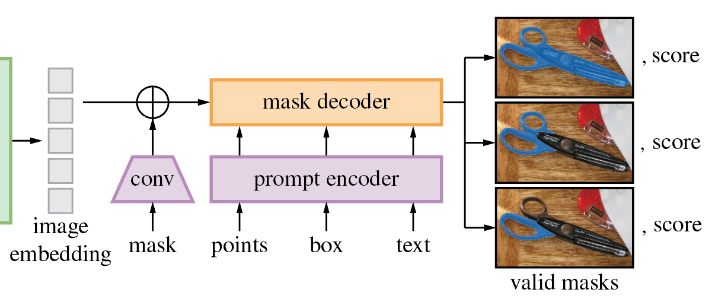
SAM模型由三个部分组成。
图像编码器(Image Encoder):这是一个Vision Transformer模型(VIT),使用Masked Auto Encoders方法(MAE)对图像进行编码,将图像转换为嵌入空间。图像编码器对每个图像运行一次,可以在向模型输入提示之前应用它。
提示编码器(Prompt Encoder ):这是一个用于分割条件的编码器。可以使用以下条件进行分割提示:
1. 点(points)- 与应分割的对象相关的一组点。Prompt编码器使用位置编码将点转换为嵌入值。
2. 框(boxes)- 应分割的对象所在的边界框。类似于points,边界框的坐标通过位置编码来进行编码。
3. 分割掩码-由用户提供的分割掩码使用卷积进行嵌入,并与图像嵌入进行element-wise求和。
4. 文本(text)- 由CLIP模型编码的文本表示。
掩码解码器(Mask Decoder) :掩码解码器有效地将图像嵌入、提示嵌入和输出标记映射到掩码。
下图描述了SAM生成掩码的流程图。 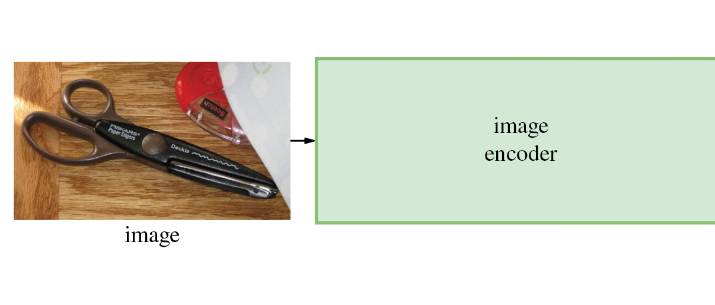
向右滑动查看完整图片
接下来,我们一起来看看运行利用OpenVINO 来优化加速SAM的推理有哪些重点步骤吧。 注意:以下步骤中的所有代码来自OpenVINO Notebooks开源仓库中的237-segment-anything notebook 代码示例,您可以点击以下链接直达源代码。 https://github.com/openvinotoolkit/openvino_notebooks/tree/main/notebooks/237-segment-anything
第一步:安装相应工具包、加载模型并转换为OpenVINO IR格式
本次代码示例需要首先安装SAM相应工具包。
!pip install -q "segment_anything" "gradio>=3.25"
向右滑动查看完整代码
然后下载及加载相应的PyTorch模型。
有几个SAM checkpoint可供下载。在本次代码示例中,我们将使用基于vit_b的模型,但模型加载的方法是通用的,也适用于其他SAM模型。将下面的模型URL、保存checkpoint的路径和模型类型设置为对应的SAM模型checkpoint,然后使用SAM_model_registry加载模型。
  import sys

  sys.path.append("../utils")
  from notebook_utils import download_file

  checkpoint = "sam_vit_b_01ec64.pth"
  model_url = "https://dl.fbaipublicfiles.com/segment_anything/sam_vit_b_01ec64.pth"
  model_type = "vit_b"

  download_file(model_url)
向右滑动查看完整代码
加载模型
  from segment_anything import sam_model_registry

  sam = sam_model_registry[model_type](checkpoint=checkpoint)
向右滑动查看完整代码
正如我们已经讨论过的,每个图像可以使用一次图像编码器,然后可以多次运行更改提示、提示编码器和掩码解码器来从同一图像中检索不同的对象。考虑到这一事实,我们将模型分为两个独立的部分:image_encoder和mask_pr预测器(提示编码器和掩码解码器的组合)。
第二步:定义图像编码器和掩码预测器
图像编码器输入是NCHW格式的形状为1x3x1024x1024的张量,包含用于分割的图像。图像编码器输出为图像嵌入,张量形状为1x256x64x64。代码如下
  import warnings
  from pathlib import Path
  import torch
  from openvino.tools import mo
  from openvino.runtime import serialize, Core

  core = Core()

  ov_encoder_path = Path("sam_image_encoder.xml")

  if not ov_encoder_path.exists():
      onnx_encoder_path = ov_encoder_path.with_suffix(".onnx")
      if not onnx_encoder_path.exists():
          with warnings.catch_warnings():
              warnings.filterwarnings("ignore", category=torch.jit.TracerWarning)
              warnings.filterwarnings("ignore", category=UserWarning)

              torch.onnx.export(sam.image_encoder, torch.zeros(1,3,1024,1024), onnx_encoder_path)

      ov_encoder_model = mo.convert_model(onnx_encoder_path, compress_to_fp16=True)
      serialize(ov_encoder_model, str(ov_encoder_path))
  else:
      ov_encoder_model = core.read_model(ov_encoder_path)
  ov_encoder = core.compile_model(ov_encoder_model)
掩码预测器
本次代码示例需要导出的模型带有参数return_single_mask=True。这意味着模型将只返回最佳掩码,而不是返回多个掩码。对于高分辨率图像,这可以在放大掩码开销大的情况下提升运行时速度。
组合提示编码器和掩码解码器模型具有以下输入列表:
image_embeddings:从image_encoder中嵌入的图像。具有长度为1的批索引。
point_coords:稀疏输入提示的坐标,对应于点输入和框输入。方框使用两个点进行编码,一个用于左上角,另一个用于右下角。坐标必须已转换为长边1024。具有长度为1的批索引。
point_labels:稀疏输入提示的标签。0是负输入点,1是正输入点,2是左上角,3是右下角,-1是填充点。*如果没有框输入,则应连接标签为-1且坐标为(0.0,0.0)的单个填充点。
模型输出:
掩码-预测的掩码大小调整为原始图像大小,以获得二进制掩码,应与阈值(通常等于0.0)进行比较。
iou_predictions-并集预测上的交集。
low_res_masks-后处理之前的预测掩码,可以用作模型的掩码输入。
第三步:在交互式分割模式下运行OpenVINO 推理
加载分割用的测试图片。
  import numpy as np
  import cv2
  import matplotlib.pyplot as plt

  download_file("https://raw.githubusercontent.com/facebookresearch/segment-anything/main/notebooks/images/truck.jpg")
  image = cv2.imread('truck.jpg')
  image = cv2.cvtColor(image, cv2.COLOR_BGR2RGB)
原始图片如下,
  plt.figure(figsize=(10,10))
  plt.imshow(image)
  plt.axis('off')
  plt.show()
预处理及可视化函数定义:
为图像编码器准备输入,包含以下步骤:
将BGR图像转换为RGB
调整图像保存纵横比,其中最长尺寸等于图像编码器输入尺寸1024。
归一化图像减去平均值(123.675、116.28、103.53)并除以标准差(58.395、57.12、57.375)
将HWC数据布局转换为CHW并添加批次维度。
根据图像编码器预期的输入形状,按高度或宽度(取决于纵横比)向输入张量添加零填充。
视频编码
要开始处理图像,我们应该对其进行预处理,并使用ov_encoder获得图像嵌入。我们将在所有实验中使用相同的图像,因此可以运行一次视频编码、生成一次图像嵌入,然后重用它们。
  preprocessed_image = preprocess_image(image)
  encoding_results = ov_encoder(preprocessed_image)

  image_embeddings = encoding_results[ov_encoder.output(0)]
现在,我们可以尝试为掩码生成提供不同的提示。
点输入举例
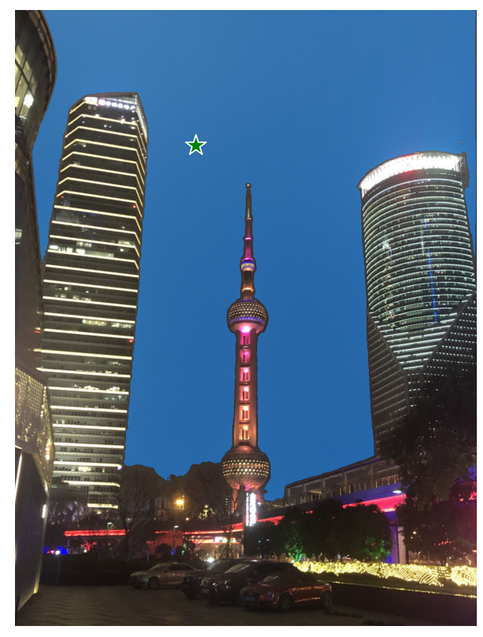
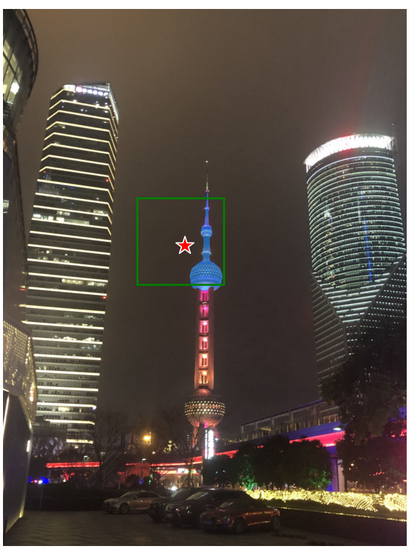
在本例中,我们选择一个点作为输入(input_point)。绿色星形符号在下图中显示了它的位置。
  input_point = np.array([[500, 375]])
  input_label = np.array([1])

  plt.figure(figsize=(10,10))
  plt.imshow(image)
  show_points(input_point, input_label, plt.gca())
  plt.axis('off')
  plt.show()
添加一个批索引,连接一个填充点,并将其转换为输入张量坐标系。
  coord = np.concatenate([input_point, np.array([[0.0, 0.0]])], axis=0)[None, :, :]
  label = np.concatenate([input_label, np.array([-1])], axis=0)[None, :].astype(np.float32)
  coord = resizer.apply_coords(coord, image.shape[:2]).astype(np.float32)
将输入打包以在掩码预测器中运行。
  inputs = {
      "image_embeddings": image_embeddings,
      "point_coords": coord,
      "point_labels": label,
  }
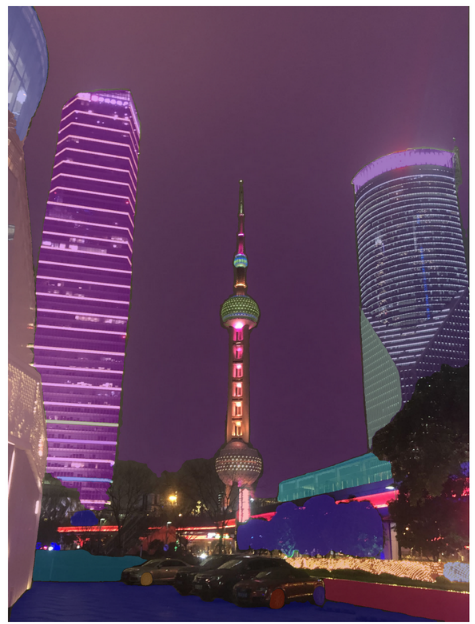
预测一个掩码并设置阈值以获得二进制掩码(0-无对象,1-对象)。
  results = ov_predictor(inputs)

  masks = results[ov_predictor.output(0)]
  masks = postprocess_masks(masks, image.shape[:-1])
  masks = masks > 0.0
绘制结果
  plt.figure(figsize=(10,10))
  plt.imshow(image)
  show_mask(masks, plt.gca())
  show_points(input_point, input_label, plt.gca())
  plt.axis('off')
  plt.show()
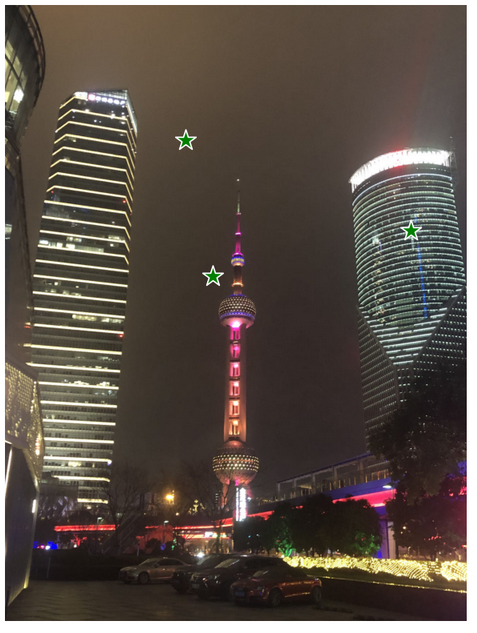
多点输入举例
  input_point = np.array([[500, 375], [1125, 625], [575, 750])
  input_label = np.array([1, 1, 1])
模型输入的提示反应在测试图片上为
  plt.figure(figsize=(10,10))
  plt.imshow(image)
  show_points(input_point, input_label, plt.gca())
  plt.axis('off')
  plt.show()
像上面单点输入的例子一样,讲输入点变换为张量坐标系,进而将输入打包成所需格式,最后获得的分割结果如下图所示
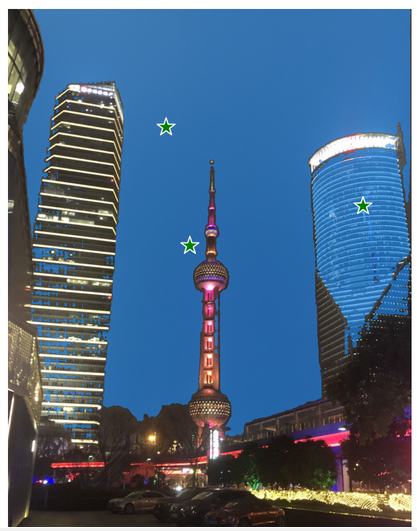
带负标签的框和点输入
在这个例中,我们使用边界框和边界框内的点来定义输入提示。边界框表示为其左上角和右下角的一组点。点的标签0表示该点应从掩码中排除。
  input_box = np.array([425, 600, 700, 875])
  input_point = np.array([[575, 750]])
  input_label = np.array([0])
反应在测试图片中为
添加批次索引,连接方框和点输入,为方框角添加适当的标签,然后进行变换。本次没有填充点,因为输入包括一个框输入。
  box_coords = input_box.reshape(2, 2)
  box_labels = np.array([2,3])

  coord = np.concatenate([input_point, box_coords], axis=0)[None, :, :]
  label = np.concatenate([input_label, box_labels], axis=0)[None, :].astype(np.float32)

  coord = resizer.apply_coords(coord, image.shape[:2]).astype(np.float32)
打包输入,并进行预测
  inputs = {
      "image_embeddings": image_embeddings,
      "point_coords": coord,
      "point_labels": label,
  }

  results = ov_predictor(inputs)

  masks = results[ov_predictor.output(0)]
  masks = postprocess_masks(masks, image.shape[:-1])
  masks = masks > 0.0
结果如图所示
第四步:在自动分割模式下运行OpenVINO 推理
由于SAM可以有效地处理提示,因此可以通过在图像上采样大量提示来生成整个图像的掩码。automatic_mask_generation函数实现了这一功能。它的工作原理是在图像上的网格中对单点输入提示进行采样,SAM可以从每个提示中预测多个掩码。然后,对掩码进行质量过滤,并使用非最大抑制进行去重复。额外的选项允许进一步提高掩模的质量和数量,例如对图像的多个裁剪进行预测,或对掩模进行后处理以去除小的断开区域和孔洞。
  from segment_anything.utils.amg import (
      MaskData,
      generate_crop_boxes,
      uncrop_boxes_xyxy,
      uncrop_masks,
      uncrop_points,
      calculate_stability_score,
      rle_to_mask,
      batched_mask_to_box,
      mask_to_rle_pytorch,
      is_box_near_crop_edge,
      batch_iterator,
      remove_small_regions,
      build_all_layer_point_grids,
      box_xyxy_to_xywh,
      area_from_rle
)
  from torchvision.ops.boxes import batched_nms, box_area
  from typing import Tuple, List, Dict, Any
在自动掩码生成中有几个可调参数,用于控制采样点的密度以及去除低质量或重复掩码的阈值。此外,生成可以在图像的裁剪上自动运行,以提高对较小对象的性能,后处理可以去除杂散像素和孔洞。
定义自动分割函数
  def automatic_mask_generation(
      image: np.ndarray, min_mask_region_area: int = 0, points_per_side: int = 32, crop_n_layers: int = 0, crop_n_points_downscale_factor: int = 1, crop_overlap_ratio: float = 512 / 1500, box_nms_thresh: float = 0.7, crop_nms_thresh: float = 0.7
) -> List[Dict[str, Any]]:
      """
      Generates masks for the given image.

      Arguments:
        image (np.ndarray): The image to generate masks for, in HWC uint8 format.

      Returns:
         list(dict(str, any)): A list over records for masks. Each record is
           a dict containing the following keys:
             segmentation (dict(str, any) or np.ndarray): The mask. If
               output_mode='binary_mask', is an array of shape HW. Otherwise,
               is a dictionary containing the RLE.
             bbox (list(float)): The box around the mask, in XYWH format.
             area (int): The area in pixels of the mask.
             predicted_iou (float): The model's own prediction of the mask's
               quality. This is filtered by the pred_iou_thresh parameter.
             point_coords (list(list(float))): The point coordinates input
               to the model to generate this mask.
             stability_score (float): A measure of the mask's quality. This
               is filtered on using the stability_score_thresh parameter.
             crop_box (list(float)): The crop of the image used to generate
               the mask, given in XYWH format.
      """
      point_grids = build_all_layer_point_grids(
          points_per_side,
          crop_n_layers,
          crop_n_points_downscale_factor,
      )
      mask_data = generate_masks(
          image, point_grids, crop_n_layers, crop_overlap_ratio, crop_nms_thresh)

      # Filter small disconnected regions and holes in masks
      if min_mask_region_area > 0:
          mask_data = postprocess_small_regions(
              mask_data,
              min_mask_region_area,
              max(box_nms_thresh, crop_nms_thresh),
          )

      mask_data["segmentations"] = [
          rle_to_mask(rle) for rle in mask_data["rles"]]

      # Write mask records
      curr_anns = []
      for idx in range(len(mask_data["segmentations"])):
          ann = {
              "segmentation": mask_data["segmentations"][idx],
              "area": area_from_rle(mask_data["rles"][idx]),
              "bbox": box_xyxy_to_xywh(mask_data["boxes"][idx]).tolist(),
              "predicted_iou": mask_data["iou_preds"][idx].item(),
              "point_coords": [mask_data["points"][idx].tolist()],
              "stability_score": mask_data["stability_score"][idx].item(),
              "crop_box": box_xyxy_to_xywh(mask_data["crop_boxes"][idx]).tolist(),
          }
          curr_anns.append(ann)

      return curr_anns
运行自动分割预测
prediction = automatic_mask_generation(image)
以上automatic_mask_generation函数返回一个掩码列表,其中每个掩码都是一个包含有关掩码的各种数据的字典:
分割:掩码
面积:掩码的面积(以像素为单位)
bbox:XYWH格式的掩码的边界框
predicted_out:模型自己对掩模质量的预测
point_coords:生成此掩码的采样输入点
稳定性核心:衡量掩码质量的一个附加指标
crop_box:用于以XYWH格式生成此掩码的图像的裁剪
查看掩码的信息
  print(f"Number of detected masks: {len(prediction)}")
  print(f"Annotation keys: {prediction[0].keys()}")
获得如下结果


绘制最后的分割结果
  from tqdm.notebook import tqdm

  def draw_anns(image, anns):
      if len(anns) == 0:
          return
      segments_image = image.copy()
      sorted_anns = sorted(anns, key=(lambda x: x['area']), reverse=True)
      for ann in tqdm(sorted_anns):
          mask = ann["segmentation"]
          mask_color = np.random.randint(0, 255, size=(1, 1, 3)).astype(np.uint8)
          segments_image[mask] = mask_color
      return cv2.addWeighted(image.astype(np.float32), 0.7, segments_image.astype(np.float32), 0.3, 0.0)
  import PIL

  out = draw_anns(image, prediction)
  cv2.imwrite("result.png", out[:, :, ::-1])

  PIL.Image.open("result.png")
看看这些分割的效果,是不是非常的惊艳呢。其实除了以上我们介绍的代码内容,在我们的Jupyter Notebook代码里,还为大家提供了窗口式鼠标点击输入提示的交互式分割体验,甚至可以在手机端输入URL地址体验即时的互动效果,如下图所示

这么多有趣又快速的OpenVINO 运行物体分割的方式,快在你本地的机器上克隆我们的代码示例,自己动手试试SAM的效果吧。
小结:
整个的步骤就是这样!现在就开始跟着我们提供的代码和步骤,动手试试用OpenVINO 和SAM吧。
关于英特尔OpenVINO 开源工具套件的详细资料,包括其中我们提供的三百多个经验证并优化的预训练模型的详细资料,请您点击https://www.intel.com/content/www/us/en/developer/tools/openvino-toolkit/overview.html
除此之外,为了方便大家了解并快速掌握OpenVINO 的使用,我们还提供了一系列开源的Jupyter notebook demo。运行这些notebook,就能快速了解在不同场景下如何利用OpenVINO 实现一系列、包括计算机视觉、语音及自然语言处理任务。OpenVINO notebooks的资源可以在GitHub这里下载安装:
https://github.com/openvinotoolkit/openvino_notebooks 。
审核编辑 :李倩
-
SAM(通用图像分割基础模型)丨基于BM1684X模型部署指南2026-01-12 705
-
中科院提出FastSAM快速分割一切模型!比Meta原版提速50倍!2023-06-28 2861
-
用OpenVINO™ C++ API编写YOLOv8-Seg实例分割模型推理程序2023-06-25 3491
-
YOLOv8最新版本支持SAM分割一切2023-06-18 2827
-
分割一切?Segment Anything量化加速实战2023-06-16 2219
-
SAM 到底是什么2023-06-12 9259
-
在AI爱克斯开发板上用OpenVINO™加速YOLOv8-seg实例分割模型2023-06-05 2281
-
AI爱克斯开发板上使用OpenVINO加速YOLOv8目标检测模型2023-05-26 3026
-
第一篇综述!分割一切模型(SAM)的全面调研2023-05-24 3519
-
近期分割大模型发展情况2023-05-22 2428
-
SAM分割模型是什么?2023-05-20 4058
-
AI+制造业:机器视觉开启掘金新大陆2023-05-15 2187
-
在AI爱克斯开发板上用OpenVINO™加速YOLOv8目标检测模型2023-05-12 2893
-
在AI爱克斯开发板上用OpenVINO™加速YOLOv8分类模型2023-05-05 2097
全部0条评论

快来发表一下你的评论吧 !
