

【灵动微】FTHR-G0140开发板移植RT-Thread驱动
描述
#申请原创# #有奖活动#
【目的】移植RT-Thread nano到FTHR-G0140开发板上,并实现任务的创建与运行。
【开发环境】
MDK5.28
【移植步骤】
1、打开一个可以亮灯的基础例程,这里打开示例的GPIO工程。
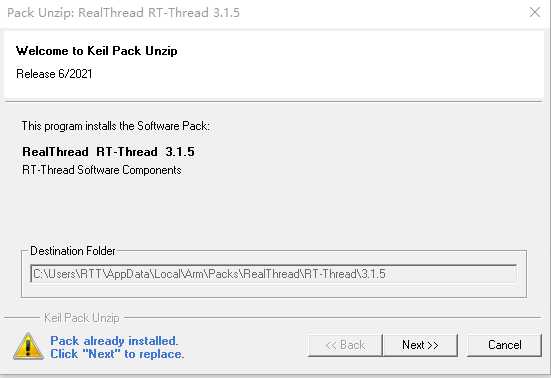
2、Nano Pack 安装:我们从官网下载安装文件,RT-Thread Nano 离线安装包下载,下载结束后双击文件进行安装:
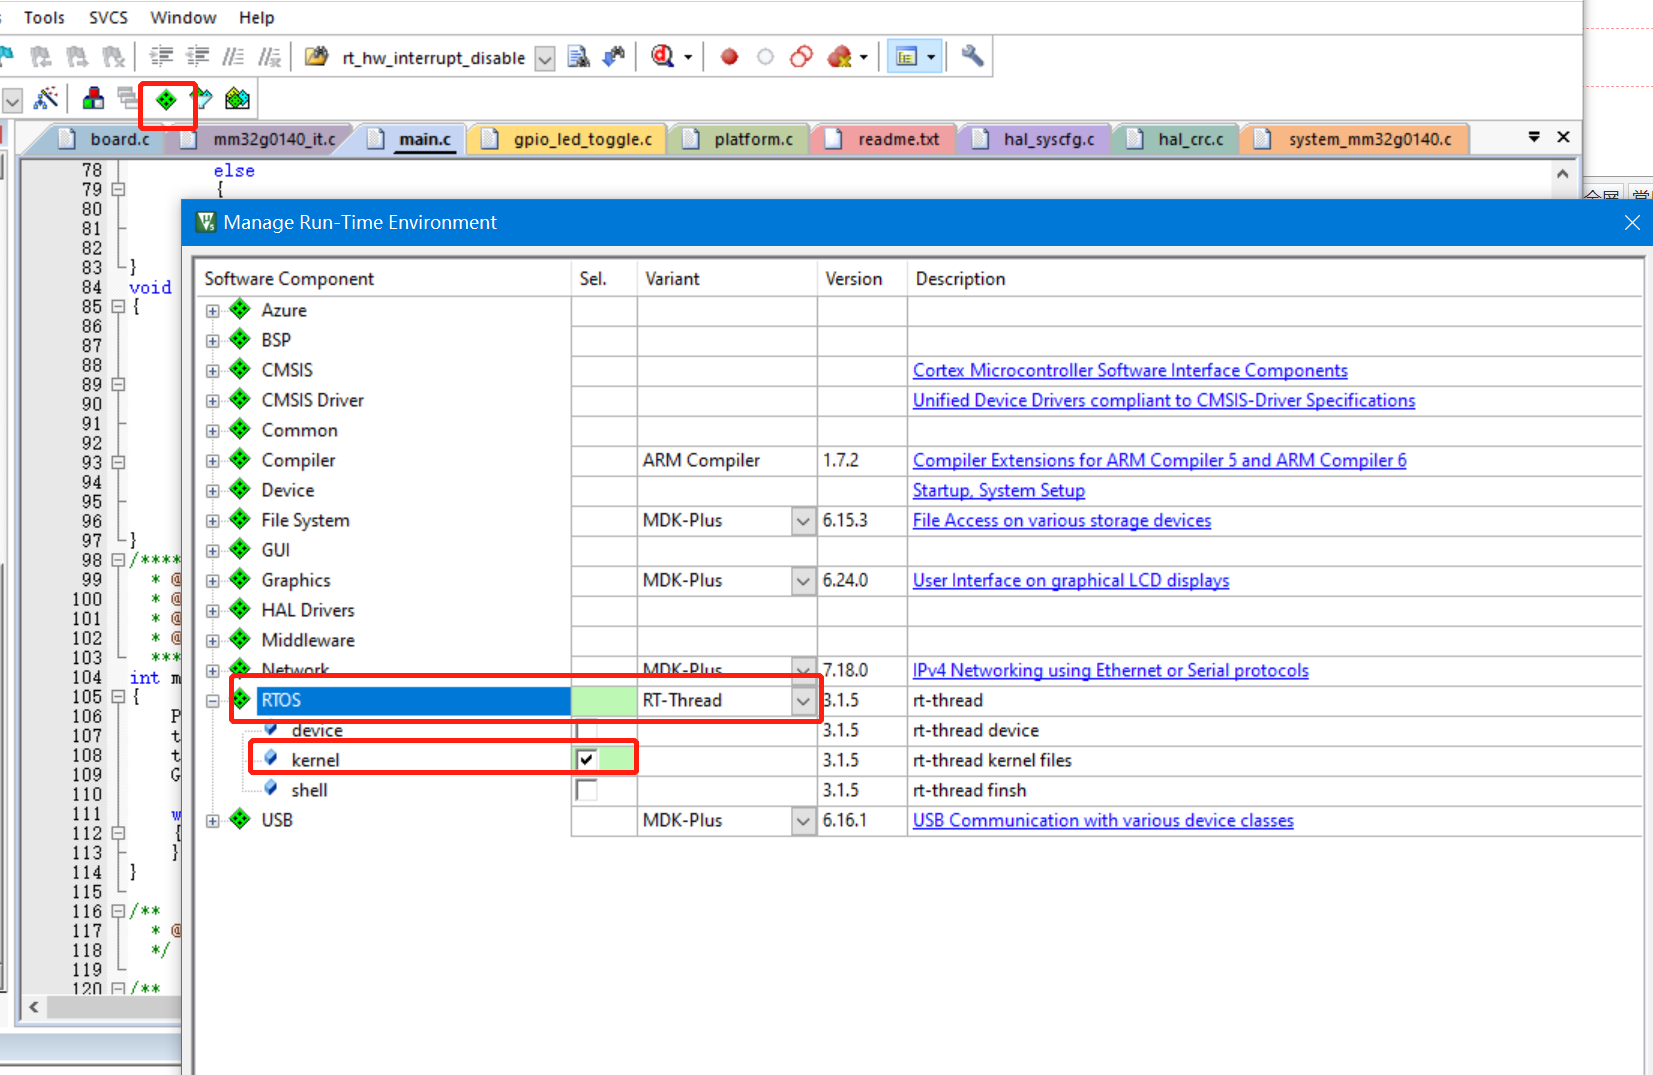
3、添加 RT-Thread Nano 到工程,打开已经准备好的可以运行的裸机程序,将 RT-Thread 添加到工程。如下图,点击 Manage Run-Time Environment。
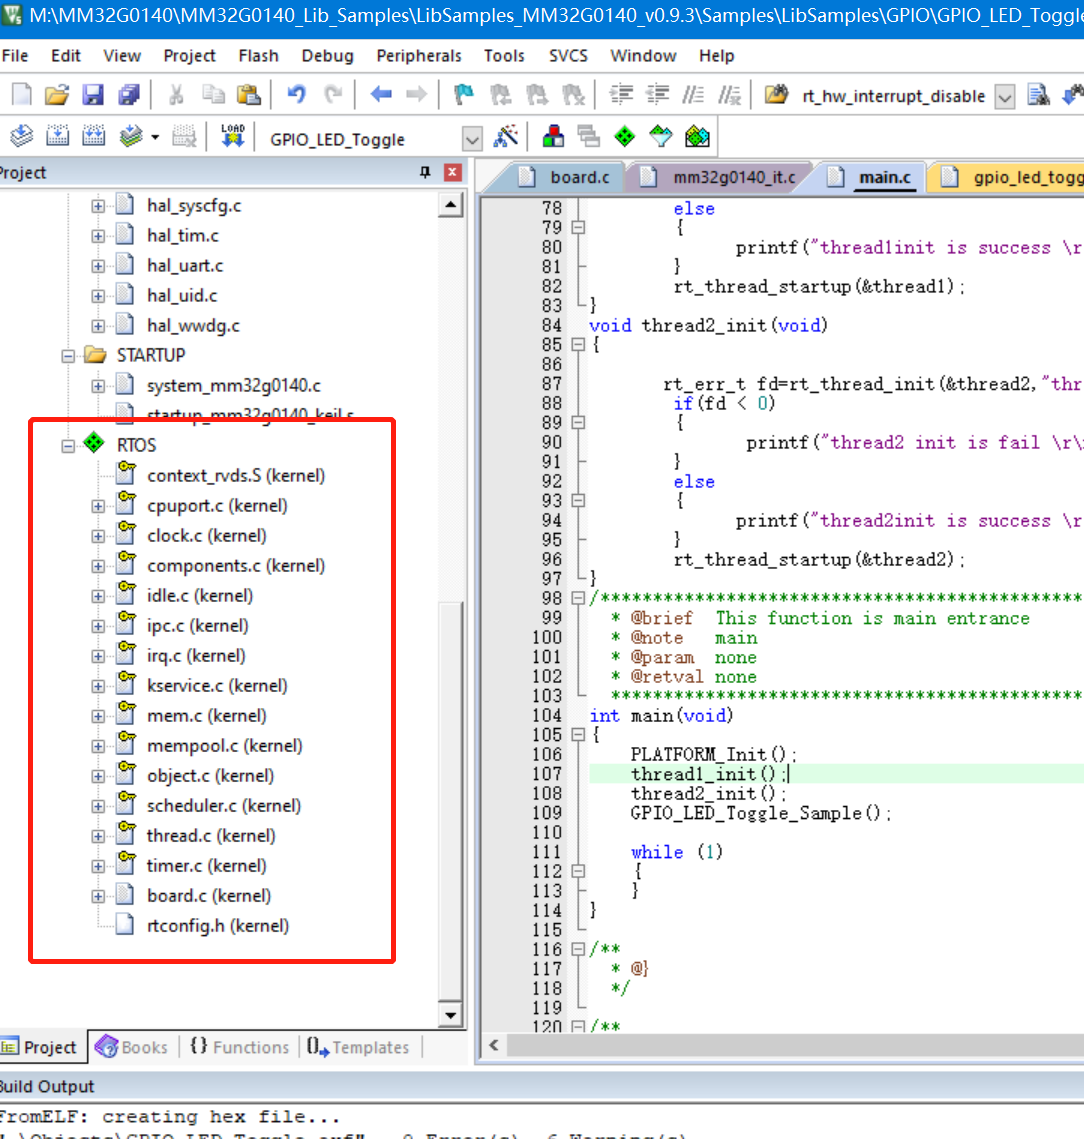
4、现在可以在 Project 看到 RT-Thread RTOS 已经添加进来了,展开 RTOS,可以看到添加到工程的文件:
5、适配 RT-Thread Nano
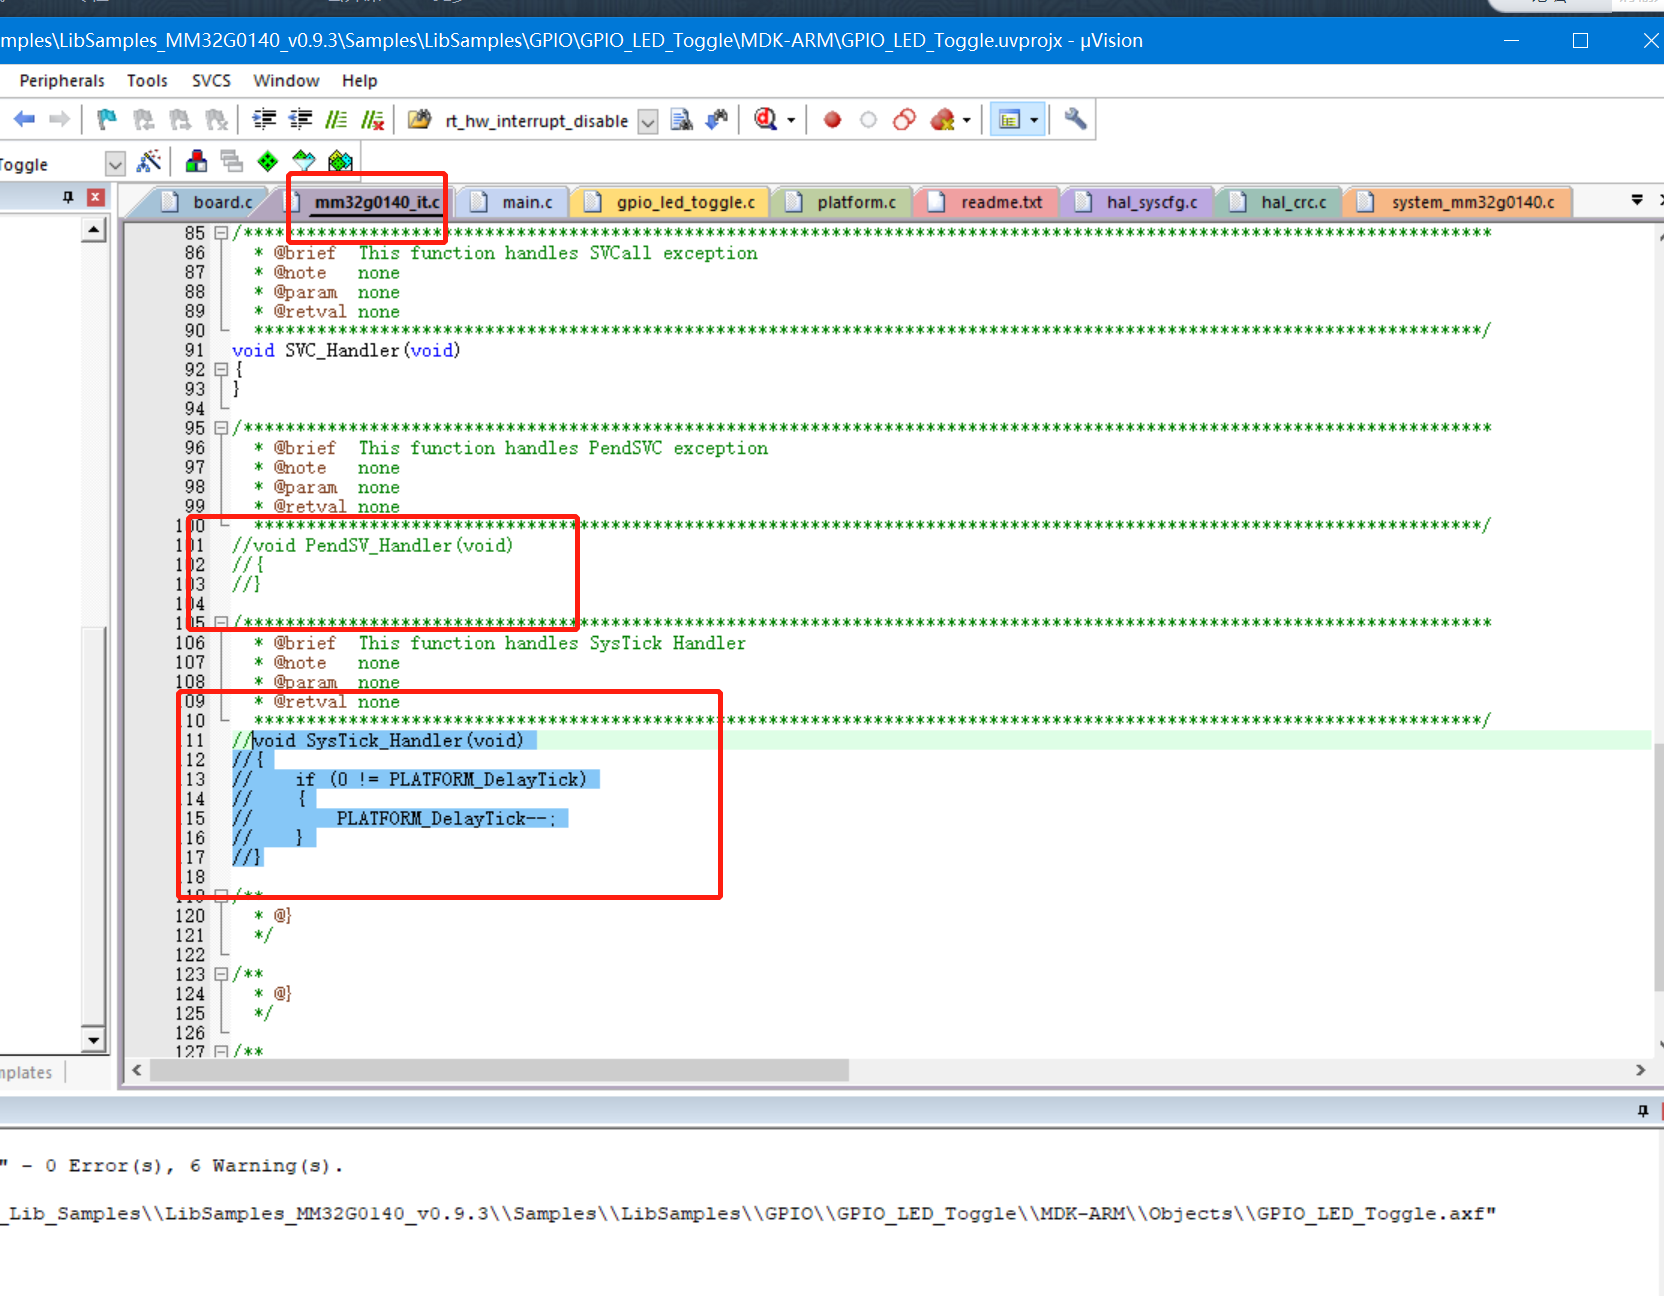
中断与异常处理
RT-Thread 会接管异常处理函数 HardFault_Handler() 和悬挂处理函数 PendSV_Handler(),这两个函数已由 RT-Thread 实现,所以需要删除工程里中断服务例程文件中的这两个函数,避免在编译时产生重复定义。
系统时钟配置
需要在 board.c 中实现 系统时钟配置(为 MCU、外设提供工作时钟)与 os tick 的配置 (为操作系统提供心跳 / 节拍)。
如下代码所示,用户需要在 board.c 文件中系统初始化和 OS Tick 的配置,cortex-m0 架构使用 SysTick_Handler()
我们修改函数内容如下:
#define SYSCLK_HSI_XXMHz 72000000
void rt_os_tick_callback(void)
{
rt_interrupt_enter();
rt_tick_increase();
rt_interrupt_leave();
}
void SysTick_Handler(void)
{
rt_os_tick_callback();
}
/**
* This function will initial your board.
*/
void rt_hw_board_init(void)
{
SysTick_Config(SYSCLK_HSI_XXMHz/1000);
/*
* TODO 1: OS Tick Configuration
* Enable the hardware timer and call the rt_os_tick_callback function
* periodically with the frequency RT_TICK_PER_SECOND.
*/
/* Call components board initial (use INIT_BOARD_EXPORT()) */
#ifdef RT_USING_COMPONENTS_INIT
rt_components_board_init();
#endif
#if defined(RT_USING_USER_MAIN) && defined(RT_USING_HEAP)
rt_system_heap_init(rt_heap_begin_get(), rt_heap_end_get());
#endif
}
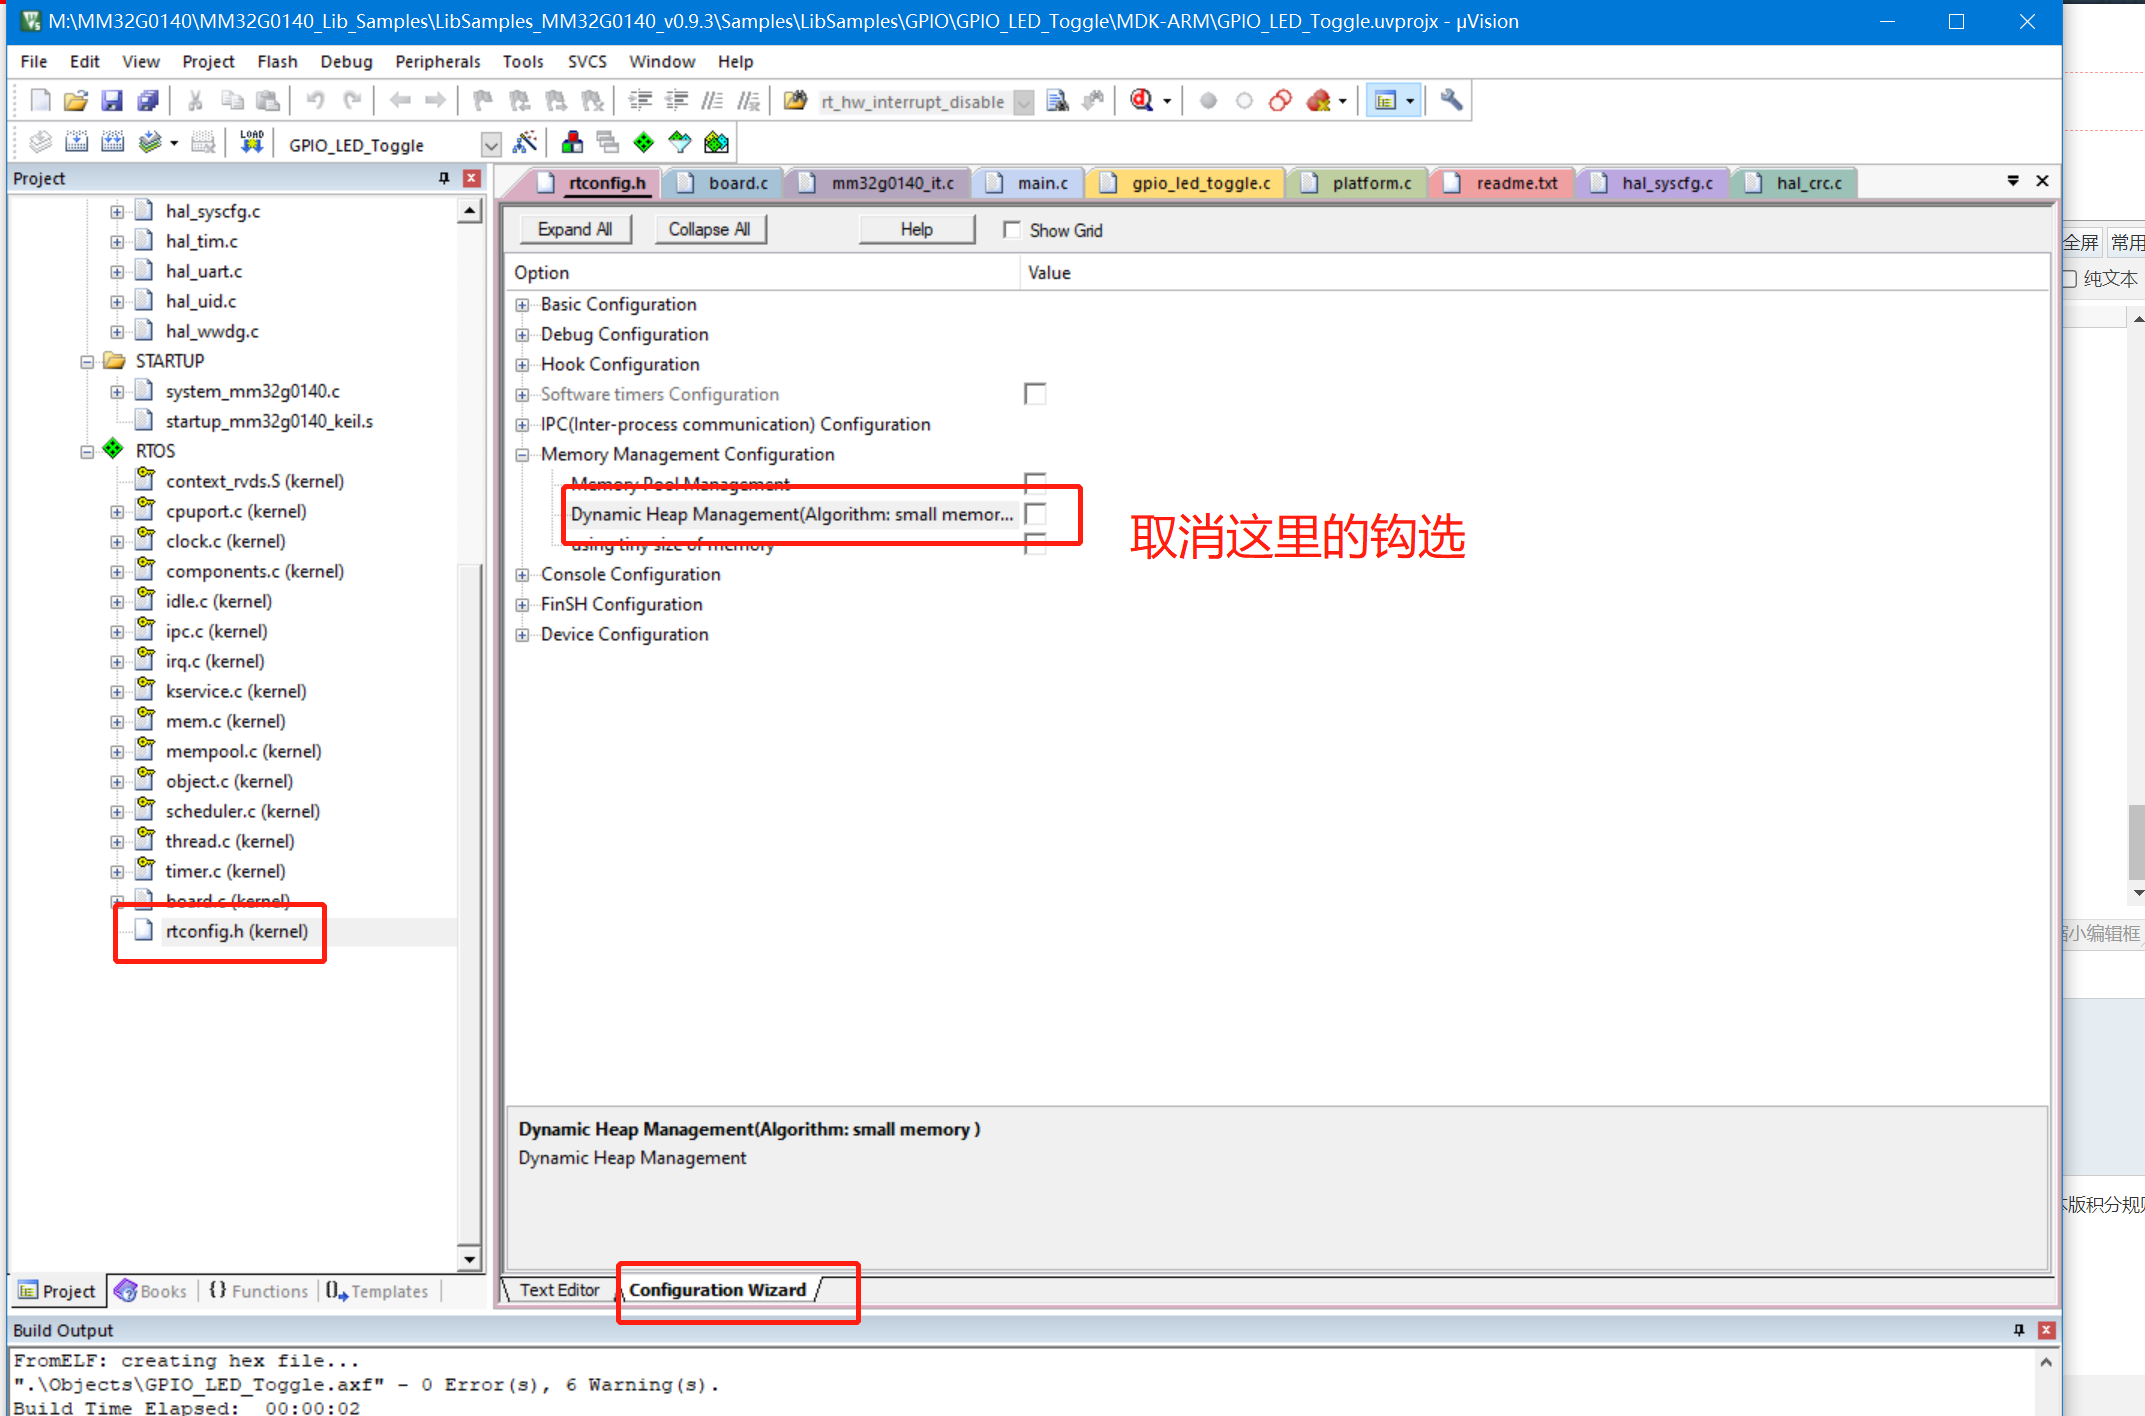
同时我们打开rttconfig.h,在Memory Management Configuation中关闭动态内存池管理
然后我们就可以编译工程了:
Program Size: Code=6560 RO-data=556 RW-data=148 ZI-data=3172
FromELF: creating hex file...
".ObjectsGPIO_LED_Toggle.axf" - 0 Error(s), 0 Warning(s).
Build Time Elapsed: 00:00:02
6、创建两个任务,并启动:
struct rt_thread thread1;
struct rt_thread thread2;
char thread1_stack[512];
char thread2_stack[512];
void thread1_entry(void*param)
{
while (1)
{
printf("thread1 is runningrn");
rt_thread_mdelay(200);
}
}
void thread2_entry(void*param)
{
while (1)
{
printf("thread2is runningrn");
rt_thread_mdelay(400);
}
}
void thread1_init(void)
{
rt_err_t fd=rt_thread_init(&thread1,"thread1",&thread1_entry,0,&thread1_stack[0],sizeof(thread1_stack),10,10);
if(fd < 0)
{
printf("thread1 init is fail rn");
}
else
{
printf("thread1init is success rn");
}
rt_thread_startup(&thread1);
}
void thread2_init(void)
{
rt_err_t fd=rt_thread_init(&thread2,"thread2",&thread2_entry,0,&thread2_stack[0],sizeof(thread2_stack),10,10);
if(fd < 0)
{
printf("thread2 init is fail rn");
}
else
{
printf("thread2init is success rn");
}
rt_thread_startup(&thread2);
}
/***********************************************************************************************************************
* @brief This function is main entrance
* @note main
* @param none
* @retval none
*********************************************************************************************************************/
int main(void)
{
PLATFORM_Init();
thread1_init();
thread2_init();
while (1)
{
}
}
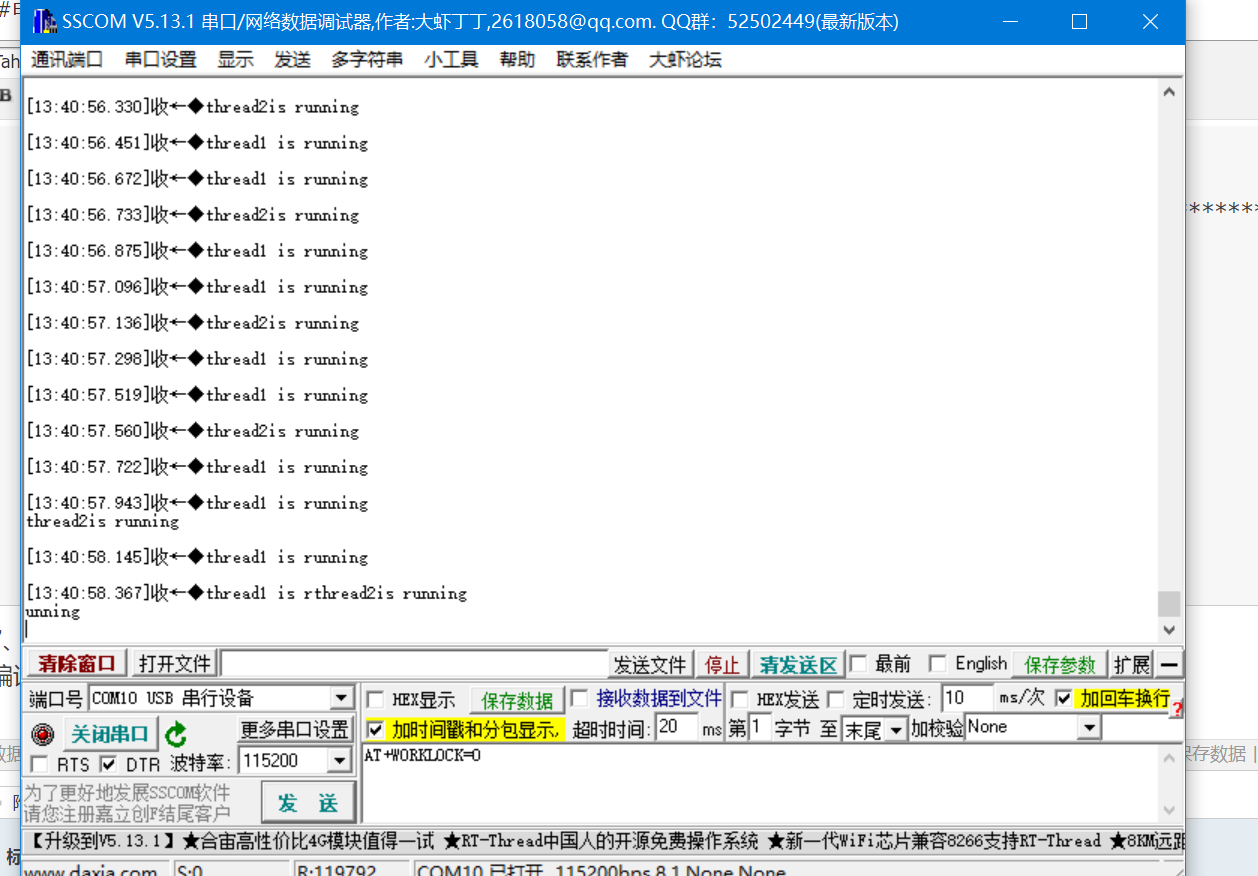
7、实验效果:
编译后下载到开发板,我们就可以看到RT-Thread成功启动了两个任,打印效果如下:
【总结】作为这款芯片是基于Cortex-M0核,厂家采用了标准的CMSIS结构,使得移植RTT比较成功。
审核编辑 黄宇
-
【QEMU系列】不用开发板运行RT-Thread指南-ARM架构2024-08-09 2972
-
rt-studio潘多拉开发板最新rt-thread不能运行解决办法2023-10-16 3038
-
RT-Thread qemu mps2-an385 bsp移植制作 :环境搭建篇2023-08-02 1891
-
移植RT-Thread nano到CW32L0832023-07-03 24333
-
FTHR-G0140开发板LED点灯2023-06-05 220185
-
RT-Thread文档_其他开发板 上手指南2023-02-22 700
-
【项目移植】国民技术N32G4FR开发板:RT-Thread Nano移植FinSH2023-02-14 3818
-
基于RoboMasterC型开发板的RT-Thread使用分享(一)2023-01-05 4931
-
机智云设备移植RT-Thread2022-04-19 2154
-
RT-Thread Studio驱动SD卡2021-12-27 1682
-
STM32WB55在RT-Thread系统上移植官方蓝牙BLE功能2021-12-04 1384
-
移植RT-Thread的原理与方法2021-09-17 10741
-
RT-Thread开发,如何有效学习RT-Thread的五个步骤2017-09-25 37202
全部0条评论

快来发表一下你的评论吧 !
