
 PSOC6-GPIO的控制
描述
GPIO是一种具有输入和输出功能的数字引脚,简称IO口。
IO口一般具有以下几个功能模式:
- 输入上拉:内部具有弱上拉,也就是高电平输入模式。
- 输入下拉:内部具有弱下拉,也就是低电平输入模式。
- 输入:只具有读取io口电平功能,同时引脚悬空,容易被外部影响而改变电平状态。
- 模拟输入:输入功能从数字变为模拟。
- 输出:IO口具有输出功能,高低电平的输出。
- 推挽输出:IO口利用功率管进行驱动、
- 开漏输出:IO口的低电平具有输出功能,而高电平则变为悬空,也就是隔离。
- 复用开漏输出:将IO口交由外设处理开漏输出。
- 复用推挽输出:将IO口交由外设处理推挽输出。
我们基于上一个项目所使用的demo继续。
| 名称 | 值 | 详细 |
| PIN_MODE_OUTPUT | 0x00 | 输出 |
| PIN_MODE_INPUT | 0x01 | 输入 |
| PIN_MODE_INPUT_PULLUP | 0x02 | 输入上拉 |
| PIN_MODE_INPUT_PULLDOWN | 0x03 | 输入下拉 |
| PIN_MODE_OUTPUT_OD | 0x04 | 开漏输出 |
我们开始初始化定时器吧!
#define HWTIMER_DEV_NAME   "time2"     /* 定时器名称 */

/* 定时器超时回调函数 */
static rt_err_t timeout_cb(rt_device_t dev, rt_size_t size)
{
    rt_kprintf("this is hwtimer timeout callback fucntion!n");
    rt_kprintf("tick is :%d !n", rt_tick_get());

    return 0;
}

static int hwtimer_sample(void)
{
    rt_err_t ret = RT_EOK;
    rt_hwtimerval_t timeout_s;      /* 定时器超时值 */
    rt_device_t hw_dev = RT_NULL;   /* 定时器设备句柄 */
    rt_hwtimer_mode_t mode;         /* 定时器模式 */

    /* 查找定时器设备 */
    hw_dev = rt_device_find(HWTIMER_DEV_NAME);
    if (hw_dev == RT_NULL)
    {
        rt_kprintf("hwtimer sample run failed! can't find %s device!n", HWTIMER_DEV_NAME);
        return RT_ERROR;
    }

    /* 以读写方式打开设备 */
    ret = rt_device_open(hw_dev, RT_DEVICE_OFLAG_RDWR);
    if (ret != RT_EOK)
    {
        rt_kprintf("open %s device failed!n", HWTIMER_DEV_NAME);
        return ret;
    }

    /* 设置超时回调函数 */
    rt_device_set_rx_indicate(hw_dev, timeout_cb);

    /* 设置模式为周期性定时器 */
    mode = HWTIMER_MODE_PERIOD;
    ret = rt_device_control(hw_dev, HWTIMER_CTRL_MODE_SET, &mode);
    if (ret != RT_EOK)
    {
        rt_kprintf("set mode failed! ret is :%dn", ret);
        return ret;
    }

    /* 设置定时器超时值为5s并启动定时器 */
    timeout_s.sec = 0;      /* 秒 */
    timeout_s.usec = 1000;     /* 微秒 */

    if (rt_device_write(hw_dev, 0, &timeout_s, sizeof(timeout_s)) != sizeof(timeout_s))
    {
        rt_kprintf("set timeout value failedn");
        return RT_ERROR;
    }

    /* 延时3500ms */
    rt_thread_mdelay(3500);

    /* 读取定时器当前值 */
    rt_device_read(hw_dev, 0, &timeout_s, sizeof(timeout_s));
    rt_kprintf("Read: Sec = %d, Usec = %dn", timeout_s.sec, timeout_s.usec);

    return ret;
}
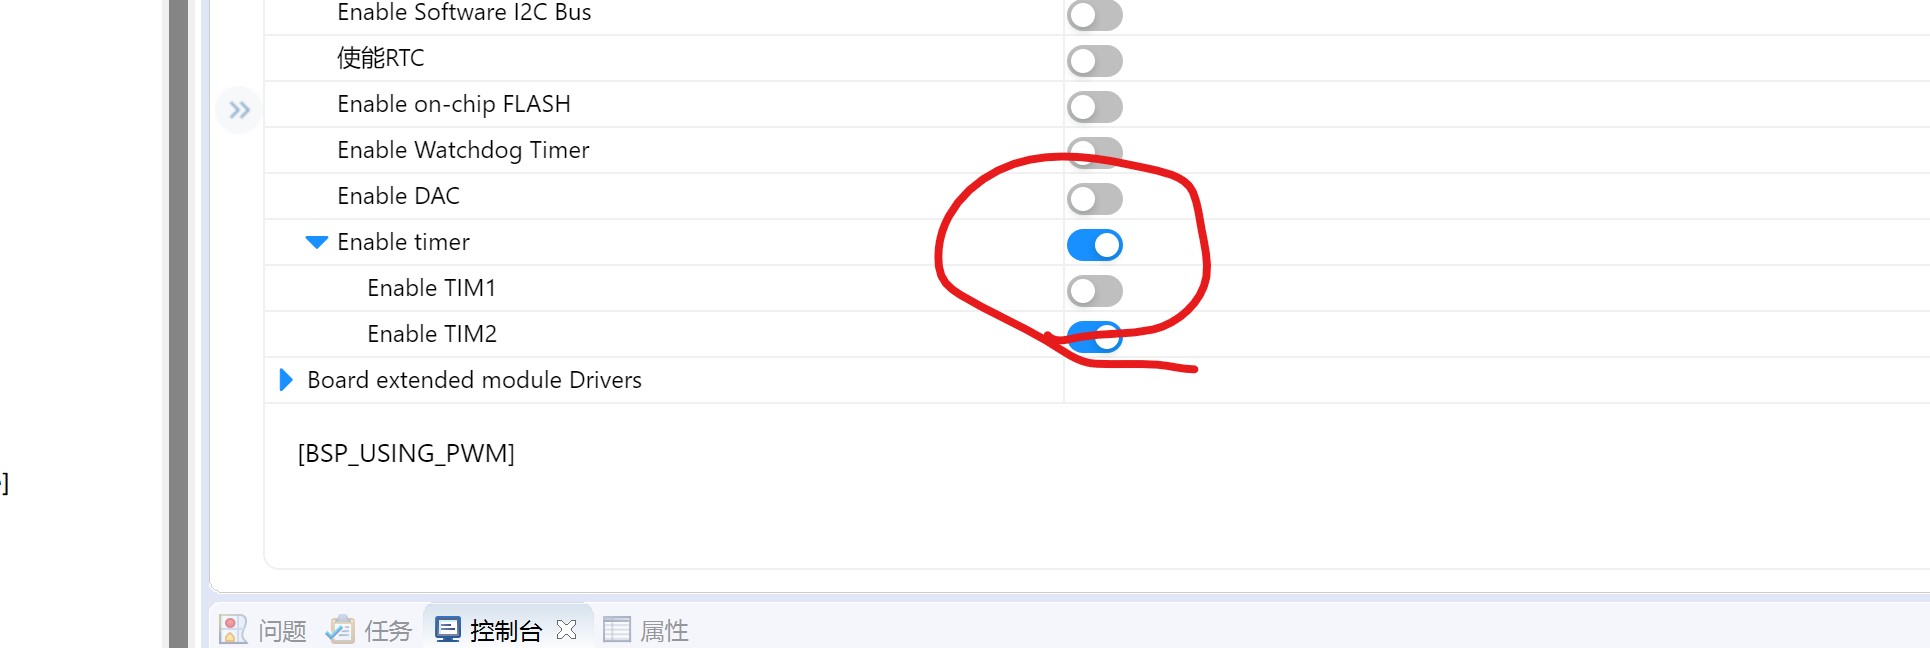
我们进入rtthead进行组件设置,打开time的组件和硬件使能即可!
 硬件定时器设置
 驱动程序开启
我们修改定时器回调函数的内容!
/* 定时器超时回调函数 */
static rt_err_t timeout_cb(rt_device_t dev, rt_size_t size)
{
    //rt_kprintf("this is hwtimer timeout callback fucntion!n");
    //rt_kprintf("tick is :%d !n", rt_tick_get());
    ledDelay++;
    if(ledDelay    >=ledDelayVal){
        ledDelay=0;
        ledStatus=~ledStatus;
    }
    buttonShadeTime++;
    if(buttonShadeTime    >=buttonShadeTimeVal){
        buttonShadeTime=0;
        buttonShadeFlag=1;
    }
    mnbn1S++;
    if(mnbn1S    >=mnbn1SVal){
        mnbn1S=0;
        rt_kprintf("button is :%d !n", rt_pin_read(Button_PIN));
    }
    return 0;
}
我们添加方法:
#define LED_PIN     GET_PIN(0, 0)
#define Button_PIN  GET_PIN(5,0)
#define ledDelayVal 500
unsigned char buttonDownFlag=0;
unsigned char ledDownFlag=0;
unsigned short ledDelay=0;
unsigned char ledStatus=0;
#define buttonShadeTimeVal 10
unsigned char buttonShadeTime=0;
#define buttonShadeCountVal 5
unsigned char buttonShadeCount=0;
unsigned char buttonShadeFlag=0,buttonFinshFlag=0;
unsigned char buttonDownLast=0;
#define mnbn1SVal 1000
unsigned short mnbn1S=0;
#define HWTIMER_DEV_NAME   "time2"     /* 定时器名称 */
void ButtonShadeHandler(void){
    if(!buttonShadeFlag){
           return;
    }
    buttonShadeFlag=0;
    if((!rt_pin_read(Button_PIN))==buttonDownLast){
        buttonShadeCount++;
        if(buttonShadeCount    >=buttonShadeCountVal){
            buttonShadeCount=0;
            buttonFinshFlag=1;
        }
    }else{
        buttonDownLast=!rt_pin_read(Button_PIN);
        buttonShadeCount=0;
    }
}
void ButtonHandler(void){
    if(!buttonFinshFlag){
           return;
    }
    buttonFinshFlag=0;
    if(!buttonDownLast){
      if(!buttonDownFlag){
       buttonDownFlag=1;
       ledDownFlag=~ledDownFlag;
      }
   }else{
      buttonDownFlag=0;
   }
}
我们修改main方法为:
int main(void)
{
    rt_pin_mode(LED_PIN, PIN_MODE_OUTPUT);
    rt_pin_mode(Button_PIN, PIN_MODE_INPUT_PULLUP);
    hwtimer_sample();
    while(1)
    {
        ButtonShadeHandler();
        ButtonHandler();
        if(!ledDownFlag){
            if(!ledStatus){
                rt_pin_write(LED_PIN, PIN_HIGH);
            }else{
                rt_pin_write(LED_PIN, PIN_LOW);
            }
        }else{
            rt_pin_write(LED_PIN, PIN_HIGH);
        }

    }
}
运行效果:
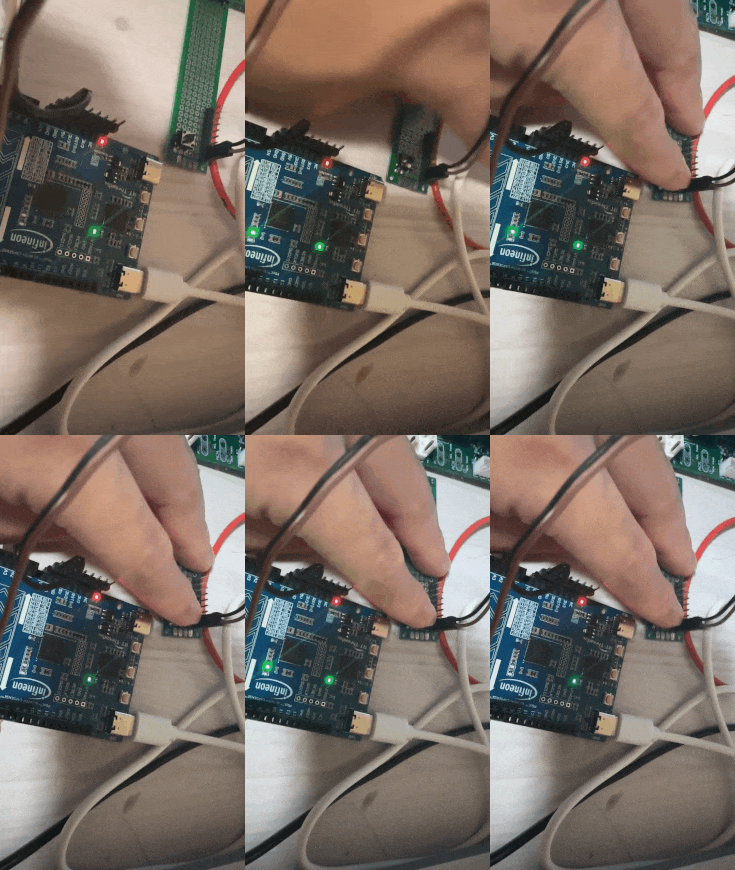
点击P5.0接口的button来实现主板的灯控制!按一下开始闪烁,按一下关。
 运行效果
运行效果审核编辑:汤梓红
声明:本文内容及配图由入驻作者撰写或者入驻合作网站授权转载。文章观点仅代表作者本人,不代表电子发烧友网立场。文章及其配图仅供工程师学习之用,如有内容侵权或者其他违规问题,请联系本站处理。
举报投诉
-
PSOC6 GPIO无法触发中断的原因?怎么解决?2024-02-02 531
-
在PSoc4上控制GPIO时,怎样才能用modustoolBox为GPIO设置驱动模式?2024-01-22 595
-
PSoC™ 6 CY8CPROTO-062-4343W如何配置GPIO和ADC引脚?2024-01-18 610
-
请问如何将ECO输出分配给PSoC6的GPIO?2024-01-16 673
-
使用Psoc6的智能家居概念2023-06-26 1007
-
PSOC6的入门案例demo2023-06-07 1456
-
【英飞凌PSoC 6】新建RTT工程2023-04-24 2879
-
PSOC6核心板开源分享2022-07-27 1023
-
PSOC 4怎么在固件中控制GPIO?2019-10-08 1599
-
PSOC5 GPIO奇怪行为2019-03-14 1354
-
按时如何在PSoC6中复用?2018-08-19 2118
-
赛普拉斯推出PSoC® 6 BLE Pioneer套件2017-10-10 10448
-
PSoC3_5 GPIO应用笔记2012-11-22 4743
-
PSoC3内部模拟布线和管脚选择2011-06-09 2674
全部0条评论

快来发表一下你的评论吧 !

