

自定义算子开发
描述
地平线工具链中已经支持了丰富的算子,在大多数情况下,您的模型应该可以通过使用hb_mapper工具完成转换并顺利部署到地平线芯片上。 少部分算子不支持情况下,我们建议您先尝试下替换算子的可能性,这样有利于将地平线芯片能力充分发挥出来。
自定义算子目前只提供CPU算子开发能力,可自定义onnx算子以及caffe算子。一个完整的自定义算子应用过程包括注册算子、算子实现、含自定义算子模型转换和运行含自定义op模型四个阶段。
1 自定义onnx算子
1.1 将含有自定义算子的pytorch模型导出ONNX
使用torch.onnx.register_custom_op_symbolic注册自定义算子,再导出onnx模型。有以下几处配置参数需要注意:
1. register_custom_op_symbolic函数的第一个参数'::adaptive_avg_pool2d'为pytorch对应操作符名称,若填写错误,则会导致自定义算子注册失败
2. 操作域必须设置为horizon.custom,算子类型为PyOp
3. class_name_s需要与算子实现文件中的类名相对应
4. module_s与算子实现文件名相同,若算子实现文件在当前目录的子目录(custom_op)中,要将相对路径包含进去:"custom_op/sample_custom"
5. 必须指定input_types_i、output_types_i、output_shape_s三个参数
6. 注意指定opset_version为10或11
参考代码:
import torch
from horizon_nn.horizon_onnx.onnx_pb import TensorProto
from torch.onnx.utils import register_custom_op_symbolic
#prepare your model and input_data
def horizon_pool(g, input, output_size):
return g.op(
'horizon.custom::PyOp', #required, ! must be 'horizon.custom' domain !
input,
class_name_s="GlobalAveragePool", #required ! must match the class def name in sample_custom python file !
compute_s="compute", #optional, 'compute' by default
module_s="sample_custom", #required ! must match the file name of the "op_register_files" !
input_types_i=[TensorProto.FLOAT], #required
output_types_i=[TensorProto.FLOAT], #required
output_shape_s=["1, 1024, 1, 1"]) #required
register_custom_op_symbolic('::adaptive_avg_pool2d',
horizon_pool,
opset_version=11)
torch.onnx.export(model, input_data, "custom_op.onnx", opset_version=11)
1.2 算子实现
对应上一节注册自定义算子时配置的算子实现文件(class_name需要保持一致)。
#sample_custom.py
import numpy as np
from horizon_nn.custom import op_implement_register
@op_implement_register("CustomIdentity")
class CustomIdentity(object):
def __init__(self, kernel_size, threshold):
self._kernel_size = kernel_size
self._default_threshold = threshold
def compute(self, X):
return X
@op_implement_register("GlobalAveragePool")
class GlobalAveragePool(object):
def __init__(self):
pass
def compute(self, X):
return np.nanmean(X, axis=(2, 3)).reshape(-1, 1024, 1, 1)
2 自定义caffe算子
2.1 修改prototxt
在原始模型文件中,将自定义算子对应的类型标记为"Custom" ,并设置custom_param。params 是算子的传入参数,指定方式为‘param_name’:param_value, 多个参数之间使用 \n 分隔。
layer {
name: "hr_op"
type: "Custom"
bottom: "res3d_in"
top: "res3d"
custom_param {
kind: "CustomIdentity"
shape {
dim: 1
dim: 512
dim: 28
dim: 28
}
params: "'kernel_size': 10 \n'threshold': 0.5"
}
}
2.2 算子实现
相比于onnx模型,caffe模型的自定义算子实现还需要提供该算子的输出尺寸。
#sample_custom.py
from horizon_nn.custom.op_registration import op_implement_register, op_shape_infer_register
@op_implement_register("CustomIdentity")
class CustomIdentity(object):
def __init__(self, kernel_size, threshold):
self._kernel_size = kernel_size
self._default_threshold = threshold
def compute(self, X):
return X
@op_shape_infer_register("CustomIdentity")
def infer_shape(inputs_shape):
"""Infer the output shapes of the custom operator.
Arguments:
input_shapes: A list of input shapes.
Returns:
Return a list of custom operator's output shapes.
"""
outputs_shape = inputs_shape
return outputs_shape
3 含自定义算子的模型转换
在模型转换配置文件中,添加自定义算子相关参数,示例如下:
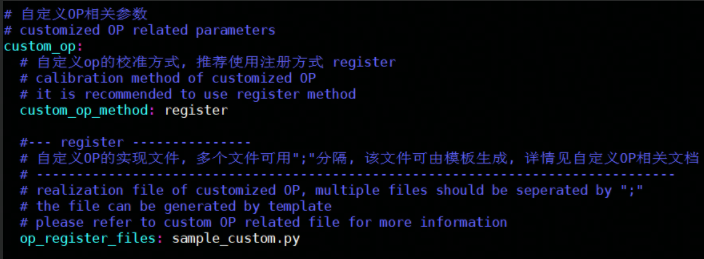
custom_op_method:固定使用 register;
op_register_files:自定义算子计算的实现文件,如果有多份实现,使用 ‘;’ 将各个文件分开即可。
4 含自定义算子的模型推理
想将包含自定算子的.bin模型顺利部署到开发板上,还需要提供自定义算子的C++代码实现。 您可以使用下文提供的模板进行修改:
头文件:
// custom_identity.h
#ifndef ADVANCED_SAMPLES_CUSTOM_IDENTITY_H_
#define ADVANCED_SAMPLES_CUSTOM_IDENTITY_H_
#include
#include
#include "dnn/hb_dnn.h"
#include "dnn/plugin/hb_dnn_layer.h"
#include "dnn/plugin/hb_dnn_ndarray.h"
namespace hobot {
namespace dnn {
Layer *CustomIdentity_layer_creator();
class CustomIdentity : public Layer {
public:
CustomIdentity() = default;
~CustomIdentity() override = default;
public:
int32_t Init(const Attribute &attributes) override;
int32_t Forward(const std::vector &bottomBlobs,
std::vector &topBlobs,
const hbDNNInferCtrlParam *inferCtrlParam) override;
std::string GetType() const override { return "CustomIdentity"; }
private:
std::string module_;
};
} // namespace dnn
} // namespace hobot
#endif
cpp文件:
// custom_identity.cpp
#include "custom_identity.h"
namespace hobot {
namespace dnn {
Layer *CustomIdentity_layer_creator() { return new CustomIdentity; }
int32_t CustomIdentity::Init(const Attribute &attributes) {
// unused attribute, just demonstrating
attributes.GetAttributeValue(&module_, "module");
return 0;
}
int32_t CustomIdentity::Forward(const std::vector &bottomBlobs,
std::vector &topBlobs,
const hbDNNInferCtrlParam *inferCtrlParam) {
const NDArray *input = bottomBlobs[0];
NDArray *out = topBlobs[0];
const auto *input_data = input->Dptr();
auto *out_data = out->Dptr();
uint32_t size = input->Size();
for (uint32_t i = 0U; i < size; i++) {
out_data[i] = input_data[i];
}
return 0;
}
} // namespace dnn
} // namespace hobot
将以上两个文件放在当前工程目录下之后,编写infer代码时仅需要在加载模型之前增加对算子的注册即可,注册可参考以下代码:
//infer.cpp
#include "custom_identity.h"
// register custom layer
hbDNNRegisterLayerCreator("CustomIdentity",
hobot::dnn::CustomIdentity_layer_creator)
本文转载自地平线开发者社区:https://developer.horizon.ai
原作者:颜值即正义
原文链接:https://developer.horizon.ai/forumDetail/71036525692881018
-
如何使用BMLang开发自定义的算子?2023-09-18 1092
-
1602自定义字符2016-01-20 1008
-
怎么样去开发自定义应用程序?2018-07-11 2950
-
如何在android设备上安装自定义rom2019-11-05 6442
-
PyTorch如何实现自定义CUDA算子并调用的方法且测量CUDA程序耗时2021-03-30 6253
-
自定义视图组件教程案例2022-04-08 1057
-
ArkUI如何自定义弹窗(eTS)2022-08-31 4219
-
labview自定义控件2023-05-15 1241
-
labview超快自定义控件制作和普通自定义控件制作2023-08-21 1166
-
HarmonyOS开发实例:【自定义Emitter】2024-04-14 2254
-
HarmonyOS开发案例:【 自定义弹窗】2024-05-16 2736
-
HarmonyOS应用自定义键盘解决方案2025-06-05 2845
全部0条评论

快来发表一下你的评论吧 !
