

虹科分享|使用PEAK CAN卡实现UDS诊断自动化测试
描述

此文章转载自“博客园”作者:疯狂的机器人


环境搭建
ENVIRONMENT SETUP


01
硬件环境:
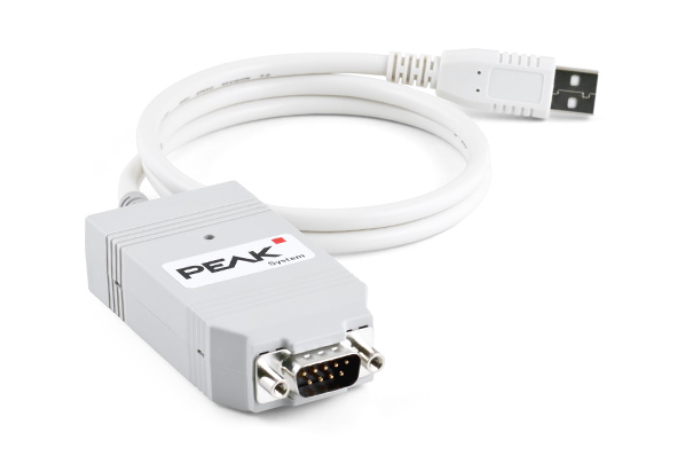
①上位机:PEAK PCAN
PCAN-USB驱动:【虹科】带您了解PCAN如何获取驱动以及如何接线
②下位机:ECM(发动机控制模块)
02
Python环境:下载地址:https://www.python.org/ftp/python/3.7.9/python-3.7.9-amd64.exepip3 install robotframework==3.2.2pip3 install robotframework-ride==1.7.4.2pip3 install xlrd==1.2.0pip3 install udsoncan==1.14pip3 install python-can==3.3.4pip3 install can-isotp==1.7
项目介绍
PROJECT INTRODUTION
01
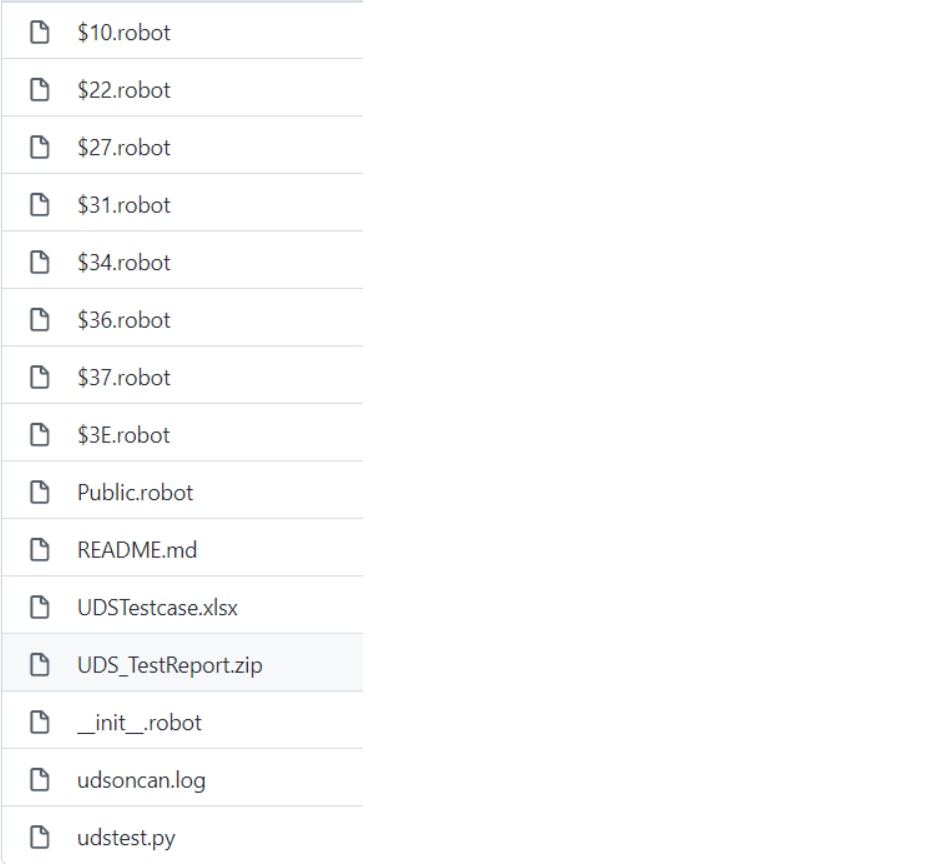 文件目录:
文件目录:10−−3E:L2层robot测试用例
Public.robot:L1层关键字方法
UDS_TestReport.zip:自动化测试报告
udstest.py:python封装自定义uds测试方法
UDSTestcase.xlsx:UDS诊断测试用例
02
udstest.py# _*_ coding:utf-8 _*_from can.interfaces.pcan.pcan import PcanBusfrom udsoncan.connections import PythonIsoTpConnectionimport xlrd, os, udsoncan, isotp, sys, binasciiclass udstest(object):def __init__(self):udsoncan.setup_logging() # udslogdef get_xlsx(self, sheet):"获取指定Excel数据"excel = os.path.join(os.path.dirname(os.path.abspath(__file__)), 'UDSTestcase.xlsx') # 获取用例文件路径file = xlrd.open_workbook(excel)list = []sheet = file.sheet_by_name(sheet) # 获得指定sheet数据row_value1 = sheet.row_values(0) # 获取第1行的标题nrows = sheet.nrows # 获取当前sheet行数ncols = sheet.ncols # 获取当前sheet列数for i in range(1, nrows): # 从第2行遍历当前sheetrow = sheet.row_values(i) # 获取行数据dict = {} # 创建空字典for j in range(0, ncols): # 遍历sheet列,组成字典if row_value1[j] == 'NO.':dict[row_value1[j]] = int(row[j])else:dict[row_value1[j]] = row[j] # 从第一列开始,将每一列的数据与第1行的数据组成一个键值对,形成字典list.append(dict) # 将字典添加list中return listdef set_can(self, txid, rxid):"""can总线相关配置"""if isinstance(txid, str) or isinstance(rxid, str):txid = eval(txid)rxid = eval(rxid)isotp_params = {'stmin': 5, # 流控帧间隔时间,0-127ms 或 100-900ns 值从 0xF1-0xF9'blocksize': 0, # 流控帧单包大小,0表示不限制'tx_padding': 0, # 当 notNone表示用于填充发送的消息的字节。'rx_flowcontrol_timeout': 1000, # 在停止接收和触发之前等待流控制帧的毫秒数'rx_consecutive_frame_timeout': 1000, # 在停止接收和触发 a 之前等待连续帧的毫秒数}try:self.canbus = PcanBus(channel='PCAN_USBBUS1', bitrate=500000) # CAN总线初始化self.tp_addr = isotp.Address(isotp.AddressingMode.Normal_29bits, txid=txid, rxid=rxid) # 网络层寻址方法tp_stack = isotp.CanStack(bus=self.canbus, address=self.tp_addr, params=isotp_params) # 网络/传输层(IsoTP 协议)self.conn = PythonIsoTpConnection(tp_stack) # 应用层和传输层之间建立连接except:print(sys.exc_info()[1])else:print('CAN配置成功')def uds_request_respond(self, request_command):"""发送uds请求和接收uds响应"""if not isinstance(request_command, str): # 判断request_command数据类型request_command = str(int(request_command))requestPdu = binascii.a2b_hex(request_command.replace(' ', '')) # 处理request_commandif not self.conn.is_open():self.conn.open() # 打开连接try:self.conn.specific_send(requestPdu) # 发送uds请求except:print("发送请求失败")else:print('UDS发送请求:%s' % request_command)try:respPdu = self.conn.specific_wait_frame(timeout=3) # 接收uds响应except:print('响应数据失败')else:res = respPdu.hex().upper()respond = ''for i in range(len(res)):if i % 2 == 0:respond += res[i]else:respond += res[i] + ' 'print('UDS响应结果:%s' % respond)self.conn.close() # 关闭连接self.canbus.shutdown() # 关闭总线return respond.strip()
03
UDSTestcase.xlsx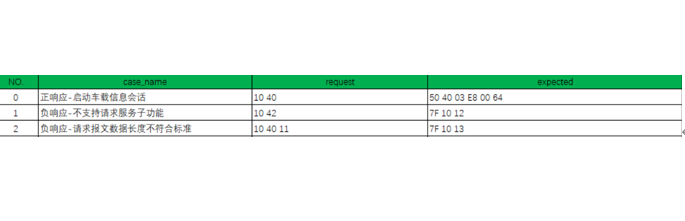
04
UDS_TestReport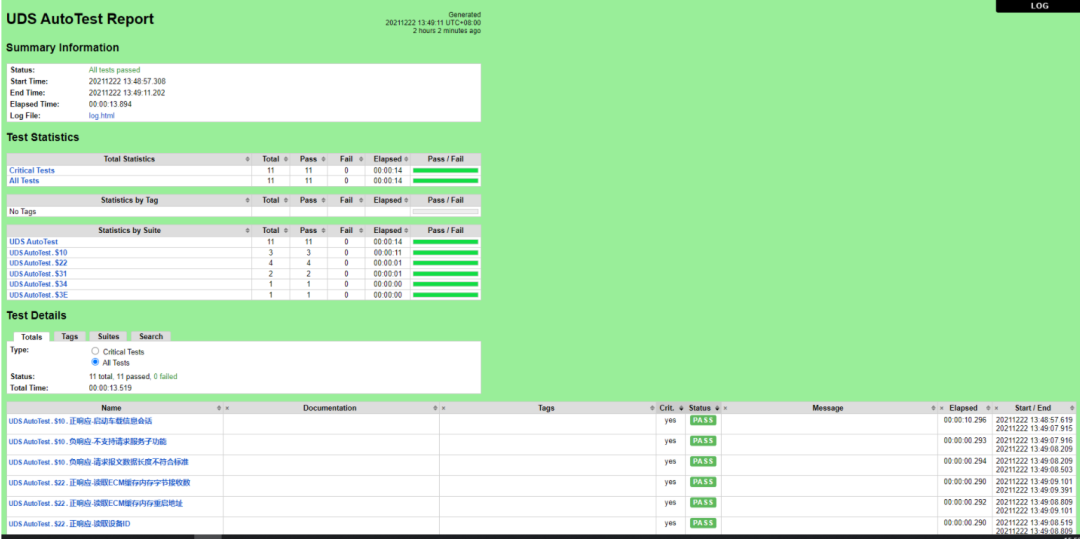
声明:本文内容及配图由入驻作者撰写或者入驻合作网站授权转载。文章观点仅代表作者本人,不代表电子发烧友网立场。文章及其配图仅供工程师学习之用,如有内容侵权或者其他违规问题,请联系本站处理。
举报投诉
- 相关推荐
- 热点推荐
- 测试
-
虹科答疑 | 如何快速上手CAN诊断仪?10分钟从开机到实战2026-02-11 921
-
虹科PEAK解决方案2025-12-19 459
-
虹科方案 领航智能交通革新:虹科PEAK智行定位车控系统Demo版亮相2024-08-27 1146
-
车载以太网自动化测试套件—AETP.UDS2024-08-15 1241
-
TSMaster 的 CAN UDS 诊断操作指南(下)2024-06-18 5209
-
TSMaster 的 CAN UDS 诊断操作指南(上)2024-06-08 7918
-
【野火】瑞萨RA MCU创意氛围赛+ 基于CAN总线的UDS诊断升级MCU /bootloader/UDS诊断/14229/157652023-06-13 2872
-
【鲁班猫创意氛围赛】低成本便携全自动化ECU诊断升级和测试工具2023-05-14 1387
-
基于CAN总线技术的工业自动化中应用2022-09-26 2246
-
虹科干货 | 基于CDE软件对PEAK CAN卡进行测试2022-08-18 3431
-
虹科干货 | 虹科Automation softPLC入门操作指南(5)——项目自动化2022-06-24 1946
-
虹科案例|基于MATLAB实现PEAK CAN卡的报文收发2022-01-10 9385
-
虹科手持式CAN/CAN FD总线诊断设备2021-11-10 1094
-
虹科新品|CanEasy—总线仿真和分析软件(CAN/CAN FD/LIN/汽车以太网)2021-11-09 4896
全部0条评论

快来发表一下你的评论吧 !
