

利用micro_ros实现esp32与旭日x3派的通讯
描述
参考:https://github.com/micro-ROS/micro_ros_arduino
https://blog.csdn.net/ZhangRelay/article/details/101394537
- micro_ros可以理解为一个运行在嵌入式平台的轻量级ros,其好处是建立了一套上位机平台(主要运行ubuntu+ros)与下位机平台(MCU)的通讯机制,包括串口、UDP、wifi等,省去了我们编写通讯协议的烦恼。
- 这套通讯机制最大的好处是可以将下位机平台(MCU)当作ros中的一个Node,实现topic的发布、订阅,以及service、action等等。可以说是无缝兼容ros。
- 个人粗浅的理解,ros最大的方便就是提供了一个基于Node的分布式通讯机制。
本文所用安装环境:
- 上位机:旭日x3派 (ros2 foxy+ubuntu 20.04)
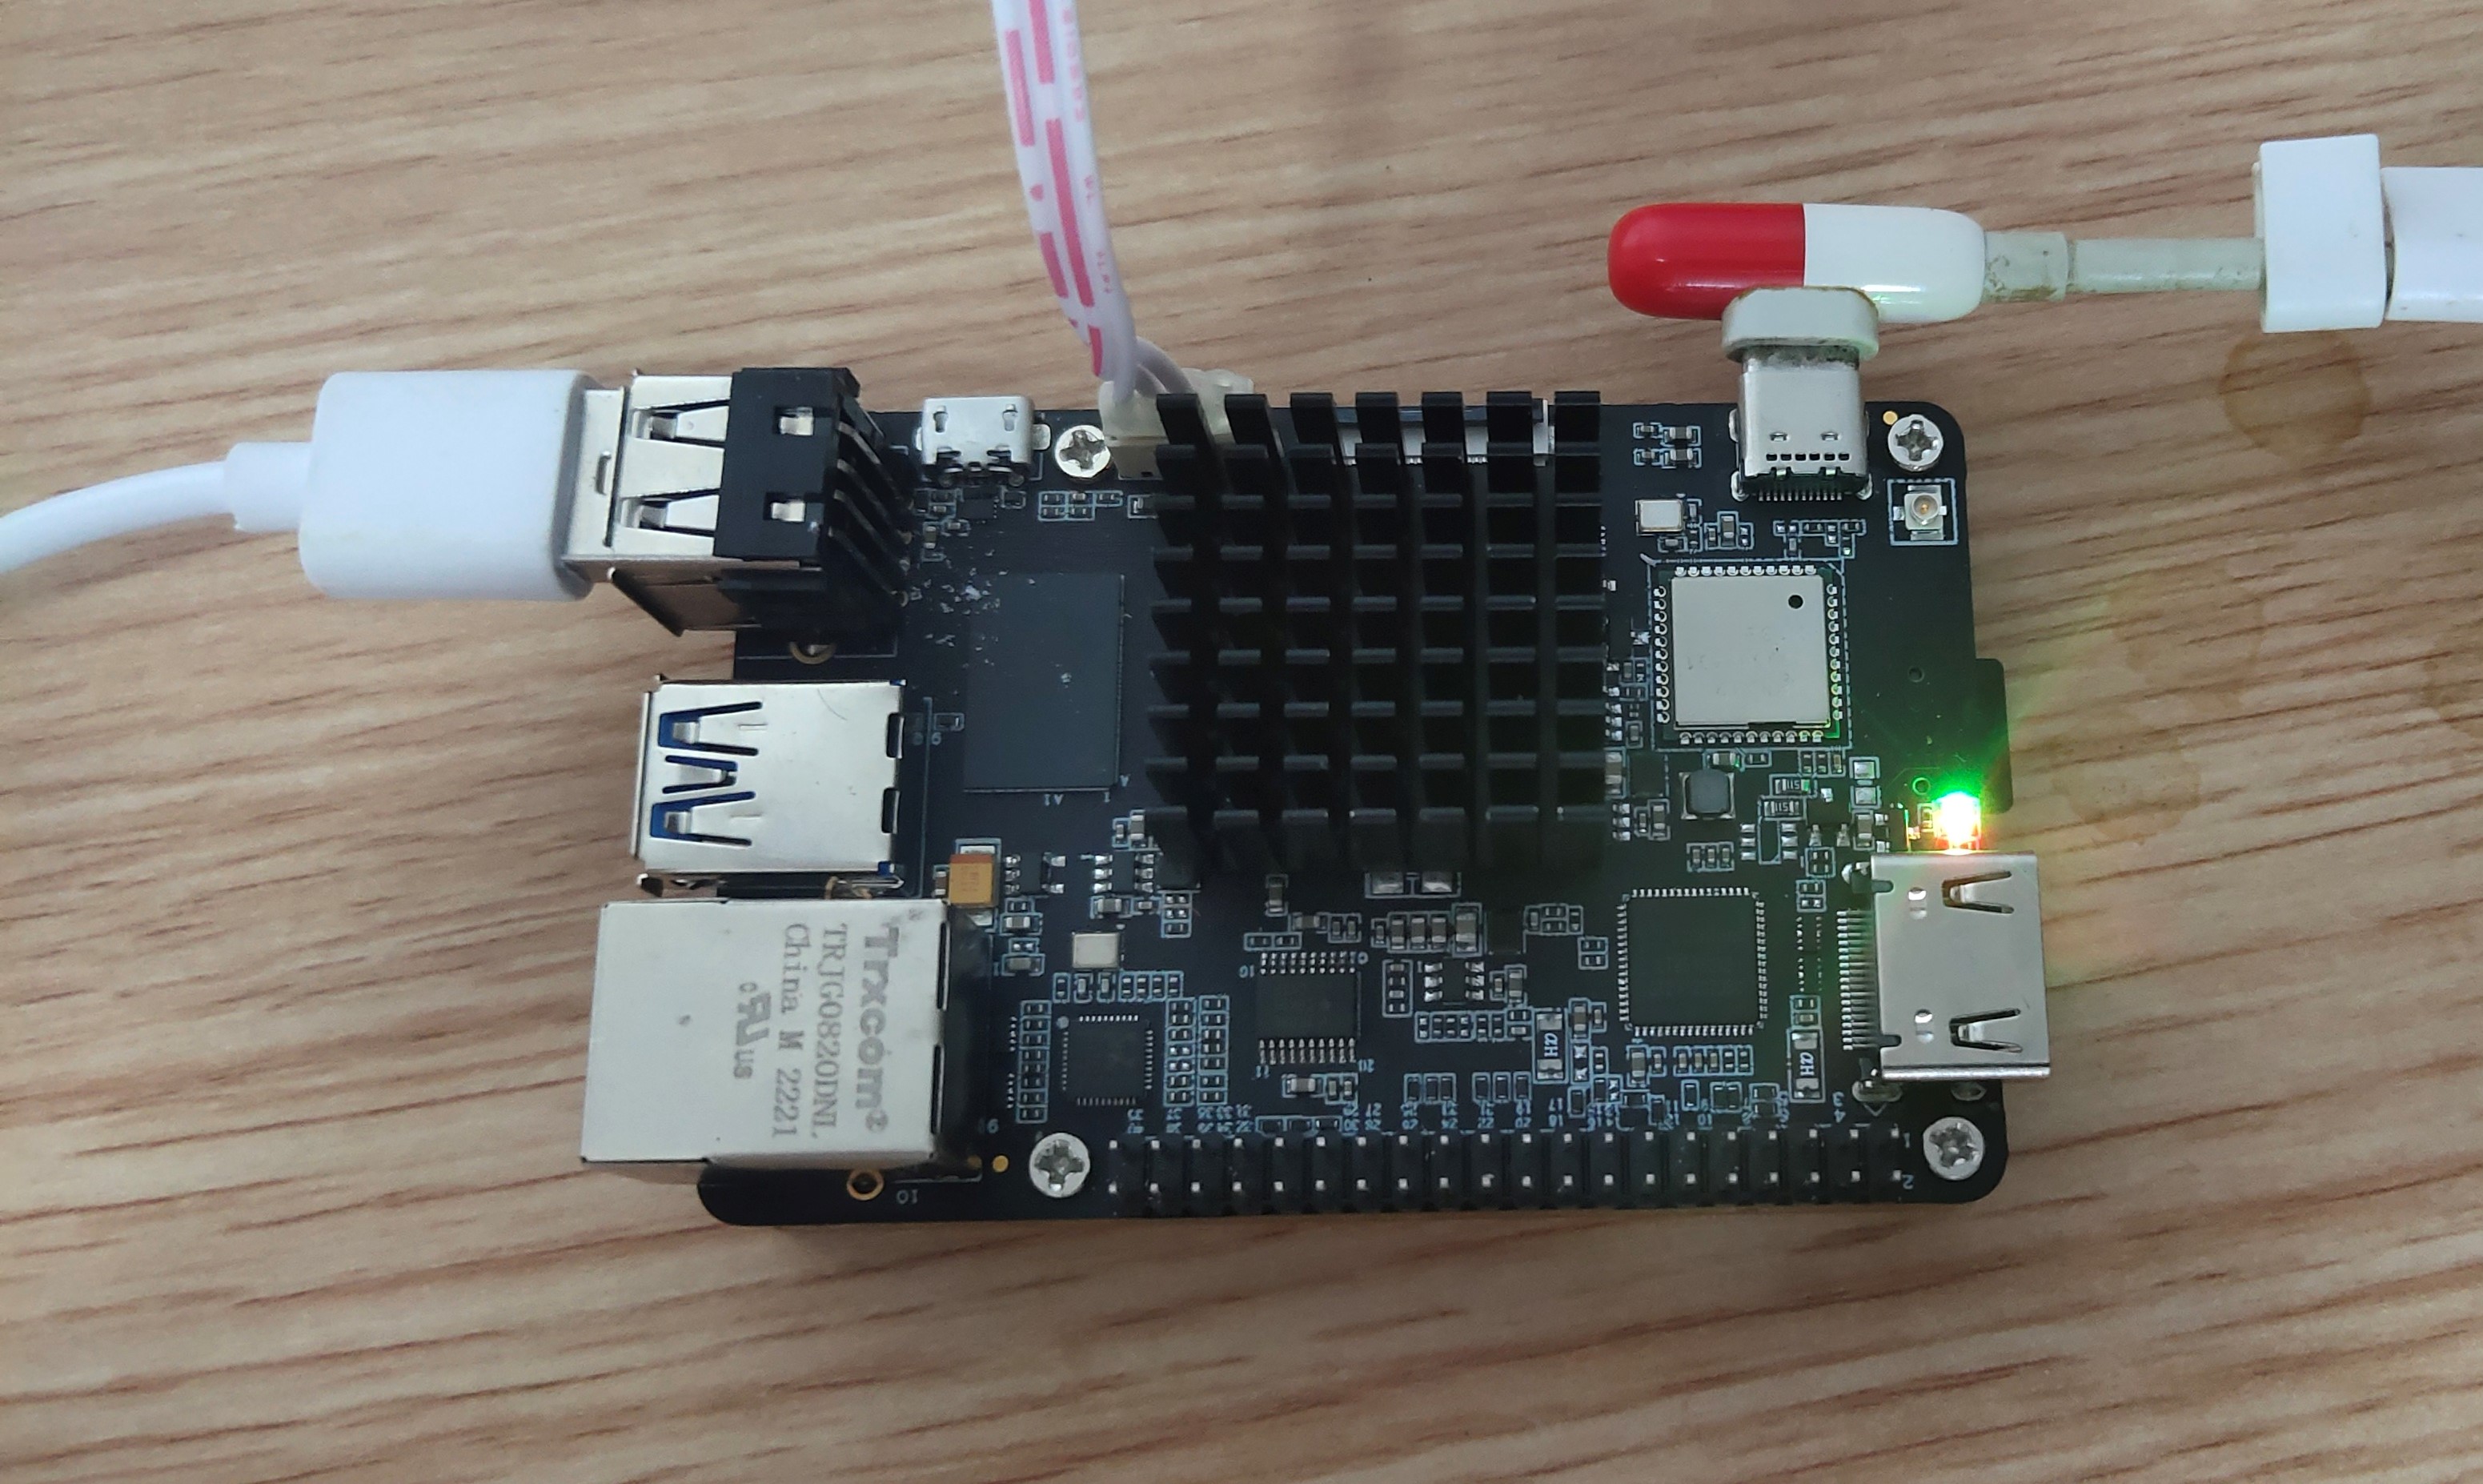
- 下位机:M5stack Atom Lite(esp32 core)
0. micro_ros与micro_ros_arduino的安装
参考我之前写的一篇记录https://zhuanlan.zhihu.com/p/540924221
特别注意:
- 2GB内存的旭日x3派开启swap,否则micro_ros_agent的build过程容易内存不足;
- 网络环境务必能够通畅无阻的访问github,否则大概率失败!
1. 下位机配置
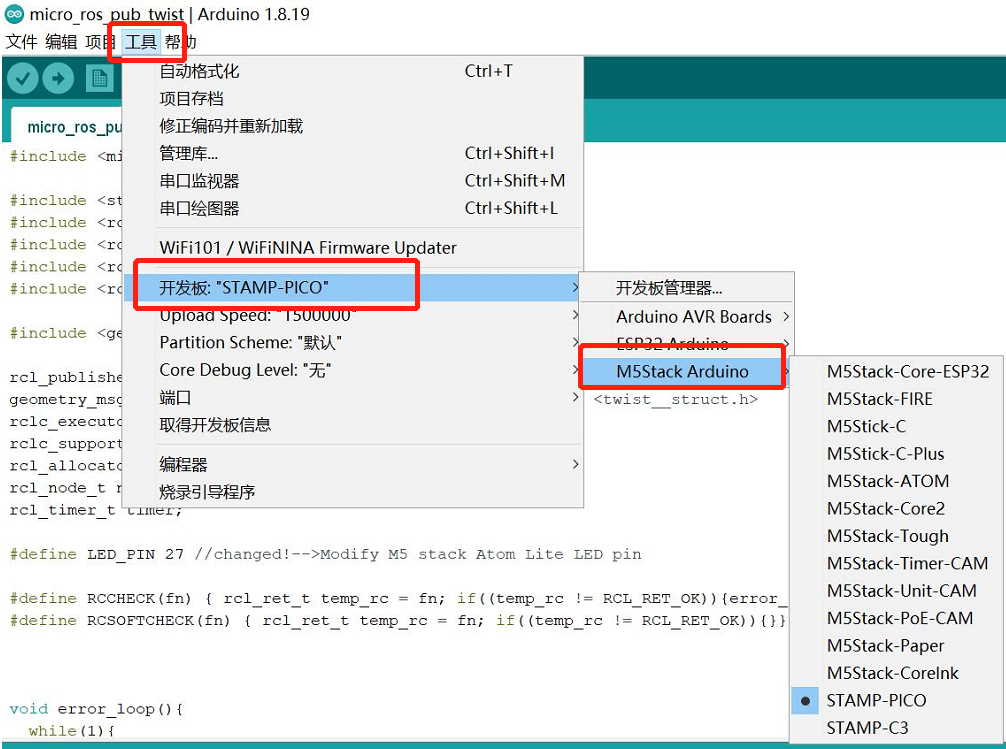
1.1 arduino支持包安装
我这里使用的下位机是M5stack Atom Lite,其核心是esp32,但我用arduino框架进行开发。
理论上,所有支持arduino开发的嵌入式平台应该都可以。
注意:务必安装自己嵌入式平台对应的arduino支持包。
正确安装M5stack支持包后,在开发板管理中应该出现M5 stack相关的信息。
1.2 下位机代码
#include #include #include #include #include #include #include //changed!rcl_publisher_t publisher;geometry_msgs__msg__Twist msg; //changed!-->modify msg type rclc_executor_t executor;rclc_support_t support;rcl_allocator_t allocator;rcl_node_t node;rcl_timer_t timer;#define LED_PIN 27 //changed!-->Modify M5 stack Atom Lite LED pin#define RCCHECK(fn) { rcl_ret_t temp_rc = fn; if((temp_rc != RCL_RET_OK)){error_loop();}}#define RCSOFTCHECK(fn) { rcl_ret_t temp_rc = fn; if((temp_rc != RCL_RET_OK)){}}void error_loop(){ while(1){ digitalWrite(LED_PIN, !digitalRead(LED_PIN)); delay(100); }}void timer_callback(rcl_timer_t * timer, int64_t last_call_time){ RCLC_UNUSED(last_call_time); if (timer != NULL) { RCSOFTCHECK(rcl_publish(&publisher, &msg, NULL)); static int cnt = 0; msg.linear.x = 0.2; //const linear.x msg.angular.z = 1.0 - 0.001*cnt; //variable angular.z cnt++; }}void setup() { set_microros_transports(); pinMode(LED_PIN, OUTPUT); digitalWrite(LED_PIN, HIGH); delay(2000); allocator = rcl_get_default_allocator(); //create init_options RCCHECK(rclc_support_init(&support, 0, NULL, &allocator)); // create node RCCHECK(rclc_node_init_default(&node, "micro_ros_arduino_node", "", &support)); // create publisher RCCHECK(rclc_publisher_init_default( &publisher, &node, ROSIDL_GET_MSG_TYPE_SUPPORT(geometry_msgs, msg, Twist), "turtle1/cmd_vel")); //changed!-->modify topic name // create timer, const unsigned int timer_timeout = 1000; RCCHECK(rclc_timer_init_default( &timer, &support, RCL_MS_TO_NS(timer_timeout), timer_callback)); // create executor RCCHECK(rclc_executor_init(&executor, &support.context, 1, &allocator)); RCCHECK(rclc_executor_add_timer(&executor, &timer)); // changed!-->msg initialization msg.linear.x=0; msg.linear.y=0; msg.linear.z=0; msg.angular.x=0; msg.angular.y=0; msg.angular.z=0;}void loop() { delay(100); RCSOFTCHECK(rclc_executor_spin_some(&executor, RCL_MS_TO_NS(100)));}
1.3 代码解析
- 代码基于micro_ros_arduino的示例代码micro-ros_publisher,对其进行简单修改。
- ros2中turtle接收的msg类型为twist,所以首先添加twist头文件,并定义msg类型为twist
#include //changed!geometry_msgs__msg__Twist msg; //changed!-->modify msg type
- 将msg中的变量初始化为0
// changed!-->msg initialization msg.linear.x=0; msg.linear.y=0; msg.linear.z=0; msg.angular.x=0; msg.angular.y=0; msg.angular.z=0;
- 修改发布的topic的名字,修改为turtle1/cmd_vel。
- 这一topic name要与ros2中turtlesim接收的topic name一致
// create publisher RCCHECK(rclc_publisher_init_default( &publisher, &node, ROSIDL_GET_MSG_TYPE_SUPPORT(geometry_msgs, msg, Twist), "turtle1/cmd_vel")); //changed!-->modify topic name
- 在定时器回调函数中对线速度和角速度进行处理
- 线速度恒定,角速度变化
void timer_callback(rcl_timer_t * timer, int64_t last_call_time){ RCLC_UNUSED(last_call_time); if (timer != NULL) { RCSOFTCHECK(rcl_publish(&publisher, &msg, NULL)); static int cnt = 0; msg.linear.x = 0.2; //const linear.x msg.angular.z = 1.0 - 0.001*cnt; //variable angular.z cnt++; }}
- 修改LED灯的管脚号(非必须)
2. 上位机配置
将下位机代码烧录后,将下位机通过串口连接上位机,这里我使用usb串口的方式连接。
为了显示turtle的运动,旭日x3派需要连接hdmi或者远程VNC,我使用的后者。
新建终端,source一下ros2,再source一下micro_ros。
source /opt/tros/setup.bash #或者 source /opt/ros/foxy/setup.bashcd /microros_ws/ #进入micro_ros的工作空间source install/setup.bash #source一下,也可以将这些命令添加到 /.bashrc
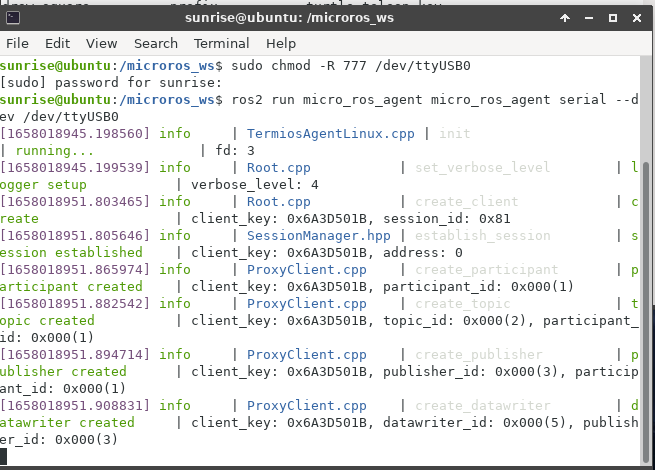
- 首先提升串口读写权限(确保自己的串口是ttyUSB0,因硬件而异)
sudo chmod -R 777 /dev/ttyUSB0
- 开启micro_agent
ros2 run micro_ros_agent micro_ros_agent serial --dev /dev/ttyUSB0
- 按下下位机的复位键(特别注意,需要按下复位键)
- 重新开启一个终端,打开turtlesim_node
ros2 run turtlesim turtlesim_node
- 此时可以看到turtle在运动了

3. 其他
- publisher示例代码的话题发布频率默认为1Hz,可以进行调整,10Hz没问题。但是想要100Hz往上就不行了
- 需要更高的话题发布频率需要使用rclc_publisher_init_best_effort代替rclc_publisher_init_default
- 但是best_effort的pub也需要best_effort的sub,所以当使用best_effort发布twist时,turtle不会运动,因为没有使用best_effort的sub来接收。关于这个可以参考:https://docs.ros.org/en/rolling/Concepts/About-Quality-of-Service-Settings.html#qos-compatibilities
本文转自地平线开发者社区
原作者:Tianci
原链接:https://developer.horizon.ai/forumDetail/98129540173361336
-
【地平线旭日X3派试用体验】开箱与板载资源介绍视频2022-07-10 5206
-
【 地平线旭日X3派试用体验】#旭日X3派首百尝鲜#资料下载及环境搭建初试2022-07-12 4285
-
【 地平线旭日X3派试用体验】 HHP环境搭建及简单demo演示2022-07-31 6700
-
#旭日X3派首百尝鲜# 用solidworks画了一个旭日X3派的模型2022-08-31 26000
-
【 地平线旭日X3派试用体验】地平线旭日X3派AGV智能车设计2022-09-12 5459
-
旭日X3派首百尝鲜#地平线旭日X3派 MIPI摄像头GC4663人体跟随调试2022-10-03 7573
-
【地平线旭日X3派试用体验】地平线旭日X3派AGV智能车设计2022-10-21 4688
-
使用旭日X3派实现手势检测2023-06-02 2054
-
解决旭日X3派串口登陆时,控制窗口小的情况2022-07-13 1429
-
旭日X3派烧录最小启动固件2022-07-18 1812
-
#旭日X3派首百尝鲜#旭日x3派移植mjpg-streamer2022-08-10 2433
-
旭日,从地平线升起——地平线旭日X3派开箱试用2022-11-08 3186
-
旭日X3派更新最小启动固件2022-11-10 1958
-
平平无奇纵享丝滑,旭日X3派高速网络新体验2023-02-21 1771
-
当旭日X3派遇上ChatGPT,我们能「chat」什么2023-02-24 2879
全部0条评论

快来发表一下你的评论吧 !
