
 【昉·星光 2(VisionFive 2)RISC-V单板计算机】板上直接开发-USB手柄按键采集
描述
前言
前面我们直接在开发板上安装了GCC等开发环境,可以直接在板上进行开发。
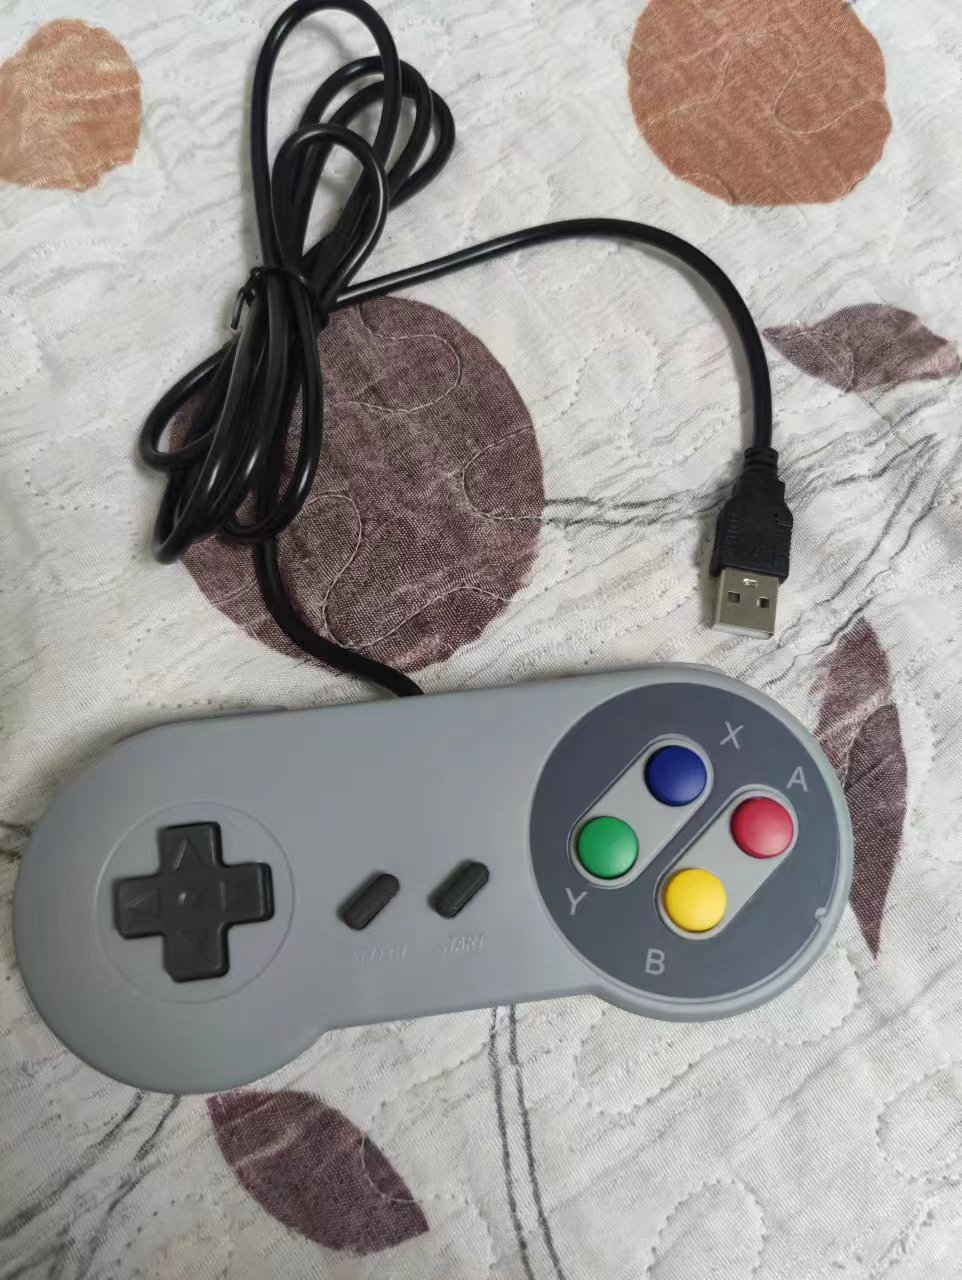
刚好手里有个USB的游戏手柄,我们就来编写代码读取手柄按键,体验下板上直接C开发。
输入设备

插入USB手柄,可以看到多了/dev/input文件夹,多了event0设备
代码
vi key.c添加如下代码
1.  /* 单独测试:#define KEY_TEST 1
1.  * 作为接口:#define KEY_TEST 0
1.  * 编译 aarch64-linux-gnu-gcc key.c -o key -lpthread
1.  * 运行 chmod +x key
1.  *      ./key /dev/input/event8
1.  */
1.
1. #include< stdint.h >
1. #include< stdio.h >
1. #include< stdlib.h >
1. #include< string.h >
1. #include< unistd.h >
1.
1. #include< pthread.h >
1.
1. #include < linux/input.h >
1. #include < sys/types.h >
1. #include < sys/stat.h >
1. #include < fcntl.h >
1.
1. #define KEY_TEST 1
1.
1. int s_keys_fd = -1;
1. uint32_t s_keys_state = 0;
1.
1.
1. void key_setstate(int code , int vaule, uint32_t* key)
1. {
1.  if(vaule == 0)
1.  {
1.   switch(code)
1.   {
1.    case 296:
1.     *key &= ~(1u< < 3);
1.    break;
1.    case 297:
1.     *key &= ~(1u< < 4);
1.    break;
1.    case 288:
1.     *key &= ~(1u< < 5);
1.    break;
1.    case 289:
1.     *key &= ~(1u< < 8);
1.    break;
1.    case 290:
1.     *key &= ~(1u< < 6);
1.    break;
1.    case 291:
1.     *key &= ~(1u< < 7);
1.    break;
1.    case 292:
1.     *key &= ~(1u< < 1);
1.    break;
1.    case 294:
1.     *key &= ~(1u< < 2);
1.    break;
1.    default:
1.    break;
1.   }
1.  }
1.  else
1.  {
1.   switch(code)
1.   {
1.    case 296:
1.     *key |= (1u< < 3);
1.    break;
1.    case 297:
1.     *key |= (1u< < 4);
1.    break;
1.    case 288:
1.     *key |= (1u< < 5);
1.    break;
1.    case 289:
1.     *key |= (1u< < 8);
1.    break;
1.    case 290:
1.     *key |= (1u< < 6);
1.    break;
1.    case 291:
1.     *key |= (1u< < 7);
1.    break;
1.    case 292:
1.     *key |= (1u< < 1);
1.    break;
1.    case 294:
1.     *key |= (1u< < 2);
1.    break;
1.    default:
1.    break;
1.   }
1.  }
1. }
1.
1. /*
1.  * SELECT 296   SELECT   3
1.  * START  297   START    4
1.  * UP     288   右上     5
1.  * RIGHT  289   右右     8
1.  * DOWN   290   右下     6
1.  * LEFT   291   右左     7
1.  * A      292   左前上    1
1.  * B      294   左前下    2
1.  */
1. int key_getstate(int key)
1. {
1.  if(s_keys_state & (1u<
编译
gcc key.c -o key
测试
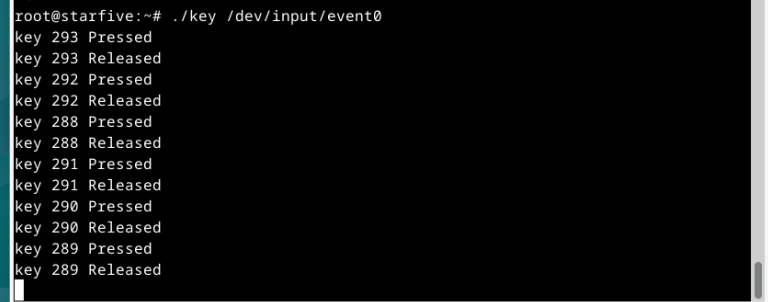
按不同的按键,打印如下
总结
可以看到直接在板上开发非常方便,免去了交叉编译的繁琐。
审核编辑:汤梓红
声明:本文内容及配图由入驻作者撰写或者入驻合作网站授权转载。文章观点仅代表作者本人,不代表电子发烧友网立场。文章及其配图仅供工程师学习之用,如有内容侵权或者其他违规问题,请联系本站处理。
举报投诉
-
【作品合集】赛昉科技VisionFive 2单板计算机开发板测评2025-09-04 39859
-
昉·星光2 RISC-V单板计算机体验(一) - 开箱2024-02-21 1767
-
【RISC-V + OpenCV 计算机视觉】用 VisionFive 2 昉·星光 2 进行物体识别2023-09-08 911
-
【昉·星光 2 高性能RISC-V单板计算机体验】2更换Debian操作系统2023-08-31 2156
-
【昉·星光 2 高性能RISC-V单板计算机体验】+3、系统功能测试2023-07-26 1908
-
【昉·星光 2(VisionFive 2)RISC-V单板计算机】尝试玩3D赛车-帧率有点低2023-07-21 2044
-
【昉·星光 2(VisionFive 2)RISC-V单板计算机】根目录扩容-愉快的install大型软件2023-07-18 1804
-
【RISC-V专题】昉·星光 2(VisionFive 2)RISC-V单板计算机免费试用2023-05-16 811
-
RISC-V VisionFive (昉星光单板计算机)系列课程2022-04-15 3347
-
【RISC-V专题】赛昉科技昉·星光RISC-V单板计算机首发试用2022-04-14 4232
-
赛昉科技昉·星光RISC-V单板计算机首发试用2022-04-12 2194
-
昉·星光单板计算机正式发售,加速RISC-V生态发展2021-12-09 1534
全部0条评论

快来发表一下你的评论吧 !

