一、基础环境
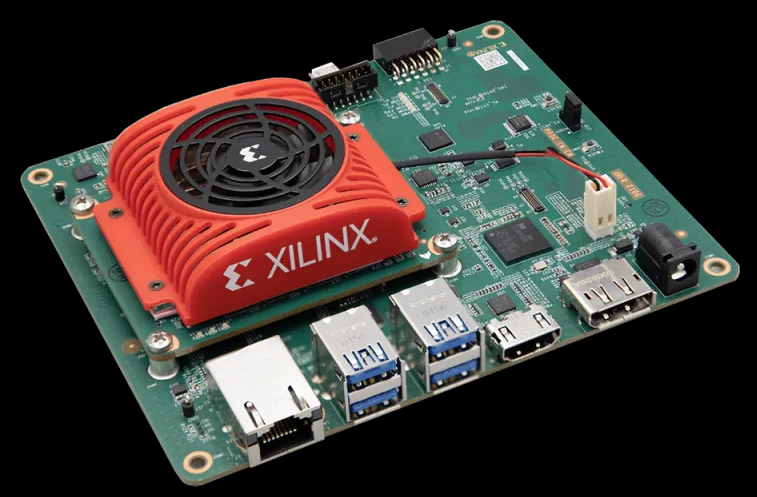
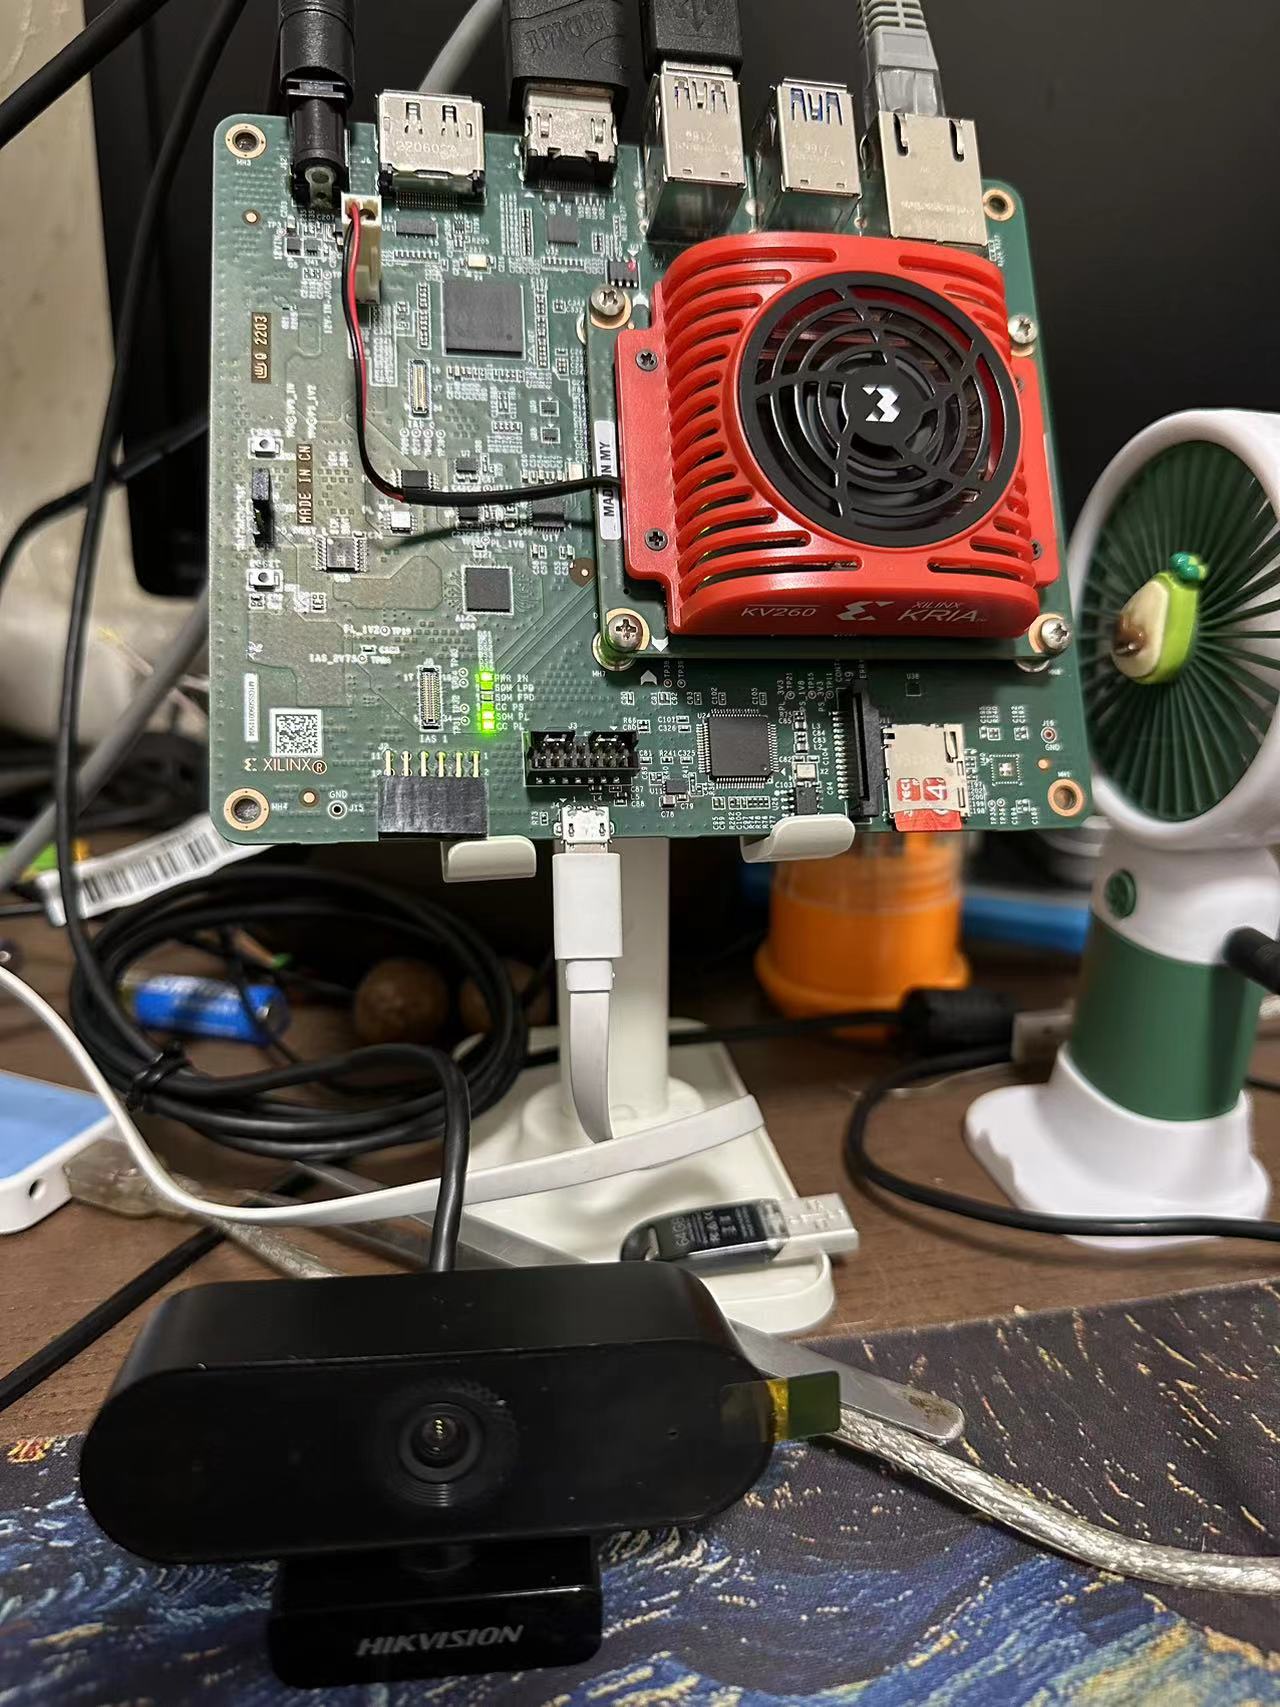
硬件:KV260视觉入门套件
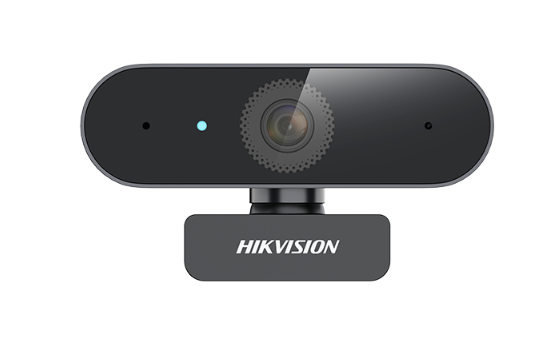
摄像头:海康720P USB摄像头(因为部署Vitis AI之后懒得poweroff插MIPI camera了,直接USB上)
软件:Ubuntu 22.04 + Vitis AI v3.0

root@kria:~# uname -a
Linux kria 5.15.0-1020-xilinx-zynqmp #22-Ubuntu SMP Fri Feb 2414:14:20 UTC 2023 aarch64 aarch64 aarch64 GNU/Linux
root@kria:~#
二、初步体验
Vitis AI 3.0的用户手册如下,基本概念和指南很清晰,只需要一步一步照着做即可。
Vitis AI — Vitis™ AI 3.0 documentation (xilinx.github.io)
先拿smartcam来开刀,展示下具体流程,先apt update/upgrade全部走一遍。
(一)Docker安装&配置
Vitis AI v3.0通过Docker部署,故需要安装&配置Docker环境。
apt install docker-ce docker-ce-cli containerd.io docker-buildx-plugin docker-compose-plugin
随后验证安装是否成功:

因为一直root,所以可以忽略Docker用户权限。
之后添加国内Docker镜像源,否则2.4G的smartcam镜像一晚上根本下不完。
先在/etc/docker/ 目录下增加daemon.json文件,将国内镜像源加进去,文件内容如下:
{
    "registry-mirrors": [
        "https://ccr.ccs.tencentyun.com",
        "https://docker.mirrors.ustc.edu.cn",
        "https://hub-mirror.c.163.com",
        "https://mirror.baidubce.com",
        "https://registry.docker-cn.com"
    ]
}
之后service docker restart重启Docker服务,再docker info检查是否OK,差不多就是下面的样子:
Cgroup Version: 2
 Plugins:
  Volume: local
  Network: bridge host ipvlan macvlan null overlay
  Log: awslogs fluentd gcplogs gelf journald json-file local logentries splunk syslog
 Swarm: inactive
 Runtimes: io.containerd.runc.v2 runc
 Default Runtime: runc
 Init Binary: docker-init
 containerd version: 8165feabfdfe38c65b599c4993d227328c231fca
 runc version: v1.1.8-0-g82f18fe
 init version: de40ad0
 Security Options:
  apparmor
  seccomp
   Profile: builtin
  cgroupns
 Kernel Version: 5.15.0-1023-xilinx-zynqmp
 Operating System: Ubuntu 22.04.3 LTS
 OSType: linux
 Architecture: aarch64
 CPUs: 4
 Total Memory: 3.814GiB
 Name: kria
 ID: d0241500-7aff-4090-bba3-e961db7c1818
 Docker Root Dir: /var/lib/docker
 Debug Mode: false
 Experimental: false
 Insecure Registries:
  127.0.0.0/8
 Registry Mirrors:
  https://ccr.ccs.tencentyun.com/
  https://docker.mirrors.ustc.edu.cn/
  https://hub-mirror.c.163.com/
  https://mirror.baidubce.com/
  https://registry.docker-cn.com/
 Live Restore Enabled: false
(二)配置Vitis AI
先添加Xilinx软件包源,通过add-apt-repository ppa:xilinx-apps/ppa和add-apt-repository ppa:ubuntu-xilinx/updates两个cmd设置额外的apt repository。

之后,apt update更新所有package。
root@kria:~/Vitis-AI# apt update
Hit:1 https://download.docker.com/linux/ubuntu jammy InRelease
Hit:2 http://ports.ubuntu.com/ubuntu-ports jammy InRelease
Hit:3 http://ports.ubuntu.com/ubuntu-ports jammy-updates InRelease
Hit:4 http://oem.archive.canonical.com/updates jammy-limerick InRelease
Hit:5 https://ppa.launchpadcontent.net/ubuntu-xilinx/sdk/ubuntu jammy InRelease
Hit:6 http://ports.ubuntu.com/ubuntu-ports jammy-backports InRelease
Hit:7 http://ports.ubuntu.com/ubuntu-ports jammy-security InRelease
Hit:8 https://ppa.launchpadcontent.net/ubuntu-xilinx/updates/ubuntu jammy InRelease
Hit:9 https://ppa.launchpadcontent.net/xilinx-apps/ppa/ubuntu jammy InRelease
Reading package lists... Done
Building dependency tree... Done
Reading state information... Done
5 packages can be upgraded. Run 'apt list --upgradable' to see them.
root@kria:~/Vitis-AI# apt upgrade
Reading package lists... Done
Building dependency tree... Done
Reading state information... Done
Calculating upgrade... Done
Get more security updates through Ubuntu Pro with 'esm-apps' enabled:
  python2.7-minimal libjs-jquery-ui libopenexr25 libavcodec58 libavutil56
  libswscale5 libswresample3 libavformat58 python2.7 libpython2.7-minimal
  libpython2.7-stdlib
Learn more about Ubuntu Pro at https://ubuntu.com/pro
The following packages have been kept back:
  gjs libgjs0g libsmbclient libwbclient0 samba-libs
0 upgraded, 0 newly installed, 0 to remove and 5 not upgraded.
后续,继续apt install xlnx-firmware-kv260-smartcam下载smartcam固件。
root@kria:~/Vitis-AI# apt install xlnx-firmware-kv260-smartcam
Reading package lists... Done
Building dependency tree... Done
Reading state information... Done
The following NEW packages will be installed:
  xlnx-firmware-kv260-smartcam
0 upgraded, 1 newly installed, 0 to remove and 5 not upgraded.
Need to get 2973 kB of archives.
After this operation, 7921 kB of additional disk space will be used.
Get:1 https://ppa.launchpadcontent.net/xilinx-apps/ppa/ubuntu jammy/main arm64 xlnx-firmware-kv260-smartcam arm64 0.9-0xlnx1 [2973 kB]
Fetched 2973 kB in 4s (727 kB/s)
Scanning processes...
Restarting services...ocessor microcode upgrades.
Package configuration
通过xmutil命令xmutil listapps查看:

Active_slot为0的表示正在运行,可以xmutil unloadapp停止掉,这之前还要xmutil desktop_disable禁用桌面,奇怪的是xmutil unloadapp运行后,风扇狂转,按理来说停止服务应该资源消耗变小了,可是fan那么激动做啥?
还有个提醒memory leak的ERROR,有知道的大佬吗?
root@kria:~/Vitis-AI# xmutil unloadapp
[ 8191.766515] OF: ERROR: memory leak, expected refcount 1 instead of 2, of_node_get()/of_node_put() unbalanced - destroy cset entry: attach overlay node /axi/zyxclmm_drm
[ 8191.781699] OF: ERROR: memory leak before free overlay changeset,  /axi/isp_vcap_csi/ports/port@0/endpoint
[ 8191.793445] OF: ERROR: memory leak, expected refcount 1 instead of -1073741824, of_node_get()/of_node_put() unbalanced - destroy cset entry: attach overlay node /axi/isp_vcap_csi/ports/port@0/endpoint
[ 8191.811821] OF: ERROR: memory leak before free overlay changeset,  /axi/scaler@b0100000/ports/port@1/endpoint
[ 8191.821849] OF: ERROR: memory leak, expected refcount 1 instead of -1073741824, of_node_get()/of_node_put() unbalanced - destroy cset entry: attach overlay node /axi/scaler@b0100000/ports/port@1/endpoint
[ 8191.840101] OF: ERROR: memory leak before free overlay changeset,  /axi/scaler@b0100000/ports/port@0/endpoint
[ 8191.850111] OF: ERROR: memory leak, expected refcount 1 instead of -1073741824, of_node_get()/of_node_put() unbalanced - destroy cset entry: attach overlay node /axi/scaler@b0100000/ports/port@0/endpoint
[ 8191.868361] OF: ERROR: memory leak, expected refcount 1 instead of 2, of_node_get()/of_node_put() unbalanced - destroy cset entry: attach overlay node /axi/scaler@b0100000/ports
[ 8191.884328] OF: ERROR: memory leak before free overlay changeset,  /axi/csiss@80000000/ports/port@1/endpoint
[ 8191.894253] OF: ERROR: memory leak, expected refcount 1 instead of -1073741824, of_node_get()/of_node_put() unbalanced - destroy cset entry: attach overlay node /axi/csiss@80000000/ports/port@1/endpoint
[ 8191.912406] OF: ERROR: memory leak before free overlay changeset,  /axi/csiss@80000000/ports/port@0/endpoint
[ 8191.922328] OF: ERROR: memory leak, expected refcount 1 instead of -1073741824, of_node_get()/of_node_put() unbalanced - destroy cset entry: attach overlay node /axi/csiss@80000000/ports/port@0/endpoint
[ 8191.940542] OF: ERROR: memory leak, expected refcount 1 instead of 2, of_node_get()/of_node_put() unbalanced - destroy cset entry: attach overlay node /axi/i2c@80030000/i2c-mux@74/i2c@0/isp@3c/sensors/sensor@0
remove from slot 0 returns: 0 (Ok)
(三)启动Docker
先下载xilinx/smartcam的Docker IMG,通过docker pull xilinx/smartcam命令。
root@kria:~/Vitis-AI# docker pull xilinx/smartcam
Using default tag: latest
latest: Pulling from xilinx/smartcam
00f50047d606: Pull complete
d7951c234d55: Pull complete
05265a2d1f35: Pull complete
90b46a25b424: Pull complete
80e164c37cc5: Pull complete
3d8f42a1f194: Pull complete
b98fe3f03a5b: Pull complete
59a6d05de11d: Pull complete
c3201d2e9455: Pull complete
5a86aa1eda97: Pull complete
1c16e9132328: Pull complete
d5655ba163b7: Pull complete
3044adb41328: Pull complete
f5dc15e1f4ef: Pull complete
Digest: sha256:da2e52629011aeec332152a0f468d3ff156917dba9b596cf6d0de958d5dc29d7
Status: Downloaded newer image for xilinx/smartcam:latest
docker.io/xilinx/smartcam:latest
用了国内的源,速度就是快,很快就下载完成。再看看imgs:
root@kria:~/Vitis-AI# docker images
REPOSITORY        TAG       IMAGE ID       CREATED         SIZE
hello-world       latest    b038788ddb22   4 months ago    9.14kB
xilinx/smartcam   latest    aa0270aef908   11 months ago   1.41GB
通过命令启动xilinx/smartcam镜像,
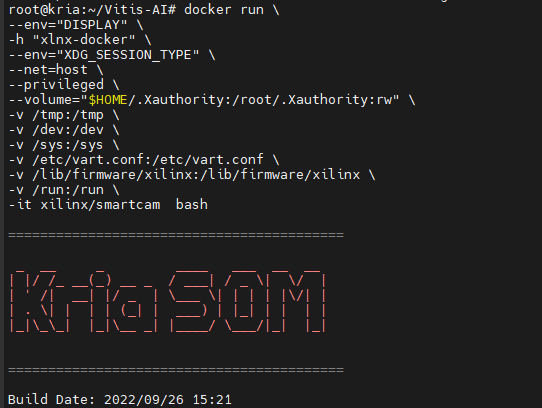
此时root@xlnx-docker:/# 提示进入Docker环境。
三、运行
如文章之初所说,因为部署Vitis AI之后懒得poweroff插MIPI camera了(直接带电插MIPI camera又感觉有风险),那就直接USB camera上吧。
先确定USB camera的名字,通过拔插USB摄像头确定是/dev/media1,为什么不是/dev/video*?一个问号。
root@xlnx-docker:/# ls /dev/media*
/dev/media0  /dev/media1
本来想smartcam --usb=1 -W 640 -H 480 --target=dp,接上HDMI显示器后不能显示,貌似显示器不支持这个分辨率,为什么是640X480这个奇葩的分辨率,是因为海康USB摄像头为720P,所以选了个摄像头支持的分辨率。
root@xlnx-docker:/# smartcam --usb=1 -W 640 -H 480 --target=dp
Resize: mean_r=128.000000
Resize: mean_g=128.000000
Resize: mean_b=128.000000
Resize: scale_r=1.000000
Resize: scale_g=1.000000
Resize: scale_b=1.000000
[ 9484.157137] zynqmp-display fd4a0000.display: Layer width:height must be 640:480
[ 9484.187386] zynqmp-display fd4a0000.display: Layer width:height must be 640:480
[ 9484.202081] zynqmp-display fd4a0000.display: Layer width:height must be 640:480
[ 9484.224098] zynqmp-display fd4a0000.display: Layer width:height must be 640:480
[ 9484.264872] zynqmp-display fd4a0000.display: Layer width:height must be 640:480
那就RTSP吧,smartcam --usb=1 -W 640 -H 480 --target=rtsp伺候:
root@xlnx-docker:/# smartcam --usb=1 -W 640 -H 480 --target=rtsp
stream ready at:
 rtsp://172.17.0.1:554/test
rtsp://192.168.99.238:554/test
用支持RTSP的播放器再同一网段内连接,本人头像就不照了,刚好在刷抖音,刷个人脸来看看。
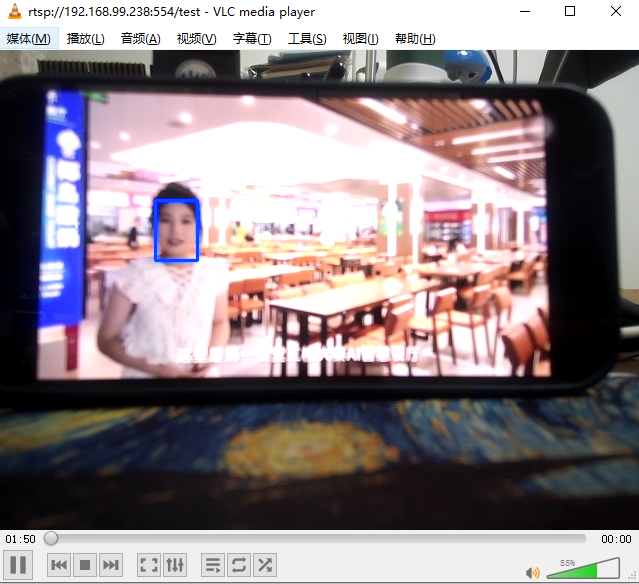
效果不错,最后,来一张合影,基本上各种线缆都接上了。
 |


