

在QEMU/aarch64上完成smart用户态应用的运行并使用VSCode进行调试
电子说
描述
环境:Ubuntu20.04
xmake安装
sudo add-apt-repository ppa:xmake-io/xmake
sudo apt update
sudo apt install xmake
下载源码
用户态应用程序
rt-thread
QEMU安装
首先安装必要依赖:
sudo apt-get install -y libglib2.0-dev libpixman-1-dev
安装qemu:
sudo dpkg -i ./tools/qemu/qemu_7.1.0-2022111713_amd64.deb
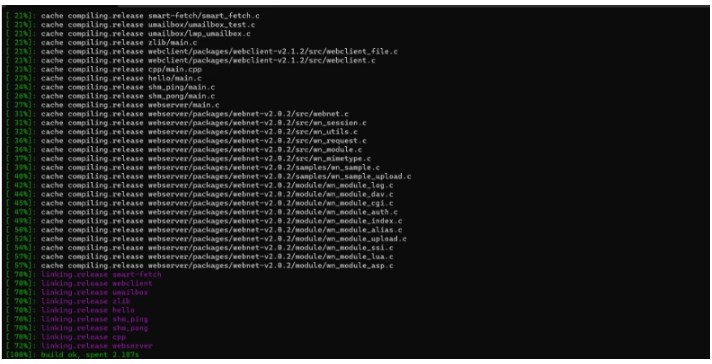
编译
首先需要更新环境变量
source env.sh
进入apps目录进行编译
cd apps/
// notes:这里注意如果是linux平台下需要先安装解压缩工具,下面为7zip的下载方式
sudo add-apt-repository universe
sudo apt update
sudo apt install p7zip-full p7zip-rar
xmake f -a aarch64 //选择目标平台为aarch64
xmake -j8
镜像制作
运行xmake smart-rootfs制作rootfs,运行xmake smart-image制作镜像
xmake smart-rootfsxmake smart-image -o ../prebuilt/qemu-virt64-aarch64/ext4.img # 将镜像输出至 qemu-virt64-aarch64 目录
运行qemu
进入userapp/prebuilt/qemu-virt64-aarch64,运行run.sh脚本启动qemu
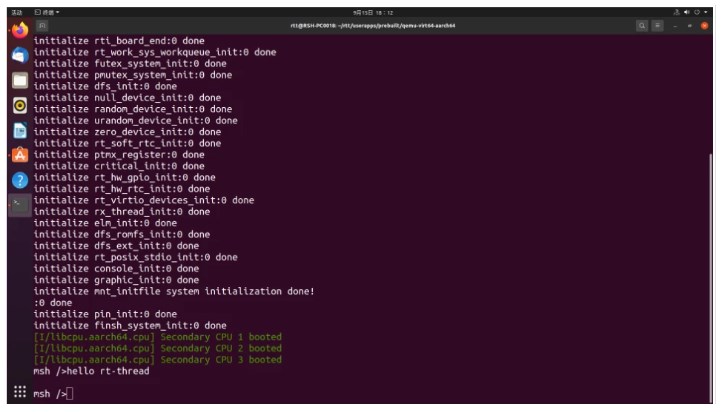
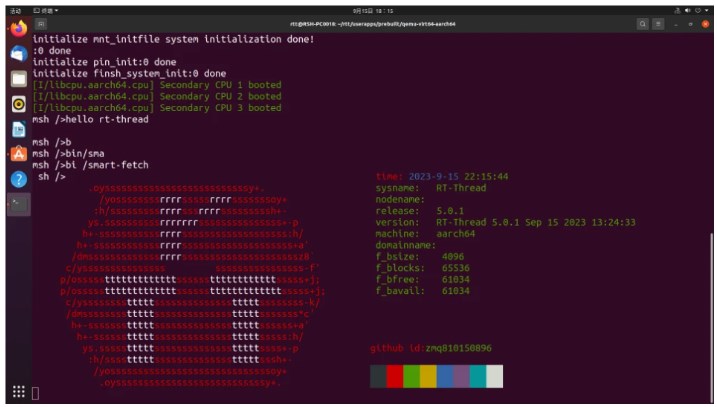
运行用户态应用
使用VSCode调试用户态应用
准备工作
下载源码(如上)
安装VSCode:安装VSCode并安装C/C++扩展插件
$ sudo add-apt-repository ppa:ubuntu-desktop/ubuntu-make
$ sudo apt-get update
$ sudo apt-get install ubuntu-make
$ umake ide visual-studio-code
提示输入 a 即可
安装内核编译工具
编译内核的时候需要用到 aarch64-linux-musleabi- 工具链
环境变量配置为:
export RTT_CC="gcc"
export RTT_EXEC_PATH="/opt/aarch64-linux-musleabi_for_x86_64-pc-linux-gnu/bin"
export RTT_CC_PREFIX="aarch64-linux-musleabi-"
export PATH="**RTT_EXEC_PATH:**PATH"
安装scons:
sudo apt-get install scons
安装xmake:
sudo add-apt-repository ppa:xmake-io/xmake
sudo apt update
sudo apt install xmake
安装gdb-multiarch:
sudo apt-get install gdb-multiarch
编译userapps与内核
在 userapps 中,编译 app:
用户态的应用用xmake编默认没有调试符号
cd apps
xmake f -m debug -a aarch64 # 配置为 aarch64 平台,并指定debug模式,就有调试信息了
xmake -j8
制作镜像:
xmake smart-rootfs
xmake smart-image -o ../prebuilt/qemu-virt64-aarch64/ext4.img # 将镜像输出至 qemu-virt64-aarch64 目录
基于 rt-thread 仓库的 qemu-virt64-aarch64 构建内核镜像:
选择 RT-Thread Kernel 选项
使能Smart内核
在该目录下执行scons编译
将生成的内核镜像 rtthread.bin 和 rtthread.elf 更新到 userappsprebuiltqemu-virt64-aarch64 目录中。
使用命令 ./run.sh,测试 qemu 正常运行后,使用 ctrl a,x 结束运行。
VSCode配置
要想使用VSCode配置用户态应用,需要先在工程路径下添加调试配置
首先在 userapps 目录下使用命令 code .,使用 VSCode 打开该目录。
在 userapps 目录下创建launch.json ,如下所示(需要更新实际的 gdb 路径):
{
"version": "0.2.0",
"configurations": [
{
"name": "Debug smart @ Linux",
"type": "cppdbg",
"request": "launch",
"args": [],
"stopAtEntry": true,
"externalConsole": true,
"cwd": "${workspaceRoot}",
"program": "${workspaceRoot}/apps/build/rootfs/bin/smart-fetch",
"serverLaunchTimeout": 2000,
"miDebuggerPath":"/usr/bin/gdb-multiarch",
"miDebuggerServerAddress": ":1234",
"setupCommands": [
{
"text": "cd ${workspaceRoot}"
},
{
"text": "file ${workspaceRoot}/apps/build/rootfs/bin/smart-fetch"
},
{
"text": "break main"
}
],
"customLaunchSetupCommands": [],
"launchCompleteCommand": "exec-run"
},
]
}
launch.json 配置文件中的 smart-fetch,改为自己要调试的应用。
如果上述配置 launch.json 的文件无法进行调试,那就使用以下配置:
{
"version": "0.2.0",
"configurations": [
{
"name": "aarch64-debug",
"type": "cppdbg",
"request": "launch",
"miDebuggerPath": "/usr/bin/gdb-multiarch",
"program": "${workspaceFolder}/rtthread.elf",
"setupCommands": [
{
"description": "为 gdb 启用整齐打印",
"text": "-enable-pretty-printing",
"ignoreFailures": true
},
{
"text": "target remote localhost:1234"
},
{
"text": "restore ${workspaceFolder}/rtthread.elf"
}
],
"launchCompleteCommand": "None",
"cwd": "${workspaceFolder}"
}
]
}
launch.json 配置文件中的 rtthread.elf,改为自己要调试的应用。
调试用户态应用
这部分开始正式调试用户态应用,具体步骤如下:
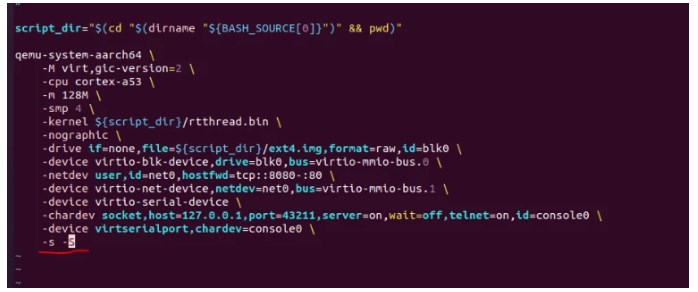
修改run.sh脚本,在脚本里添加-s -S
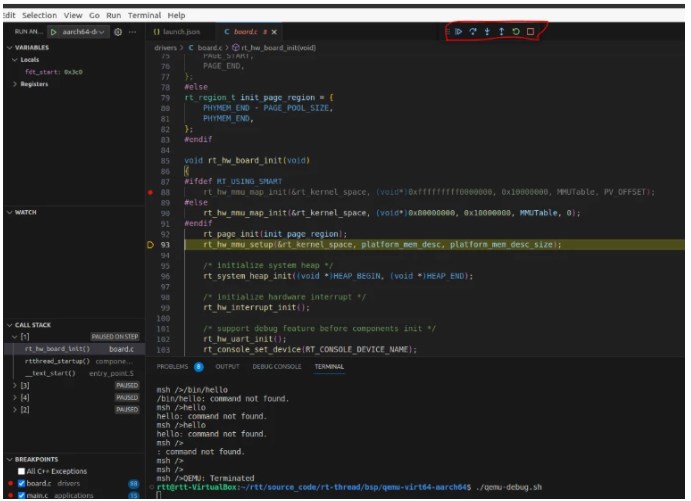
在 VSCode 终端输入 ./run.sh,如果调试的是内核,可以看到启动过程被挂起,等待调试前端来连接。
在 VSCode 中按下 F5 开始调试内核,可以看到应用的源码文件被打开,运行的代码将停在断点处。
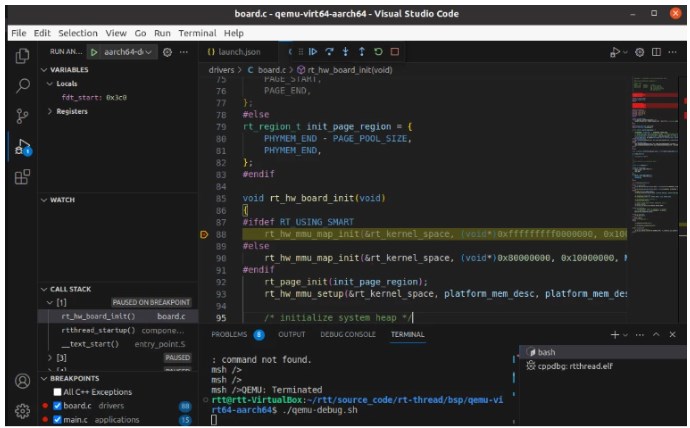
如果调试的是用户态应用,我们以smart_fetch为例,在VSCode终端输入./run.sh,并按下F5开始调试,选择要运行的用户态应用,运行的代码将停在断点处
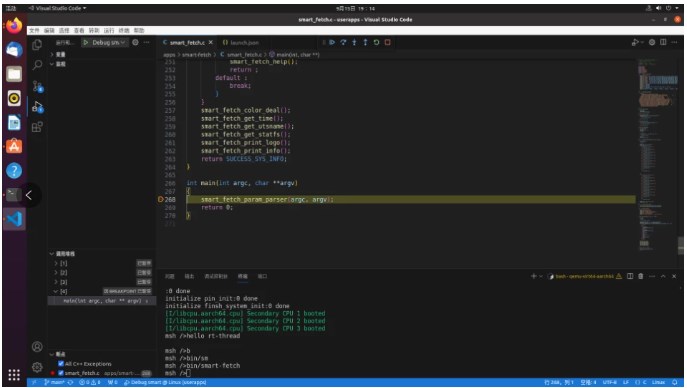
后续就可以单步调试用户态应用了。单步运行后,应用代码执行的打印将显示在终端上。
-
无法在 VF2 上运行 aarch64 / x86_64 容器怎么处理?2026-03-17 124
-
第四章:在 PC 交叉编译 aarch64 的 tensorflow 开发环境并测试2024-08-25 4627
-
探索aarch64架构上使用ftrace的BPF LSM2024-01-25 2063
-
RT-Thread BSP qemu-virt64-aarch64文件系统2023-10-08 2026
-
最新的Linux aarch64 LSA驱动程序2023-08-23 499
-
AArch64外部调试详解2023-08-02 788
-
RT-Thread BSP qemu-virt64-aarch64的编译环境搭建步骤2023-04-04 3154
-
运行ldd qemu-系统-aarch64显示的不是动态可执行文件,这个怎么做?2023-03-30 651
-
在VSCode中使用QEMU调试FreeRTOS2023-03-06 4466
-
如何使用预装程序创建并分发AArch64容器2022-09-30 2209
-
AArch64寄存器介绍2022-08-24 7886
-
如何在x86环境下基于Qemu和Docker快速搭建AARCH64开发环境2022-07-11 5040
-
在ARMv8中aarch64与aarch32是怎样进行切换的2022-04-01 7980
-
在AArch64平台上性能下降的例子2021-09-09 3518
全部0条评论

快来发表一下你的评论吧 !
