

同步模式下OpenVINO2023 SDK的推理方式
描述
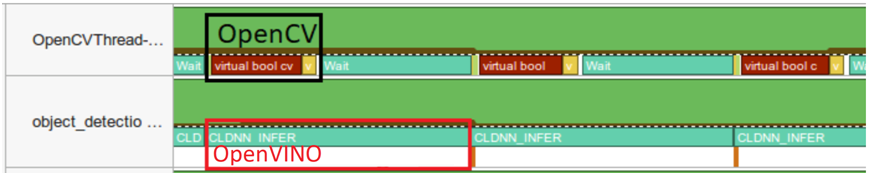
同步模式推理流程
OpenVINO2023版本的SDK支持同步与异步推理模式相比之前OpenVINO2021版本更加的简洁,易用。同时支持创建多个Requst然后基于多个Requst实现流水线方式的推理从而提升CPU推理的吞吐率。同步模式下OpenVINO2023 SDK的推理方式如下:

推理的流程如下:
while(true) {
  // capture frame
  // populate CURRENT InferRequest
  // Infer CURRENT InferRequest
  //this call is synchronous
  // display CURRENT result
}
以YOLOv5s的模型为例,在OpenVINO C++上同步推理的代码实现如下:
// 创建IE插件, 查询支持硬件设备
ov::Core core;
std::string model_onnx = "D:/python/yolov5-7.0/yolov5s.onnx";
auto model = core.read_model(model_onnx);
ov::CompiledModel cmodel = core.compile_model(model, "CPU");


// create infer request
auto request = cmodel.create_infer_request();
cv::Mat frame;
while (true) {
  bool ret = cap.read(frame);
  if (frame.empty()) {
    break;
  }
  image_detect(frame, request);
  char c = cv::waitKey(1);
  if (c == 27) { // ESC
    break;
  }
}
其中image_detect方法包含模型的图像前处理、同步推理、后处理。其中同步推理:
// 前处理
// 开启同步
request.infer();
// 后处理
运行结果如下:
异步模式推理流程
当使用OpenVINO2023提供的Request对象的回调功能以后,我们可以把模型的后处理直接放到回调中去,这样异步推理方式就变成只有图像前处理+模型推两个步骤了,然后通过创建两个Request基于流水线方式,实现异步流水线模式推理方式,这个时候推理流程如下:
推理的流程如下:
while(true) {
  // capture frame
  // populate NEXT InferRequest
  // start NEXT InferRequest
  // this call is async and returns immediately
  // wait for the CURRENT InferRequest
  // display CURRENT result
  // swap CURRENT and NEXT InferRequests
}
首先需要创建两个Request,然后分别设置它们的Callback部分代码,主要是在Callback中完成后处理操作。这部分的代码如下:
 1// 创建IE插件, 查询支持硬件设备
 2ov::Core core;
 3std::string model_onnx = "D:/python/yolov5-7.0/yolov5s.onnx";
 4auto model = core.read_model(model_onnx);
 5ov::CompiledModel cmodel = core.compile_model(model, "AUTO");
 6
 7// create infer request
 8auto request = cmodel.create_infer_request();
 9auto next_request = cmodel.create_infer_request();
10std::exception_ptr exception_var;
11request.set_callback([&](std::exception_ptr ex) {
12    if (ex) {
13        exception_var = ex;
14        return;
15    }
16    det_boxes.clear();
17    det_ids.clear();
18    ov::Tensor output = request.get_output_tensor();
19    const float* prob = (float*)output.data();
20    const ov::Shape outputDims = output.get_shape();
21    size_t numRows = outputDims[1];
22    size_t numCols = outputDims[2];
23
24    // 后处理, 1x25200x85
25    std::vector boxes;
26    std::vector classIds;
27    std::vector confidences;
28    cv::Mat det_output(numRows, numCols, CV_32F, (float*)prob);
29    for (int i = 0; i < det_output.rows; i++) {
30        float confidence = det_output.at(i, 4);
31        if (confidence < 0.45) {
32            continue;
33        }
34        cv::Mat classes_scores = det_output.row(i).colRange(5, numCols);
35        cv::Point classIdPoint;
36        double score;
37        minMaxLoc(classes_scores, 0, &score, 0, &classIdPoint);
38
39        // 置信度 0~1之间
40        if (score > 0.25)
41        {
42            float cx = det_output.at(i, 0);
43            float cy = det_output.at(i, 1);
44            float ow = det_output.at(i, 2);
45            float oh = det_output.at(i, 3);
46            int x = static_cast((cx - 0.5 * ow) * x_factor);
47            int y = static_cast((cy - 0.5 * oh) * y_factor);
48            int width = static_cast(ow * x_factor);
49            int height = static_cast(oh * y_factor);
50            cv::Rect box;
51            box.x = x;
52            box.y = y;
53            box.width = width;
54            box.height = height;
55
56            boxes.push_back(box);
57            classIds.push_back(classIdPoint.x);
58            confidences.push_back(score);
59        }
60    }
61
62    // NMS
63    std::vector indexes;
64    cv::NMSBoxes(boxes, confidences, 0.25, 0.45, indexes);
65    for (size_t i = 0; i < indexes.size(); i++) {
66        int index = indexes[i];
67        det_ids.emplace_back(classIds[index]);
68        det_boxes.emplace_back(boxes[index]);
69    }
70});
依据上述的推理流程,最终调用执行的代码如下:
 1cv::Mat frame, next_frame;
 2// do first frame
 3cap.read(frame);
 4async_image_detect(frame, request);
 5std::milliseconds tout{ 50 };
 6int cnt = 0;
 7while (true) {
 8    bool ret = cap.read(next_frame);
 9    if (next_frame.empty()) {
10        break;
11    }
12
13    int64 start = cv::getTickCount();
14    // 继续异步
15    if (cnt % 2 == 0) {
16        async_image_detect(next_frame, next_request);
17        request.wait_for(tout);
18    }
19    if (cnt % 2 == 1) {
20        async_image_detect(next_frame, request);
21        next_request.wait_for(tout);
22    }
23    for (size_t t = 0; t < det_boxes.size(); t++) {
24        int idx = det_ids[t];
25        cv::rectangle(frame, det_boxes[t], colors_table[idx % 6], 2, 8, 0);
26        putText(frame, classNames[idx].c_str(), det_boxes[t].tl(), cv::FONT_HERSHEY_PLAIN, 1.0, cv::Scalar(255, 0, 0), 1, 8);
27    }
28
29    // 计算FPS render it
30    float t = (cv::getTickCount() - start) / static_cast(cv::getTickFrequency());
31    putText(frame, cv::format("FPS: %.2f", 1.0 / t), cv::Point(20, 40), cv::FONT_HERSHEY_PLAIN, 2.0, cv::Scalar(255, 0, 0), 2, 8);
32    cv::imshow("OpenVINO2023 - YOLOv5 7.0 异步推理", frame);
33    char c = cv::waitKey(1);
34    if (c == 27) { // ESC
35        break;
36    }
37    next_frame.copyTo(frame);
38    cnt++;
39}
40cv::waitKey(0);
41cv::destroyAllWindows();
42return 0;
其中async_image_detect方法中实现了YOLOv5模型推理的图像前处理与启动异步推理模式
preprocess(frame)
// 开启异步
request.start_async();
审核编辑:汤梓红
声明:本文内容及配图由入驻作者撰写或者入驻合作网站授权转载。文章观点仅代表作者本人,不代表电子发烧友网立场。文章及其配图仅供工程师学习之用,如有内容侵权或者其他违规问题,请联系本站处理。
举报投诉
-
为什么深度学习中的Frame per Second高于OpenVINO™演示推理脚本?2025-03-06 360
-
为什么无法在运行时C++推理中读取OpenVINO™模型?2025-03-05 494
-
OpenVINO2024 C++推理使用技巧2024-07-26 2461
-
如何快速下载OpenVINO Notebooks中的AI大模型2023-12-12 2690
-
NNCF压缩与量化YOLOv8模型与OpenVINO部署测试2023-11-20 2888
-
OpenVINO场景文字检测与文字识别教程2023-09-24 3010
-
如何在OpenVINO工具包中使用带推理引擎的blob?2023-08-15 645
-
在英特尔开发者套件上用OpenVINO™ 2023.0加速YOLOv8-Pose姿态估计模型2023-06-15 2094
-
OpenVINO2022版本Python API演示2022-07-22 3422
全部0条评论

快来发表一下你的评论吧 !
