
OpenCV4中联通组件分析的一个缺点
描述
数据集
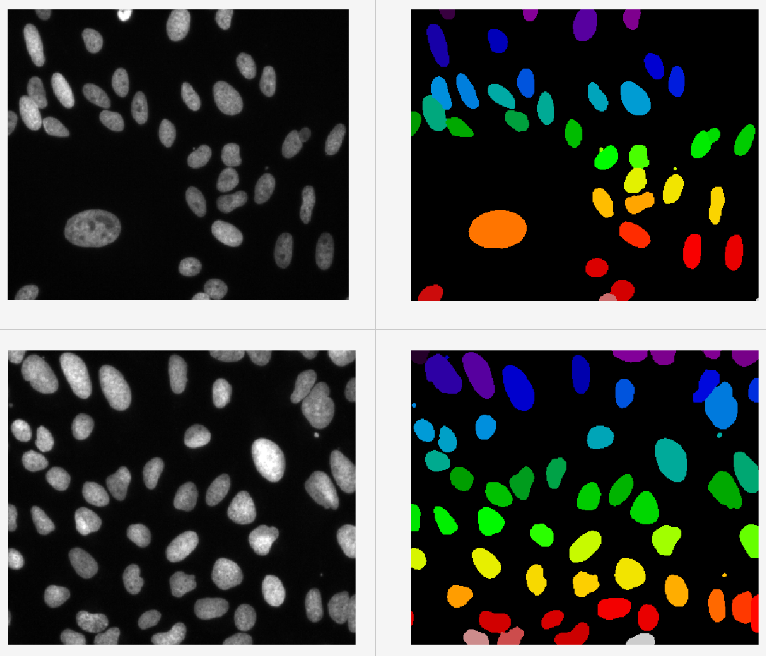
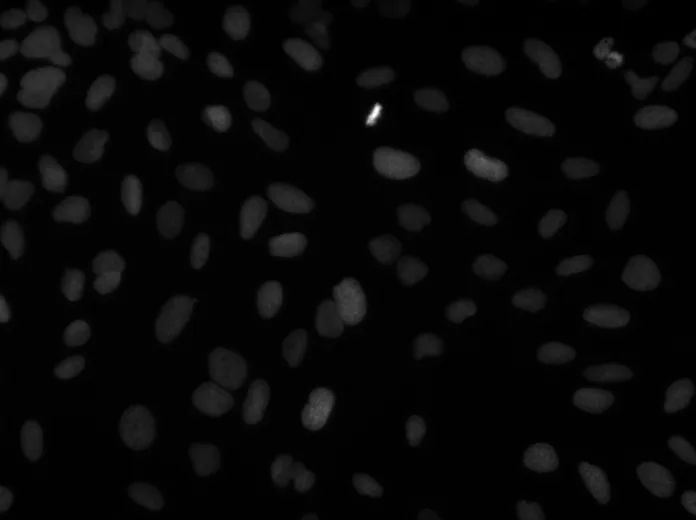
最近别人给了我一个生物数据分割的标注数据集,让我训练一下,发现这个数据集比较诡异,图像格式是tif的16位的浮点数,OpenCV读取过来要显示得先转换,然后它的Mask是PNG的带透明通道,最坑人的是Mask标记都是1、只有相互连接的对象标记才相互不同。官方给出的原始图像解析以后是这样:

OpenCV读取显示图像样本
OpenCV读取tif格式16位的图像在于imread的第二个参数,默认情况下会转换为BGR彩色八位字节的图像,如果这样就是一片漆黑;这里选择为-1表示不改变原图像的通道数据信息,这样就可以读取原始图像数据了,然后转换为32f的,再归一化到0~1之间,直接显示即可。代码如下:
import numpy as np
img = cv.imread("D:/11111.tif", -1)  # uint16
img_16 = img.astype(np.float32)
cv.normalize(img_16, img_16, 0, 1, cv.NORM_MINMAX)
img_16.astype(np.float32)
result = np.uint8(img_16*255)
cv.imwrite('D:/tensor_cv2.jpg', result)

OpenCV读取显示Mask图像
Mask图像是带透明通道的RGBA的图像,但是实际上所有的标注信息只存在于red通道中,所以读取以后,直接拆分通道,然后把red通道数据作为灰度图像处理,因为灰度值太低了,显示的时候我给扩大了点倍数,直接把灰度图像扔到联通组件扫描的函数中,然后就可以看到结果了。相关代码如下:
import numpy as np
img = cv.imread("D:/11111.png")  # uint16
bb, gg, rr = cv.split(img)
h, w, c = img.shape
print(img.shape, img.dtype)
numOfcons, labels = cv.connectedComponents(rr)

colors = []
for i in range(numOfcons):
    b = np.random.randint(0, 256)
    g = np.random.randint(0, 256)
    r = np.random.randint(0, 256)
    colors.append((b, g, r))

colors[0] = (0, 0, 0)
image = np.zeros((h, w, 3), dtype=np.uint8)
for row in range(h):
    for col in range(w):
        image[row, col] = colors[labels[row, col]]

cv.imshow("colored labels", image)
cv.imwrite("D:/opencv_labels.png", image)
cv.imshow("bgr", rr*100)
cv.waitKey(0)
cv.destroyAllWindows()
标记的Mask信息原图

基于联通组件查找以后的彩色显示(注意白色粘连)

对比与解决
对比之后发现,OpenCV中联通组件扫描以后把不同标签的样本粘连在一起了,这个是因为OpenCV寻找联通组件只分为两种值0为背景,非0就作为前景,不做灰度级别区分的联通域识别,所以导致了粘连。这个时候,只要用skimage库的函数来替换OpenCV的联通组件扫描就可以避免粘连了,因为skimage库的联通组件扫描支持独立标签分级。代码演示如下:
import skimage.io
import skimage.morphology

# Load one image after uncompressing masks.zip
gt = skimage.io.imread("D:/11111.png")

# Keep first channel only
gt = gt[:, :, 0]

# Label independent connected components
gt = skimage.morphology.label(gt)
colors = []
for i in range(150):
    b = np.random.randint(0, 256)
    g = np.random.randint(0, 256)
    r = np.random.randint(0, 256)
    colors.append((b, g, r))
colors[0] = (0, 0, 0)
h, w = gt.shape
image = np.zeros((h, w, 3), dtype=np.uint8)
for row in range(h):
    for col in range(w):
        image[row, col] = colors[gt[row, col]]

# Display image or use as needed
cv.imshow("colored labels", image)
cv.imwrite("D:/labels.png", image)
cv.waitKey(0)
cv.destroyAllWindows()
运行结果对比 - 可以发现白色区域没有粘连,成功分割!

希望OpenCV迟早有一天可以支持这种分级的区域联通组件扫描算法。
审核编辑:刘清
-
OpenCV4.8 CUDA编程代码教程2023-12-05 2228
-
OpenCV中自带组件HighGUI怎么使用?2020-11-05 1470
-
鲁班猫0 -安装opencv2023-04-09 1313
-
CMake在Linux 6.1.1-1.0.0中搜索包opencv损坏了吗?2023-05-09 587
-
中联通公开招募3G电子渠道合作企业2009-12-11 654
-
基于opencv4和Yolo-Fastest,实现PC和单片机通信,控制步进电机捕获目标2021-11-23 884
-
使用Raspberry Pi构建一个OpenCV人群计数装置2022-08-12 4127
-
分享两个OpenCV图像处理与分析的问题2022-08-22 1496
-
如何在Raspberry Pi 3上安装OpenCV4库2022-09-08 2419
-
OpenCV4中SIFT算法概述2022-11-23 2126
-
OpenCV4源码分析2023-02-22 1820
-
学习OpenCV4的系统化路线图2023-07-05 1245
-
OpenCV4笔记之连通域分析2023-12-25 2107
-
OpenCV4图像分析之BLOB特征分析2023-12-28 2637
-
opencv-python和opencv一样吗2024-07-16 2735
全部0条评论

快来发表一下你的评论吧 !

