
鸿蒙NXET实战:高德地图定位SDK【获取Key+获取定位数据】(二)
电子说
1.4w人已加入
描述
如何申请key
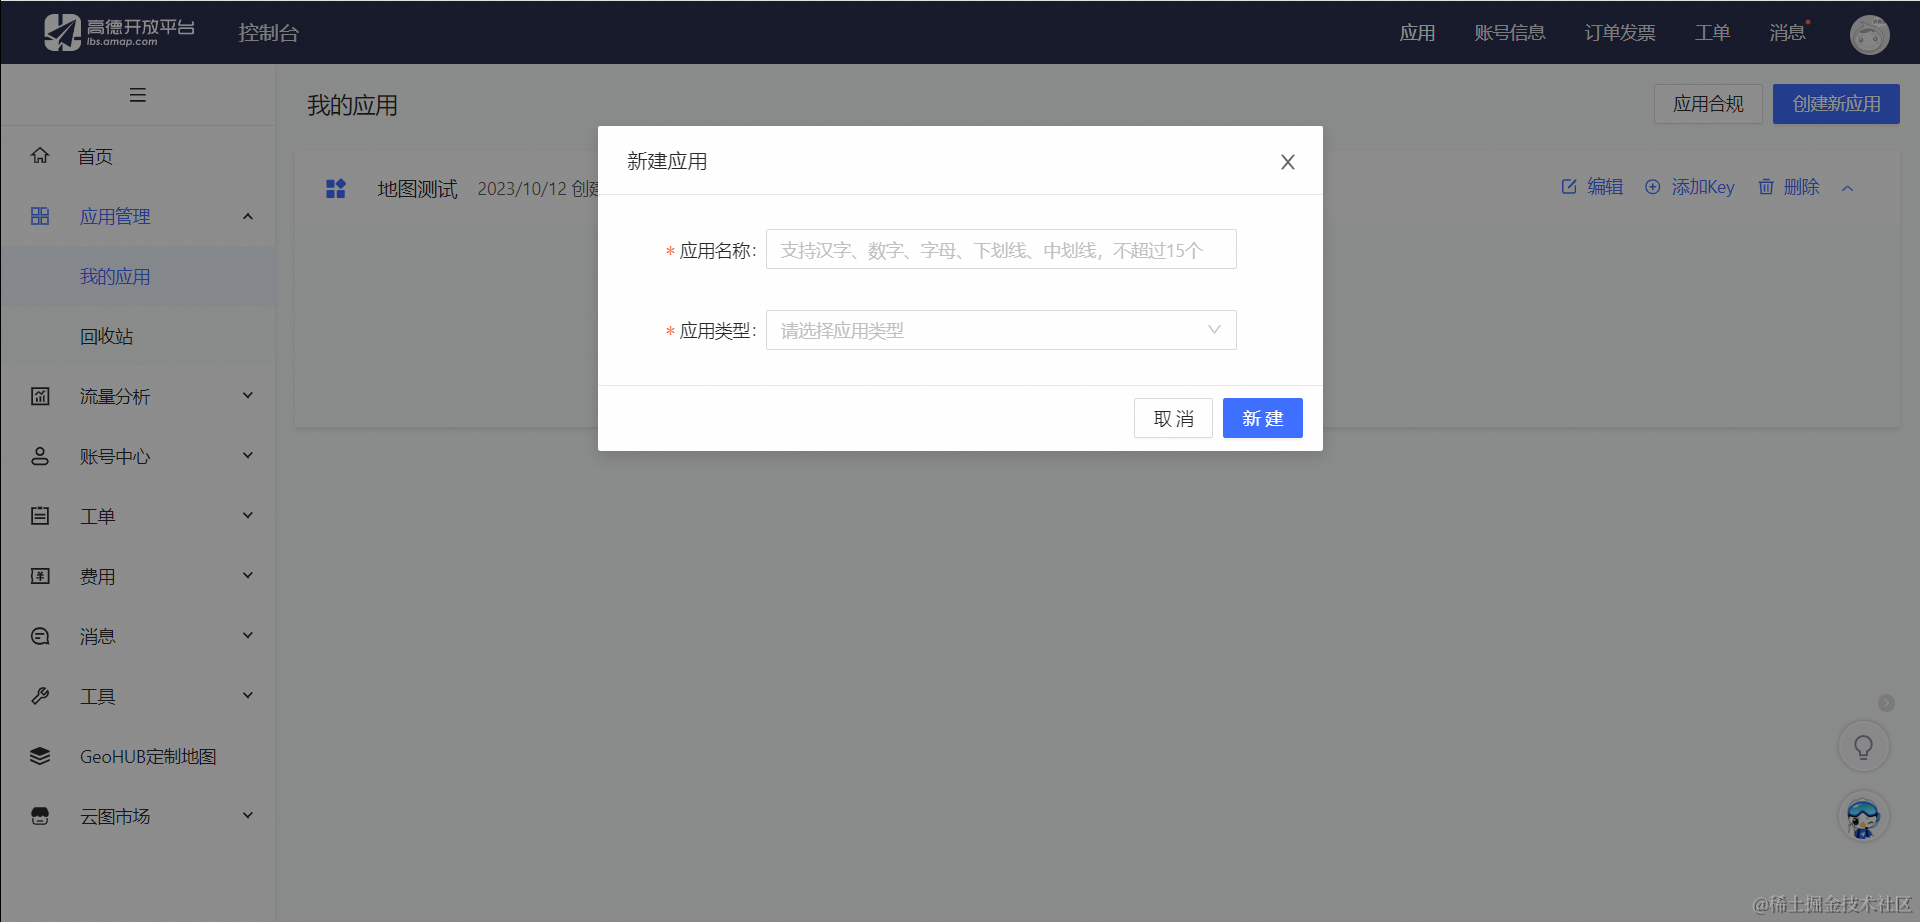
1、创建新应用
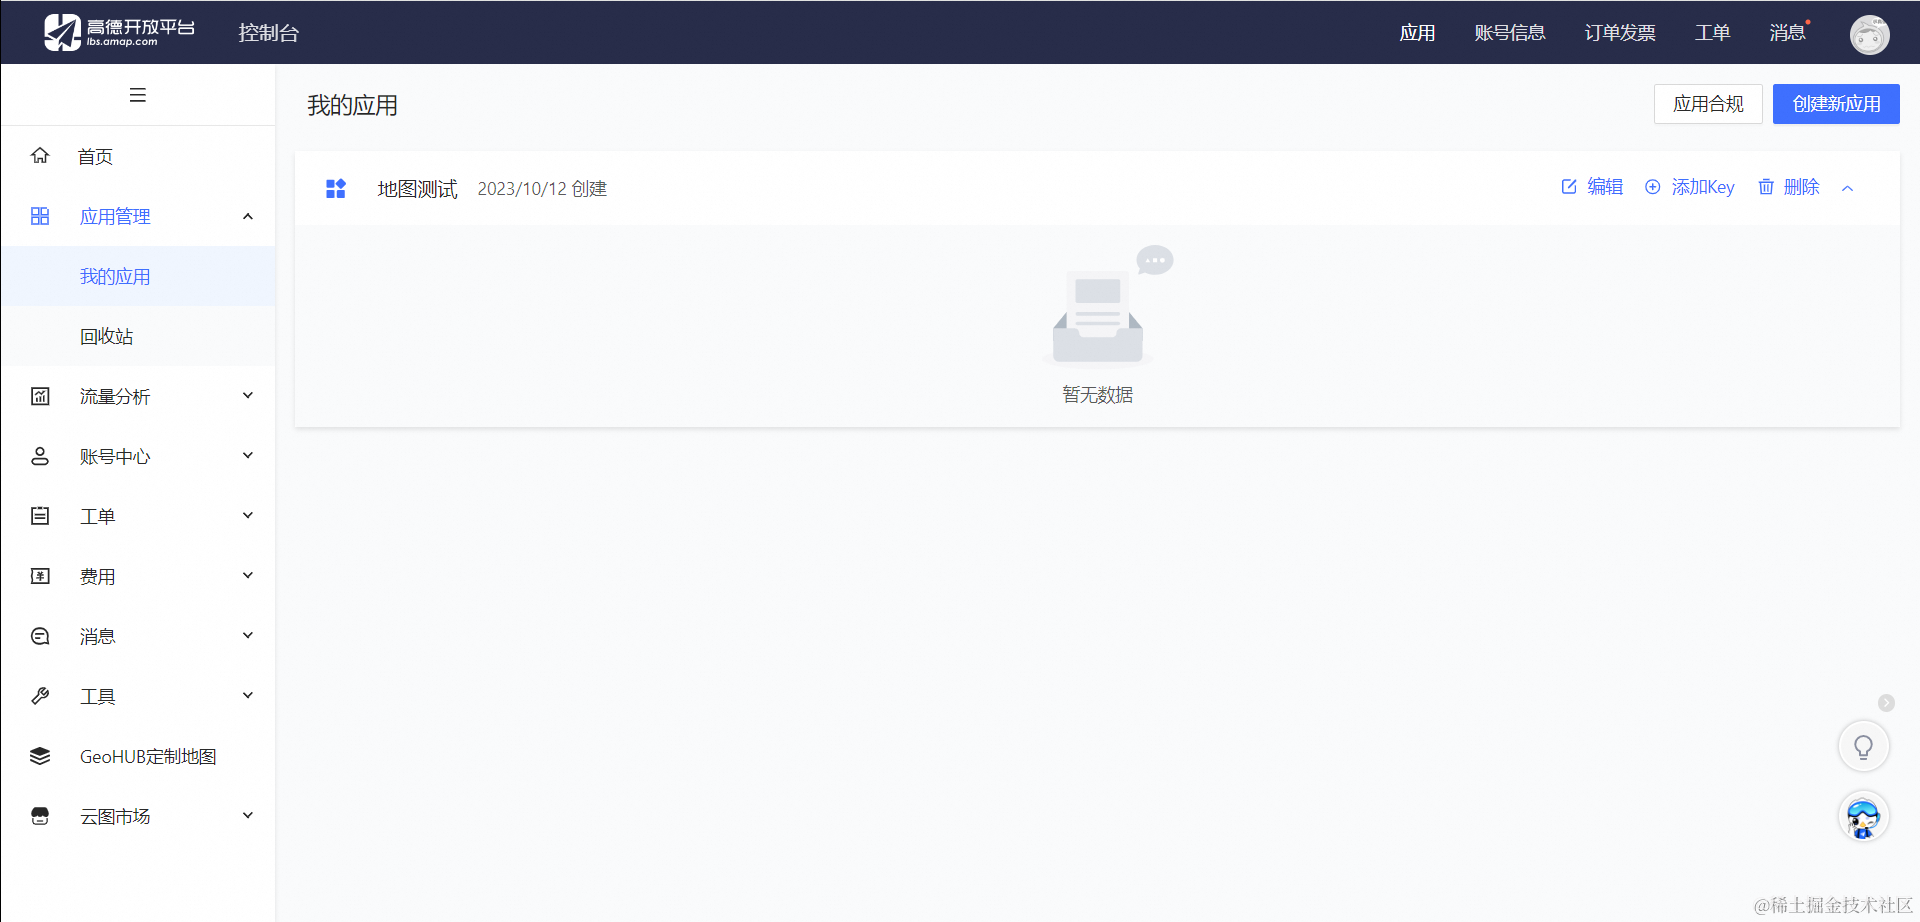
进入[控制台],创建一个新应用。如果您之前已经创建过应用,可直接跳过这个步骤。


2、添加新Key
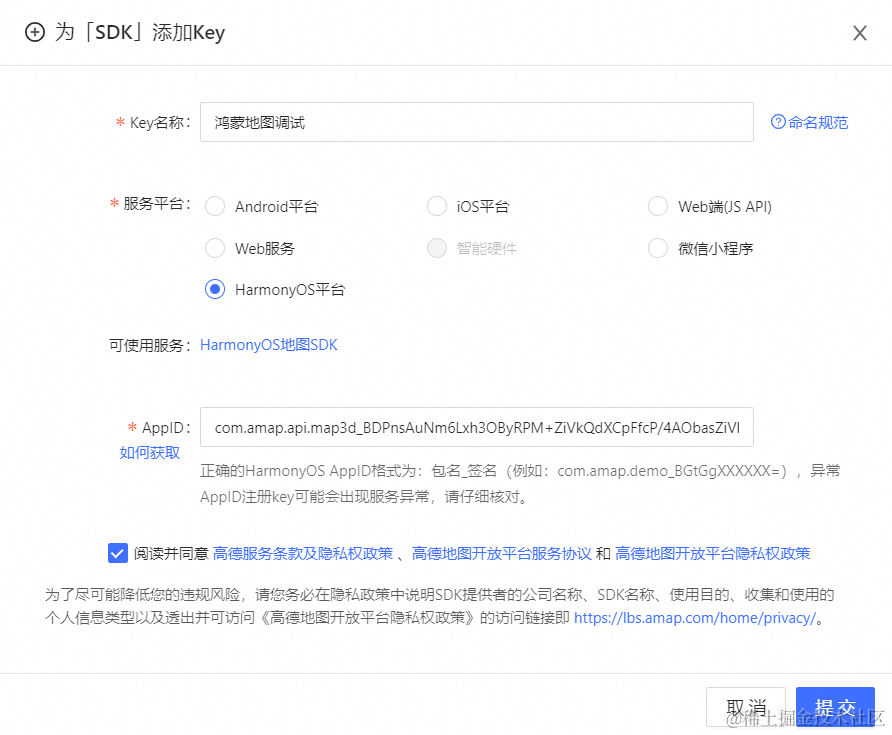
在创建的应用上点击"添加新Key"按钮,在弹出的对话框中,依次:输入应用名名称,选择绑定的服务为“HarmonyOS平台”,输入AppID,如下图所示:
注意
1个KEY只能用于一个应用(多渠道安装包属于多个应用),1个Key在多个应用上使用会出现服务调用失败。

在阅读完高德地图API服务条款后,勾选此选项,点击“提交”,完成 Key 的申请,此时您可以在所创建的应用下面看到刚申请的 Key 了。
如何获取AppID
请在当前应用的Ablitiy中使用如下代码获取
let flag = bundleManager.BundleFlag.GET_BUNDLE_INFO_WITH_SIGNATURE_INFO;
let bundleInfo = bundleManager.getBundleInfoForSelfSync(flag)
let appId = bundleInfo.signatureInfo.appId;
注意事项
- 获取AppID之前需要先配置应用的签名信息。
- 目前通过DevEco Studio连接云真机获取到的appId不全,只获取到了"包名_", 使用云真机调试高德地图SDK时会导致鉴权不通过,正确的appId形式为:"包名_签名信息", 例如:com.amap.demo_BGtGgVB3ASqU7ar1nHkwX4s0nIexDbEwqNrVoatUDs17GrClWC7V2/zhoYh6tFQHAd5DASWVTEAgvZfzrEGljjs=

获取定位数据
使用定位SDK之前,需要在 config.json 文件中进行相关权限设置,确保定位功能可以正常使用。
第一步,配置module.json5
首先,声明权限
...
 "requestPermissions": [
      {
        "name": "ohos.permission.APPROXIMATELY_LOCATION",
        "usedScene": {
          "abilities": [
            "Harmony_location_demoAbility"
          ],
          "when": "always"
        }
      },
      {
        "name": "ohos.permission.LOCATION",
        "usedScene": {
          "abilities": [
            "Harmony_location_demoAbility"
          ],
          "when": "always"
        }
      },
      {
        "name": "ohos.permission.LOCATION_IN_BACKGROUND",
        "usedScene": {
          "abilities": [
            "Harmony_location_demoAbility"
          ],
          "when": "always"
        }
      },
      {
        "name": "ohos.permission.INTERNET",
        "usedScene": {
          "abilities": [
            "Harmony_location_demoAbility"
          ],
          "when": "always"
        }
      },
      {
        "name": "ohos.permission.KEEP_BACKGROUND_RUNNING",
        "usedScene": {
          "abilities": [
            "Harmony_location_demoAbility"
          ],
          "when": "always"
        }
      }
    ]
...
第二步,向工程中添加定位开发包
从ohpm仓库获取定位包,依次添加依赖。
"dependencies": {
    "@amap/amap_lbs_common": "1.0.0",
    "@amap/amap_lbs_location": "1.0.0"
}
第三步,初始化定位
首先,设置Key
[获取Key]
AMapLocationManagerImpl.setApiKey("您的key");
初始化隐私政策
AMapLocationManagerImpl.updatePrivacyShow(AMapPrivacyShowStatus.DidShow, AMapPrivacyInfoStatus.DidContain, getContext(this))
    AMapLocationManagerImpl.updatePrivacyAgree(AMapPrivacyAgreeStatus.DidAgree, getContext(this))
创建AMapLocationManagerImpl
locationManger?: AMapLocationManagerImpl;
this.locationManger = new AMapLocationManagerImpl(this.context);
动态申请相关权限
reqPermissionsFromUser(permissions: Array< Permissions >): void {
    let context: Context = getContext(this) as common.UIAbilityContext;
    let atManager: abilityAccessCtrl.AtManager = abilityAccessCtrl.createAtManager();
    // requestPermissionsFromUser会判断权限的授权状态来决定是否唤起弹窗
    atManager.requestPermissionsFromUser(context, permissions).then((data: PermissionRequestResult) = > {
      let grantStatus: Array< number > = data.authResults;
      let length: number = grantStatus.length;
      for (let i = 0; i < length; i++) {
        if (grantStatus[i] === 0) {
          // 用户授权,可以继续访问目标操作
        } else {
          // 用户拒绝授权,提示用户必须授权才能访问当前页面的功能,并引导用户到系统设置中打开相应的权限
          return;
        }
      }
      // 授权成功
    }).catch((err: BusinessError) = > {
      console.error(`Failed to request permissions from user. Code is ${err.code}, message is ${err.message}`);
    })
  }
最后,开始请求相关定位信息
如:连续定位
let listener: IAMapLocationListener = {
                onLocationChanged: (location) =  > {
                // todo something
                }, onLocationError: (error) =  > {
                // todo something
                }
              };

let options: AMapLocationOption = {
  priority: geoLocationManager.LocationRequestPriority.FIRST_FIX,
  scenario: geoLocationManager.LocationRequestScenario.UNSET,
  timeInterval: 2,
  distanceInterval: 0,
  maxAccuracy: 0,
  allowsBackgroundLocationUpdates: true,
  locatingWithReGeocode: false,
  reGeocodeLanguage: AMapLocationReGeocodeLanguage.Chinese,
  isOffset: true
}

this.locationManger?.setLocationListener(AMapLocationType.Updating,listener)
this.locationManger?.setLocationOption(AMapLocationType.Updating,options)
this.locationManger?.startUpdatingLocation()
//  停止定位
//  this.locationManger?.stopUpdatingLocation()
如需在后台定位,则要在应用切入后台前调用开启后台定位任务
this.locationManger?.startContinuousTask()
回到前台可以停止后台任务
this.locationManger?.stopContinuousTask()
至此就可以看到定位相关信息。也可依据参考手册实现单次定位、最后位置等操作。
审核编辑 黄宇
声明:本文内容及配图由入驻作者撰写或者入驻合作网站授权转载。文章观点仅代表作者本人,不代表电子发烧友网立场。文章及其配图仅供工程师学习之用,如有内容侵权或者其他违规问题,请联系本站处理。
举报投诉
-
LuatOS AGPS 辅助定位开发实战教程2025-10-31 1030
-
《仿盒马》app开发技术分享-- 定位获取(25)2025-06-30 239
-
鸿蒙地图功能开发【3. 代码开发】##地图开发##2025-06-29 53
-
HarmonyOS实战:高德地图自定义定位图标展示2025-06-09 551
-
谷歌地图GPS定位2025-05-29 1049
-
如何获取 OpenAI API Key?API 获取与代码调用示例 (详解教程)2025-05-04 12498
-
openai api key获取的三种方案(有一种可以白嫖到 api key)2025-02-24 13799
-
鸿蒙开发实例【使用高德地图鸿蒙SDK】(一)2024-03-22 2021
-
【鸿蒙千帆起】高德地图携手HarmonyOS NEXT,开启智能出行新篇章2024-02-02 464
-
鸿蒙应用开发的JS UI框架如何实现高德地图的访问?2022-04-28 4099
-
【合宙Air551G双频定位开发板试用体验】 获取定位数据2022-03-25 932
-
大彩串口屏4G应用-HTTP定位和获取天气2021-07-22 3119
-
高德地图要圆梦自动驾驶?2017-08-24 1761
-
DIY --GPS +VB版谷歌地图定位个人定位黑匣子2013-06-21 20457
全部0条评论

快来发表一下你的评论吧 !

