

产品测评:【HZHY-AI300G智能盒试用连载体验】驻车辅助系统
描述
继上期电子发烧友用户分享的HZHY-AI300G的测评之后,本期我们又迎来了一位新用户的测评。测评内容如下:
终于怀着激动的心情拿到了这块专门为工业应用设计的RK3588智能盒。除了主机外,还附带了两根天线和一个电源。
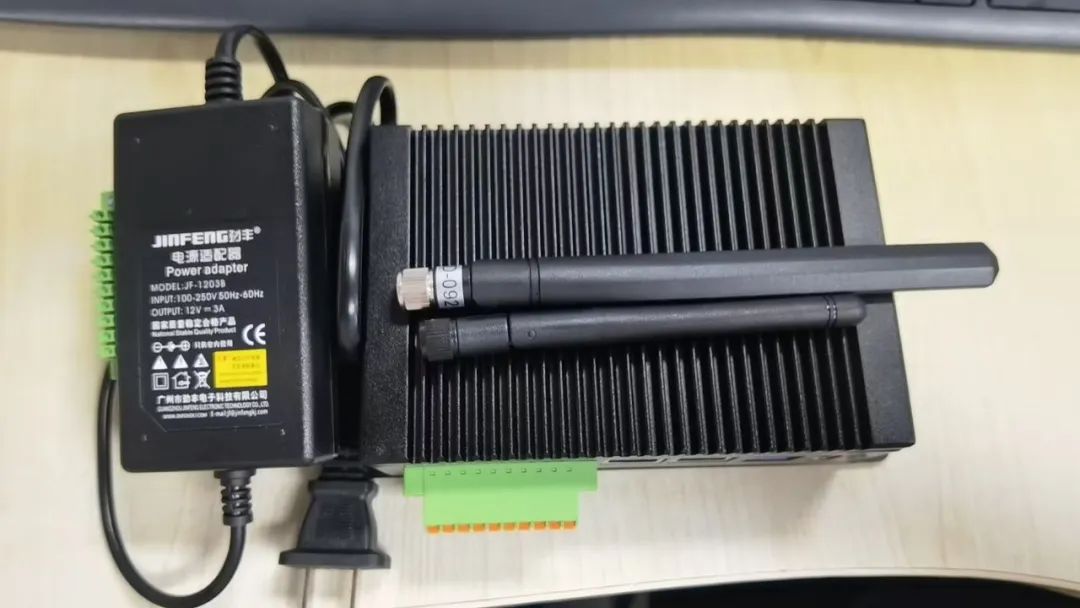
我拿到的是4G+32G的版本。
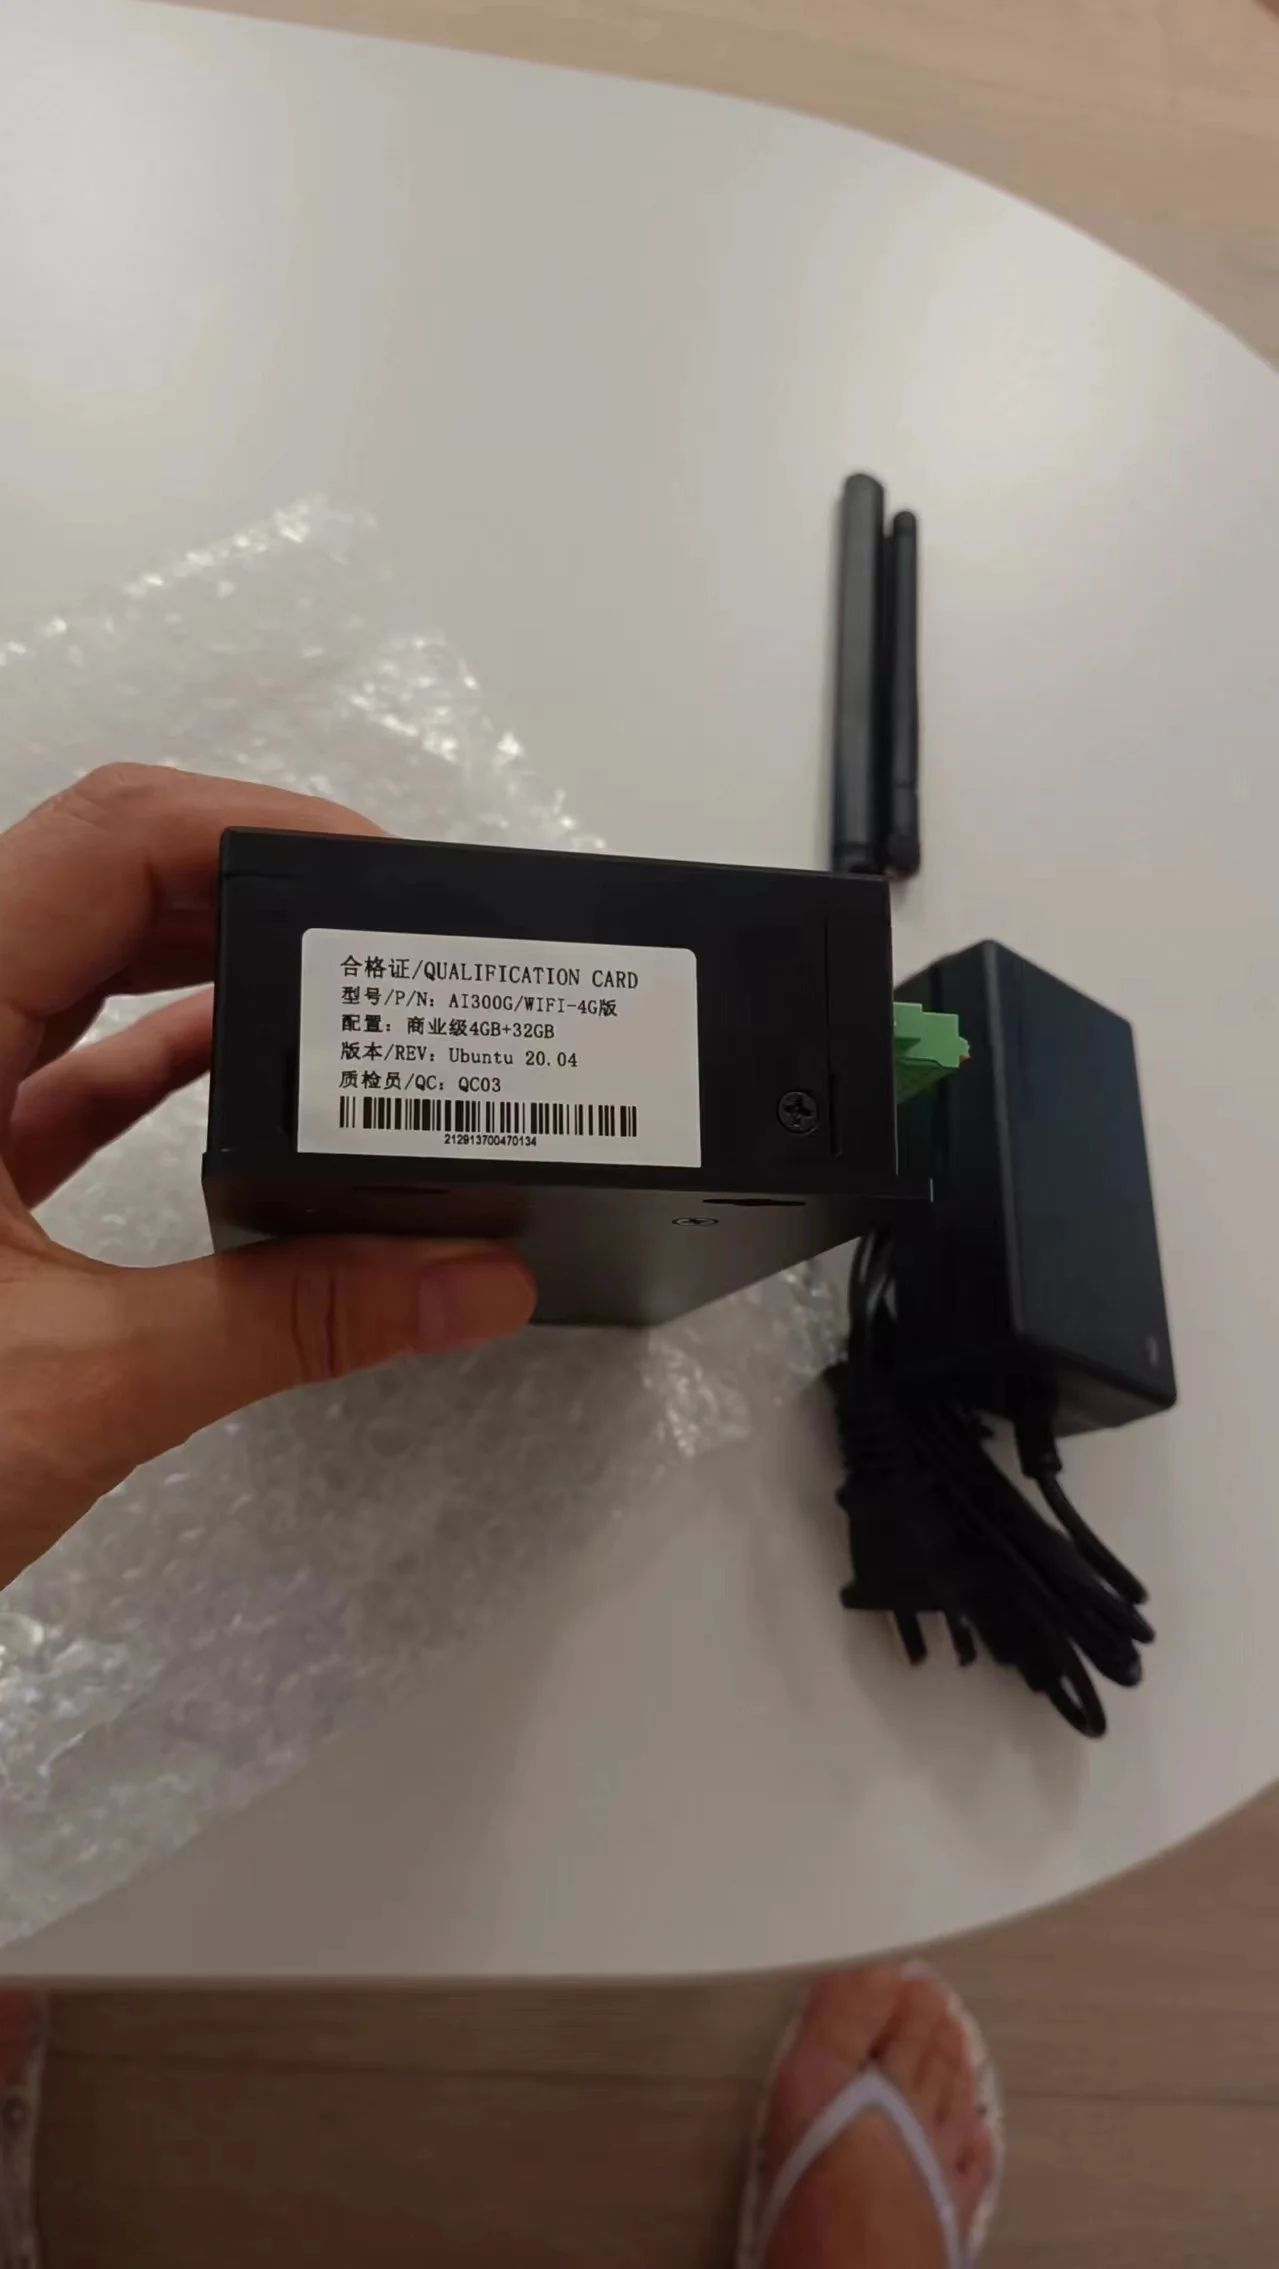
在接下来的一个月中,我会深度评测这块开发板,并用它完成一个完整的项目。项目分为以下几个部分完成:
车窗智能防结冰;
后视镜智能调整;
倒车雷达方案对比;
可视无线倒车雷达;
车窗自动关闭及防夹手功能;
自动驻车及自动取消功能。
车窗智能防结冰
要实现车窗智能防结冰,方法是对车内的温度实时监控,当车内外温差过大时启动风扇让空气流通,降低温差。
那么实现项目的本质就是,如何通过MCU检测到温度变化,并实现与HZHY-AI300G智能盒的双向通讯,不但可以把温度上报给HZHY-AI300G智能盒,同时当HZHY-AI300G智能盒下发通风指令时,MCU也可以正确执行。
我搭了一个简单的电路来进行测试。其中使用BMP280作为温度传感器进行数据测量,而用一个小LED作为执行器,用来代表同风扇。MCU使用的是ESP32-S3开发板,开发环境方便起见使用的是Circuitpython。
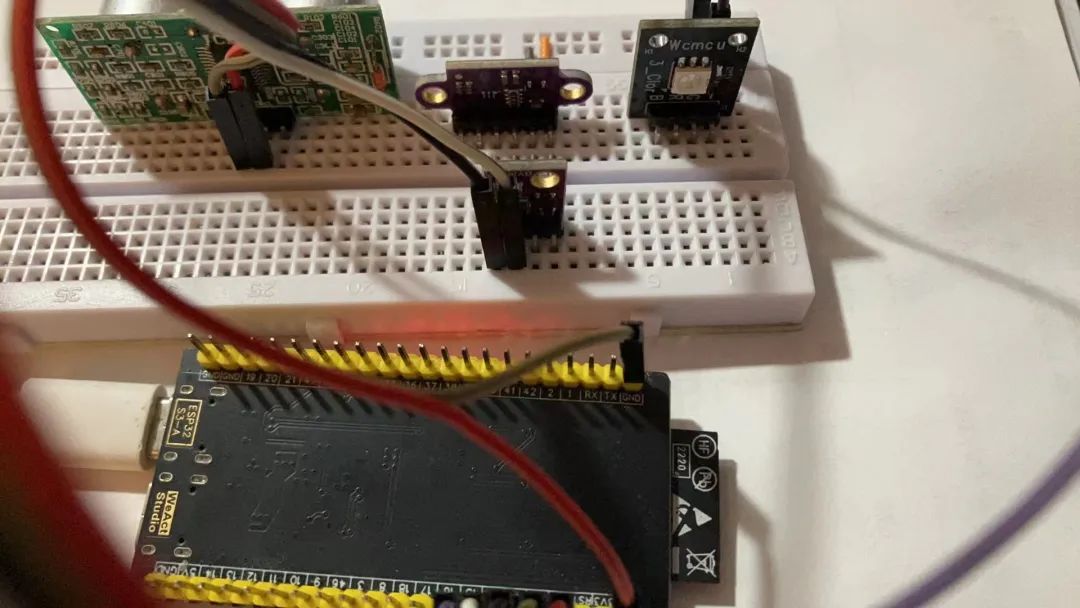
Circuitpython开发环境准备这一步我就直接跳过,因为和我们评测的HZHY-AI300G智能盒无关。
我们通过两个MQTT Topic来进行通信。第一个Topic是test/topic,这个topic用来从mcu上报传感器数据到HZHY-AI300G智能盒;另一个topic是test/cmd,用来让HZHY-AI300G智能盒下发指令给MCU。
MCU的主要功能为,测量温度并每秒钟上报;如果接收到HZHY-AI300G智能盒下发的信息则按指令开关LED。具体代码如下,注意要把MQTT broker的地址改为HZHY-AI300G智能盒的IP:
import time
import wifi
import socketpool
import ssl
import adafruit_minimqtt.adafruit_minimqtt as MQTT
import json
# Define callback methods which are called when events occur
def connect(client, userdata, flags, rc):
# This function will be called when the client is connected
# successfully to the broker.
print("Connected to MQTT Broker!")
print("Flags: {0}\\n RC: {1}".format(flags, rc))
def disconnect(client, userdata, rc):
# This method is called when the client disconnects
# from the broker.
print("Disconnected from MQTT Broker!")
def subscribe(client, userdata, topic, granted_qos):
# This method is called when the client subscribes to a new feed.
print("Subscribed to {0} with QOS level {1}".format(topic, granted_qos))
def unsubscribe(client, userdata, topic, pid):
# This method is called when the client unsubscribes from a feed.
print("Unsubscribed from {0} with PID {1}".format(topic, pid))
def publish(client, userdata, topic, pid):
# This method is called when the client publishes data to a feed.
print("Published to {0} with PID {1}".format(topic, pid))
def message(client, topic, message):
# This method is called when a topic the client is subscribed to
# has a new message.
print(f"New message on topic {topic}: {message}")
pool = socketpool.SocketPool(wifi.radio)
ssl_context = ssl.create_default_context()
# Set up a MiniMQTT Client
# NOTE: We'll need to connect insecurely for ethernet configurations.
mqtt_client = MQTT.MQTT(
broker="192.168.x.x",
port=1883,
username="",
password="",
is_ssl=False,
socket_pool=pool,
ssl_context=ssl_context,
# Connect callback handlers to client
mqtt_client.on_connect = connect
mqtt_client.on_disconnect = disconnect
mqtt_client.on_subscribe = subscribe
mqtt_client.on_unsubscribe = unsubscribe
mqtt_client.on_publish = publish
mqtt_client.on_message = message
def func():
pass
# MQTT Topic
# Use this topic if you'd like to connect to a standard MQTT broker
mqtt_topic = "test/topic"
print("Attempting to connect to %s" % mqtt_client.broker)
try:
mqtt_client.disconnect()
except:
pass
mqtt_client.connect()
# print("Subscribing to %s" % mqtt_topic)
# mqtt_client.subscribe(mqtt_topic)
# print("Publishing to %s" % mqtt_topic)
# mqtt_client.publish(mqtt_topic, "Hello Broker!")
# print("Unsubscribing from %s" % mqtt_topic)
# mqtt_client.unsubscribe(mqtt_topic)
# print("Disconnecting from %s" % mqtt_client.broker)
# mqtt_client.disconnect()
import board
import busio
i2c = busio.I2C(scl=board.GPIO7, sda=board.GPIO6)
assert i2c.try_lock()
print(i2c.scan())
i2c.unlock()
# 温度测试
if 1:
import adafruit_bmp280
bmp280 = adafruit_bmp280.Adafruit_BMP280_I2C(i2c, address=0x76)
bmp280.sea_level_pressure = 1013.25
import digitalio
led = digitalio.DigitalInOut(board.GPIO15)
led.direction = digitalio.Direction.OUTPUT
led.value = True
mqtt_client.subscribe("test/cmd")
def func(client, topic, message):
led.value = int(message)
print(f"New message on topic {topic}: {message}")
mqtt_client.on_message = func
while True:
# Poll the message queue
mqtt_client.loop(timeout=1)
msg = {"Temperature": bmp280.temperature}
# Send a new message
mqtt_client.publish(mqtt_topic, json.dumps(msg))
print(msg)
time.sleep(1)
接线方式:
SCL: 7
SDA: 6
LED: 15
HZHY-AI300G智能盒的代码我们可以基于上一篇MQTT测试代码修改。两边信息传递使用的json文本,这是一种非常有效的指令及数据传递方式。代码如下,如果检测到上报的温度大于31度,则会要求开启LED,否则则熄灭LED。
from paho.mqtt import client as mqtt_client
import json
broker = '127.0.0.1'
port = 1883
topic = "test/topic"
client_id = "receiver"
# username = 'user'
# password = 'password'
def connect_mqtt():
def on_connect(client, userdata, flags, rc, properties):
if rc == 0:
print("Connected to MQTT Broker!")
else:
print("Failed to connect, return code %d\\n", rc)
# Set Connecting Client ID
client = mqtt_client.Client(client_id=client_id, callback_api_version=mqtt_client.CallbackAPIVersion.VERSION2)
# client.username_pw_set(username, password)
client.on_connect = on_connect
client.connect(broker, port)
return client
def subscribe(client: mqtt_client):
def on_message(client, userdata, msg):
print(f"Received `{msg.payload.decode()}` from `{msg.topic}` topic")
my_dict = json.loads(msg.payload.decode())
if 'Temperature' in my_dict:
temp = int(my_dict["Temperature"])
if temp > 31:
client.publish("test/cmd", "0")
print("Too Hot!!!")
else:
client.publish("test/cmd", "1")
client.subscribe(topic)
client.on_message = on_message
def run():
client = connect_mqtt()
subscribe(client)
client.loop_forever()
if __name__ == '__main__':
run()
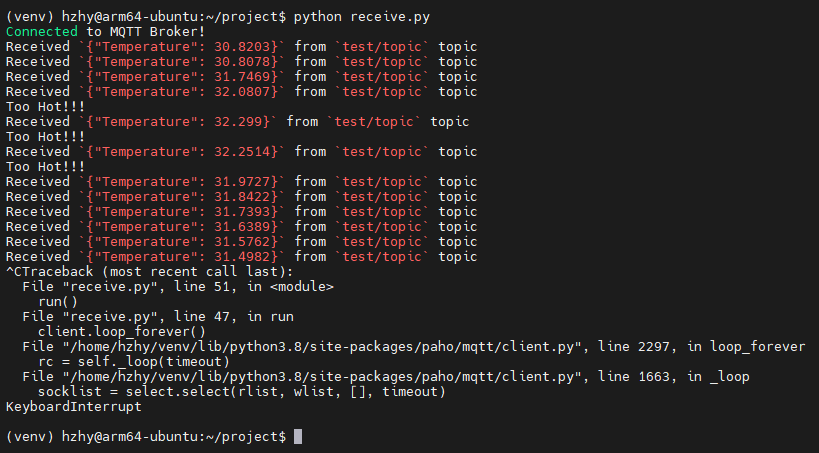
同时运行两边的代码,可以看到智能盒打印出了收到的温度信息,当温度高于31度时,打印对应文本,并点亮MCU上的LED。
后视镜智能调整
接下来我们来看一下执行器的控制。譬如后视镜调整,警报驱动,窗机启停等功能,实际上都是HZHY-AI300G智能盒向MCU下发指令控制执行器的过程。
我们使用一个舵机作为执行器,依然先完成MCU部分的增量代码。代码内容非常简单,把接收到的舵机角度直接传递给舵机即可。
# 舵机测试
if 1:
import pwmio
from adafruit_motor import servo
pwm = pwmio.PWMOut(board.GPIO14, frequency=50)
s1 = servo.Servo(pwm, min_pulse=500, max_pulse=2500)
mqtt_client.subscribe("test/cmd")
def func(client, topic, message):
print(f"New message on topic {topic}: {message}")
s1.angle = int(message)
msg = {"angle": int(message)}
mqtt_client.publish(mqtt_topic, json.dumps(msg))
mqtt_client.on_message = func
while True:
# Poll the message queue
mqtt_client.loop(timeout=1)
舵机记得要使用5V供电,接在14号引脚上。
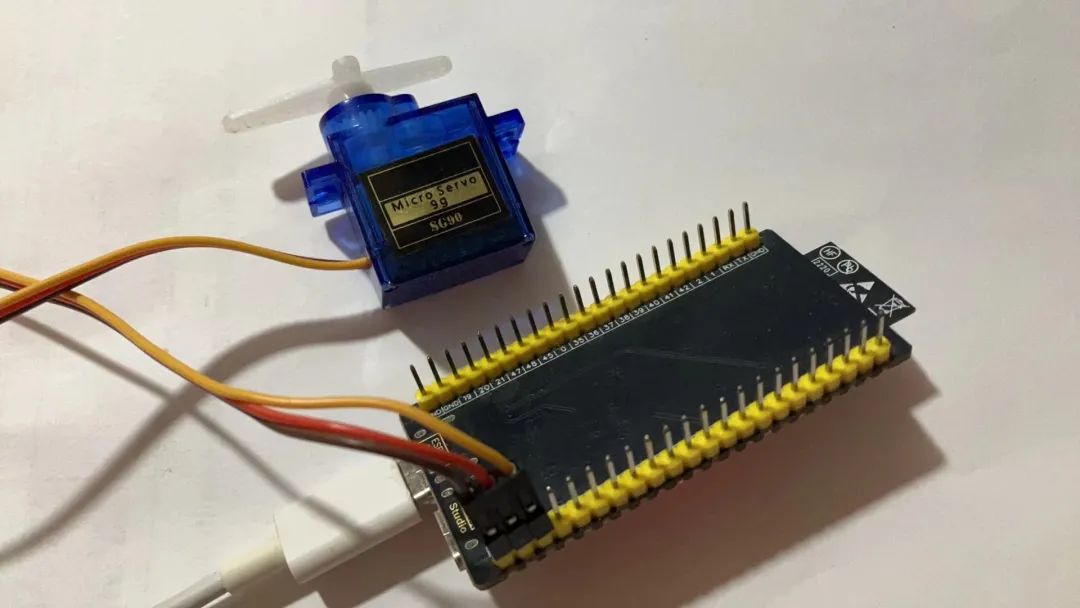
HZHY-AI300G智能盒由于是单纯的下发指令,因此这次代码我们可以基于一开始的发送代码进行修改。出于测试目的,我们让HZHY-AI300G智能盒下发每间隔1S旋转舵机180度的指令:
import time
from paho.mqtt import client as mqtt_client
broker = '127.0.0.1'
port = 1883
topic = "test/topic"
client_id = "sender"
# username = 'user'
# password = 'password'
def connect_mqtt():
def on_connect(client, userdata, flags, rc, properties):
if rc == 0:
print("Connected to MQTT Broker!")
else:
print("Failed to connect, return code %d\\n", rc)
# Set Connecting Client ID
client = mqtt_client.Client(client_id=client_id, callback_api_version=mqtt_client.CallbackAPIVersion.VERSION2)
# client.username_pw_set(username, password)
client.on_connect = on_connect
client.connect(broker, port)
return client
def publish(client):
msg_count = 0
while True:
time.sleep(1)
msg = f"messages: {msg_count}"
result = client.publish(topic, msg)
# result: [0, 1]
status = result[0]
if status == 0:
print(f"Send `{msg}` to topic `{topic}`")
else:
print(f"Failed to send message to topic {topic}")
msg_count += 1
def run():
client = connect_mqtt()
# client.loop_start()
# publish(client)
# client.loop_stop()
# 舵机测试
if 1:
while True:
client.publish("test/cmd", "0")
time.sleep(1)
client.publish("test/cmd", "180")
time.sleep(1)
if __name__ == '__main__':
run()
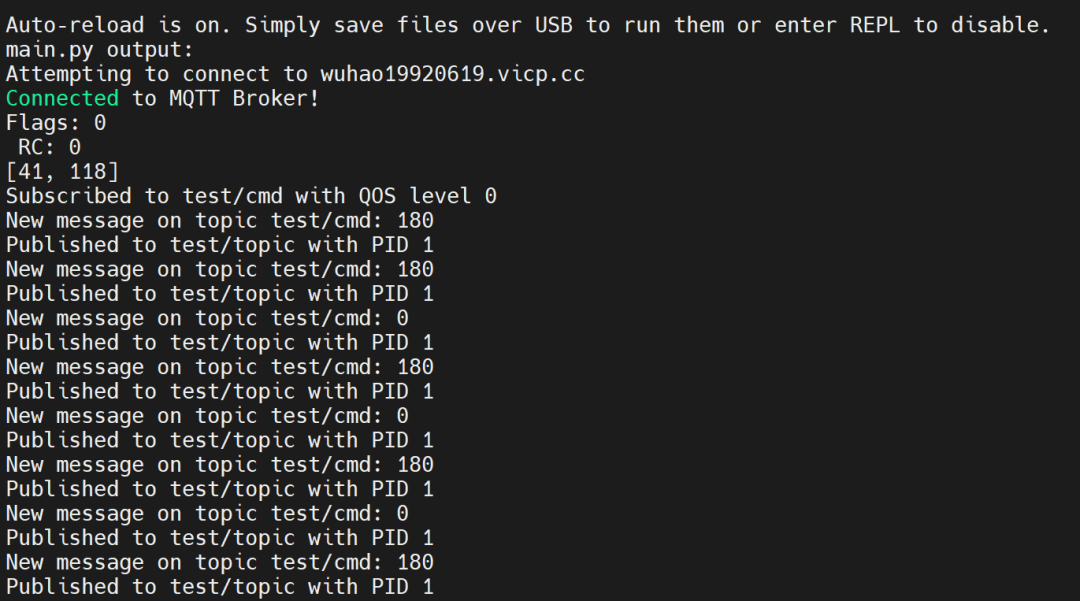
两边代码同时运行,我们就可以观察到舵机按照要求运动起来。观察MCU的控制台输出,可以看到打印出了接收到的数据信息:
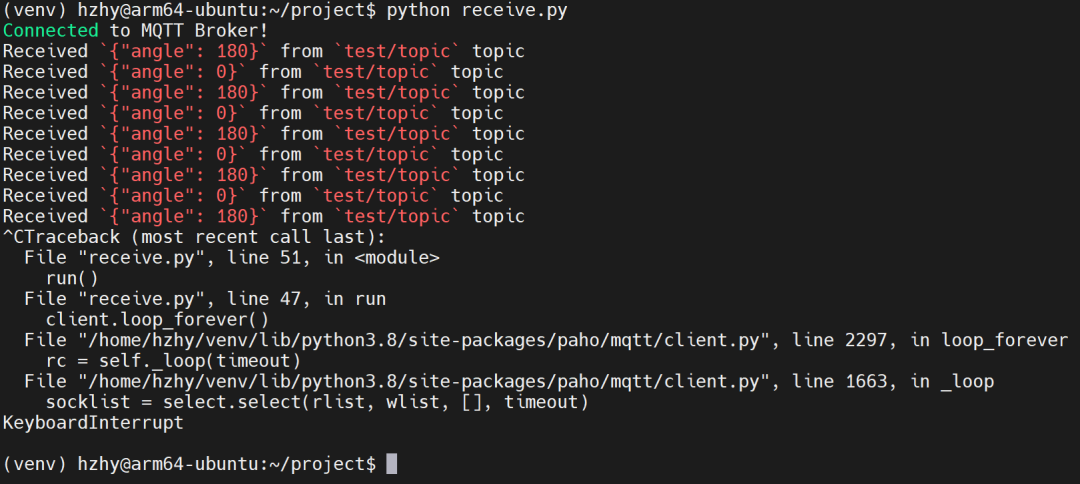
而如果我们同步运行HZHY-AI300G智能盒上的接收代码,也可以看到对应的反馈信息:
倒车雷达方案对比
倒车雷达两种方案的验证,同样也是使用MCU获取两个传感器得到的信号,并把数据一起上报给HZHY-AI300G智能盒。
MCU的代码可以基于之前的代码上做增量修改,因为MQTT通讯部份都是一样的。增加如下部分就可以实现读取两个距离传感器的数据,并上报给HZHY-AI300G智能盒:
# 测距测试
if 0:
import adafruit_vl53l0x
vl53 = adafruit_vl53l0x.VL53L0X(i2c)
import adafruit_us100
# Connect TX to TX, RX to RX
uart = busio.UART(board.GPIO4, board.GPIO5, baudrate=9600)
sonar = adafruit_us100.US100(uart)
while True:
# Poll the message queue
mqtt_client.loop(timeout=1)
msg = {"vl53l0x": vl53.range, "sonar": int(sonar.distance * 10)}
# Send a new message
mqtt_client.publish(mqtt_topic, json.dumps(msg))
print(msg)
time.sleep(1)
HZHY-AI300G智能盒部分的代码可以不用做修改。两边同时运行,我们可以看到HZHY-AI300G智能盒有如下输出:
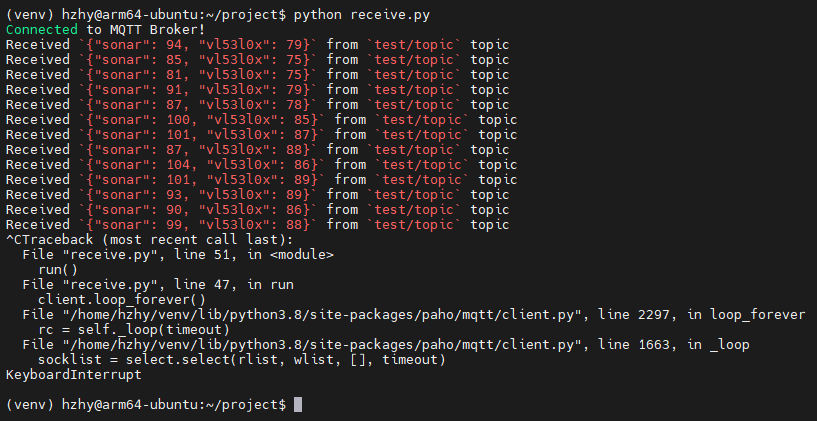
两个传感器都可以测量距离,但是原理不同。一个是基于超声波,使用声纳的方式来测距;另外一个是基于激光,测量方式也和声纳类似,但在激光上被叫做TOF。
两者很难说优略,与其说是替代的关系,不如说是互补的关系。因为激光波长远小于超声波,因此超声波测量范围会比较大,但是精度稍低;而激光精度会高一些,但是范围比较小。因此两种传感器搭配使用的话会获得更好的结果。
我们诚挚感谢这位发烧友对HZHY-AI300G智能盒的热情支持和积极反馈。内容会持续更新,欢迎大家前往发烧友平台查看。若您也愿意分享使用体验,请在平台上发布,我们将赠送一份精美礼品,以表谢意!
-
【新品体育】HZHY-AI300G智能盒免费试用2024-06-05 1236
-
【HZHY-AI300G智能盒试用连载体验】+ 具有 Local AI 功能的工业用照明控制器2024-07-14 3015
-
【HZHY-AI300G智能盒试用连载体验】+ 智能工业互联网网关2024-07-15 8805
-
【HZHY-AI300G智能盒试用连载体验】基建智慧工地物联边缘代理技术研究及应用2024-07-16 1498
-
【HZHY-AI300G智能盒试用连载体验】驻车辅助系统2024-07-19 9442
-
电子驻车系统的功能/特点/参数2020-12-17 1662
-
产品测评:【HZHY-AI300G智能盒试用体验】+ 具有 Local AI 功能的工业用照明控制器2024-07-26 1947
-
HZHY-AI500G智能盒2024-07-27 940
-
案例分享 | 探索HZHY-AI300G工业智能盒:从硬件接口到云端集成的全方位应用2024-08-29 1233
-
产品测评:基于RK3588工业级芯片,构建智能工业互联网网关2024-10-19 4474
-
HZHY-AI100G:适配鸿蒙系统的AI边缘计算智能盒2024-11-23 1490
-
案例分享 ▏合众恒跃HZHY-AI300G智盒搭载RK3588,适配国产银河麒麟操作系统2024-11-30 1744
-
案例分享 ▏【瑞芯微RK3588】HZHY-AI300G智能盒部署DeepSeek-R1模型实战指南2025-02-21 2643
-
HZHY-AI300G-技术规格说明书2025-04-17 325
全部0条评论

快来发表一下你的评论吧 !

