
网络监控工具Nagios和Zabbix的功能和使用场景
描述
转载请注明以下内容:
来源:公众号【网络技术干货圈】
作者:圈圈
ID:wljsghq
在现代网络管理中,监控工具是确保网络运行正常、快速发现和解决问题的关键。本文将详细介绍网络工程师常用的两款监控工具:Nagios、Zabbix。每款工具都有其独特的功能和使用场景,了解并掌握这些工具的使用对于网络工程师而言至关重要。
Nagios
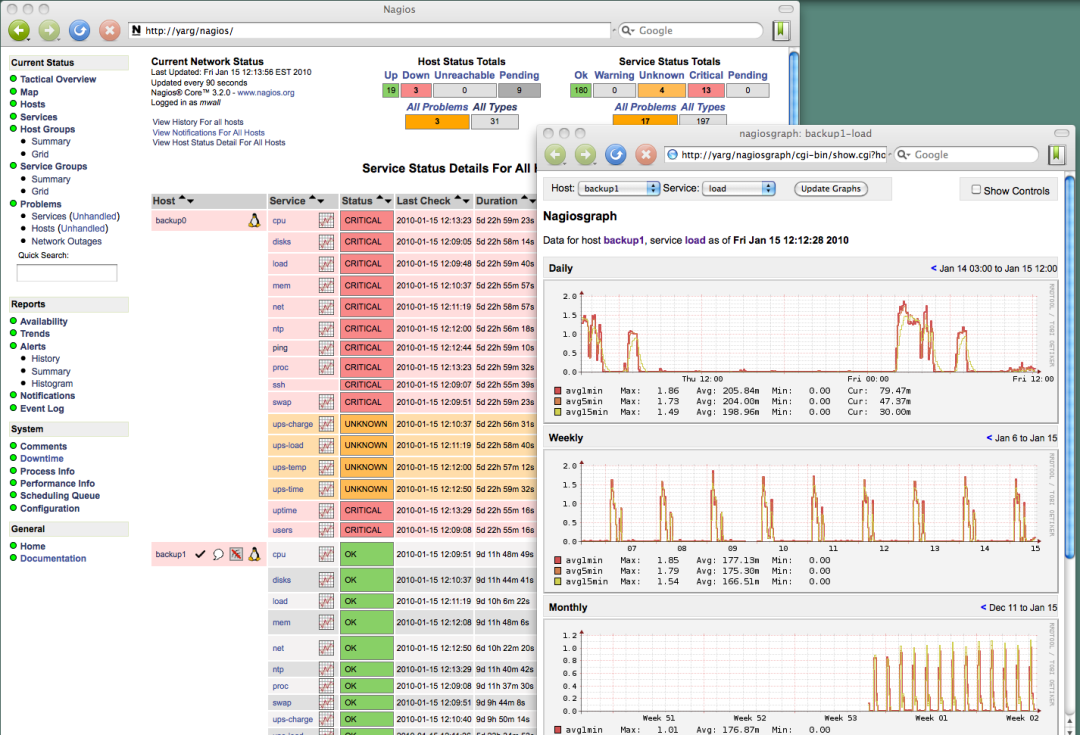
Nagios是一款开源的网络监控工具,最初由Ethan Galstad在1999年发布。它的设计目的是监控系统的运行状态,包括网络设备、服务器、应用程序及服务,并在问题发生时提供告警。Nagios的核心优势在于其灵活的插件系统,可以通过各种插件扩展其功能,适应不同的监控需求。
主要功能
Nagios的主要功能包括:
网络和服务器监控:监控主机的可达性和服务的运行状态。
服务监控:支持HTTP、SMTP、POP3、NNTP、PING等常见协议的监控。
资源使用监控:监控CPU负载、内存使用、磁盘使用等系统资源。
告警机制:通过电子邮件、短信等方式发送告警通知,及时报告问题。
插件支持:通过自定义插件扩展监控功能,支持几乎所有的应用程序、服务和系统。
安装与配置
为了使用Nagios进行网络监控,首先需要在服务器上安装并配置Nagios。
在安装Nagios之前,需要准备一台运行Linux操作系统的服务器。本文以CentOS 7为例,介绍Nagios的安装过程。
更新系统包:
sudo yum update
安装必要的软件包:
sudo yum install httpd php gcc glibc glibc-common gd gd-devel make net-snmp
启动并配置HTTP服务器:
sudo systemctl start httpd
sudo systemctl enable httpd
下载并解压Nagios Core源码包:
cd /tmp
wget https://assets.nagios.com/downloads/nagioscore/releases/nagios-4.4.6.tar.gz
tar -zxvf nagios-4.4.6.tar.gz
cd nagios-4.4.6
配置、编译并安装Nagios:
./configure
make all
sudo make install
sudo make install-init
sudo make install-commandmode
sudo make install-config
sudo make install-webconf
创建Nagios用户和组:
sudo useradd nagios
sudo groupadd nagcmd
sudo usermod -a -G nagcmd nagios
sudo usermod -a -G nagcmd apache
下载并解压Nagios插件:
cd /tmp
wget https://nagios-plugins.org/download/nagios-plugins-2.3.3.tar.gz
tar -zxvf nagios-plugins-2.3.3.tar.gz
cd nagios-plugins-2.3.3
配置、编译并安装Nagios插件:
./configure --with-nagios-user=nagios --with-nagios-group=nagios
make
sudo make install
启动Nagios服务并配置为开机自启动:
sudo systemctl start nagios
sudo systemctl enable nagios
确保Apache服务器也在运行:
sudo systemctl start httpd
sudo systemctl enable httpd

使用方法
Nagios的配置文件主要位于/usr/local/nagios/etc目录下。通过编辑这些配置文件,可以定义需要监控的主机、服务和告警规则。
nagios.cfg:主配置文件,控制Nagios的全局设置。
objects/commands.cfg:命令定义文件,包含Nagios使用的检查命令。
objects/contacts.cfg:联系人定义文件,定义告警接收者。
objects/localhost.cfg:本地主机和服务定义文件,默认示例。
配置示例
编辑nagios.cfg,确保配置正确:
cfg_file=/usr/local/nagios/etc/objects/commands.cfg
cfg_file=/usr/local/nagios/etc/objects/contacts.cfg
cfg_file=/usr/local/nagios/etc/objects/localhost.cfg
添加监控对象
在objects/localhost.cfg文件中,添加需要监控的主机和服务。例如:
define host {
    use             linux-server
    host_name       webserver
    alias           My Web Server
    address         192.168.1.1
}

define service {
    use                     generic-service
    host_name               webserver
    service_description     HTTP
    check_command           check_http
}
检查配置文件并重启Nagios
检查配置文件语法:
/usr/local/nagios/bin/nagios -v /usr/local/nagios/etc/nagios.cfg
如果没有错误,重启Nagios:
sudo systemctl restart nagios
实际案例
案例一:监控Web服务器
配置Nagios监控一台Web服务器的运行状态,并设置告警策略。当Web服务器无法访问时,Nagios会发送邮件告警。
添加Web服务器的主机定义:
define host {
    use             linux-server
    host_name       webserver
    alias           My Web Server
    address         192.168.1.1
}
添加HTTP服务的监控:
define service {
    use                     generic-service
    host_name               webserver
    service_description     HTTP
    check_command           check_http
    notification_interval   10 ; 每10分钟通知一次
    notification_options    w,u,c,r ; 通知类型:warning, unknown, critical, recovery
}
配置联系人以接收告警通知:
编辑contacts.cfg文件,添加联系人信息:
define contact {
    contact_name            admin
    alias                   Nagios Admin
    service_notification_period     24x7
    host_notification_period        24x7
    service_notification_options    w,u,c,r
    host_notification_options       d,u,r
    service_notification_commands   notify-service-by-email
    host_notification_commands      notify-host-by-email
    email                   admin@example.com
}
配置告警命令:
编辑commands.cfg文件,定义告警命令:
define command {
    command_name    notify-service-by-email
    command_line    /usr/bin/printf "%b" "***** Nagios *****

Notification Type: $NOTIFICATIONTYPE$

Service: $SERVICEDESC$
Host: $HOSTALIAS$
Address: $HOSTADDRESS$
State: $SERVICESTATE$

Date/Time: $LONGDATETIME$

Additional Info:

$SERVICEOUTPUT$
" | /bin/mail -s "** $NOTIFICATIONTYPE$ alert - $HOSTALIAS$/$SERVICEDESC$ is $SERVICESTATE$ **" $CONTACTEMAIL$
}

define command {
    command_name    notify-host-by-email
    command_line    /usr/bin/printf "%b" "***** Nagios *****

Notification Type: $NOTIFICATIONTYPE$

Host: $HOSTNAME$
State: $HOSTSTATE$

Address: $HOSTADDRESS$

Date/Time: $LONGDATETIME$

Additional Info:

$HOSTOUTPUT$
" | /bin/mail -s "** $NOTIFICATIONTYPE$ alert - $HOSTNAME$ is $HOSTSTATE$ **" $CONTACTEMAIL$
}
案例二:监控数据库服务器
配置Nagios监控一台MySQL数据库服务器的性能指标,包括CPU使用率、内存使用率、磁盘I/O、数据库查询性能等。当某项指标超出阈值时,发送告警邮件。
添加数据库服务器的主机定义:
define host {
    use             linux-server
    host_name       dbserver
    alias           My Database Server
    address         192.168.1.2
}
添加MySQL服务的监控:
首先,需要安装MySQL监控插件,如check_mysql。假设插件已安装并配置好,可以在Nagios中添加相应的服务定义:
define service {
    use                     generic-service
    host_name               dbserver
    service_description     MySQL
    check_command           check_mysql
    notification_interval   10
    notification_options    w,u,c,r
}
深入配置与高级功能
除了基本的安装和配置,Nagios还提供了一些高级功能,可以更有效地帮助管理员监控和管理网络系统。
使用NRPE插件进行远程监控
NRPE(Nagios Remote Plugin Executor)插件允许Nagios服务器执行远程主机上的插件,从而监控远程主机的状态。下面是配置NRPE插件的步骤:
在远程主机上安装NRPE和Nagios插件:
sudo yum install nrpe nagios-plugins-all
配置NRPE:
编辑/etc/nagios/nrpe.cfg文件,允许Nagios服务器访问:
allowed_hosts=127.0.0.1,192.168.1.10
在NRPE配置文件中定义命令:
command[check_users]=/usr/lib64/nagios/plugins/check_users -w 5 -c 10
command[check_load]=/usr/lib64/nagios/plugins/check_load -w 15,10,5 -c 30,25,20
启动并启用NRPE服务:
sudo systemctl start nrpe
sudo systemctl enable nrpe
在Nagios服务器上配置远程主机和服务检查:
在Nagios服务器的配置文件中添加远程主机和服务定义:
define host {
    use             linux-server
    host_name       remote_host
    alias           Remote Host
    address         192.168.1.20
}

define service {
    use                     generic-service
    host_name               remote_host
    service_description     Users
    check_command           check_nrpe!check_users
}

define service {
    use                     generic-service
    host_name               remote_host
    service_description     Load
    check_command           check_nrpe!check_load
}
使用Nagios XI进行高级管理
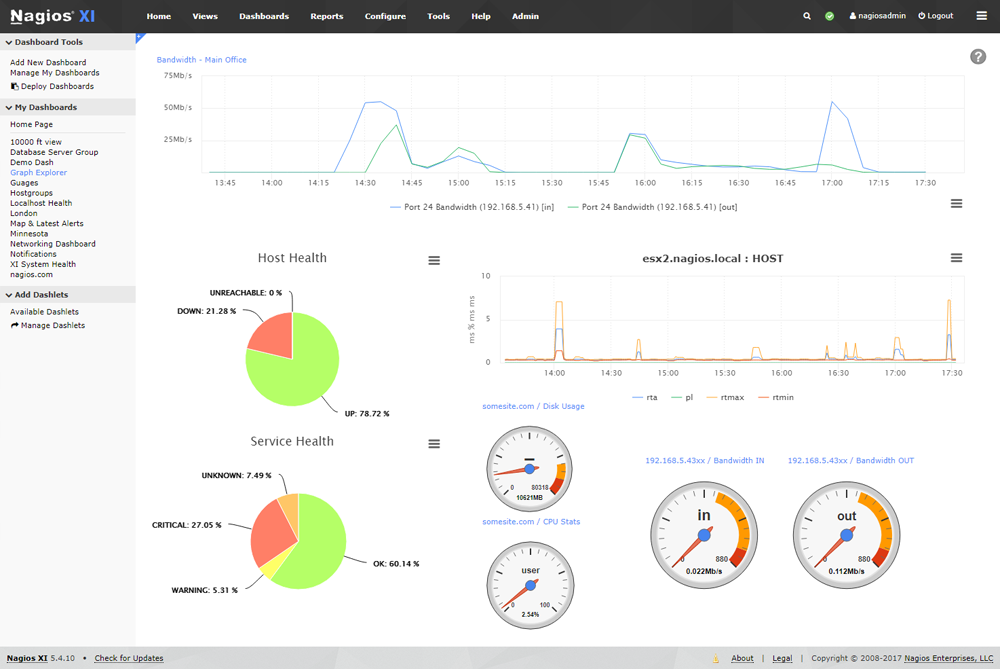
Nagios XI是Nagios的商业版本,提供了更加用户友好的界面和一些高级功能,如自动发现、配置向导、报告和预测分析等。虽然Nagios XI是付费软件,但对于大规模部署和需要更复杂管理功能的企业来说,它是一个非常值得考虑的选项。

安装Nagios XI:
Nagios XI的安装比Nagios Core稍微复杂,需要更多的系统资源。可以参考官方文档进行安装:https://www.nagios.com/products/nagios-xi/
使用自动发现功能:
Nagios XI提供自动发现功能,可以快速发现网络中的设备并进行初始配置,大大减少手工配置的工作量。
配置向导:
配置向导帮助用户快速配置常见的监控场景,如Web服务器、数据库服务器、网络设备等,极大地简化了配置过程。
使用Nagios Fusion进行集中管理
Nagios Fusion是另一款Nagios的商业产品,允许用户集中管理多个Nagios服务器。对于大型企业或多站点的网络监控,Nagios Fusion提供了统一的视图和集中管理功能。
安装Nagios Fusion:
同样,Nagios Fusion的安装可以参考官方文档:https://www.nagios.com/products/nagios-fusion/
添加多个Nagios服务器:
在Nagios Fusion的管理界面中,可以添加多个Nagios服务器,集中查看和管理它们的状态。
统一视图:
Nagios Fusion提供了统一的视图,显示所有连接的Nagios服务器的状态,帮助管理员快速了解整个网络的健康状况。
以下是一个复杂的实际案例,展示了如何使用Nagios监控一个包含多种设备和服务的网络环境。
某公司拥有一个大型网络环境,包括多个Web服务器、数据库服务器、文件服务器和网络设备(如路由器、交换机)。公司希望使用Nagios监控所有这些设备,并在出现问题时及时通知相关管理员。
定义主机组:
为了更好地组织和管理主机,可以将相同类型的主机分组。例如,将所有Web服务器分为一个组:
define hostgroup {
    hostgroup_name  web-servers
    alias           Web Servers
    members         webserver1,webserver2,webserver3
}

define hostgroup {
    hostgroup_name  db-servers
    alias           Database Servers
    members         dbserver1,dbserver2
}

define hostgroup {
    hostgroup_name  file-servers
    alias           File Servers
    members         fileserver1,fileserver2
}
定义服务模板:
为了减少重复配置,可以定义一些服务模板。例如,定义一个HTTP服务模板:
define service {
    name                            http-service
    use                             generic-service
    check_command                   check_http
    notification_interval           30
    notification_options            w,u,c,r
    register                        0
}
应用模板到主机组:
将HTTP服务模板应用到所有Web服务器:
define service {
    use                             http-service
    hostgroup_name                  web-servers
    service_description             HTTP
}
添加特定服务监控:
为数据库服务器添加MySQL监控:
define service {
    use                             generic-service
    hostgroup_name                  db-servers
    service_description             MySQL
    check_command                   check_mysql
    notification_interval           10
    notification_options            w,u,c,r
}
配置告警策略:
为每个主机组配置不同的告警策略。例如,为Web服务器配置邮件告警,为数据库服务器配置短信告警:
define contact {
    contact_name                    webadmin
    alias                           Web Admin
    service_notification_period     24x7
    host_notification_period        24x7
    service_notification_options    w,u,c,r
    host_notification_options       d,u,r
    service_notification_commands   notify-service-by-email
    host_notification_commands      notify-host-by-email
    email                           webadmin@example.com
}

define contact {
    contact_name                    dbadmin
    alias                           Database Admin
    service_notification_period     24x7
    host_notification_period        24x7
    service_notification_options    w,u,c,r
    host_notification_options       d,u,r
    service_notification_commands   notify-service-by-sms
    host_notification_commands      notify-host-by-sms
    pager                           +1234567890
}
Zabbix
Zabbix是一款企业级开源监控解决方案,由Alexei Vladishev在1998年创建,并于2001年发布第一个版本。Zabbix的设计目标是提供全面的监控功能,涵盖从硬件到软件、从网络设备到虚拟化环境的监控需求。Zabbix不仅支持实时监控,还能生成详细的报告和图表,帮助管理员进行性能分析和容量规划。

Zabbix的主要功能包括:
自动发现:能够自动发现网络中的设备和服务,并生成相应的监控项。
多种监控方式:支持SNMP、JMX、IPMI、WMI、agent、agentless等多种监控方式。
高级告警:支持多种告警渠道,如电子邮件、短信、即时通讯工具等,具备灵活的告警策略和依赖关系管理。
可视化:提供丰富的图表、仪表盘、报告等可视化工具,帮助管理员直观地了解系统状态。
数据存储和趋势分析:支持大规模数据存储和长时间趋势分析,方便进行历史数据查询和分析。
Zabbix安装与配置
为了使用Zabbix进行网络监控,首先需要在服务器上安装并配置Zabbix。
在安装Zabbix之前,需要准备一台运行Linux操作系统的服务器。本文以CentOS 7为例,介绍Zabbix的安装过程。
更新系统包:
sudo yum update
安装MariaDB数据库:
sudo yum install mariadb-server mariadb
sudo systemctl start mariadb
sudo systemctl enable mariadb
安装Apache和PHP:
sudo yum install httpd php php-mysql php-gd php-xml php-bcmath php-mbstring
sudo systemctl start httpd
sudo systemctl enable httpd
添加Zabbix仓库:
sudo rpm -Uvh https://repo.zabbix.com/zabbix/5.4/rhel/7/x86_64/zabbix-release-5.4-1.el7.noarch.rpm
sudo yum clean all
安装Zabbix Server、Web前端和Agent:
sudo yum install zabbix-server-mysql zabbix-web-mysql zabbix-agent
创建Zabbix数据库和用户:
mysql -uroot -p
CREATE DATABASE zabbix CHARACTER SET utf8 COLLATE utf8_bin;
CREATE USER 'zabbix'@'localhost' IDENTIFIED BY 'password';
GRANT ALL PRIVILEGES ON zabbix.* TO 'zabbix'@'localhost';
FLUSH PRIVILEGES;
exit;
导入初始架构和数据:
zcat /usr/share/doc/zabbix-server-mysql*/create.sql.gz | mysql -uzabbix -p zabbix
编辑/etc/zabbix/zabbix_server.conf文件,配置数据库连接:
DBHost=localhost
DBName=zabbix
DBUser=zabbix
DBPassword=password
启动并启用Zabbix Server和Agent:
sudo systemctl start zabbix-server
sudo systemctl enable zabbix-server
sudo systemctl start zabbix-agent
sudo systemctl enable zabbix-agent
编辑Apache配置文件/etc/httpd/conf.d/zabbix.conf:
php_value date.timezone Europe/Riga
将Europe/Riga替换为实际的时区,例如Asia/Shanghai。
启动并启用Apache:
sudo systemctl restart httpd
通过Web浏览器访问Zabbix前端安装向导,完成安装配置:
访问http://your-server-ip/zabbix,根据提示完成安装向导的配置。
使用方法
完成安装和基本配置后,可以开始使用Zabbix进行监控。
添加主机和监控项
添加主机:
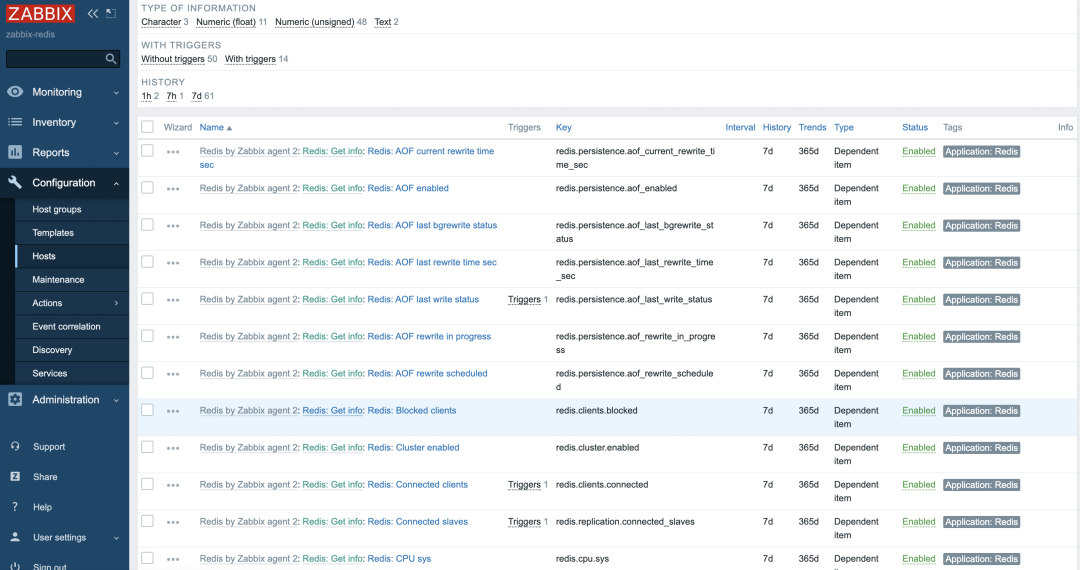
在Zabbix前端界面,导航到“Configuration” -> “Hosts”,点击“Create host”按钮,添加需要监控的主机。配置主机名、群组、接口等信息。
创建监控项:
在主机配置页面,导航到“Items”标签,点击“Create item”按钮,添加需要监控的项。例如,监控CPU使用率:
Name: CPU Load
Type: Zabbix agent
Key: system.cpu.load[percpu,avg1]
Type of information: Numeric (float)
Units: %

创建触发器:
在主机配置页面,导航到“Triggers”标签,点击“Create trigger”按钮,添加告警触发条件。例如,CPU使用率超过80%时触发告警:
Name: CPU load is too high
Expression: {hostname:system.cpu.load[percpu,avg1].last()} > 0.8
Severity: High
配置告警和通知
添加媒体类型:
导航到“Administration” -> “Media types”,添加新的媒体类型(如电子邮件、短信等)。
配置告警动作:
导航到“Configuration” -> “Actions”,点击“Create action”按钮,配置告警动作。例如,配置当CPU使用率超过阈值时发送电子邮件通知:
Name: CPU load high alert
Event source: Trigger
Condition: Trigger severity = "High"
Operation: Send message to user group "Zabbix administrators"
使用模板
Zabbix提供了许多预定义的模板,帮助快速配置常见的监控场景。可以在Zabbix前端界面导航到“Configuration” -> “Templates”,导入或创建模板,并应用到需要监控的主机上。
实际案例
案例一:监控Web服务器
配置Zabbix监控一台Web服务器的运行状态,包括HTTP响应时间、CPU使用率、内存使用率等。当某项指标超出阈值时,发送告警通知。
添加Web服务器主机:
在Zabbix前端添加Web服务器主机,配置基本信息。
创建HTTP监控项:
在主机配置页面的“Items”标签,创建HTTP监控项:
Name: HTTP response time
Type: HTTP agent
Key: web.page.get[example.com,,80]
Type of information: Numeric (float)
Units: s
创建触发器:
在主机配置页面的“Triggers”标签,创建触发器:
Name: HTTP response time is too high
Expression: {hostname:web.page.get[example.com,,80].last()} > 2
Severity: High
配置告警通知:
导航到“Configuration” -> “Actions”,创建告警动作,发送电子邮件通知管理员。
案例二:监控数据库服务器
配置Zabbix监控一台MySQL数据库服务器的性能指标,包括CPU使用率、内存使用率、磁盘I/O、数据库查询性能等。当某项指标超出阈值时,发送告警通知。
添加数据库服务器主机:
在Zabbix前端添加数据库服务器主机,配置基本信息。
导入MySQL模板:
导航到“Configuration” -> “Templates”,导入MySQL监控模板。
应用模板到数据库服务器:
在数据库服务器主机配置页面,导航到“Templates”标签,选择MySQL模板并应用。
创建自定义监控项和触发器:
根据具体需求,创建额外的监控项和触发器。例如,监控MySQL查询时间:
Name: MySQL query time
Type: Zabbix agent
Key: mysql.query.time
Type of information: Numeric (float)
Units: s
创建触发器:
Name: MySQL query time is too high
Expression: {hostname:mysql.query.time.last()} > 1
Severity: High
深入配置与高级功能
除了基本的安装和配置,Zabbix还提供了一些高级功能,可以更有效地帮助管理员监控和管理网络系统。
使用Zabbix代理和代理守护进程
Zabbix代理(Agent)和代理守护进程(Proxy)是Zabbix的重要组件,允许在被监控主机上收集数据,并将其发送到Zabbix服务器。
Zabbix代理:
Zabbix代理安装在被监控主机上,直接从操作系统和应用程序收集数据,并将其发送到Zabbix服务器。以下是安装和配置Zabbix代理的步骤:
在被监控主机上安装Zabbix代理:
sudo yum install zabbix-agent
配置Zabbix代理:
编辑/etc/zabbix/zabbix_agentd.conf文件,配置服务器地址和主机名:
Server=your_zabbix_server_ip
Hostname=your_monitored_host_name
启动并启用Zabbix代理:
sudo systemctl start zabbix-agent
sudo systemctl enable zabbix-agent
Zabbix代理守护进程:
Zabbix代理守护进程用于代理模式下,可以收集分布式网络中的数据并汇总到一个或多个Zabbix服务器。这对于大规模分布式网络环境尤为有用。
在代理服务器上安装Zabbix代理守护进程:
sudo yum install zabbix-proxy-mysql
配置Zabbix代理守护进程:
编辑/etc/zabbix/zabbix_proxy.conf文件,配置数据库和Zabbix服务器连接:
Server=your_zabbix_server_ip
Hostname=your_proxy_name
DBHost=localhost
DBName=zabbix_proxy
DBUser=zabbix
DBPassword=password
启动并启用Zabbix代理守护进程:
sudo systemctl start zabbix-proxy
sudo systemctl enable zabbix-proxy
使用Zabbix API进行自动化
Zabbix提供了功能强大的API接口,允许用户通过编程方式与Zabbix系统进行交互,进行自动化操作。例如,批量添加主机、监控项、触发器等。
Zabbix API认证:
首先,需要获取Zabbix API的认证令牌:
import requests
import json

url = "http://your_zabbix_server_ip/api_jsonrpc.php"
headers = {"Content-Type": "application/json"}

data = {
    "jsonrpc": "2.0",
    "method": "user.login",
    "params": {
        "user": "Admin",
        "password": "zabbix"
    },
    "id": 1
}

response = requests.post(url, headers=headers, data=json.dumps(data))
auth_token = response.json()["result"]
通过API添加主机:
使用获取的认证令牌,通过API添加主机:
data = {
    "jsonrpc": "2.0",
    "method": "host.create",
    "params": {
        "host": "New_Host",
        "interfaces": [
            {
                "type": 1,
                "main": 1,
                "useip": 1,
                "ip": "192.168.1.10",
                "dns": "",
                "port": "10050"
            }
        ],
        "groups": [
            {
                "groupid": "2"
            }
        ]
    },
    "auth": auth_token,
    "id": 2
}

response = requests.post(url, headers=headers, data=json.dumps(data))
print(response.json())
通过这些API调用,可以实现Zabbix系统的自动化配置和管理,极大地提高工作效率。
使用Zabbix的可视化和报表功能
Zabbix提供了丰富的可视化和报表功能,帮助管理员更好地分析和展示监控数据。
创建图表:
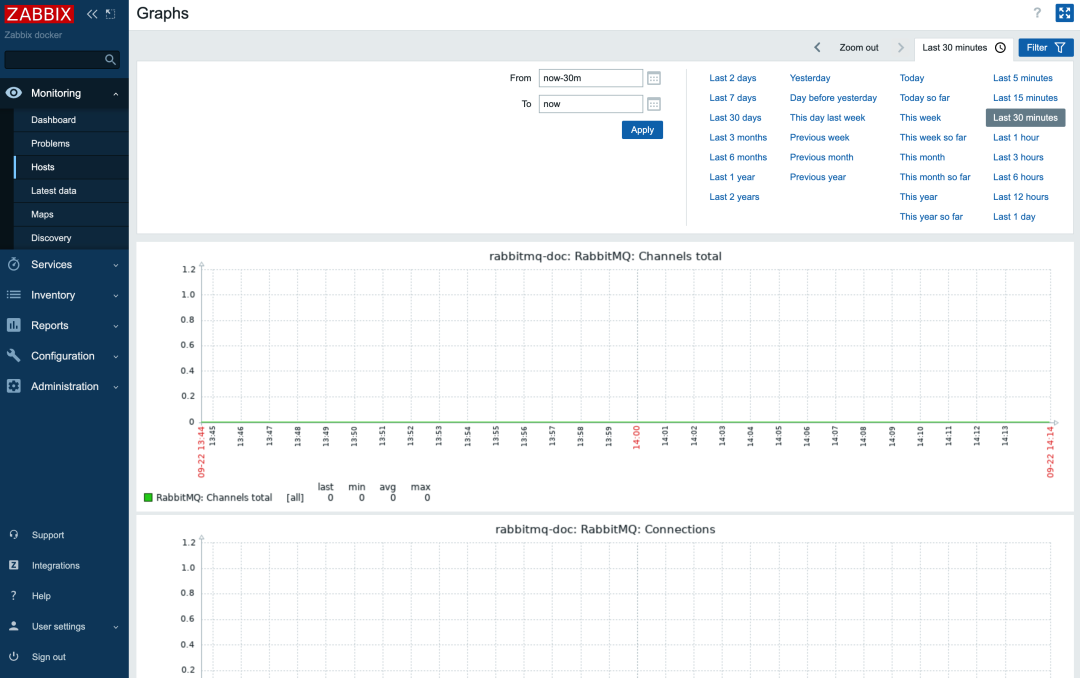
在Zabbix前端界面,导航到“Monitoring” -> “Graphs”,选择需要展示的主机和监控项,创建图表。例如,展示CPU使用率、内存使用率等。
创建仪表盘:
导航到“Monitoring” -> “Dashboard”,创建自定义仪表盘,添加多个小组件(如图表、地图、报警视图等),实时监控系统状态。
生成报表:
导航到“Reports” -> “Availability Report”或“Triggers Top 100”,生成系统可用性报告或最频繁触发的告警报告,进行深入分析。
实际案例:监控复杂网络环境
以下是一个复杂的实际案例,展示了如何使用Zabbix监控一个包含多种设备和服务的网络环境。
案例背景
某公司拥有一个大型网络环境,包括多个Web服务器、数据库服务器、文件服务器和网络设备(如路由器、交换机)。公司希望使用Zabbix监控所有这些设备,并在出现问题时及时通知相关管理员。
案例配置
定义主机组:
为了更好地组织和管理主机,可以将相同类型的主机分组。例如,将所有Web服务器分为一个组:
define hostgroup {
    hostgroup_name  web-servers
    alias           Web Servers
    members         webserver1,webserver2,webserver3
}

define hostgroup {
    hostgroup_name  db-servers
    alias           Database Servers
    members         dbserver1,dbserver2
}

define hostgroup {
    hostgroup_name  file-servers
    alias           File Servers
    members         fileserver1,fileserver2
}
定义监控模板:
为了减少重复配置,可以定义一些监控模板。例如,定义一个HTTP服务模板:
define service {
    name                            http-service
    use                             generic-service
    check_command                   check_http
    notification_interval           30
    notification_options            w,u,c,r
    register                        0
}
应用模板到主机组:
将HTTP服务模板应用到所有Web服务器:
define service {
    use                             http-service
    hostgroup_name                  web-servers
    service_description             HTTP
}
添加特定服务监控:
为数据库服务器添加MySQL监控:
define service {
    use                             generic-service
    hostgroup_name                  db-servers
    service_description             MySQL
    check_command                   check_mysql
    notification_interval           10
    notification_options            w,u,c,r
}
配置告警策略:
为每个主机组配置不同的告警策略。例如,为Web服务器配置邮件告警,为数据库服务器配置短信告警:
define contact {
    contact_name                    webadmin
    alias                           Web Admin
    service_notification_period     24x7
    host_notification_period        24x7
    service_notification_options    w,u,c,r
    host_notification_options       d,u,r
    service_notification_commands   notify-service-by-email
    host_notification_commands      notify-host-by-email
    email                           webadmin@example.com
}

define contact {
    contact_name                    dbadmin
    alias                           Database Admin
    service_notification_period     24x7
    host_notification_period        24x7
    service_notification_options    w,u,c,r
    host_notification_options       d,u,r
    service_notification_commands   notify-service-by-sms
    host_notification_commands      notify-host-by-sms
    pager                           +1234567890
}
-
Zabbix与Prometheus运维监控系统的对比2025-09-18 449
-
NAGIOS XI的功能介绍2025-01-22 624
-
zabbix监控系统的安装与配置2024-11-08 1556
-
常见的7款网络监控工具分享2023-06-16 2757
-
如何用zabbix的实现主机监控2023-05-05 2203
-
CW-Zabbix基于Zabbix的监控工具2022-06-16 984
-
关于5种常用运维监控工具的详细介绍与特点分析2021-04-08 4936
-
请问zabbix怎么使用模版监控nginx服务?2020-11-04 1939
-
概述nagios监控Windows服务器过程2019-07-10 1318
-
linux监控平台搭建2019-07-09 1855
全部0条评论

快来发表一下你的评论吧 !

