

Multi-Scaler IP的Linux示例以及Debug(上)
描述
本篇文章介绍了在 ZCU106 上创建 Video Multi-Scaler IP 的 AMD Vivado™ Design Tool 和 Petalinux 工程;在 ZCU106 上 Run 生成的 Image,并测试生成的图像文件,以及常见问题的 Debug。
AMD Vivado™ Design Tool 工程:
打开 Vivado 2022.2,按照 PG325 -> ch.6 Example Design 的步骤,打开 Multi-scaler 的 Example,步骤如下:
To open the example project, perform the following:
Select the Video Multi-Scaler IP from the Vivado IP catalog.
Double-click the selected IP or right-click the IP and select Customize IP from the menu.
Configure the build-time parameters in the Customize IP window and click OK. The Vivado IDE generates an example design matching the build-time configuration.
In the Generate Output Products window, select Generate or Skip. If Generate is selected, the IP output products are generated after a brief moment.
Right-click Video Multi-Scaler in the Sources panel, and select Open IP Example Design from the menu.
In the Open IP Example Design window, select example project directory, and click OK.
Example 工程打开之后,在 BD 工程里加入 AXI GPIO IP 和 Slice,加入 AXI GPIO 和 Slice 是为了替换 PS GPIO EMIO。AXI GPIO 和 Slice IP 配置如下:
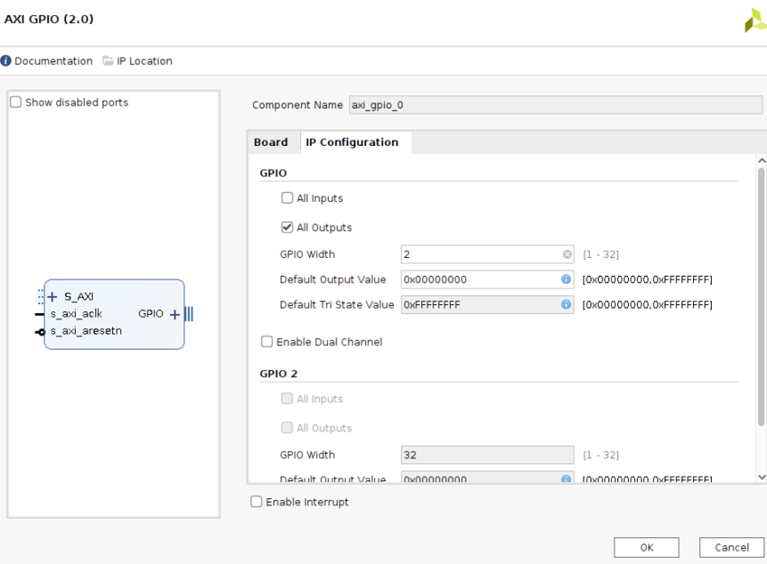
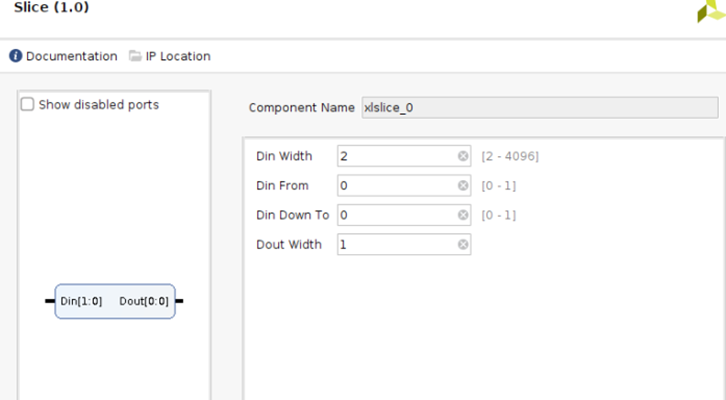
删除原先 GPIO EMIO 到 Multi-Scaler IP 的 Reset 连线。 把 AXI GPIO 和 Slice 直接连接到 Multi-Scaler IP 的Reset 管脚,如下:

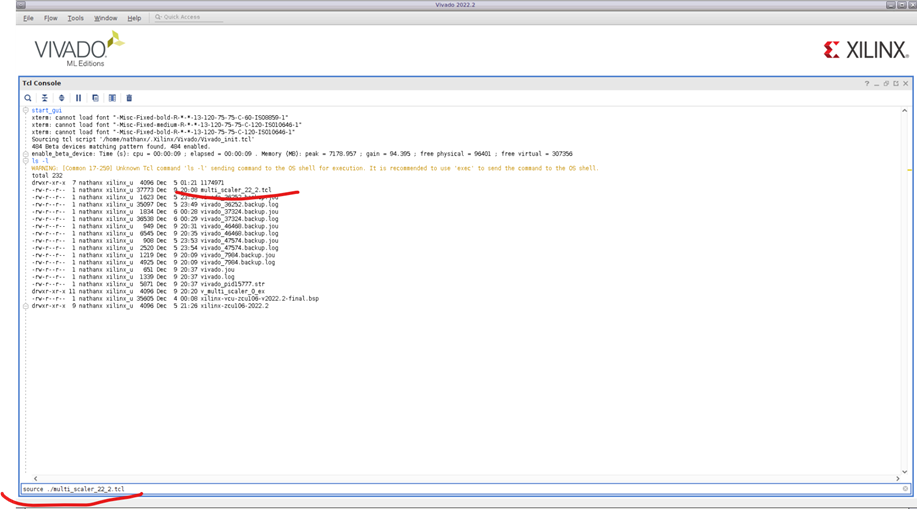
或者打开 Vivado 2022.2 GUI 界面,确保重建 BD 工程的 Tcl 文件”multi_scaler_22_2.tcl”在当前路径下,然后运行”source ./multi_scaler_22_2.tcl”,重建 BD 工程,如下所示:
(”multi_scaler_22_2.tcl”点击阅读原文查看附件)
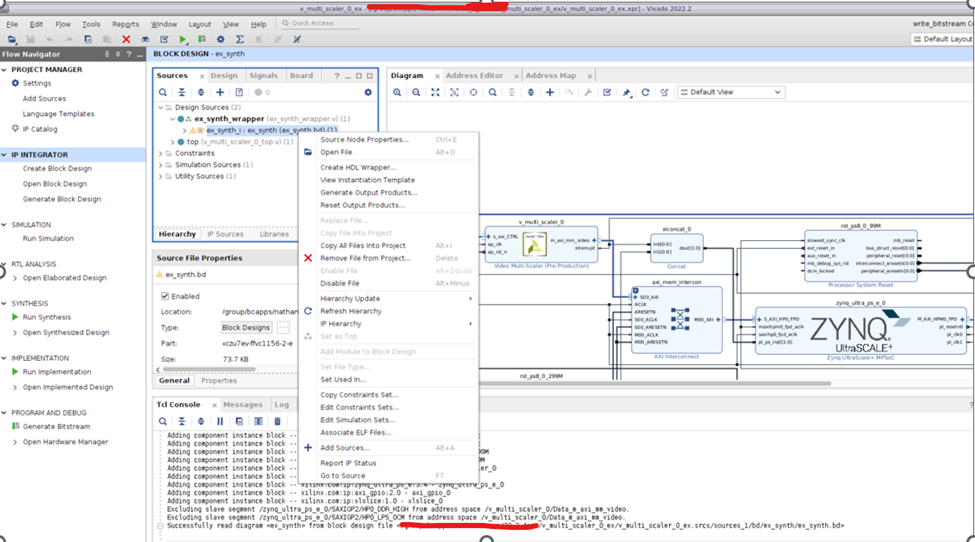
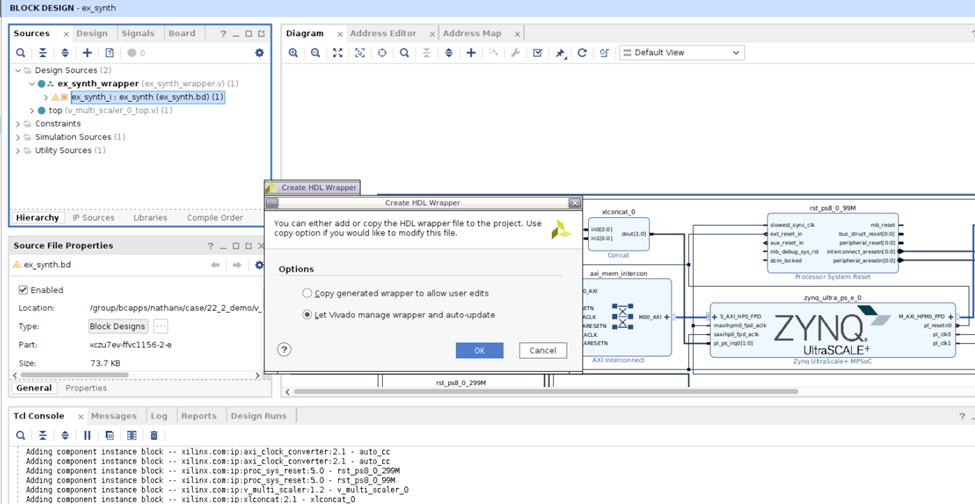
当 BD 工程建好之后,选中 BD 文件,按右键,选择”Create HDL Wrapper”。
在“Create HDL Wrapper”对话框中,选择”Let Vivado manage wrapper and auto-update”,如下:
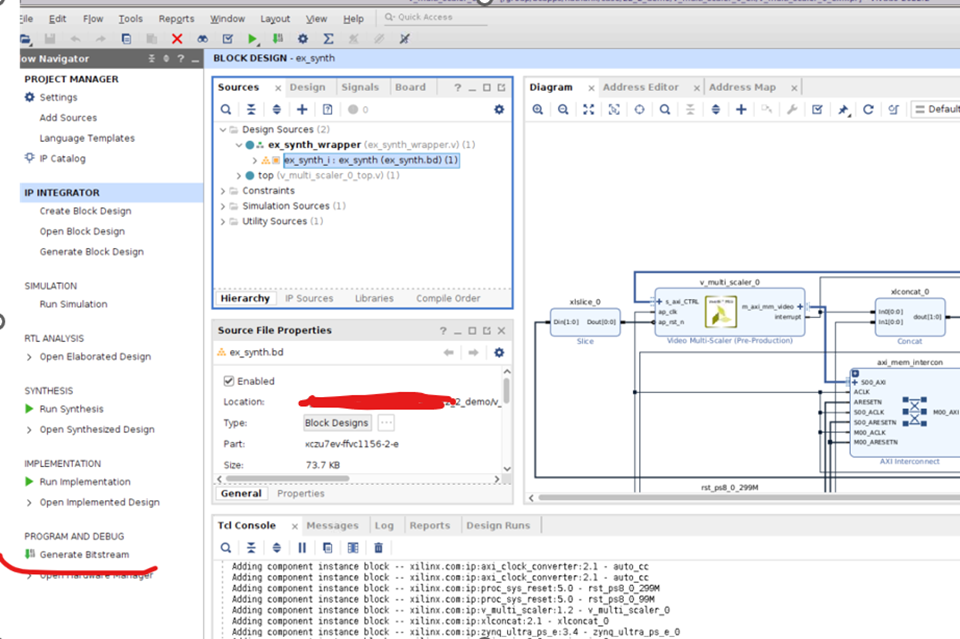
然后点击“Generate Bitstream”。
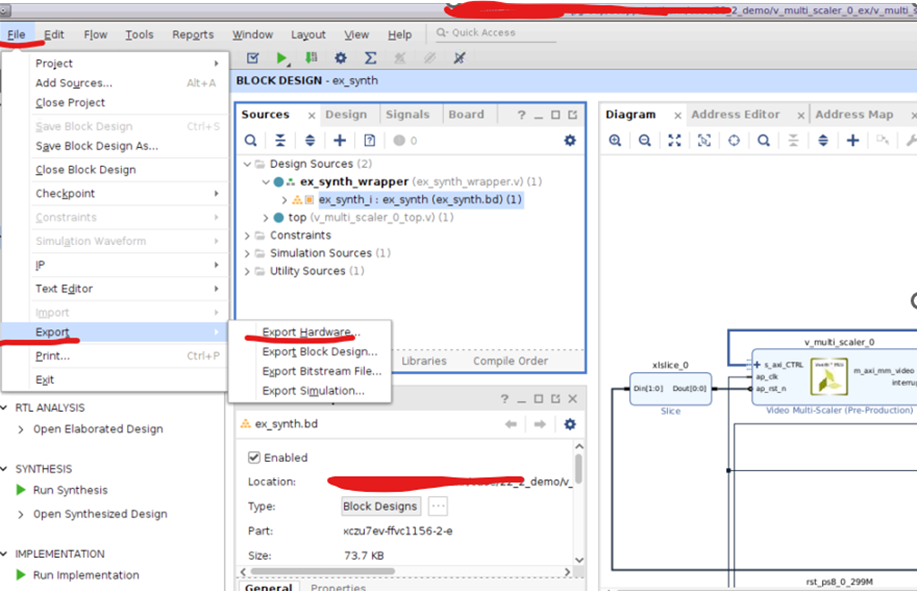
Bitstream 成功生成后,选择 File -> Export -> Export Hardware。
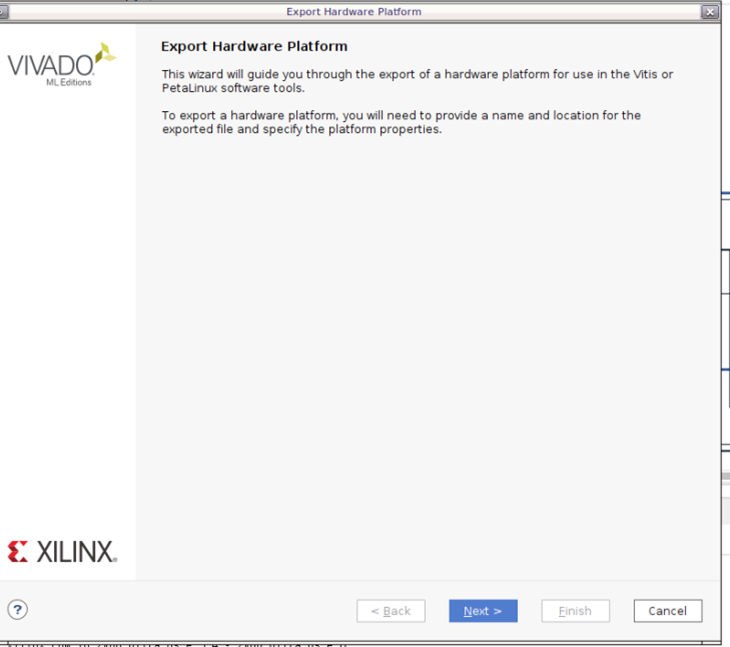
选择“Next”。
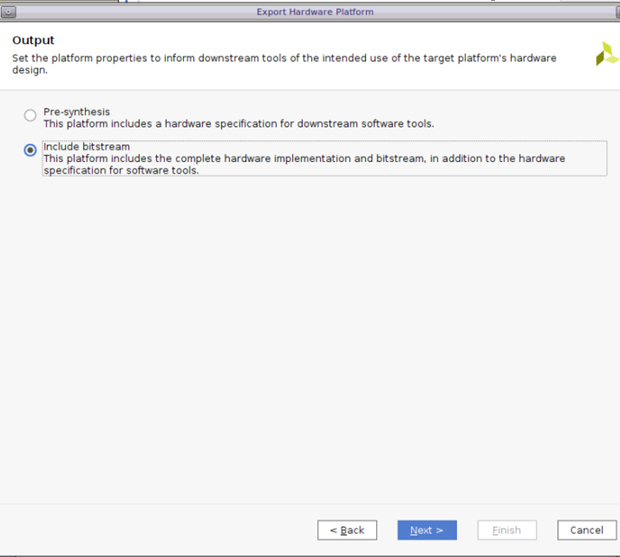
选择“Include Bitstream”。
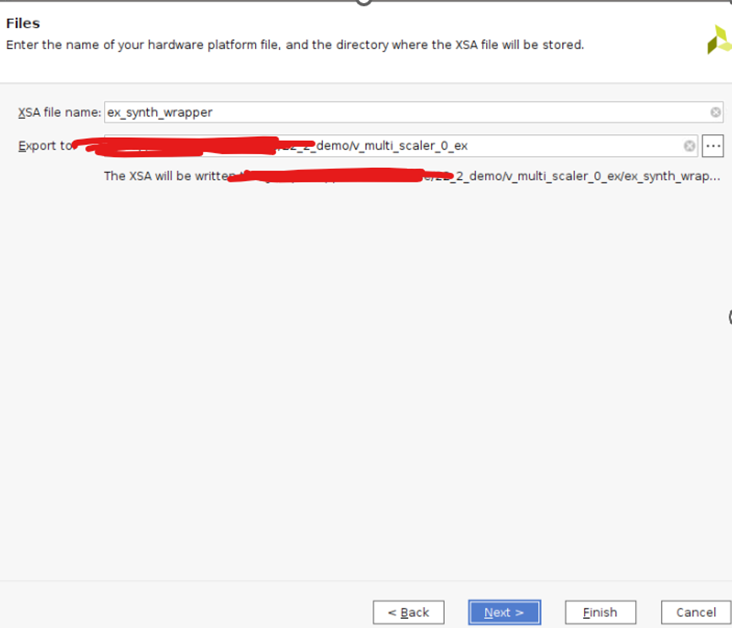
选择“Export XSA”的路径。
-
如何在Linux系统上设置站群服务器IP地址2024-12-11 879
-
Multi-Scaler IP的Linux示例以及Debug(下)2024-09-18 969
-
记录一次解决RT-Thread创建基于ART-PI的示例项目可以下载但却无法debug的问题2023-10-12 1058
-
Multi-scaler的裸机测试流程2023-05-19 2090
-
如何使用Linux ip命令2022-12-12 2428
-
Gowin Scaler IP快速用户指南2022-10-10 914
-
Gowin Scaler Lite Down&Up IP用户使用指南2022-09-30 783
-
Gowin Scaler IP用户指南2022-09-15 701
-
ARM的Debug工具Multi-ICE有何特点呢2022-06-16 1933
-
linux上的在线debug如何开展?2021-12-24 589
-
Video Scaler IP Core几小时后停止运行2019-04-02 2325
-
在支持ARM的评估板上使用TCP / IP示例2018-05-14 3934
-
Vivado中使用debug工具步骤与调试技巧2017-11-17 63544
-
基于Vivado HLS的Down Scaler视频系统设计2017-04-11 2459
全部0条评论

快来发表一下你的评论吧 !

